
Copper Sheet Gauge, Grades, And Costs: Buy Right, Build Right

Understanding Copper Sheet and Its Core Advantages
When you search for copper sheet or copper sheet metal, you’re likely looking for a material that balances strength, flexibility, and performance across a wide range of projects. But what exactly qualifies as a copper sheet, and why is it so valued in industries from architecture to electronics and even DIY crafts? Let’s break it down so you can choose the right sheet of copper for your needs.
What Qualifies as Copper Sheet vs Foil vs Plate
Sounds complex? It’s actually all about thickness. According to industry standards and leading suppliers, copper products are classified as follows:
| Product | Typical Thickness Range | Flexibility | Common Uses |
|---|---|---|---|
| Copper Foil | < 0.2 mm | Very High | EMI/RFI shielding, crafts, electronics |
| Copper Sheet | 0.5 mm – 6 mm | Moderate | Architecture, copper backsplash, copper countertops, bus bars, roofing, decorative panels |
| Copper Plate | > 6 mm | Low | Heavy machinery, structural, industrial bases |
So, if you’re planning a copper backsplash or need material for copper countertops, you’ll most likely be working with copper sheets. For intricate electronics or shielding, copper foil is the go-to, while copper plate is reserved for heavy-duty structural work.
Why Copper Sheet Is Chosen for Architecture and Electronics
Imagine walking into a kitchen with a warm, reflective sheet of copper lining the walls. Or think about the hidden electrical pathways inside your devices. Copper sheets are prized for their:
- Outstanding electrical and thermal conductivity – crucial for wiring, bus bars, and heat sinks
- Superior formability – easy to cut, bend, and shape for custom designs
- Corrosion resistance – develops a protective patina, making it ideal for indoor/outdoor use
- Antimicrobial properties – naturally inhibits bacteria, perfect for kitchens and healthcare surfaces
- Distinctive patina aesthetics – evolves from shiny red to classic green over time
- Recyclability – retains value and supports sustainable building
Whether you’re specifying copper sheets for a decorative wall panel or selecting copper sheet metal for electrical bus bars, these benefits ensure a durable, high-performance result.
Common Tempers and What They Mean for Formability
When choosing a copper sheet, you’ll notice terms like “soft,” “cold rolled,” or “half hard.” These temper designations indicate how the metal will behave during fabrication:
- Soft (Annealed): Extremely malleable; best for intricate forming, sculpting, or etching
- Cold Rolled (H00): The most popular temper for construction, balancing strength and formability; ideal for roofing and flashing
- Half Hard (H02) and Hard (H04): Higher strength, less formable; used where durability is more important than ease of shaping
For example, a soft copper sheet is perfect for detailed embossing, while a half-hard or hard temper is better for structural or wear-resistant applications. The ASTM B370 standard covers these tempers for architectural copper products (Copper Development Association).
Key takeaway: The right temper strikes a balance between formability and strength. For complex shapes, choose softer copper; for durability, opt for harder tempers.
In summary, copper sheets fill a unique niche between foil and plate—offering versatility for everything from copper countertops to electrical bus bars. By understanding thickness, temper, and core advantages, you’ll be ready to select the ideal sheet of copper for your next project.

Standards Grades and Tolerances That Guide Quality
When you’re specifying copper sheet for a project—whether it’s copper flashings on a roof, copper wall panels for a lobby, or a custom copper panel for an architectural feature—the details matter. How do you make sure you get exactly what you expect? Let’s break down the standards, grades, and tolerances that ensure your copper sheet delivers both performance and peace of mind.
Standards and Certifications That Govern Copper Sheet
Sounds complex? It doesn’t have to be. The industry relies on clear standards to define and verify copper sheet quality. The most widely referenced is ASTM B152/B152M, which covers copper sheet, strip, plate, and rolled bar for general engineering use (ASTM International). This standard outlines requirements for chemical composition, mechanical properties, and tolerances, helping you avoid costly surprises.
For building applications—like copper roofing sheets, copper shingles, and copper flashings—confirm that your supplier follows ASTM or equivalent standards. Certifications, such as mill test reports, document compliance and traceability, while ISO-certified processes signal a commitment to consistent quality.
Choosing Alloy and Temper for Your Project
Not all copper sheets are created equal. You’ll want to specify:
| Order Line Item | Why It Matters | How to Verify |
|---|---|---|
| Alloy | Impacts corrosion resistance, color, and formability; e.g., C110 for electrical, C122 for plumbing | Check mill test report or certificate of analysis |
| Temper (e.g., Soft, H02, H04) | Determines how easily the sheet can be bent, formed, or embossed | Review supplier’s documentation and, if needed, perform a bend test |
| Thickness | Controls strength, weight, and compatibility with joinery or flashing details | Measure with calipers or micrometer; check against purchase order |
| Finish | Affects appearance and readiness for further finishing (e.g., bright, mill, or pre-patinated) | Inspect visually and compare to approved sample or spec |
For example, copper flashings and copper roof panels typically use a soft or half-hard temper for ease of forming and long-term durability. If you’re designing a decorative copper panel or copper wall panels, you may prioritize a specific finish or tighter flatness tolerance for aesthetics.
What to Request from Suppliers to Avoid Surprises
Imagine receiving your copper roofing sheets only to find warping, inconsistent thickness, or scratches. To prevent this, always clarify your expectations in the RFQ (Request for Quote) and purchase order. Here’s a checklist for incoming inspection:
- Check for visual defects (dents, scratches, surface blemishes)
- Verify flatness and absence of warping
- Measure thickness at multiple points
- Confirm alloy and temper against documentation
- Inspect finish for consistency
- Review mill test report or certifications
When it comes to tolerances, reference materials such as Protocase’s published standards show that thickness tolerances for copper sheet can be as tight as ±0.006 to ±0.010 inches depending on the nominal thickness. If your application is sensitive—say, for a high-end copper panel installation or a precision-formed copper flashing—request tighter tolerances and document them clearly.
Key insight: Always align the copper sheet temper with your forming and fabrication plans. A mismatch can lead to excessive rework or even material failure—especially in demanding applications like copper roofing or complex architectural details.
By specifying alloy, temper, thickness, finish, and required certifications up front, you’ll ensure your copper sheets, copper wall panels, and copper flashings meet both your technical and aesthetic goals. Next, we’ll simplify how to choose the right thickness and gauge for your project, so your designs are both precise and practical.
Thickness Gauge and Sheet Sizes Made Simple
When you’re ready to buy copper sheet, you’ll quickly run into terms like “gauge,” “ounce,” and “mil.” Sounds confusing? You’re not alone. Let’s break down how thickness, gauge, and sheet sizes work—so you can confidently select the right material for your project, whether you’re planning a decorative panel, a 4x8 copper sheet for a wall, or a precise electrical component.
Gauge vs Actual Thickness and Why Conversions Matter
Ever wondered how thick is 18 gauge metal or why your supplier lists both gauge and inches? Gauge is a legacy system that varies by material—meaning an 18 gauge copper sheet is not the same thickness as 18 gauge steel. For copper, the most accurate way to specify what you need is by actual thickness (in inches or millimeters) or by weight per square foot (like “16 oz copper sheet”). Using a copper sheet gauge chart or supplier’s conversion table is essential for precision.
| Gauge (B&S) | Approx. Thickness (inches) | Weight (oz/sq ft) | Typical Uses |
|---|---|---|---|
| ~23 | 0.0216 | 16 | Standard 16 oz copper for roofing & flashing (often approximated as 24 ga.) |
| 20 | 0.0323 | 24 | Architectural panels, heavy-duty crafts |
| 18 | 0.0400 | 32 | Countertops, bar tops, durable panels (18 gauge copper sheet) |
| 22 | 0.0253 | 20 | Decorative work, medium-weight flashing (22 gauge copper sheet metal) |
As you can see, even a small change in gauge can mean a big difference in sheet metal thickness and performance.
Popular Copper Sheet Sizes and How to Plan Your Cuts
Most copper sheets are sold in standard sizes—commonly 3x8, 4x8, or 3x10 feet. The copper sheet metal 4x8 format is especially popular for construction and architectural projects. But how do you make the most of each sheet and minimize waste?
- Measure your finished part dimensions. Sketch out your pieces, including allowances for bends or seams.
- Check the sheet size available. For example, a 4x8 copper sheet gives you 32 square feet to work with.
- Lay out your parts on paper or CAD. Arrange for the fewest cuts and least scrap.
- Factor in cut kerf. Each cut removes a small amount of material—account for this in your plan.
- Order a little extra. Mistakes happen, and it’s better to have a small surplus than to run short.
Some suppliers offer custom-cut copper sheet to your exact size, but planning your own cut layout can optimize yield and save cost.
Selecting Thickness for Stiffness, Weight, and Bendability
Choosing the right sheet thickness is about balancing stiffness and formability. Thicker sheets (lower gauge numbers) provide more strength and rigidity—ideal for surfaces like countertops or bar tops. Thinner sheets are easier to bend and form, making them perfect for detailed craftwork or lightweight flashing.
- 16 oz copper sheet (0.0216”): The industry standard for roofing and flashing—easy to form by hand, yet durable enough for outdoor use.
- 18 gauge copper sheet (0.040”): Heavier and stiffer, best for applications needing extra strength or less flex.
- 22 gauge copper sheet metal (0.0253”): Flexible, handles moderate forming, great for decorative panels or light-duty covers.
Remember, if your project requires sharp bends or intricate shapes, opt for a thinner sheet or confirm the temper is soft/annealed. For heavy-wear surfaces, a thicker gauge will hold up better over time (Copper Development Association).
Best practice: Always specify copper sheet by actual thickness (inches or mm) in your RFQ or technical drawings—not just by gauge. This avoids confusion and ensures you receive exactly what your design requires.
By understanding gauge, sheet metal thickness, and standard sizes, you’ll be able to confidently select the right copper sheet for any project. Next, we’ll dive into hands-on tips for cutting, forming, and machining copper for a professional finish.
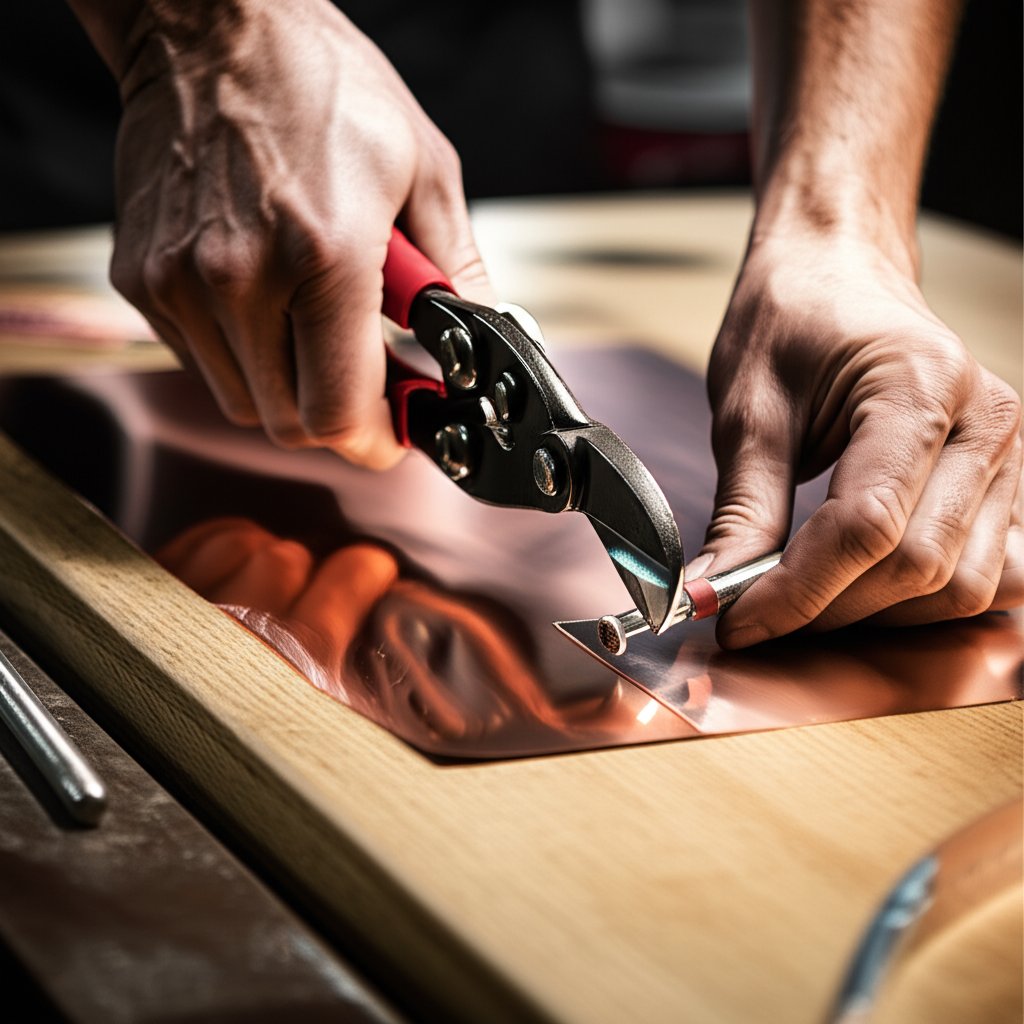
Cut Form and Machine Copper Sheet Like a Pro
When you’re ready to transform a flat copper sheet into a finished part—whether it’s for a hammered copper sheet accent, a custom bracket, or copper metal sheets craft—choosing the right tools and techniques is key. Sounds complicated? Let’s break it down so you can achieve clean cuts, smooth bends, and a professional finish, even if you’re working in a small shop or at home.
How to Cut Copper Sheet Cleanly and Safely
Whether you’re tackling thin copper sheets for crafts or heavier architectural panels, tool selection matters. Here’s a quick guide to get you started:
| Tool Type | Best For | Notes |
|---|---|---|
| Metal Shears/Aviation Snips | Thin to medium sheets, straight or gentle curves | Manual, precise, ideal for most copper sheets for crafts |
| Jigsaw (fine-tooth blade) | Medium sheets, complex shapes | Secure sheet to avoid vibration; go slow for clean edges |
| Band Saw | Thicker sheets, straight or curved cuts | Use appropriate blade; steady feed reduces burrs |
| CNC Router/Plasma Cutter | Intricate patterns, high repeatability | Best for detailed copper metal sheets craft or production |
| Scoring Knife | Very thin sheets | Score, then snap; clean for small, straight cuts |
- For thin copper sheeting, aviation snips or a scoring knife work well for straight lines and simple shapes.
- For hammered copper sheet or thicker material, use a band saw or jigsaw with a fine-tooth blade.
- For intricate designs or repeated patterns, CNC routing or plasma cutting delivers accuracy and speed.
Always secure your material on a sturdy work surface and wear gloves and eye protection—sharp edges and flying debris are common hazards.
Drilling and Edge Finishing Best Practices
Need to add holes for mounting or assembly? Use sharp high-speed steel (HSS) or cobalt bits. For best results:
- Center punch before drilling to prevent wandering.
- Start with a small pilot hole, then step up to the final size.
- Peck the drill (lift and clear chips) for cleaner cuts and less heat.
- Clamp the sheet firmly to avoid vibration and galling.
After cutting or drilling, you’ll notice sharp burrs along the edges. These not only look rough but can be dangerous. Here’s how to deburr copper sheet safely and efficiently:
- Hand files—great for smoothing small areas and tight corners.
- Sandpaper or sanding blocks—ideal for long edges or large surfaces.
- Deburring tools—specialized for quick, controlled removal of sharp edges.
For mass production or larger parts, consider rotary tools or vibratory tumblers for consistent, uniform results. Deburring not only improves safety but also prepares the surface for finishing or soldering.
Forming Tips to Avoid Cracking and Distortion
Forming copper sheet—whether for hammered copper sheet details or copper sheets for crafts—requires a balance of force and finesse. Here’s a step-by-step approach for a clean inside-radius bend:
- Mark your bend line clearly with a non-scratching scribe.
- Clamp the sheet between soft jaws or use a brake die to avoid marring the surface.
- Apply steady, even pressure along the bend line—use a mallet for gentle curves or a press brake for sharp bends.
- If the copper resists bending or shows signs of cracking, anneal it first by heating until red-hot and cooling—this restores ductility.
- Release the sheet and check for springback—adjust as needed.
Always account for material thickness when planning bends. Tighter radii require softer, thinner material, while thicker or harder sheets are best for gentle curves and minimal forming.
- Use backing materials (wood blocks or sandbags) to support the sheet and prevent distortion.
- For embossed or decorative work, pair a suitable embossing tool with a soft backing to create crisp patterns without tearing the metal.
Pro tip: Always check manufacturer datasheets or tool maker guidelines for recommended speeds, feeds, and minimum bend radii. This ensures you won’t damage your copper sheet or tools—especially for hammered copper sheet or detailed copper metal sheets craft.
By following these shop-proven methods, you’ll achieve neat, safe, and reliable results—whether you’re making copper sheets for crafts, architectural accents, or custom parts. Next, we’ll look at how to join and heat treat copper sheet for even greater project durability and finish.
Join and Heat Treat Copper Sheet for Reliable Builds
When you need to connect, reinforce, or reshape copper sheet, the right joining and heat treatment methods make all the difference. Whether you’re soldering a copper foil sheet for electronics, brazing copper strips in a plumbing system, or annealing rolled copper sheeting before a complex bend, understanding the fundamentals ensures strong, durable results. Let’s walk through the essentials for professional-quality copper sheet work.
Soldering Copper Sheet for Electrical and Decorative Work
Ever wondered how to achieve a crisp, conductive joint on a thin copper sheet or copper foil sheets? Successful soldering is all about meticulous prep and controlled heat. Here’s a proven workflow for reliable joints:
- Surface Prep: Clean all surfaces using abrasive pads or a wire brush to remove oxides, oils, and dirt. Even a new copper foil sheet needs a bright, bare-metal finish for the solder to flow properly.
- Fit-Up: Ensure tight, gap-free contact between parts. For lap joints, maintain a small capillary gap (ideally 0.002–0.005 inches) to promote wicking of solder.
- Flux Application: Brush on a thin, even layer of appropriate flux—never use your fingers. The flux dissolves residual oxides and protects the copper during heating.
- Assembly and Support: Insert the copper strip or sheet into the joint, twisting slightly for full flux coverage. Secure the assembly to maintain alignment and capillary spacing.
- Heating: Use a small torch or, for thin copper foil sheets, an electric resistance soldering tool. Apply heat to the copper—not the solder—until the entire joint area is up to temperature.
- Solder Application: Touch the solder to the joint (not the flame). If the solder melts and flows, continue feeding until the joint is filled. Work around the joint for even distribution.
- Cooling and Cleaning: Allow the joint to cool naturally; avoid shock cooling. Once cool, wipe away any flux residue with a damp cloth to prevent corrosion (CDA Soldering Guide).
For electrical work, choose a lead-free, tin-based solder for environmental safety; in plumbing, always use a solder certified for potable water. The right flux and joint geometry are crucial for both strength and conductivity.
Brazing and Welding Considerations for Thin Sections
Need a higher-strength joint or working at elevated temperatures? Brazing is your go-to. Unlike soldering, brazing uses filler metals that melt above 840°F (typically 1100–1500°F for copper), producing robust, leak-tight connections. Here’s what to keep in mind:
- Joint Design: Maintain a precise capillary gap (0.002–0.005 inches) for strong, uniform joints. Good fit-up is even more critical for brazing than soldering.
- Filler Selection: Use a copper-phosphorus or silver-copper alloy filler for copper-to-copper joints. For joining copper to other metals or for applications requiring extra ductility, select a silver-bearing filler as specified in AWS A5.8 (e.g., BCuP or BAg series).
- Flux Use: Not all brazing fillers require flux for copper-to-copper joints (phosphorus-containing fillers are often self-fluxing), but flux is essential when joining copper to brass or other alloys.
- Heat Source: Oxy-fuel torches are standard for most sheet thicknesses; induction or resistance brazing is used for high-precision or production work.
- Post-Braze Cleaning: Remove all flux residues after cooling to avoid long-term corrosion or leaks.
Welding copper sheet is less common due to copper’s high thermal conductivity and rapid heat dissipation, which can cause warping and incomplete fusion. Specialized techniques (such as TIG with direct current electrode negative, high preheat, and precise filler selection) are required, and process parameters should always be confirmed with welding handbooks or authoritative datasheets (Nickel Institute).
- Soldering: Low-temperature, easy, best for electrical and decorative joints; not for high-stress or high-heat applications.
- Brazing: Higher-temperature, stronger, excellent for plumbing, HVAC, and structural copper strip assemblies.
- Welding: Highest strength, but technically demanding on copper sheet; best reserved for specialized fabrication.
Annealing Procedures to Restore Formability
After repeated bending or forming, copper sheet can become work-hardened—making it prone to cracking, especially in tight bends or deep draws. Annealing restores softness and ductility, allowing further shaping without damage. Here’s how to do it safely:
- Preparation: Clean the copper sheet or copper strip thoroughly to remove dirt, oil, and oxides.
- Heating: Using a propane torch or annealing oven, heat the area evenly to about 700°F (400°C) or until the copper glows dull red in a dimly lit room (MatEdU).
- Quenching/Cooling: Allow the sheet to air cool or quench in water—cooling rate is not critical for copper. The copper will remain soft and ready for further forming.
- Testing: Gently bend the sheet to confirm restored flexibility. If still hard, repeat the annealing process.
Annealing is especially useful before forming tight radii in rolled copper or after extensive hammering in decorative work. It’s also a must for restoring ductility to copper strips used in electrical bus bars or architectural details.
Remember: Always select filler metals and set heat input according to published standards and datasheets. This ensures your copper sheet joints are reliable, safe, and code-compliant—whether you’re working with copper foil sheet, copper strip, or heavy rolled copper sheeting.
By mastering soldering, brazing, and annealing techniques—and respecting the unique properties of copper—you’ll create durable, professional-quality assemblies for everything from electronics to decorative panels and plumbing. Next, discover how to finish and maintain your copper sheet for lasting beauty and performance.

Finishes Patina and Maintenance That Last
Imagine watching your copper sheet evolve from a bright, reddish metal to a rich tapestry of blues and greens—each hue telling its own story. That’s the magic of copper patina, and whether you want to embrace its natural aging or lock in a specific look, understanding how copper finishes change and how to care for them is key to getting the most from your project. Let’s break down the science, safe patina techniques, and best maintenance practices for copper sheet, hammered copper, and everything in between.
Natural Patina Versus Forced Patina
When you leave a copper sheet exposed to the elements, it undergoes a series of chemical reactions—starting with a brownish copper oxide and, over time, developing the classic patina green or blue-green surface so admired in architecture and art. This transformation is driven by oxygen, moisture, and environmental factors like temperature, humidity, air pollution, and the presence of sulfur or salts. The result? Each piece of patina copper is unique, with color variations ranging from deep greens (malachite and brochantite) to blues and purples (azurite) depending on its environment and history.
Not patient enough to wait years for a patina to form? You can accelerate the process with safe, at-home methods. Here’s a step-by-step way to test a patina recipe before using it on your prized copper baking sheet or decorative panel:
- Choose a scrap piece of copper sheet that matches your main item in finish and thickness.
- Clean the surface thoroughly with mild soap and water; dry completely.
- Prepare your patina solution: For a blue patina, mix one part Miracle-Gro with three parts water. For green, use one part Miracle-Gro with three parts red wine vinegar. Alternatively, a vinegar and salt soak or an ammonia vapor bath (with proper safety precautions) can yield different effects.
- Apply the solution by spraying, wiping, or soaking the copper. Monitor the color change over 30 minutes to several hours.
- Rinse and dry when you reach the desired shade. Always test on a small area first to ensure you achieve the look you want.
- Seal the finish with wax or lacquer if you want to preserve the color and prevent further change.
Tip: The longer the copper is exposed to the patina solution, the more intense the effect. Always wear gloves and work in a well-ventilated area when using chemicals like ammonia.
Cleaning Copper Without Damaging the Surface
Whether you love the look of a natural patina or want to keep your copper sheet bright and shiny, gentle cleaning is essential. Overzealous scrubbing or harsh chemicals can remove the finish—or worse, scratch your hammered copper surface. Here’s a quick-reference guide for safe cleaning and maintenance:
-
Do:
- Use mild soap and warm water with a soft cloth for routine cleaning.
- For tarnish, apply a copper-specific cleaner like Wright's copper cream or a homemade paste of vinegar and baking soda.
- Dry thoroughly after cleaning to prevent water spots and slow oxidation.
- Test any cleaner on a hidden area first, especially if you have a lacquered or sealed finish.
-
Don’t:
- Avoid abrasive pads, steel wool, or harsh chemicals like bleach and ammonia (unless using ammonia for patina, with proper ventilation).
- Don’t use acid-based cleaners on food-contact surfaces like a copper baking sheet unless the manufacturer approves.
- Never scrub hammered copper or delicate finishes aggressively—gentle is best.
If you want to maintain a shiny, untarnished look, consider a light coat of mineral oil or a copper polish after each cleaning. For items like copper sinks or kitchen surfaces, always double-check that any product used is food safe and manufacturer-recommended.
Sealers and Waxes to Preserve Your Finish
Once you’ve achieved your ideal patina copper shade or a mirror-bright polish, sealing is the next step to lock in the look. Wax, lacquer, or proprietary copper sealants are all options, each with their own pros and cons:
- Wax (e.g., carnauba or beeswax): Offers a natural, low-gloss barrier that slows oxidation and is easy to reapply. Ideal for decorative panels or hammered copper art.
- Clear lacquer: Provides a more durable, high-gloss seal—perfect for high-touch surfaces, but may need professional removal if you want to re-patina later.
- Specialty copper sealants: Designed for specific environments or applications; always follow the manufacturer’s directions.
For food-contact surfaces like a copper baking sheet, always verify that your chosen sealer or wax is food safe. When in doubt, opt for reversible methods and consult the product’s technical data sheet.
Takeaway: The more you preserve the original finish, the less maintenance you’ll need—but you may miss out on the evolving beauty of natural patina. Conversely, letting copper age naturally means more frequent cleaning if you want to avoid uneven or blotchy patina, especially in kitchens or humid environments.
By understanding how to patina copper safely, clean it gently, and seal it wisely, you can enjoy the full spectrum of copper’s character—whether you love the iconic patina green dome or prefer the warmth of freshly polished metal. Next, we’ll troubleshoot common issues and help you keep your copper sheet projects looking their best for years to come.
Troubleshooting Copper Sheet Work Like a Technician
Ever wondered why your copper sheet project didn’t turn out quite as planned? Maybe your thin copper sheet cracked on a bend, your perforated copper sheet warped during cutting, or a once-shiny finish turned blotchy after patina. The good news: most copper sheet issues can be traced to a few root causes—and solved with practical, technician-level fixes. Let’s walk through a hands-on troubleshooting guide so you can keep your work on track, whether you’re using 22 gauge copper sheet, 24 gauge copper sheet, or even 18 ga copper sheet for larger builds.
When Forming Causes Cracking
| Problem | Root Cause / Action |
|---|---|
| Cracking during bends |
|
| Distorted or warped bends |
|
When Edges Burr or Warp During Cutting
| Problem | Root Cause / Action |
|---|---|
| Ragged or burred edges |
|
| Warped or distorted cuts |
|
When Joints Fail or Patina Looks Uneven
| Problem | Root Cause / Action |
|---|---|
| Solder won’t wet or joint fails |
|
| Patina is blotchy or streaked |
|
- Always anneal copper before tight bends, especially with 22 gauge copper sheet or thicker.
- Match cutting tools to sheet thickness—avoid forcing heavy tools on thin copper sheet.
- Keep all surfaces clean and dry before joining or finishing.
- Store sheet copper vertically and protect from scratches or contamination.
- Practice on scrap before committing to a full-size perforated copper sheet or decorative panel.
Tip: Scrap testing is your best friend. Running a quick trial on offcuts lets you dial in bend radii, tool settings, and patina recipes before risking your main sheet copper—saving time, money, and frustration.
By following this troubleshooting framework, you’ll be able to spot and fix issues quickly, whether you’re working with thin copper sheet for jewelry, 24 gauge copper sheet for crafts, or 18 ga copper sheet in architectural builds. Up next, we’ll show you how to estimate weight, cost, and source copper sheet with confidence—so your next project starts strong and stays on budget.

Estimate Weight, Cost, and Source Copper Sheet Smartly
Ever found yourself asking, “How much does a copper sheet weigh?” or “What’s the real copper sheet price for my project?” Whether you’re budgeting for a renovation or sourcing materials for manufacturing, getting these answers right is crucial for both accuracy and cost control. Let’s break down how to estimate weight and price, understand market factors, and ensure you’re buying from a credible source—so you can confidently evaluate any copper sheets for sale.
Weight and Cost Estimation Workflow
Sounds complex? It’s actually a straightforward process once you know the steps. Accurately estimating the weight of your copper sheet is the first step to calculating costs and arranging shipping. Here’s how to do it:
- Measure your sheet dimensions: Record the length, width, and thickness of your copper sheet in consistent units (inches, millimeters, or meters).
- Calculate the volume: Multiply length × width × thickness to get the sheet’s volume.
- Find the density of copper: Use a published value from a trusted source—typical copper density is about 8.96 g/cm³.
- Compute the weight: Multiply the volume by the density to get the total weight of the sheet.
- Estimate cost: Multiply the calculated weight by the supplier’s per-unit price (often listed as price per kilogram or pound). For special sizes, add any cutting or processing fees.
For example, if you’re considering a 4x8 sheet of copper, just plug in the sheet’s length, width, and thickness, use the standard density, and you’ll get an accurate estimate. Many suppliers also offer online calculators to simplify this process if you prefer not to crunch the numbers yourself.
Market Factors That Influence Pricing
Why does the price of sheet copper seem to change from week to week? Copper is a globally traded commodity, and its price is influenced by a variety of market signals:
- Raw material costs: The London Metal Exchange (LME) sets benchmark prices that ripple through the supply chain.
- Alloy and purity: High-purity copper (like C11000) commands a premium, while alloys or recycled grades may be more affordable.
- Sheet thickness and size: Thicker or oversized sheets require more raw material, increasing the copper sheet metal price.
- Surface finish and coatings: Specialty finishes or protective coatings add to the cost.
- Quantity ordered: Bulk orders often unlock lower per-unit prices, while small-quantity or cut-to-size orders may include surcharges.
- Shipping and logistics: Freight can be a significant part of the total price, especially for heavy or large sheets.
- Currency exchange rates: Copper is typically priced in USD; local currency fluctuations can impact your final cost.
- Seasonal and global demand: Construction and manufacturing booms can drive up the copper for sale price, especially during peak building seasons.
It’s always a good idea to request a time-stamped quote and check the validity period, as market prices can shift quickly. For projects with flexible timelines, consider timing your purchase to avoid seasonal surges or commodity spikes.
Reminder: Always verify the current metal price index or benchmark before finalizing your budget. This ensures your estimate reflects up-to-date market conditions and helps you avoid surprises.
What to Include in RFQs and Purchase Orders
Ready to buy copper sheet or compare copper sheet metal price quotes? The more detail you provide, the more accurate and comparable your quotes will be. Here’s a simple table template for your RFQ (Request for Quotation) or purchase order:
| Item | Alloy | Temper | Thickness | Size | Finish | Quantity | Certs |
|---|---|---|---|---|---|---|---|
| Copper Sheet | C11000 (example) | Soft/Half-Hard | Specify (e.g., 0.8mm) | e.g., 4x8 ft | Mill/Polished/Patina | Number of sheets | Mill test report, RoHS |
Double-check that you include:
- Exact dimensions (length, width, thickness)
- Alloy and temper (for performance and compatibility)
- Surface finish or special coatings
- Quantity and delivery requirements
- Certifications or compliance needs (e.g., ASTM, RoHS, REACH)
Clear, complete specifications help suppliers deliver accurate pricing and quality, while reducing the risk of delays or costly errors.
By following this workflow, you’ll be able to estimate the price of a sheet of copper with confidence, navigate the factors that drive cost, and ensure your next copper sheet order is smooth from quote to delivery. Up next, we’ll explore how rapid prototyping services can help you turn your copper sheet designs into finished parts faster and more efficiently.
From Concept to Parts Using Copper Sheet in Prototyping
Ever wondered how to bring a complex copper sheet design to life—fast? Maybe you’ve hit a wall with tight deadlines, intricate bends, or features that traditional shops struggle to deliver. That’s where rapid prototyping steps in, helping you turn digital concepts into finished copper sheet parts quickly and with fewer headaches. Let’s explore when it makes sense to outsource, what you need for a smooth transition from design to part, and how to get the most from expert partners.
When to Outsource Copper Sheet Prototyping
Imagine you’ve finalized a copper busbar with tight hole-to-edge tolerances, or a decorative panel with complex cutouts and surface finishes. Tackling these in-house can be tough—especially if you lack specialized tools or experience. Outsourcing to a professional rapid prototyping service offers distinct advantages:
| Option | Best For | Pros | Cons |
|---|---|---|---|
| Rapid Prototyping Partner (e.g., XTJ) | Complex copper sheet parts, tight tolerances, DFM guidance, multi-material builds |
|
|
| Local Sheet Metal Shop | Simple copper parts, low-moderate complexity |
|
|
| In-House Fabrication | Basic shapes, low volume, when you have time/tools |
|
|
If you’re searching for where to buy copper sheeting or where to purchase copper sheets for a prototype, consider whether your project needs advanced forming, tight tolerances, or unique finishes. In these cases, a full-service rapid prototyping partner can help you avoid costly rework and get to market faster.
What to Include in a DFM Review for Copper Parts
Design for Manufacturability (DFM) is more than a buzzword—it’s your best defense against surprises. Before you buy copper sheeting or commit to fabrication, review these essentials with your partner:
- 2D/3D drawings (preferably in STEP or DXF format)
- Material grade (e.g., C110, C122)
- Thickness and temper
- Surface finish (mill, patina, bead blasted, etc.)
- Bend radii and hole-to-edge distances
- Tolerance requirements
- Special features (embossing, cutouts, inserts)
- Quantity and delivery timeline
DFM feedback helps you optimize bend allowances, avoid cracking, and ensure features like holes and slots are manufacturable. It’s especially valuable for copper sheet, which can be prone to distortion if not handled with care (Five Flute).
ROI Insight: Investing in DFM early—especially for bend radii and feature spacing—can save you from costly rework, delays, or scrap. It’s a small step that pays off big.
How to Brief a Service Partner for Faster Turnaround
To get the best results from any rapid prototyping service, clarity is key. Here’s a checklist to ensure your copper sheet project moves smoothly from concept to part:
- 2D/3D CAD files with all dimensions and tolerances
- Material and temper specification
- Surface finish or patina requirements
- Critical features called out (e.g., tight bends, hole sizes, cutouts)
- Required certifications (ISO, RoHS, etc.)
- Delivery address and timeline
- Any reference samples or photos (if matching an existing part)
This preparation helps your partner quote accurately and deliver a part that matches your vision. If you’re still wondering where can I buy copper sheet metal or where to buy copper sheet metal for prototyping, start by gathering these details for a faster, smoother experience.
And if you need a vetted provider, XTJ’s rapid prototyping services offer CNC machining, sheet forming, and finishing for copper and other materials, with ISO 9001:2015 certified processes, quick turnarounds, and complimentary DFM feedback—making them a strong choice when you need to buy copper sheeting or move from concept to part with confidence.
Copper Sheet FAQs
1. What is the difference between copper sheet, foil, and plate?
Copper sheet, foil, and plate differ mainly by thickness. Foil is the thinnest, ideal for electronics and crafts, while copper sheet is thicker and used in architecture, backsplashes, and electrical applications. Copper plate is the thickest and best for structural or heavy-duty industrial uses.
2. How do I choose the right copper sheet thickness for my project?
Determine your required strength and flexibility. Thinner sheets are easier to form and suitable for crafts or flashing, while thicker gauges provide more rigidity for countertops or bar tops. Always specify actual thickness in inches or millimeters for accuracy.
3. What standards or certifications should I look for when buying copper sheet?
Look for copper sheets that comply with ASTM B152/B152M for general engineering and architectural use. Request mill test reports and ensure suppliers follow ISO-certified processes for consistent quality and traceability.
4. How can I estimate the cost and weight of a copper sheet?
Multiply the sheet’s length, width, and thickness to calculate volume, then use the published density of copper to estimate weight. Multiply the weight by the current market price per unit for an accurate cost estimate. Always check the latest metal price index before purchase.
5. What are the best practices for finishing and maintaining copper sheet surfaces?
To maintain copper’s look, clean gently with mild soap and water, use copper-specific cleaners for tarnish, and avoid abrasives. For patina, test solutions on a scrap first. Apply wax or lacquer to preserve finishes, and always verify food safety for kitchen applications.
-
Posted in
copper sheet, copper sheet fabrication, copper sheet gauge, copper sheet metal, copper sheet price


