
The Real Cost Of Copper Cookware: Lifespan, Lining, Repairs
Copper Cookware Fundamentals That Matter
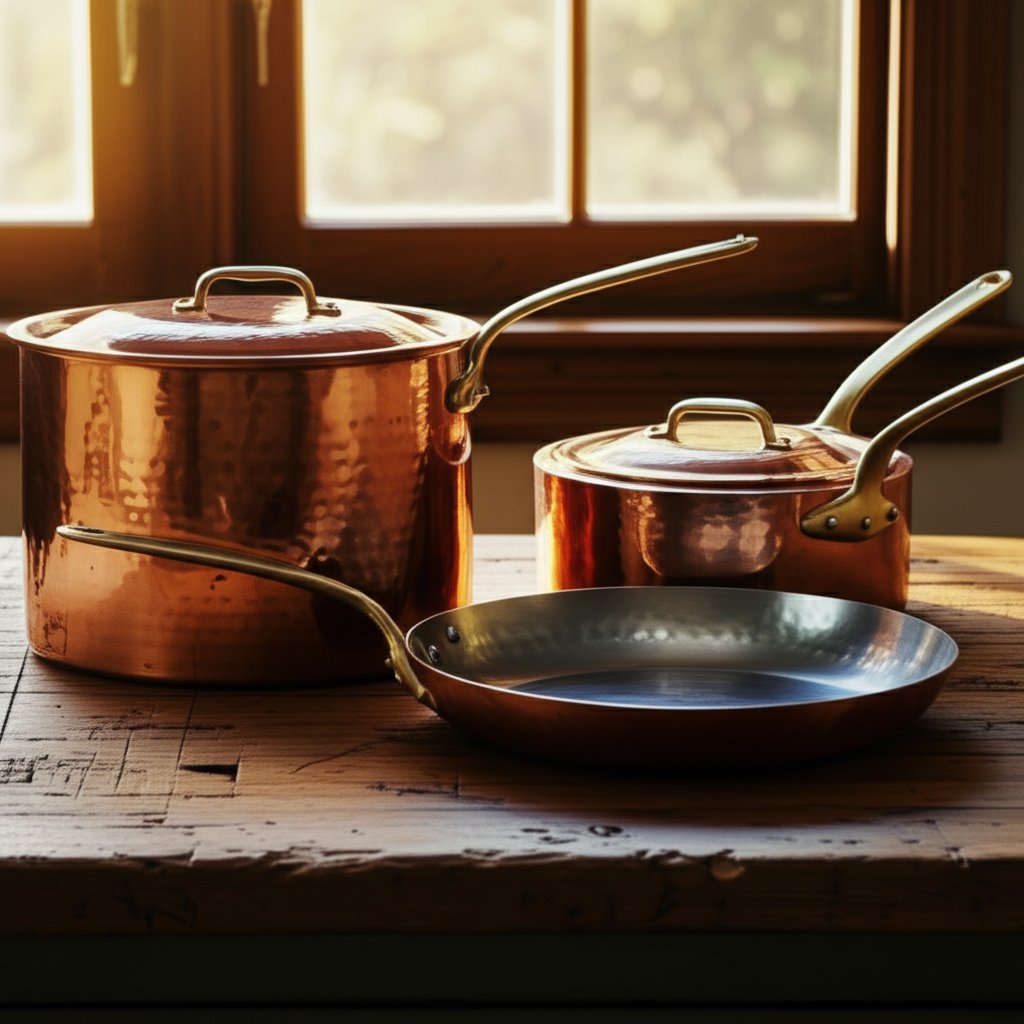
What Makes Copper Cookware Different?
Ever wondered why professional chefs and passionate home cooks are drawn to copper cookware, even when it comes with a hefty price tag? Imagine you’re making a delicate sauce or caramel, and you need the pan to react instantly to every twist of the burner knob. That’s where copper pans shine—offering a level of control and precision that’s hard to match with other materials.
Copper cookware refers to pots and pans made primarily from copper, often lined with another metal for food safety. What sets them apart is their unique ability to conduct heat rapidly and distribute it evenly across the cooking surface. This means fewer hot spots, less risk of burning, and a more predictable cooking experience—especially when working with recipes that demand finesse.
- Thermal responsiveness: Copper reacts to heat changes almost instantly, giving you near-immediate control.
- Even heat distribution: No more worrying about uneven browning or stubborn hot spots.
- Stunning aesthetics: The warm, glowing look of copper pots and pans adds a touch of elegance to any kitchen.
- Longevity: With proper care, high-quality copper cookware can last for generations.
Thermal Responsiveness Explained
So, what does it mean for a pan to be “responsive”? When you turn up the heat, copper cookware heats up fast—much faster than cast iron or even most aluminum pans. Turn the heat down, and it cools just as quickly. This immediate feedback is crucial when you’re making sauces, melting sugar for caramel, or cooking proteins that can overcook in seconds. As America’s Test Kitchen notes, copper gives cooks incredible control and helps prevent overcooking or burning, particularly in recipes that require delicate timing.
Copper gives you immediate feedback to heat changes, which helps prevent scorching and improves sauce work.
When Copper Pans Outperform Other Metals
Think about the last time you tried to make a silky béarnaise or perfectly set scrambled eggs. Copper’s even heat and quick response help you avoid curdling dairy, burning sugars, or overcooking tender fish. While stainless steel and cast iron each have their strengths, copper’s specialty is precision for tasks where temperature control is everything.
| Material | Responsiveness | Heat Distribution | Maintenance | Typical Use-Cases |
|---|---|---|---|---|
| Copper | Fast | Excellent | High (requires polishing, careful cleaning) | Sauces, caramel, delicate proteins, sugar work |
| Stainless Steel | Moderate | Good (with aluminum/copper core) | Low (easy to clean, durable) | Everyday cooking, searing, boiling, braising |
| Cast Iron | Slow | Variable (can have hot spots) | Moderate (needs seasoning, careful drying) | Searing, slow-cooked stews, baking, frying |
- Key benefits of copper cookware: unmatched heat control, evenness, and visual appeal.
- Typical trade-offs: higher cost, regular maintenance (polishing and careful cleaning), and heavier weight compared to some alternatives.
In short, copper pots and copper pans are not just for show. Their properties make a real difference in the kitchen, especially when cooking tasks demand accuracy and finesse. Whether you’re reducing a sauce, tempering chocolate, or preparing a classic French omelet, the control and consistency offered by copper cookware can elevate your results—helping you achieve smoother emulsions and avoid scorched fond. If you’re looking for a tool that responds as quickly as your instincts in the kitchen, a copper pot might just be your next favorite piece.
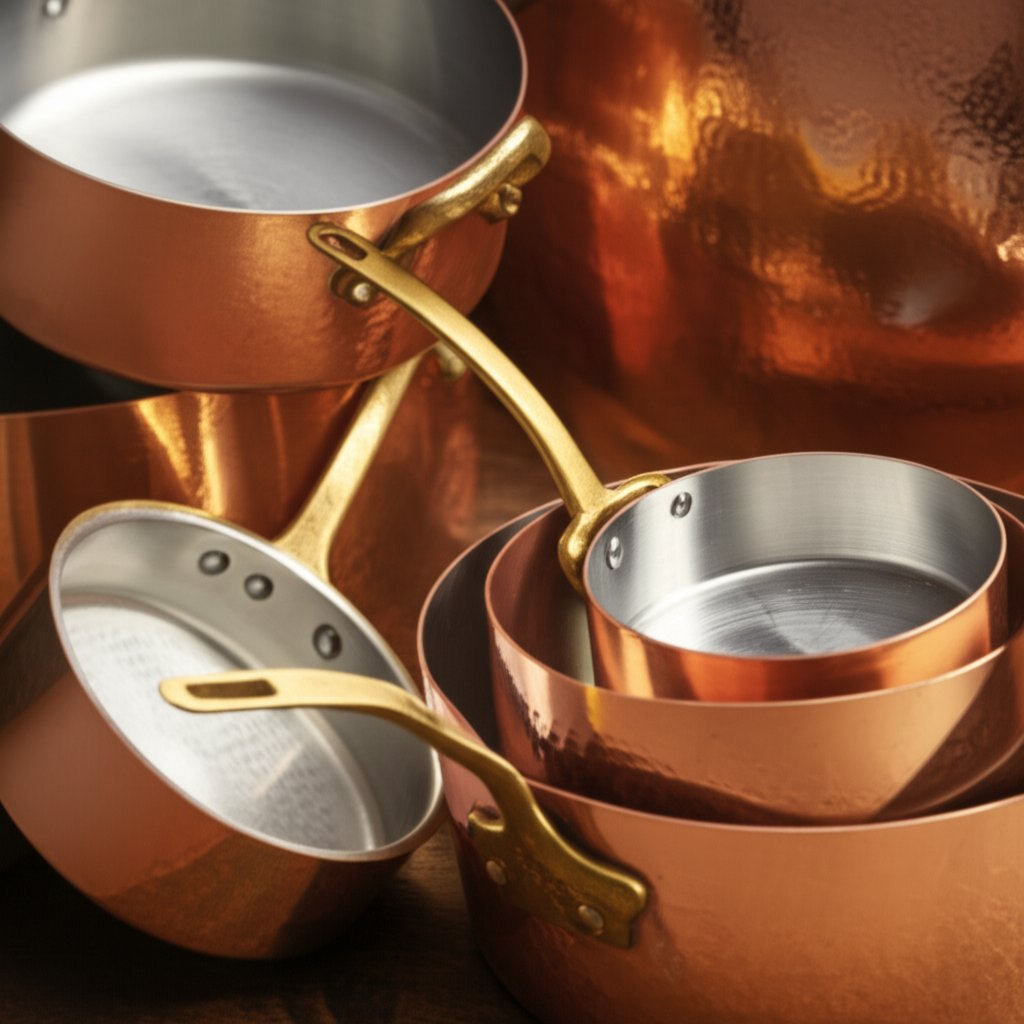
How Construction and Lining Affect Performance
Copper Thickness and Heat Behavior
Ever wondered why some copper cookware feels sturdy and reassuring in your hands, while others seem feather-light and less stable? It’s all about thickness. The thickness of the copper—sometimes called the gauge—directly impacts how the pan handles heat. Thicker copper walls (think 2.5 to 3mm) offer better heat storage and more even cooking, making the pan feel solid and predictable. Thinner copper walls, on the other hand, heat up even faster and feel more agile, but they can develop hot spots and may warp with heavy use. If you’re eyeing a piece at an antique shop or browsing online, remember: decorative copper pots are often thinner and won’t perform as well as those with substantial heft [Serious Eats].
Tin vs Stainless Linings
Since copper is reactive with acidic foods, most copper pans are lined. Your two main options are tin and stainless steel. But which is better for your kitchen?
-
Tin Lining
-
Pros
- Superb natural nonstick feel—think easy egg releases and gentle sauce work.
- Totally inert: won’t react with food or alter flavors.
-
Cons
- Low melting point (around 450°F), so avoid preheating empty or using high heat.
- Soft: can be scratched by metal utensils or harsh scrubbing.
- Requires periodic re-tinning over years of use, especially if you cook often.
-
-
Stainless Steel Lining
-
Pros
- Extremely durable—no need for re-lining.
- Handles higher heat and metal utensils without worry.
-
Cons
- Not as naturally nonstick as tin; food is more likely to stick, especially delicate proteins.
- If the lining separates from the copper, repairs are difficult or impossible.
-
Choosing between tin lined copper cookware and copper cookware with stainless steel lining comes down to your cooking style and maintenance preferences. Tin is beloved for its silkiness and ease of deglazing, while stainless steel and copper cookware win points for their resilience and long-term convenience
Line choice shapes not just maintenance, but how sauces reduce and release from the pan.
Bonding and Handle Construction
How your copper cookware is put together matters. Let’s break down the main construction types:
| Construction Type | Typical Benefits | Care Level | Weight/Handling Feel |
|---|---|---|---|
| Solid Copper with Tin Lining | Traditional, best heat response, silky release | Higher (re-tinning, gentle tools) | Hefty, balanced |
| Copper–Stainless Bimetal | Durable, no re-lining, modern convenience | Low (easy clean, less worry) | Substantial, slightly firmer feel |
| Copper-Clad Multi-Ply (e.g., copper bottom cookware) | Combines copper’s heat with stainless steel’s durability | Low to moderate | Varies—often lighter, more mainstream |
Look closely at handle attachments and rivets, too. Well-riveted handles (often with large, rounded or teardrop shapes on French or American pans) add years to your cookware’s life. Loose or poorly aligned handles are a red flag, especially on vintage pieces [Epicurious].
In summary, the way your copper pan is built—its wall thickness, lining, and construction—directly affects how it performs and how you’ll care for it. By understanding these details, you can confidently compare tin lined copper cookware, copper stainless steel cookware, and copper clad cookware to find the best fit for your kitchen. Next, we’ll look at how these choices impact compatibility with modern stovetops and ovens, so you can get the most out of every meal.
Can Copper Pans Go Where You Need Them?
Induction Readiness and Workarounds
Ever tried to use a beautiful copper pot on your new induction cooktop, only to find it won’t heat up? Sounds frustrating, but it’s a common surprise for many cooks. Here’s why: pure copper isn’t magnetic, so it doesn’t work with induction stoves out of the box. Induction cooking relies on a magnetic field to generate heat directly in the pan, which means only cookware with a magnetic base will work.
But does that mean you have to give up on copper induction cookware altogether? Not quite. There are two main solutions:
- Copper cookware with a magnetic base: Some modern copper induction saucepans and pots have a layer of stainless steel or iron bonded to the bottom. This magnetic layer allows copper cookware for induction cooktops to function just as well as traditional options. Always check the manufacturer’s notes or look for an induction icon to confirm.
- Induction adapter plates: If you already own a favorite copper saucepan that isn’t induction-ready, you can use a flat, magnetic adapter plate between the pan and the cooktop. This acts as a bridge, letting non-magnetic pans—including copper—work on induction. However, keep in mind that using an adapter plate may reduce the pan’s signature responsiveness, as the plate itself absorbs and transfers heat, adding a slight delay.
- Test the base of your pan with a fridge magnet. If it sticks, your pan likely has a magnetic layer and may work on induction.
- Look for an induction symbol or note in the manufacturer’s documentation.
- Review construction details—"copper induction cookware" or "copper cookware for induction cooktops" should mention a stainless steel or iron base.
- If your pan fails the magnet test, consider an induction adapter plate, but be aware of reduced heat responsiveness compared to direct-contact copper induction saucepans.
Stovetop and Oven Safety Tips
Whether you’re using copper on a gas range, an electric coil, or in the oven, these tips will help you preserve both your cookware and your meals:
- Handles get hot: Copper pans often have metal handles that become extremely hot in the oven. Always use oven mitts and keep a reminder in place after removing a pan.
- Lining matters: Tin-lined copper pans should not be overheated—tin can melt at temperatures above 450°F. Stainless-lined pans handle higher heat, but always check your manufacturer’s limits.
- Gradual heating is key: Sudden temperature changes can cause copper pans to warp. Allow pans to heat and cool gradually, especially after oven use.
- Broiler caution: Copper’s fast heat conduction makes it easy to scorch food under a broiler. Monitor closely and avoid extreme direct heat for extended periods [Prudent Reviews].
- Heat diffuser for gas stove: If you’re concerned about scorching or hot spots on a gas stove, a heat diffuser for gas stove use can help distribute the flame more evenly under your copper pan.
How to Verify Compatibility at Home
Still unsure if your copper pan will work on your induction or in your oven? Here’s a simple, repeatable process:
- Place a fridge magnet on the bottom of your pan. If it sticks, you likely have an induction-compatible base.
- Check for an induction symbol or compatibility note in your pan’s documentation or on the manufacturer’s website.
- Review the pan’s construction: stainless steel and copper cookware often work for induction, but pure copper or tin-lined pans usually do not unless specified.
- If you’re using an adapter plate, test the pan’s responsiveness by bringing water to a boil and observing any delay compared to direct-contact pans.
| Setup | Responsiveness | Heat Distribution | Convenience |
|---|---|---|---|
| Gas Stove + Copper Pan | Immediate | Excellent | Classic pairing, easy control—consider a heat diffuser for gas stove if needed |
| Electric Coil + Copper Pan | Fast | Very Good | Works well, but watch for hot spots on old coils |
| Induction + Adapter Plate + Copper Pan | Moderate (some delay) | Good, but less even than direct copper | Allows use of legacy pans, adds a step |
| Induction-Ready Copper Pan | Fast (nearly as responsive as gas) | Excellent | Best for modern kitchens, minimal compromise |
For the smoothest experience, match your cookware to your stove—copper shines on gas and electric, but with the right features, it can work beautifully on induction too.
Understanding copper pot induction compatibility and oven safety ensures you get the most from your investment, whether you’re simmering a sauce or finishing a roast. Next, we’ll dive into practical ways to test your pan’s performance at home—so you can see the difference for yourself.
How to Assess Your Copper Frying Pan at Home
Simple Heat-Up and Evenness Tests
Ever wondered if your copper frying pan really delivers the even heat and quick response that chefs rave about? You don’t need a laboratory or fancy tools to find out. With a few easy kitchen tests, you can see how your copper skillet stacks up against your other pans—and why real copper pans remain a favorite for precision cooking.
-
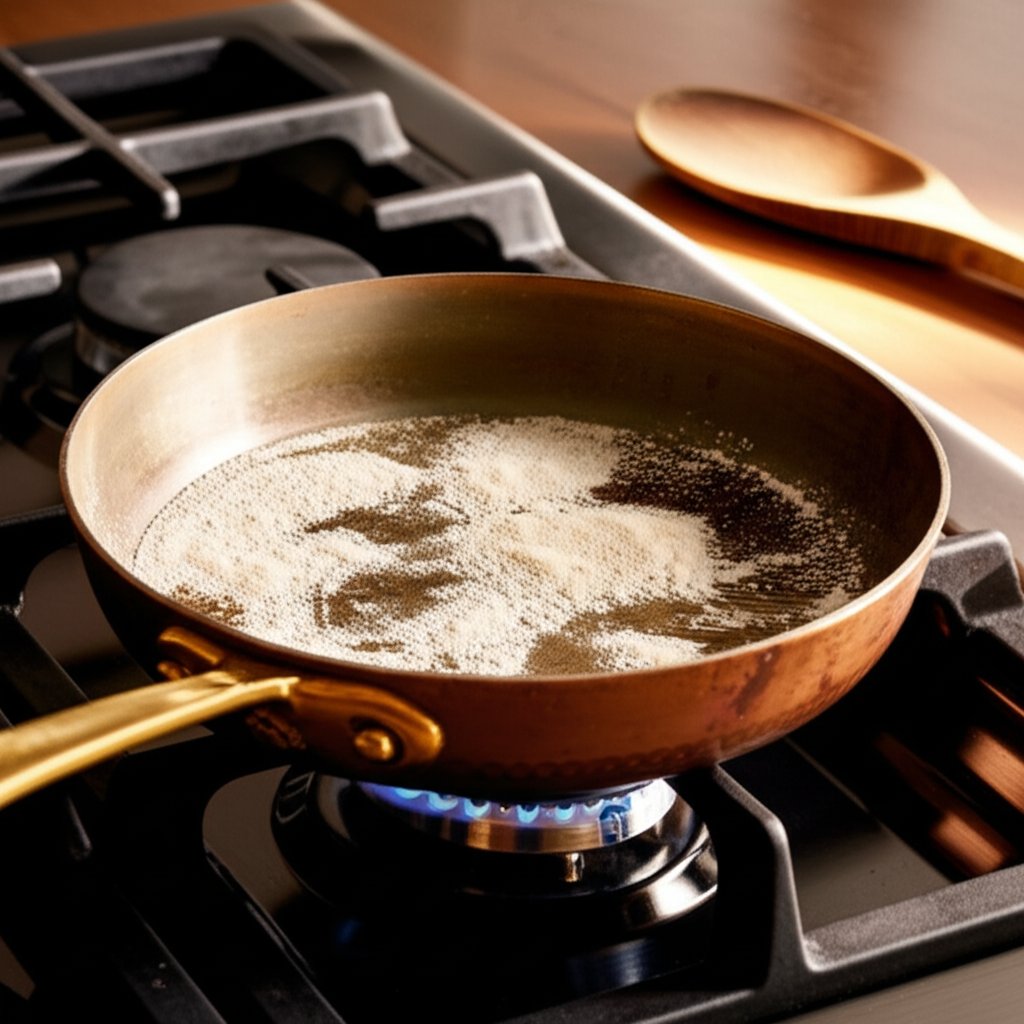
The Dry Flour (or Sugar) Test
- Start by sifting a thin, even layer of flour or granulated sugar over the bottom of your clean, dry copper frying pan.
- Place the pan on your burner over medium heat—no oil or butter needed.
- Watch closely as the flour or sugar begins to brown. Areas that darken first reveal hot spots, while a uniform golden color means even heat distribution.
- Repeat the test with your stainless or cast iron pans for comparison. Note how quickly the browning starts and whether the color is consistent from edge to center.
- For best results, use the same burner and heat setting each time, and jot down your observations.
This simple method is recommended by experienced cooks and is especially revealing for copper frying pans, which tend to show minimal hot spots and fast, even browning compared to other materials [Cooking Stack Exchange].
Responsiveness and Control Checks
One of the main reasons cooks invest in copper skillet or copper frying pans is their legendary responsiveness—how quickly they react when you adjust the heat. Here’s how to check that at home, no thermometer needed:
- Preheat your copper skillet on medium. Add a splash of water or a small pat of butter.
- Turn the heat up slightly and watch how quickly the water sizzles or the butter melts and foams.
- Now, reduce the heat to low. Notice how fast the sizzling slows or the butter stops browning. A responsive pan will react within seconds, letting you save a sauce or prevent burning instantly.
- Try the same steps with another pan. You’ll likely see that real copper pans respond to heat changes much faster than stainless or cast iron.
Copper’s advantage shows when you dial heat down and the pan obeys within moments.
Real-World Cooking Trials
Lab tests are great, but what about everyday cooking in a copper pan? Here are a few kitchen tasks that let you feel the difference in control and consistency:
- Reducing a Pan Sauce: After searing meat, deglaze the pan and reduce a sauce. Watch how quickly the liquid simmers and thickens, and whether it reduces evenly across the entire surface.
- Shallow-Frying Cutlets: Add cutlets to preheated oil. Check for edge-to-center evenness—do all pieces brown at the same rate? Notice how quickly the pan recovers heat after adding food.
- Gently Setting Eggs: Try scrambling or frying eggs over low heat. In a copper frying pan, eggs should set smoothly and evenly, with less risk of sticking or overcooking at the edges.
During professional product reviews, testers found that copper pans consistently delivered fast, even heating and immediate response to temperature changes—making them ideal for delicate tasks like sauce work and sugar cooking.
| Test | Copper Pan | Stainless Steel Pan | Cast Iron Pan |
|---|---|---|---|
| Heat-Up Speed | Fast | Moderate | Slow |
| Evenness (Flour Test) | Excellent | Good | Variable (hot spots common) |
| Responsiveness | Immediate | Moderate | Slow |
| Best Use-Cases | Sauces, caramel, eggs | Everyday cooking | Searing, slow-cooked dishes |
By using these approachable tests, you can confidently evaluate the performance of your copper cookware and see firsthand how it compares to other materials. Whether you’re considering an upgrade to copper frying pans or just curious about your current collection, these playbook-style checks put the focus on what really matters: control, consistency, and great results every time you cook in a copper pan.
Ready to put your new or vintage copper skillet to the test? Up next, we’ll walk through a smart buyer’s checklist and the best ways to prepare your cookware for its first use—so you get the most out of every meal from day one.
Smart Buying and First-Use Checklist
What to Inspect When Your Pan Arrives
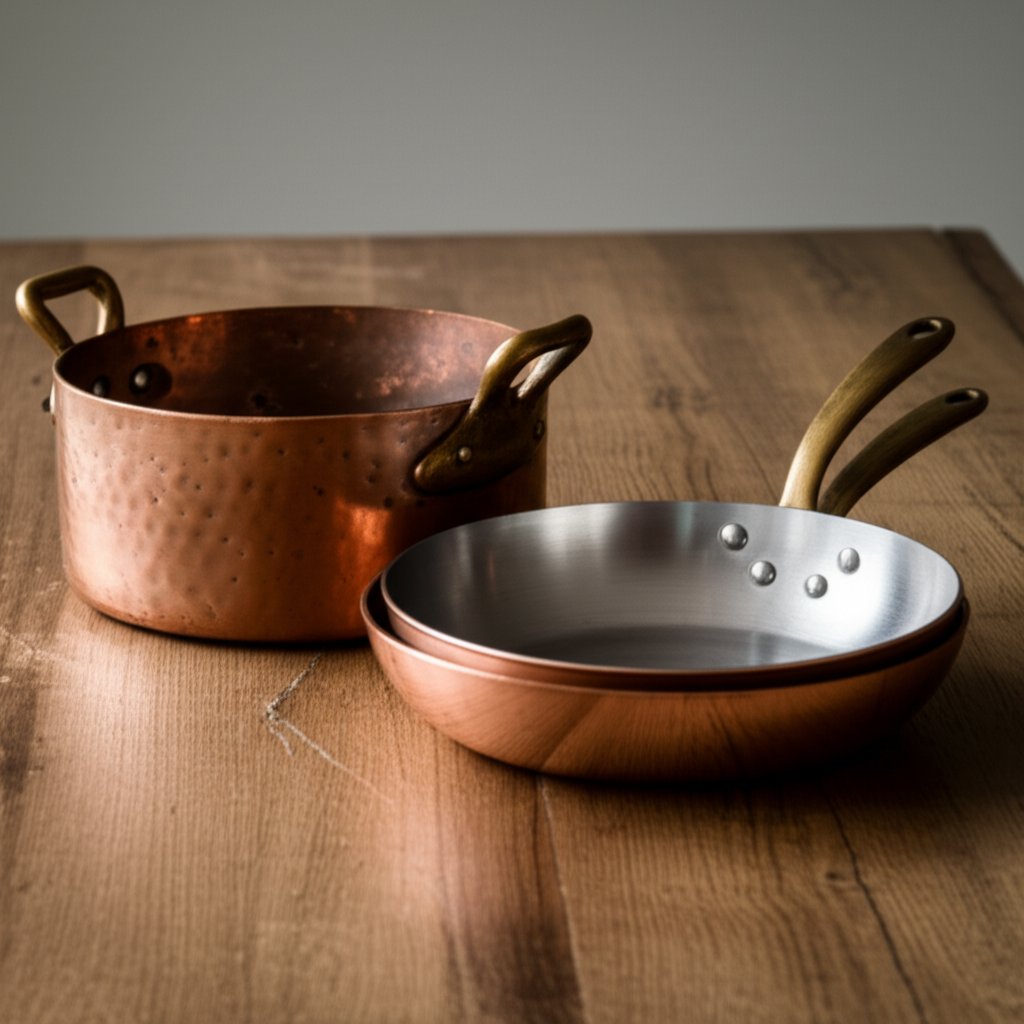
When your new copper cookware set arrives—whether it’s a single pan or a full copper pan set—resist the urge to dive straight into cooking. Taking a few minutes to check for key quality markers can save you headaches and ensure your investment lasts. Imagine you’ve just unboxed a set of copper saucepans: what should you look for?
| Inspection Point | What to Check | Why It Matters |
|---|---|---|
| Flatness of Base | Place pan on a flat surface. It should not wobble or spin. | Ensures even heating and stability on stovetops, especially induction and electric. |
| Lining Uniformity | Interior should be smooth, with no exposed copper or rough patches. | Prevents food contact with copper and reduces risk of sticking or metallic flavor. |
| Rivet Tightness | Handles should feel solid. Try gently wiggling them—no movement is ideal. | Loose rivets can lead to unsafe handling and may require repair. |
| Handle Alignment | Handles should be centered and comfortable to grip. | Good ergonomics make cooking safer and more enjoyable. |
| Lid Fit | Lids should sit flush, without gaps or rocking. | Ensures moisture retention and even cooking, especially for braises and sauces. |
| Hammered Finish (if applicable) | Pattern should be consistent; avoid obvious dents or irregularities. | Genuine hammered copper cookware is not just decorative—it often signals handwork and durability. |
- No visible gaps at lining seams or edges.
- Interior surface is smooth—no exposed copper where food will touch.
- Base sits flat and steady on the counter.
- Handles are firmly attached; rivets are clean and secure.
- Handles are comfortable and safe to grip—no sharp edges or awkward angles.
- Lid (if included) fits snugly and does not rattle.
Minor cosmetic marks or light surface abrasions are common due to the handmade nature of many best copper pans and do not affect performance. Focus on structural integrity and lining quality.
First-Use Preparation Checklist
Before you start your first recipe in that gleaming cookware copper set, a bit of prep ensures your pans perform at their best from day one. Here’s a quick, repeatable routine:
- Gentle Wash: Use mild soap and warm water to remove any manufacturing residues or dust. Avoid dishwashers, which can dull the copper and damage linings.
- Thorough Dry: Dry immediately with a soft towel to prevent water spots and oxidation.
- Optional—Tin Lining Seasoning: For tin-lined pans, some cooks like to wipe the interior with a drop of neutral oil and gently warm over low heat. This is not required but can enhance the initial nonstick feel.
- Staged Heat Exposure: Place the pan over low heat for a minute or two before using it for cooking. This helps you get a feel for copper’s rapid response and prevents thermal shock.
Start lower than you think; copper ramps up quickly.
Common Fit and Finish Red Flags
Noticing something off? Here are a few warning signs that may justify a return or professional evaluation:
- Large gaps or roughness at the lining seam—risk of food contact with raw copper.
- Persistent wobble or rocking on a flat surface—could affect performance on modern cooktops.
- Handles that feel loose or creak when lifted—a safety concern.
- Rivets with sharp edges or visible corrosion.
- Lids that do not fit at all, or pan geometry that looks obviously distorted.
For hammered copper cookware, uneven or inconsistent hammering may simply be cosmetic, but deep dents or stretched bases can affect function and should be addressed if you want the best copper cookware experience [Vintage French Copper].
By following this checklist, you’ll minimize surprises and set yourself up for years of reliable use, whether you’re unboxing a single copper frying pan or a full copper cooking set. Once your pans are ready, the next step is learning how to care for them—so they stay beautiful and high-performing for generations.
How to Keep Copper Cookware at Its Best
Daily Cleaning That Protects the Lining
When you invest in copper cookware, you’re not just buying a kitchen tool—you’re taking on a legacy piece that rewards a little extra care. Sounds complex? It’s simpler than you might think. The key is consistency and gentle handling, especially if your pans feature a tin or stainless lining.
- Let the Pan Cool: Never plunge a hot copper pan into cold water. Allow it to cool to room temperature first—this prevents warping and protects the lining.
- Hand Wash Only: Use warm water, a mild dish soap, and a soft, nonabrasive sponge or cloth. Avoid the dishwasher—harsh detergents and high heat can dull copper and damage linings.
- Gentle on the Lining: For tin or stainless interiors, skip steel wool or abrasive pads. Stick to soft sponges. For tin, never scrub aggressively—dark spots or streaks are normal signs of use and don’t affect safety or performance [Rocky Hill Forge].
- Rinse and Dry Immediately: Rinse thoroughly and dry the pan right away with a clean cotton cloth. Air-drying can leave water spots on copper and lead to unwanted tarnish.
Never scour tin-lined interiors; protect the lining and cook below high-flame extremes.
Polishing vs Embracing Patina
Ever wondered how to clean copper pans so they look as good as new? Or maybe you prefer the mellow, lived-in look of a gentle patina? Here’s how to handle both:
- Regular Light Polishing: For a quick shine, make a paste of two parts ketchup to one part fine sea salt. Rub it gently onto the copper, let it sit for a few minutes, then rinse and dry. Alternatively, mix vinegar, salt, and flour into a paste for a natural copper cleaner.
- Commercial Polishes: For heavy tarnish, use a reputable copper cleaner such as Bar Keepers Friend Soft Cleanser, Wright’s Copper Cream, or a dedicated copper cleaning paste. Always follow the product instructions, use gloves if needed, and avoid getting polish on the lining. Rinse thoroughly if any polish contacts the interior.
- Embracing Patina: Tarnish is only surface oxidation and won’t harm your pan. Many cooks appreciate the character of a gently patinated surface. Polishing less often is perfectly safe and can even improve thermal efficiency by subtly conditioning the copper.
- Avoid Abrasives: Never use abrasive powders or the rough side of a sponge on the copper’s interior—especially if it’s tin lined. Reserve any scrubbing for the exterior only, and only as needed.
- Watch for Verdigris: After polishing, check crevices near handles and rivets for leftover cleaner. Any residue can cause greenish verdigris, which should be removed promptly to avoid pitting.
So, how do you clean copper if you want that showroom gleam? Gentle, regular attention is best. If you love the softer look, simply clean as needed and skip the polish—your cookware will keep performing either way.
When to Consider Professional Re-tinning
For tin-lined copper cookware, interior care is all about preservation. Over time, tin will darken, develop streaks, or show beads from occasional overheating—these are normal. But if you spot a patch of exposed copper on the cooking surface (about the size of a quarter or larger), it’s time to consider professional re-tinning. This process restores the nonstick properties and food safety of your pan, extending its lifespan for years to come.
- Use only wooden or silicone utensils to avoid scratching the tin.
- Keep heat at low to medium—tin melts at around 450°F, so avoid high flames or preheating empty pans.
- If you inherit or buy vintage copper cookware, consider re-tinning even if the lining looks intact—it’s a safeguard for both performance and safety.
If you’re ever in doubt about the condition of your lining, consult a professional for an evaluation. The ability to re-tin is part of what makes copper cookware a true heirloom piece—one that can serve your kitchen for generations with the right care.
By following these practical steps, you’ll keep your copper cookware looking beautiful and performing at its peak—whether you polish to a shine or let a rich patina develop. Next, we’ll explore the realities of long-term ownership, from re-tinning schedules to how careful use can help your pans last a lifetime.
How to Make Copper Cookware Last a Lifetime
Longevity and Re-tinning Considerations
When you invest in copper cookware, you’re not just buying a pan—you’re taking on a piece that can serve your kitchen for decades, or even generations. But what does long-term ownership really look like? Imagine you’ve found a set of tin lined copper pans at a flea market, or perhaps inherited vintage copper pots from a family member. The key to making them last is understanding when they need professional attention and how to avoid unnecessary wear.
- Large patches of exposed copper (about the size of a quarter or more) on the cooking surface signal it’s time for re-tinning.
- Persistent sticking, even with proper technique, can mean the tin lining is worn or uneven.
- Visible thinning or flaking of the lining—especially in high-use areas—shouldn’t be ignored.
Re-tinning is a specialized process where the old tin is stripped and a fresh layer is applied, restoring both performance and safety. With mindful use—avoiding high heat and metal utensils—tin lined copper pots can go many years between services.
| Interior Lining | Maintenance Cadence | Typical Use Cautions |
|---|---|---|
| Tin Lined | Periodic service (re-tinning every decade or as needed) | Avoid high heat, use gentle tools, monitor for exposed copper |
| Stainless Lined | Low-maintenance (no re-lining required) | Safe for higher heat and metal utensils; still avoid thermal shock |
“Treat copper gently and it can serve for decades, often outlasting multiple kitchen upgrades.”
Resale Value and Vintage Appeal
Thinking about the future? Well-maintained copper cookware, especially antique copper pans or those with a known maker’s stamp, often holds or even increases its value over time. The market for vintage copper cookware for sale is robust—buyers look for pieces that are ready to use, with intact linings and minimal dents. Finish maintenance (such as keeping the exterior polished or embracing a rich, natural patina) can influence resale value, but usability is the top priority for most collectors and home cooks.
- Restored and retinned pieces are more attractive in listings for used copper pots and pans.
- Original lids, thick walls, and clear maker’s marks can nudge value higher.
- Heavy tarnish or missing parts may lower appeal but can sometimes be remedied by professional restoration.
Tools and Habits That Preserve Your Pan
Want your copper cookware to join the ranks of cherished antique copper cookware? It’s all about daily habits:
- Use wooden or silicone utensils to avoid scratching tin linings.
- Keep heat at low to medium—especially for tin lined copper pans.
- Hand wash and dry promptly to prevent spotting or corrosion.
- Polish exteriors as desired, but don’t stress about a little patina—it’s a badge of age and authenticity.
By following these steps, your copper pans—whether new, vintage, or antique—can stay beautiful and functional for years. If you’re searching for vintage copper cookware for sale, remember: condition, lining, and maker’s mark matter most.
Next, we’ll explore how modern makers and culinary innovators are using rapid prototyping to develop custom handles, lids, and bases—bridging tradition with tomorrow’s kitchen needs.
Prototyping Custom Parts and Scaling What Works
When Custom Prototyping Makes Sense
Ever wondered how top-tier brands like falk cookware or baumalu copper cookware achieve those signature handles, perfect lid fits, or the ideal weight balance in their copper pans? It’s rarely guesswork. Instead, designers and culinary innovators increasingly turn to rapid prototyping to test and refine new ideas before making big production commitments. Whether you’re a culinary school instructor, a small cookware brand, or a passionate home cook with a vision, prototyping helps bridge the gap between classic craftsmanship and modern kitchen needs.
Imagine you’re developing a new line of french copper cookware, or you want to adapt mauviel copper pans with ergonomic handles for restaurant use. Prototyping lets you experiment with different handle shapes, lid weights, or even heat-diffusing bases—without waiting months or risking costly mistakes. The result? Pans that feel right in the hand, perform beautifully on the stove, and stand up to daily use.
Prototyping Paths for Handles, Lids, and Bases
So, how do you turn your ideas into functional, testable parts? Here’s a practical comparison of the main routes you can take:
| Route | Lead Time | Design Flexibility | Material Options | Repeatability | Best For |
|---|---|---|---|---|---|
| Rapid Prototyping Partner (e.g., XTJ) | Fast (days to weeks) | High – supports complex, iterative changes | Wide (metals, plastics, alloys) | Excellent – digital files ensure consistency | Custom handles, lids, or bases for falk copper pans, baumalu copper cookware, or new product lines |
| Local Artisanal Fabrication | Moderate (weeks to months) | Medium – skilled handwork, but slower to revise | Metals, some alloys | Variable – depends on artisan skill and workload | Small batches, traditional french cookware, unique custom pieces |
| Off-the-Shelf Modification | Immediate (with available parts) | Low – limited by existing designs | Standard metals/plastics | Good for one-offs, less for consistency | Quick fixes, home hobbyists, experimental tweaks |
Choosing a rapid prototyping partner like XTJ means you can leverage technologies such as CNC Machining and Die Casting to create metal parts with the precision required for high-end copper cookware. Their experienced engineers offer complimentary DFM (Design for Manufacturability) feedback, helping you optimize for both performance and cost. This is especially valuable when you’re trying to reduce handle weight without sacrificing balance or testing new heat-diffusing bases that could set your line of duparquet copper cookware apart from the rest.
From Prototype to Pilot Run
Sounds complex? Here’s a step-by-step approach you can follow to bring your copper cookware innovations from idea to reality:
- Define Culinary Performance Targets: What are you aiming for—better balance, lighter weight, improved thermal mass, or a more ergonomic grip? Be specific about what you want your falk copper or mauviel copper pans to achieve.
- Select Materials: Choose metals or alloys that suit your goals. For handles and bases, copper, brass, or stainless steel are common for french cookware. Consider machinability, durability, and finish options.
- Request Manufacturability Feedback: Share your designs with your prototyping partner (such as XTJ) to get DFM feedback. Their engineers can suggest tweaks to ensure your parts are practical and cost-effective to produce, reducing the risk of warping or excessive weight.
- Iterate and Prototype: Make revisions based on feedback, then produce test parts. Rapid prototyping allows you to cycle through several versions quickly—ideal for fine-tuning the feel of a handle or the fit of a lid.
- Test on the Stove: Use the playbook from earlier sections—heat-up speed, evenness, and responsiveness—to evaluate your prototypes in real-world cooking scenarios. Compare your results to established favorites like falk cookware or baumalu copper cookware to benchmark performance.
Prototype fast, test honestly, and only scale what cooks love using.
Why Prototyping Matters for Modern Copper Cookware
By embracing rapid prototyping, today’s makers can iterate faster, reduce costs, and bring better products to market—whether you’re refining a new line of french copper cookware or seeking to modernize classic designs. The ability to test and adjust before mass production means fewer surprises, more consistent quality, and cookware that truly meets the needs of chefs and home cooks alike.
And if you’re inspired by the legacy of falk copper, duparquet copper cookware, or the artistry of mauviel copper pans, remember that innovation and tradition can go hand in hand. With the right prototyping approach, you can honor the past while creating the next generation of heirloom-worthy copper cookware.
Copper Cookware FAQs
1. What are the main drawbacks of copper pans?
Copper pans require regular maintenance to keep their appearance and performance. They can react with acidic foods if the lining is damaged, and tin-lined pans need periodic re-tinning. Copper cookware is also heavier and more expensive than many alternatives, and it demands careful cleaning to avoid damaging the lining.
2. Which foods should not be cooked in copper cookware?
Avoid cooking highly acidic foods like tomatoes, citrus, or vinegar-based recipes in copper cookware if the lining is worn or damaged, as copper can leach into food and affect taste and safety. With an intact lining, copper pans are safe for all types of recipes.
3. How do I know if my copper pan works on induction cooktops?
Check if a magnet sticks to the base—if it does, your pan likely has a magnetic layer suitable for induction. Look for an induction symbol in the documentation, or check with the manufacturer. Pure copper pans without a magnetic base will not work on induction unless you use an adapter plate, but this reduces responsiveness.
4. What is the difference between tin and stainless steel linings in copper cookware?
Tin linings provide a naturally nonstick surface and are ideal for delicate foods, but they require gentle use and periodic re-tinning. Stainless steel linings are highly durable, tolerate higher heat, and need less maintenance, but they are less nonstick than tin and can be harder to repair if damaged.
5. How should I care for and clean my copper cookware?
Hand wash copper cookware with mild soap and a soft sponge, and dry it immediately to prevent spots. Use commercial copper polish or a gentle homemade paste to maintain shine, but it’s safe to let a natural patina develop if you prefer. For tin-lined pans, avoid high heat and metal utensils, and consider professional re-tinning if you see exposed copper.
-
Posted in
cookware maintenance, copper cookware, induction compatibility, premium kitchenware, tin vs stainless lining


