
Stop Guessing Copper Wire Size: Ampacity Rules That Work
Copper Wire Basics and Why It Leads in Conductivity
When you flip a switch or charge your phone, do you ever wonder what’s really carrying that electricity? That’s where copper wire comes in—a material so central to modern life that it powers everything from your home’s outlets to the circuits in your car. But what makes copper the gold standard for electrical conductors, and how do you distinguish between all the terms like wire, cable, and conductor? Let’s break it down so you can confidently approach any project involving copper wire.
What Copper Wire Is and How It Works
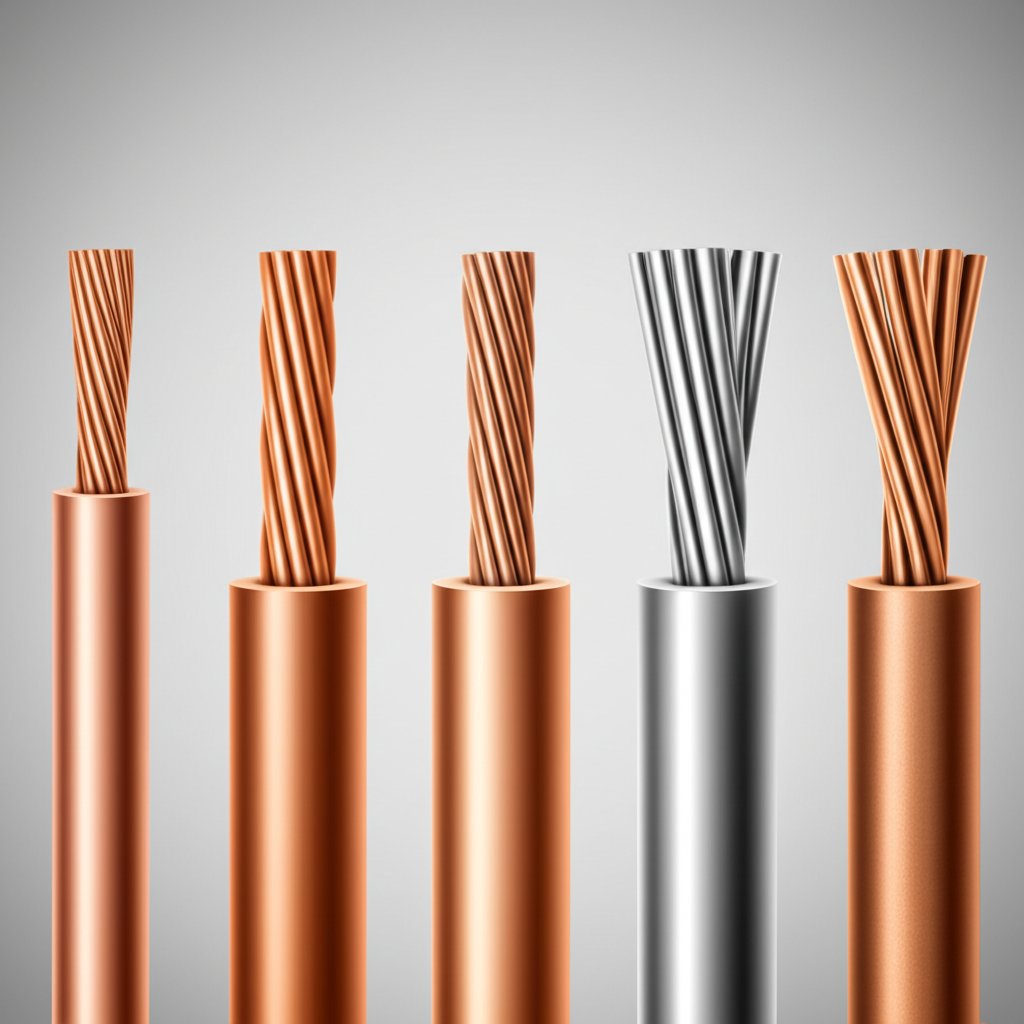
Copper wire is a thin, flexible strand or bundle of copper metal designed specifically to conduct electricity efficiently. The copper wire purpose is to safely and reliably transfer electrical current in everything from household wiring to industrial machinery. Pure copper wire—sometimes called electrolytic tough pitch or oxygen-free copper—offers exceptionally high electrical conductivity, making it the go-to choice for electrical systems in homes, vehicles, and electronics.
Why Copper Dominates Electrical Conductors
So, why does copper outperform other metals in electrical wiring? It comes down to a unique combination of physical and chemical properties:
- High Conductivity: Copper’s ability to conduct electricity is second only to silver, but it’s far more affordable for large-scale use.
- Ductility & Malleability: It can be drawn into thin wires or bent without breaking, supporting complex installations.
- Solderability: Pure copper wire is easy to join with solder, which is critical for electronics and detailed electrical work.
- Corrosion Resistance: Copper forms a protective oxide layer that still conducts electricity, so it resists moisture, pollution, and industrial atmospheres.
- Mechanical Strength: Its high tensile strength prevents stretching, breakage, and creep—helpful for both fixed and mobile applications.
These benefits are recognized by global standards organizations like ASTM, IEC, IEEE, and NEC, ensuring copper conductor products meet strict safety and performance criteria for residential, commercial, and industrial uses.
| Property | Why It Matters |
|---|---|
| Electrical Conductivity | Efficient power transmission, less voltage drop |
| Ductility | Easy to install, bend, and route without breaking |
| Corrosion Resistance | Reliable performance even in damp or polluted environments |
| Solderability | Strong, long-lasting electrical connections |
Essential Terms Installers Should Know
Before you dive into a project, it helps to clarify the language. Here’s a quick guide to common terms you’ll encounter with copper wire:
- Conductor: Any material (often copper or aluminum) that allows electricity to flow.
- Wire: A single, flexible strand or rod of metal used to conduct electricity.
- Cable: Two or more wires grouped together, often with insulation and a protective jacket.
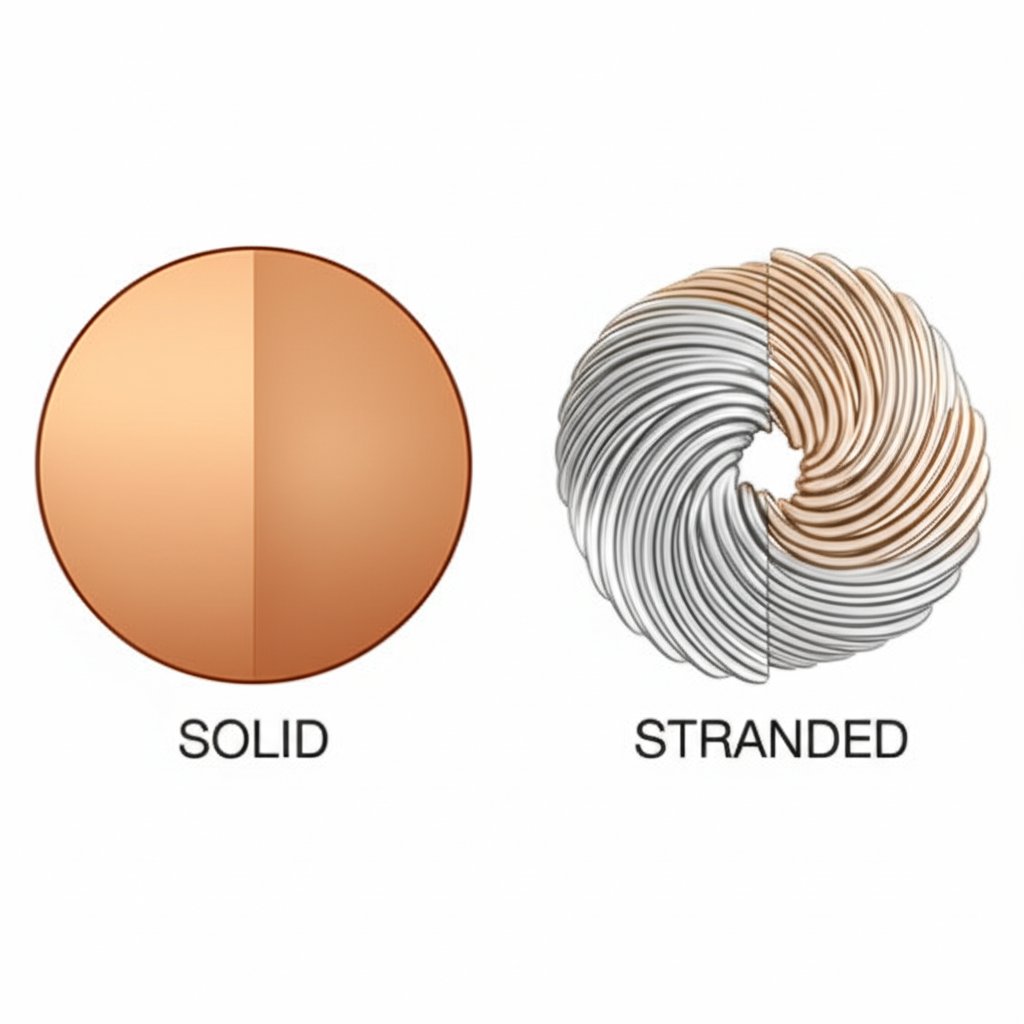
- Solid: A single, unbroken strand of metal—great for fixed installations.
- Stranded: Multiple thin wires twisted together for flexibility and vibration resistance.
- Tinned: Copper wire coated with tin for extra corrosion resistance and easier soldering.
The real strength of copper wire is its balance: unmatched conductivity combined with flexibility and resistance to corrosion—making it the backbone of safe, long-lasting electrical systems.
Wondering where you’ll actually find copper wire in use? It’s everywhere: powering home lighting and outlets, connecting circuits in electronics, running through automotive harnesses, and even shaping jewelry and craft projects. With so many types of copper wire—from bare to tinned, solid to stranded—you can always find the right fit for your application, whether you’re wiring a house or building a custom speaker cable.
Types of Copper Wire and Finishes for Every Environment
When you’re choosing copper wire for a project, the options can seem overwhelming. Should you go with a solid copper conductor for home wiring, or do you need the flexibility of stranded copper wire for an automotive harness? And what about finishes—bare, tinned, or even plated? Let’s break down the essentials so you can confidently match the right type of copper wire to every environment and application.
Solid Versus Stranded Copper Wire
Imagine you’re running wire through the walls of your house. In most cases, solid copper wire is your best bet. It consists of a single, unbroken strand of copper, which makes it durable, easy to install in fixed positions, and ideal for long, straight runs in residential and commercial wiring. Solid wire’s simple construction also means lower cost and less resistance over long distances, making it a staple for building infrastructure and control panels (Ganpati Engineering).
But what if your wiring needs to bend, twist, or flex repeatedly—like in a car door, appliance, or robotics project? That’s where stranded copper wire shines. Made of multiple thin copper strands twisted together, stranded wire is much more flexible and resistant to vibration and fatigue. It’s a popular choice for industrial machinery, automotive wiring, and any situation where movement or tight bends are part of the job.
Pros and Cons of Solid and Stranded Copper Wire
-
Solid Copper Wire
- Pros: Low resistance, cost-effective, simple to terminate, durable for fixed installations
- Cons: Less flexible, can break with repeated bending, not ideal for vibration-prone areas
-
Stranded Copper Wire
- Pros: Highly flexible, withstands vibration, easier to route in tight spaces
- Cons: Slightly higher resistance, more expensive, more complex to terminate cleanly
When to Choose Tinned or Bare
Now, let’s talk finishes. Bare wire—meaning uninsulated copper wire with no coating—is perfect for dry, indoor environments and is commonly used as a grounding wire. Its unmatched conductivity and easy handling make it ideal for grounding systems and jumpers.
But what if your project faces moisture, humidity, or even saltwater? Tinned copper wire is your answer. This type of wire has a thin layer of tin over the copper, protecting it from oxidation and corrosion. Tinned copper wire is especially valuable in marine, industrial, and outdoor environments, where long-term exposure to moisture could degrade bare copper. The tin coating also makes soldering easier and extends cable life in tough conditions.
Pros and Cons of Tinned and Bare Copper Wire
-
Bare Copper Wire
- Pros: Maximum conductivity, cost-effective, easy to terminate, ideal for dry environments
- Cons: Prone to oxidation in humid or corrosive settings, not suitable for wet locations without protection
-
Tinned Copper Wire
- Pros: Corrosion-resistant, longer life in wet/humid environments, easier to solder
- Cons: Slightly higher cost, not always necessary for dry or indoor use
Insulation and Jacket Choices
While bare and tinned copper wires are often uninsulated, most electrical systems require insulated copper for safety and code compliance. Insulation prevents accidental contact and short circuits, especially in branch circuits, control wiring, or any place wires might touch each other or conductive surfaces. The choice of insulation—PVC, XLPE, or specialty polymers—depends on the voltage, temperature, and environmental hazards involved.
For grounding, bare wire (solid or stranded) is often permitted, especially in dry, protected locations. For branch circuits or control wiring, always specify insulated cu wire to ensure safety and durability.
| Use Case | Recommended Type/Finish |
|---|---|
| Indoor Residential Wiring | Solid copper conductor, insulated copper |
| Automotive Harnesses | Stranded copper wire, insulated cu wire |
| Marine or Outdoor Wiring | Stranded tinned copper wire, insulated cu wire |
| Grounding | Solid or stranded bare wire (uninsulated copper wire) |
Making the Right Choice: Environment and Handling
Sounds complex? It doesn’t have to be. Here’s a quick decision guide:
- For fixed, indoor wiring: Choose solid copper conductor with appropriate insulation.
- For flexible, high-vibration, or automotive applications: Go with stranded copper wire, and use insulation as needed.
- For wet, humid, or marine environments: Opt for stranded tinned copper wire with robust insulation.
- For grounding in dry locations: Bare wire (solid or stranded) is typically sufficient.
By understanding the differences between solid, stranded, bare, and tinned copper wire, you’ll avoid costly mistakes and ensure your wiring stands up to the demands of any environment. Next, we’ll look at how to size your wire for safety and performance—so your installation works flawlessly from day one.
Gauge and Ampacity Selection Made Practical
When you’re staring at a reel of copper wire, how do you know it’s the right size for your project? Whether you’re wiring a new outlet, running power to a shed, or building electronics, picking the correct gauge is crucial for safety and performance. Let’s walk through a practical workflow for copper wire sizing—so you’re never left guessing.
Understanding AWG and Diameter
Ever wonder what those numbers—like 14 AWG or 24 AWG—actually mean? AWG stands for American Wire Gauge, a standardized system that measures the diameter of copper wire. Here’s the trick: the lower the AWG number, the thicker the wire and the more current it can carry. For example, 10 AWG is much thicker than 24 AWG. This matters because thicker wires have less resistance, reduce voltage drop, and safely handle higher amperage.
To make things clearer, here’s how AWG relates to physical size and current capacity:
| AWG | Approx. Diameter (mm) | Cross Section (mm²) | Typical Application Examples | Notes |
|---|---|---|---|---|
| 24 AWG | 0.51 | 0.205 | Electronics, signal wires, data cables | Low current (up to ~0.6A chassis wiring) |
| 20 AWG | 0.81 | 0.519 | Low-voltage lighting, small appliance cords | Up to ~1.5A (chassis wiring) |
| 14 AWG | 1.63 | 2.08 | Lighting circuits, receptacles (14 gauge solid copper wire) | Up to 15A (lighting/outlets) |
| 10 AWG | 2.59 | 5.26 | Water heaters, dryers, 30 amp branch circuits | Up to 30A (see below for details) |
Choosing the Right Size for 30 Amp Circuits
This is one of the most common questions: what gauge wire for 30 amp circuits? Or, phrased another way, what size wire for 30 amp loads? The answer is clear: for most residential and general-purpose installations, 10 AWG copper wire is the standard recommendation for circuits carrying up to 30 amps. This applies to things like electric water heaters, small air conditioners, and some RV or workshop outlets.
But there’s a catch—ampacity isn’t just about the number on the wire. Factors like insulation type, ambient temperature, and whether you’re running wires in a bundle all affect safe current-carrying capacity. For example, running 10 AWG copper through a hot attic or grouping it with other wires may require you to size up for safety. Always check the latest NEC or IEC tables for your specific installation, and if in doubt, consult a licensed electrician.
Here’s a quick summary for 30 amp circuits:
- 10 AWG copper wire is typically used for 30 amp branch circuits (Bates Electric).
- Never use 14 gauge solid copper wire for 30 amp loads—it’s only rated for up to 15 amps.
- For long runs (over 100 feet) or high heat, consider upsizing to 8 AWG.
Searching for what awg wire for 30 amp or what ga wire for 30 amp? The safe bet is 10 AWG copper, but always verify with code and consider your installation’s unique factors.
Quick Application Map by Gauge
Still not sure which wire to choose? Use this quick reference to match wire gauge to common applications:
- 24 AWG: Electronics, sensors, low-power signal lines
- 20 AWG: LED strips, small appliance cords, control wiring
- 14 gauge solid copper wire: General lighting, standard outlets (up to 15A)
- 12 AWG: Kitchen, laundry, or garage circuits (up to 20A)
- 10 AWG: 30 amp circuits—water heaters, window A/C, RV outlets
Don’t Forget Derating
Before you finalize your wire size, must account for real-world conditions per electrical code:
- Determine your circuit’s maximum expected current (in amps).
- Check the installation environment: Will the wire be exposed to high temperatures?
- Count the number of current-carrying conductors in the same conduit or cable bundle.
- Look up the insulation temperature rating (often printed on the wire).
- Consult the NEC or IEC ampacity tables and apply correction factors for temperature and bundling.
- When in doubt, size up or ask a professional electrician.
The safest wire size is the one that considers not just the load, but also the installation environment and local code requirements. Never guess—always verify.
Next, we’ll explore how copper wire’s physical properties—like annealing and hardness—affect installation, especially for makers and those working on custom components. Understanding these details ensures your wiring not only meets code but also stands up to real-world use.
Annealed and Hard Drawn Copper Explained for Makers
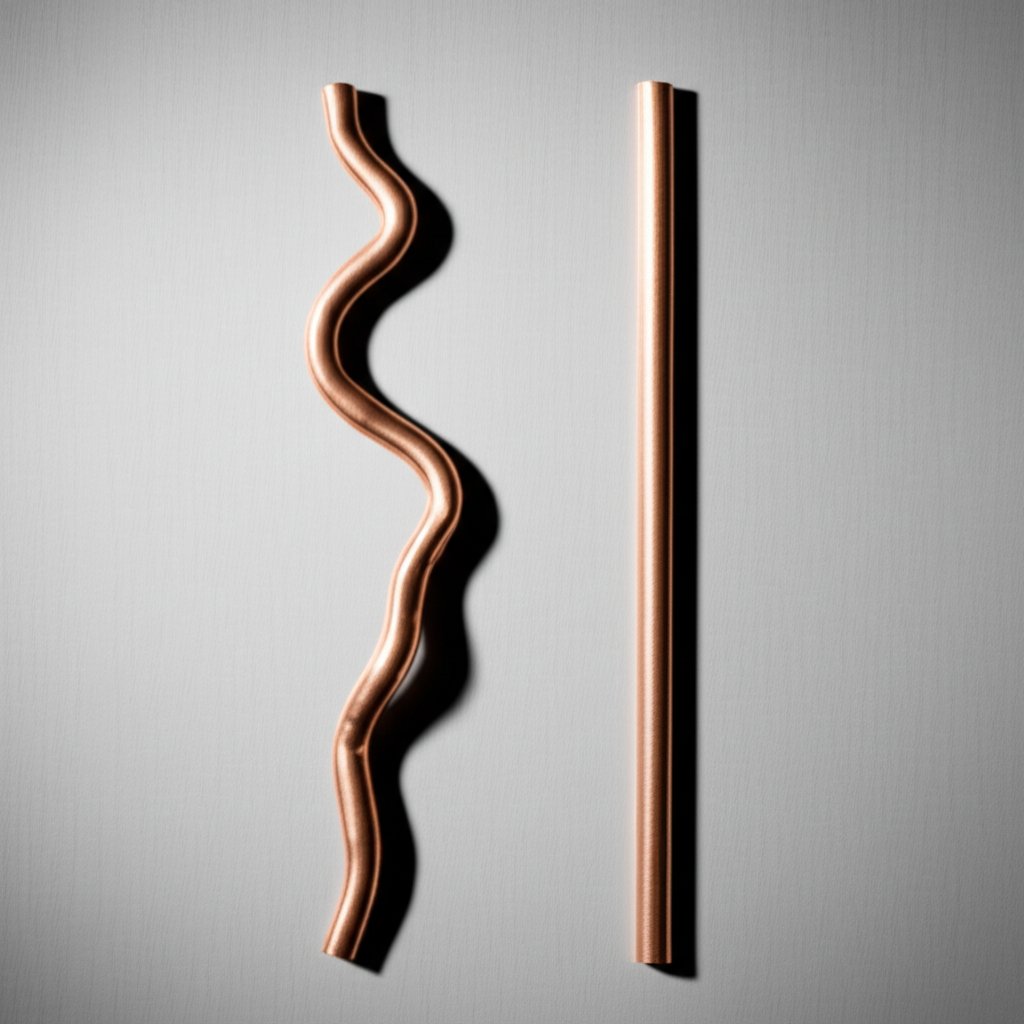
Ever tried bending copper wire for jewelry or wiring and wondered why sometimes it’s soft and pliable, other times stiff and springy? The answer lies in the metallurgy—specifically, whether you’re working with annealed copper wire or copper hard drawn. Understanding these differences helps you pick the right material for your next installation, craft, or custom project.
Annealed Versus Hard-Drawn Copper
Let’s start with the basics. Both types start with pure copper, but their final properties depend on how they’re processed after drawing through dies. Here’s what you’ll notice:
| Property | Annealed Copper Wire | Hard-Drawn Copper Wire |
|---|---|---|
| Flexibility | Very flexible—easy to bend, form, and wrap | Stiff—resists bending, holds its shape |
| Tensile Strength | Lower—best for applications needing malleability | Higher—resists stretching and mechanical stress |
| Conductivity | Higher—restored by heat treatment | Slightly lower—work hardening increases resistance |
| Typical Use | Wiring in buildings, electronics, jewelry making | Overhead lines, straight bus bars, outdoor/industrial installs |
Annealed copper wire is favored when you need dead soft copper wire for jewelry, intricate bends, or tight routing through conduits. In contrast, copper hard drawn is ideal for long, straight runs—think power transmission or outdoor installations where strength matters more than flexibility.
Work-Hardening and How to Anneal
Ever notice copper wire gets stiffer after repeated bending? That’s work-hardening in action. Each bend disturbs the copper’s crystalline structure, making it less ductile and more prone to cracking. Luckily, annealing can restore its softness.
Here’s a simple, maker-friendly approach for annealing copper wire for jewelry making or small-form projects:
- Clean the copper: Wash with degreasing soap to remove oils and residues—this prevents contamination during heating.
- Set up a heat-safe surface: Use a firebrick or heat-resistant tile. Elevate the wire if possible to ensure even heating.
- Heat with a torch: Using a butane torch, gently sweep the flame over the wire. Watch for color changes—copper will turn rainbow hues, then a dull red glow.
- Annealing is complete: Once the entire wire shows a red glow, remove the heat.
- Cool the wire: Either let it air cool or, for most jewelry applications, quench in cool water.
- Pickle and clean: Remove any fire scale with a safe pickle solution, then wash and dry the wire.
Always use proper ventilation, nonflammable surfaces, and heat-resistant gloves when annealing. Keep water or a fire extinguisher nearby, and never leave your torch unattended. Safety first!
Annealed copper wire is now dead soft—easy to shape, wrap, or twist for your next creative or technical project. If you need it stiffer, you can intentionally work-harden the wire by hammering or bending it repeatedly.
Jewelry and Craft Tips
Choosing the right copper wire for jewelry depends on both size and temper. For fine wrapping and delicate designs, go for 0.2–0.5mm soft (annealed) wire. For structural frames or chunky bangles, thicker gauges (1.5–3mm) provide strength but will be harder to shape.
- For intricate wirework: Use dead soft copper wire—easy to manipulate, less likely to snap.
- For findings (ear wires, clasps): Start with soft wire, shape, then lightly hammer to work-harden and hold form.
- Surface finish: After annealing, clean thoroughly to remove scale. Polishing restores luster, while leaving some patina adds character.
Remember, annealed copper wire lets you experiment—if it gets too stiff, just anneal again. This flexibility is why copper wire for jewelry and craft is so popular among makers of all skill levels.
Next, we’ll shift from metallurgy to practical installation—covering best practices for grounding, termination, and safe handling to ensure your copper wire projects last for years to come.
Installation, Grounding, and Reliability Best Practices
When you’re wiring a home, building a control panel, or even handling a simple light switch, how you install copper wire can make all the difference in safety and long-term reliability. Sounds complex? It doesn’t have to be. Let’s break down the best practices for grounding, terminations, and derating so you can avoid the most common pitfalls and ensure every connection does its job for years to come.
Grounding Fundamentals with Copper
Imagine a sudden electrical fault—where does that stray current go? That’s the job of the grounding wire. In most modern wiring, a bare copper wire (often called bare ground wire) is included in cables like Romex for exactly this reason. Its purpose is simple but vital: provide a safe, low-resistance path for fault current to flow harmlessly into the earth, protecting people and equipment from electric shock or fire.
Why is the ground wire bare in so many installations? Cost efficiency and simplicity are key. Since the ground wire only carries current during fault conditions, insulation isn’t always necessary—making it easy to identify and work with. Regulatory bodies like the NEC allow bare copper wire for grounding in residential and light commercial settings, provided the installation follows code. In conduit systems or areas prone to moisture or corrosion, you’ll sometimes see green-insulated copper grounding wire, offering extra protection and easier identification (WesBell Wire & Cable).
- Do use bare copper wire for grounding in dry, protected locations per code.
- Do use green-insulated copper grounding wire in conduit, wet, or corrosive environments.
- Don’t substitute other colors or materials for ground unless specifically allowed by local code.
- Don’t leave ground connections loose—secure every connection to the grounding system.
Terminations and Torque Best Practices
Ever wonder why some connections fail over time? Loose or poorly torqued terminations are a common culprit. When terminating ground wire bare copper or insulated conductors, always use the correct connectors, lugs, or screws specified for copper conductors. Under-tightened connections can overheat and fail, while over-tightening may damage the wire or connector.
- Measure the required length before cutting to minimize waste.
- Cut the wire cleanly with the appropriate tool to avoid crushing or distorting the strands.
- Strip insulation using a designated wire stripper—never use knives or snips, which can nick the copper and weaken the conductor.
- Terminate the wire with a properly sized connector or lug.
- Torque the connection to the manufacturer’s specification (check device labels or datasheets for exact values).
- Inspect every connection for tightness, no exposed strands, and proper seating.
Tip: When in doubt, always refer to the device’s datasheet or local code for the correct torque value. If you’re working with stranded copper, make sure all strands are captured in the connector—missing strands can lead to overheating and failure.
Derating and Installation Conditions
Planning to bundle several wires in a conduit or run them through a hot attic? Here’s where derating comes into play. As current flows through copper wire, it generates heat. Bundle too many wires together or install them in a hot environment, and you risk exceeding the insulation’s temperature rating, potentially leading to breakdown or fire.
To keep things safe, follow these derating best practices:
- For more than three current-carrying conductors in a bundle, reduce the ampacity of each wire according to code tables.
- If installed in ambient temperatures above 86°F (30°C), apply correction factors to the wire’s ampacity as specified by the NEC or IEC.
- Remember: grounding conductors (bare or green) are not counted as current-carrying conductors for derating purposes (JADE Learning).
- Never exceed the recommended bend radius—kinking or sharply bending copper wire can break strands, reduce conductivity, and violate code.
- Use strain relief at terminations to prevent mechanical stress from loosening connections over time.
The best copper wire installations combine careful grounding, proper terminations, and smart derating—so your system performs safely, efficiently, and reliably for decades.
By following these practical steps, you’ll extend the life of your copper grounding wire and ensure it does its job as a silent protector in your electrical system. Next, we’ll compare copper with alternative conductor materials and help you choose the right option for your environment and budget.
Copper Versus Alternatives with Honest Tradeoffs
When planning your next project, do you wonder if copper electrical wire is always the right choice—or if alternatives like aluminum, copper-clad, or tinned options could save money or perform better in certain environments? Let’s break down how copper compares to its main rivals, so you can confidently select the best conductor for your application, whether you’re running bare copper cable overhead or choosing copper wire cable for critical indoor circuits.
Copper Versus Aluminum Conductors
Imagine you’re wiring a new building or upgrading power lines. The decision between copper and aluminum can impact everything from installation ease to long-term reliability. Here’s what you need to know:
| Attribute | Copper | Aluminum | Copper-Clad Aluminum (CCA) | Tinned Copper |
|---|---|---|---|---|
| Conductivity | High—benchmark for wiring | ~60–70% of copper’s conductivity | Much lower than copper; higher resistance | Same as copper (tin is only a thin surface layer) |
| Weight | Heavier | Lighter (about half the weight for same ampacity) | Lighter than copper | Same as copper |
| Corrosion/Environmental Resistance | Excellent; forms conductive oxide | Prone to oxidation; forms non-conductive oxide | Very prone to oxidation; unreliable in humid conditions | Superior; tin layer resists corrosion, ideal for marine/humid |
| Mechanical Strength | Strong, flexible, resists breakage | Weaker, more prone to breaking when bent | Weak, breaks easily at terminals | Same as copper, plus better for repeated maintenance |
| Terminations | Standard lugs/connectors | Requires special connectors (Al-rated) | Often fails at terminations; not recommended | Easy to solder, reliable connections |
| Cost | Higher upfront | Lower upfront, but more maintenance | Very low, but high risk of failure | Slightly higher than bare copper |
| Typical Use Cases | Residential wiring, electronics, industrial, copper conductor cable | Utility power lines, service feeders, some large-scale cables | Rarely recommended; sometimes in low-cost speaker wire | Marine, outdoor, high-humidity, long-life installations |
Pros and Cons: Copper Electrical Wire
- Pros: Highest conductivity for safe, efficient power; flexible and strong; reliable, long service life; meets all major codes for copper wire and cable.
- Cons: Higher material cost; heavier to handle in large installations.
Pros and Cons: Aluminum and CCA
- Aluminum Pros: Lightweight, cost-effective for long runs (like overhead power lines); good when budget is critical and weight savings matter.
- Aluminum Cons: Lower conductivity (requires larger size for same ampacity); prone to oxidation and expansion/contraction; special connectors required; higher maintenance risk.
- CCA Cons: Poor conductivity, mechanical weakness, and high risk of failure—especially in low-voltage or high-reliability systems. Not recommended for most permanent installations (GLLEDUS).
When Copper-Clad or Tinned Makes Sense
Ever see copper coated wire or tinned copper in product specs and wonder when to use them? Here’s how these types of copper wire cable fit in:
- Copper-Clad Aluminum (CCA): Sometimes used in budget audio or data cables, but not recommended for critical power or safety circuits due to unreliable conductivity and easy breakage.
- Tinned Copper: The best choice for harsh, humid, or marine environments. The tin coating prevents oxidation and extends service life up to 10× compared to bare copper in wet locations. Tinned copper wire and cable is also easier to solder and maintain.
For most residential, commercial, and industrial projects, pure copper wire remains the gold standard—especially when you need a copper conductor cable that meets code and delivers worry-free performance.
Environmental and Maintenance Considerations
How do you match material to environment? Here’s a quick guide:
- Overhead utility lines: Aluminum or aluminum alloys for weight savings (installed by professionals with rated connectors).
- Marine, outdoor, or humid environments: Stranded tinned copper wire cable for maximum corrosion resistance and long life.
- Residential and indoor wiring: Solid or stranded copper wire and cable—safe, reliable, and easy to terminate.
- High-flex or maintenance-prone areas: Stranded copper or tinned copper for durability through repeated bending and repairs.
The best material for your project balances conductivity, cost, and environment. For most critical wiring, copper wire and cable deliver unmatched reliability—while tinned copper extends performance in harsh conditions, and aluminum is reserved for special use cases where weight and budget are the top priorities.
As you weigh your options for electric copper wire, remember: a slightly higher upfront investment in quality copper conductor cable can pay off with fewer failures, safer installations, and lower maintenance over the life of your system. In the next section, we’ll help you navigate pricing, procurement, and how to make smart copper wire and cable sourcing decisions that keep your project on track.

Pricing Insights and Smarter Copper Procurement
Ever wondered why copper wire price can swing so dramatically from one quarter to the next? Or why your last project’s quote looked very different than this year’s? If you’re responsible for buying copper wire, understanding what drives these costs—and how to plan your purchases—can make a real difference to your bottom line. Let’s break down the key factors, smart buying strategies, and the real cost of ownership so you can approach your next procurement with confidence.
What Drives Copper Wire Prices?
Sounds complex? It’s a mix of global forces and industry-specific factors. The price of copper wire is heavily influenced by:
- Raw Copper Market Volatility: Copper is a globally traded commodity. Supply disruptions—like mining strikes in South America or new mine production in Africa—can cause prices to spike or dip. For example, copper wire prices rose by over 12% in a single quarter due to supply shortages and increased demand from renewable energy projects (Gordian).
- Energy and Processing Costs: Smelting, drawing, and insulating copper wire all require significant energy. Rising energy prices or labor costs push up the final price per foot.
- Material and Insulation Inputs: The cost of plastics and specialty insulation compounds can fluctuate, especially during periods of high oil prices or supply chain disruptions.
- Logistics and Transportation: Shipping delays, fuel costs, and even packaging shortages can impact both copper cable price and availability.
Recent years have seen copper wire prices climb to five-year highs, with year-over-year increases as high as 15–24%. The surge is largely driven by green energy initiatives, electric vehicle production, and data center expansion, all of which ramp up copper demand.
Smart Procurement and Budgeting
So, how much is copper wire worth—and how can you avoid paying more than necessary? Here are some proven strategies for buyers and project managers:
- Lock in Quotes Early: When copper prices are rising, requesting fixed quotes or contracts can shield you from future spikes.
- Order Standard Gauges and Lengths: Custom sizes or oddball specifications often cost more per foot. Standardizing your requirements can yield better pricing and faster delivery.
- Consider Alternate Constructions: For non-critical applications, evaluating different types of copper wire or insulation can help manage costs without sacrificing performance.
- Leverage Supplier Relationships: Consolidating orders or negotiating with preferred vendors can unlock volume discounts and priority allocation—especially important during supply shortages.
| Procurement Lever | Likely Impact |
|---|---|
| Specification Simplification | Reduces cost, streamlines inventory |
| Order Timing (advance buy/lock-in) | Protects budget from market swings |
| Spool Size Optimization | Minimizes waste, lowers unit cost |
| Vendor Consolidation | Enables volume pricing, better service |
TCO Beyond the Purchase Price
It’s tempting to focus on the lowest copper wire prices on paper, but the real question is: what’s the total cost of ownership (TCO) for your project? TCO includes not just the initial purchase, but also installation labor, connectors, maintenance, and even future replacement or recycling costs. For example, copper may cost more upfront than aluminum, but it can reduce maintenance, energy loss, and downtime over decades of service.
The best procurement decisions balance upfront price with long-term reliability—sometimes spending a little more now saves much more over the life of your system.
By keeping an eye on market trends, understanding the drivers behind the price of copper wire, and focusing on TCO, you can make smarter, future-proof choices for every project. Next, we’ll show you how to prototype custom copper wire components and interfaces—so your ideas move from concept to reality, fast and cost-effectively.
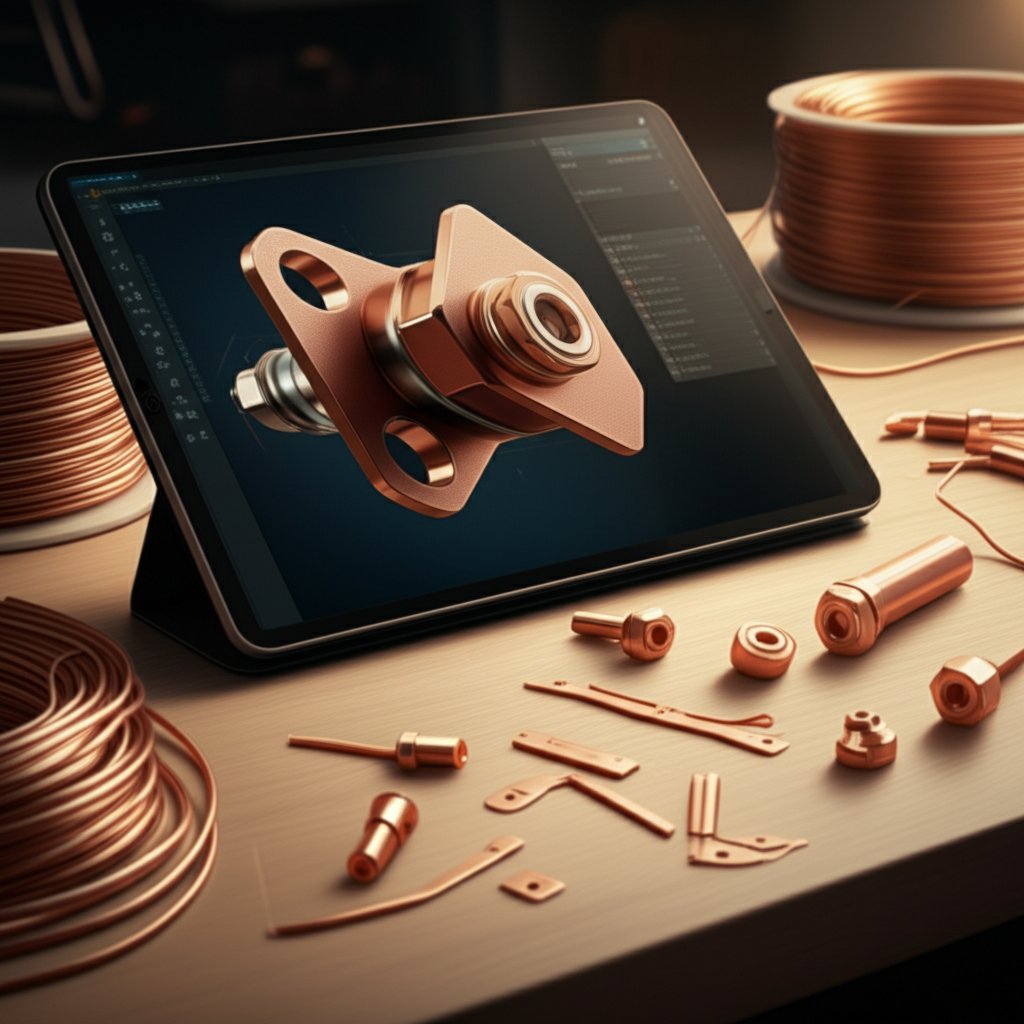
Prototyping Copper Wire Interfaces and Components
Ever need a custom terminal, bus bar, or connector that perfectly fits your copper wire design? Whether you’re building a test fixture, a custom harness, or a new device, rapid prototyping lets you move from concept to working part in days—no more waiting weeks for tooling or risking costly mistakes. But how do you go from a sketch to a reliable, manufacturable part that integrates seamlessly with copper wire, whether it’s copper strip wire, copper bare wire, or stranded bare copper conductor?
Prototyping Custom Copper Contacts and Terminals
Think about the last time you needed a custom interface for copper leads or a unique connector for insulated copper wire 24 gauge. Off-the-shelf parts rarely fit perfectly, especially when your application demands specific bend radii, tight tolerances, or specialized plating for corrosion resistance. That’s where rapid prototyping shines—allowing you to quickly test, refine, and validate your design before committing to production.
Common routes for prototyping copper wire interfaces include:
- CNC machining: Ideal for creating precise copper strip wire contacts, bus bars, or solid terminals with exact dimensions and hole patterns.
- Stamping: Efficient for flat parts or high volumes, like custom copper wire solid tabs or lugs.
- Injection overmolding: Adds a protective or strain-relief layer over a terminated assembly, especially useful for 24 gauge insulated copper wire or delicate connections.
- Die casting: Used for more complex shapes or housings that need to interface with copper wire insulated or bare.
Choosing the right route depends on your part geometry, performance needs, and how quickly you need to iterate.
DFM Tips for Conductivity and Manufacturability
Design for Manufacturability (DFM) is critical when prototyping any interface that carries current. Here are practical tips to ensure your copper wire components work as intended:
- Maintain generous bend radii: Avoid sharp corners on copper strip wire or bus bars to prevent cracking and maintain conductivity.
- Specify proper thickness: Thicker copper parts handle more current but may require different forming techniques. Match thickness to ampacity needs and available tooling.
- Allow for plating or tinning: If your environment is humid or corrosive, specify tin or nickel plating for copper bare wire contacts to extend lifespan and ease soldering.
- Insulation clearances: When designing for copper wire insulated assemblies, ensure enough space for insulation creep and voltage clearance, especially for high-voltage or dense harnesses.
- Test with real wire: Always validate your prototype with the actual copper wire solid or stranded you plan to use—fit and crimp quality can vary by supplier.
These DFM practices help ensure your prototype performs reliably and transitions smoothly to production, whether you’re working with 24 gauge insulated copper wire or heavy-duty bus bars.
From Prototype to Production
Wondering how to turn your design into a functional part, fast? Here’s a proven workflow for prototyping copper wire interfaces and components:
- Define requirements: What current, voltage, and environment must your component handle? What wire type (solid, stranded, tinned, bare) and gauge?
- Select materials: Choose the right copper alloy or finish for your needs—pure copper for high conductivity, tinned for corrosion resistance, etc.
- DFM review: Collaborate with your prototyping provider to optimize geometry, tolerances, and manufacturability.
- Rapid build: Use CNC, stamping, or overmolding to produce your prototype. For complex assemblies, consider combining processes.
- Test and validate: Check fit, crimp/solder quality, and electrical performance with the actual copper wire insulated or bare that you’ll use in production.
- Iterate as needed: Refine your design based on test results, then repeat the process for fast improvement.
Choosing a Rapid Prototyping Partner: A Comparison Table
| Provider | Core Strengths | Materials/Processes Supported | DFM/Engineering Support | Turnaround Time |
|---|---|---|---|---|
| XTJ Rapid Prototyping | Full-service, metals/plastics, ISO 9001:2015, expert DFM | Copper, aluminum, 50+ others; CNC, molding, die casting | Complimentary, highly experienced | Rapid (project-dependent) |
| Local Machine Shop | Hands-on, local support | Typically CNC, limited material selection | Varies by shop | Moderate |
| Online 3D Printing Hub | Fast quotes, broad access | Mostly plastics, limited metals | Minimal | Fast |
For copper wire interfaces—especially when you need machined copper contacts, test fixtures, or overmolded strain reliefs that integrate with copper wire solid or stranded—XTJ offers a practical, one-stop solution for both prototyping and production scale.
Real-World Example: Insulated Copper Wire 24 Gauge Prototype
Imagine you’re developing a sensor harness that requires custom terminals for 24 gauge insulated copper wire. You’d begin by specifying the copper leads, insulation thickness, and termination style. Next, you’d work with a rapid prototyping partner to CNC machine a batch of copper contacts, validate fit with your copper wire insulated samples, and overmold the assembly for strain relief. After testing, you’d iterate the design until it meets all performance and reliability targets.
The right prototyping workflow lets you quickly move from ideas to functional copper wire components—reducing risk, saving time, and ensuring your final product is robust and manufacturable.
With these strategies, you’ll be ready to tackle any custom copper wire interface challenge. In the next section, we’ll wrap up with actionable reference tables and a step-by-step workflow to help you specify copper wire for any project, from prototype to production.
Actionable Wrap Up
Ready to move from theory to action? Whether you’re wiring a new outlet, specifying a harness, or troubleshooting a circuit, having the right copper wire at your fingertips makes every job safer and more reliable. But with so many choices—14 gauge electric wire, 18 gauge copper wire, or even 20 gauge wire—how do you choose with confidence? Let’s break it down with a practical workflow, bookmarkable tables, and a few expert tips to keep your projects on track.
Quick Selection Workflow
Don’t want to guess? Here’s a step-by-step process to help you pick the right copper wire for any application:
- Define your application: Is it power, control, signal, or grounding?
- Determine the current load (amps) and voltage.
- Measure the run length and check for environmental challenges (heat, moisture, vibration).
- Select the appropriate insulation and jacket for safety and code compliance.
- Reference ampacity charts to match your current to the correct wire gauge—never use 14 awg copper wire for 30 amps; 10 AWG is typical for those loads.
- Factor in derating for bundling or high heat—if in doubt, size up.
- Choose the right termination style: crimp, solder, or specialized connector.
- When timelines are tight or designs are custom, consider rapid prototyping for testable parts—XTJ can help you iterate and validate quickly.
Key Tables to Bookmark
Keep these tables handy when specifying or troubleshooting copper wire. They’ll help you quickly convert between AWG, diameter, and ampacity, and match applications to recommended wire types.
| AWG | Approx. Diameter (mm) | Cross Section (mm²) | Typical Ampacity (A) | Common Uses |
|---|---|---|---|---|
| 18 | 1.02 | 0.823 | Up to 10 | Control wiring, 18 gauge copper wire |
| 16 | 1.29 | 1.31 | Up to 13 | Lighting, small appliances |
| 14 | 1.63 | 2.08 | Up to 15 | Lighting circuits, 14 gauge electric wire |
| 12 | 2.05 | 3.31 | Up to 20 | Outlets, kitchen, garage |
| 10 | 2.59 | 5.26 | Up to 30 | Water heaters, what size wire for 30 amps |
| 8 | 3.26 | 8.37 | Up to 40 | Large appliances, subpanels |
| 6 | 4.11 | 13.3 | Up to 55 | Feeders, heavy equipment |
Elliott Electric – Wire Gauge and Ampacity
| Application | Wire Type/Finish | Gauge Range | Termination |
|---|---|---|---|
| Branch Circuit (Indoor) | Solid, insulated copper | 14–10 AWG | Twist-on, screw terminal |
| Control Wiring | Stranded, insulated copper | 18–14 AWG | Crimp, push-in |
| Outdoor/Marine | Stranded, tinned copper | 16–8 AWG | Crimp, solder |
| Grounding | Bare copper (solid/stranded) | 14–6 AWG | Clamp, lug |
| Custom Harness/Prototype | Insulated/stranded (project-specific) | 20–10 AWG | Custom/DFM-driven |
Next Steps for Your Project
Still have questions or need a custom solution fast? Here’s how to keep your copper wire project moving:
- XTJ Rapid Prototyping – Turn your copper wire concepts into testable parts with expert DFM review and fast iterations.
- Elliott Electric – For detailed ampacity charts, product selection, and supply.
- Consult the latest NEC or IEC tables for code-compliant sizing and installation practices.
- Work with licensed electricians for final verification and installation—especially for high-current or critical circuits.
- Never guess wire size—use ampacity charts and always factor in environment and derating.
- Match your copper wire type and finish to the application for safety and longevity.
- For custom, time-sensitive projects, rapid prototyping partners like XTJ help you turn ideas into reality, fast and reliably.
With these tools and references, you’re equipped to specify, source, and install copper wire confidently—no more guesswork, just safe and efficient results every time.
Copper Wire FAQ
1. How much is 1 lb of copper wire worth?
The value of 1 lb of copper wire depends on current market rates for scrap copper, which can fluctuate due to global demand and supply. For the most accurate pricing, check local scrap yards or online metal price resources. Keep in mind that wire type and condition (bare, insulated, or tinned) can affect the price received.
2. What does copper wire do for your body?
Copper wire itself is not intended for bodily use, but copper as an element plays a role in human health by aiding in red blood cell production and supporting brain and bone function. Copper wire is designed for electrical applications and should not be used for health or dietary purposes.
3. What is the best type of copper wire for outdoor or marine environments?
For outdoor or marine environments, tinned copper wire is preferred due to its enhanced resistance to corrosion and oxidation. The tin coating helps the wire withstand moisture and harsh conditions, making it ideal for boats, outdoor lighting, and humid locations.
4. Which copper wire gauge is typically used for 30 amp circuits?
A 10 AWG copper wire is usually recommended for 30 amp circuits in residential and general-purpose installations. Always consult local electrical codes and consider environmental factors like run length and temperature before finalizing your selection.
5. How can I get a custom copper wire component or terminal quickly?
Rapid prototyping services, such as those offered by XTJ, allow you to turn your copper wire concepts into functional parts efficiently. These services provide design feedback, material selection, and fast turnaround for custom terminals, contacts, or overmolded assemblies that integrate seamlessly with your wire harnesses.
-
Posted in
copper wire, electrical installation, grounding, wire sizing, wire types


