
How to Polish Stainless Steel in 9 Steps: From Prep to Mirror
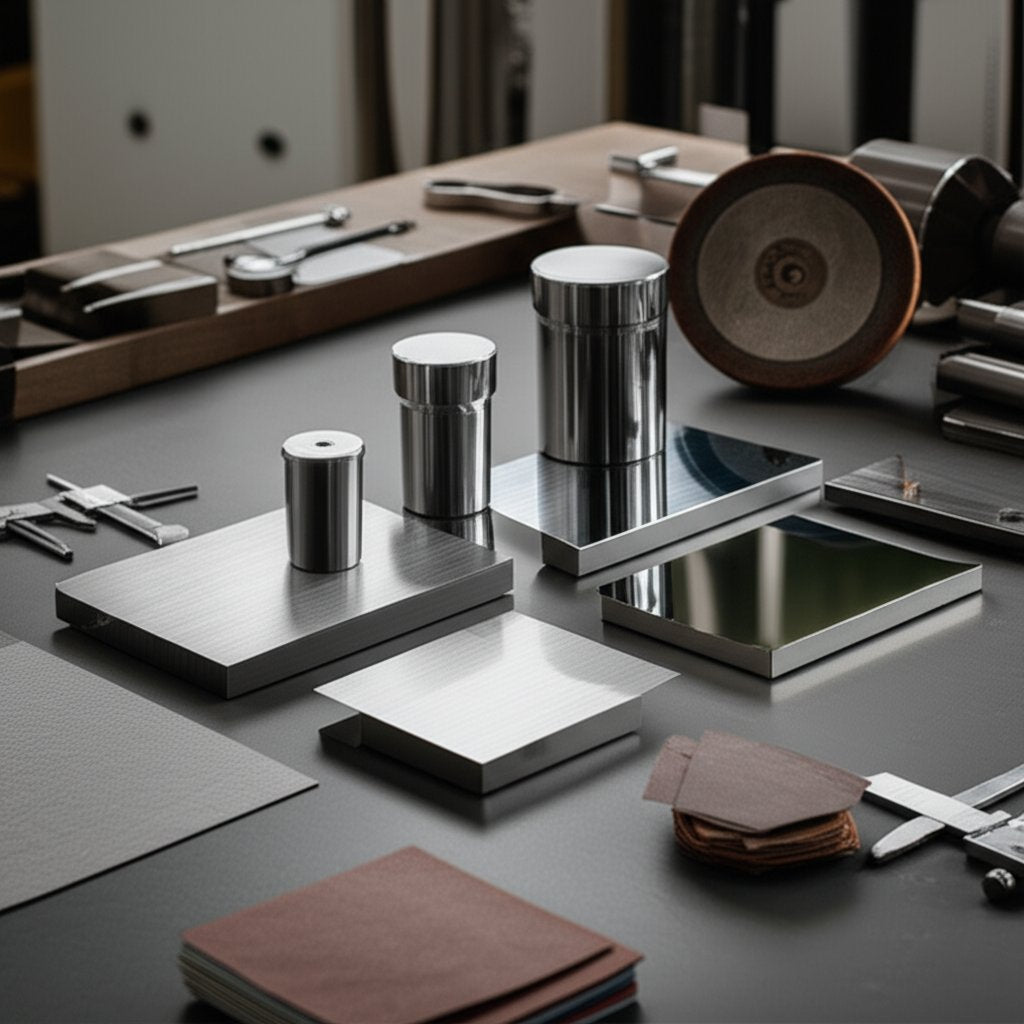
Step 1: Define Your Finish and Inspect the Stainless
Finish Options Explained: Brushed, Satin, Mirror
When you start thinking about how to polish stainless steel, the first step is to set a clear target. Are you after a uniform brushed look, a soft satin glow, or the perfect shine of a true mirror finish? Each style not only changes the appearance but also affects the metal’s performance and maintenance needs.
- Brushed Finish: Linear, visible grain; common in appliances, elevators, and architectural panels.
- Satin Finish: Fine, low-gloss surface; ideal for food equipment and pharmaceutical uses.
- Mirror Finish: Highly reflective, almost glass-like; used for decorative panels, signage, and art installations.
According to the ASTM A480 standard, these finishes range from dull (No. 1, 2D) to bright (2B, bright annealed), and on to mechanically polished types like No. 3, No. 4 (brushed), No. 7, and No. 8 (mirror). Each has a typical surface roughness (Ra) value: for example, a No. 4 brushed finish generally falls between 0.4–0.8 μm Ra, while a No. 8 mirror finish can be below 0.2 μm Ra (ISO 1302). These numbers help you align your expectations and process with industrial standards.
304 Versus 316: Behavior During Polishing
Next, check the stainless steel grade. The most common are 304 and 316. While both polish well, 316’s higher nickel and molybdenum content can make it a bit tougher and more resistant to corrosion—especially important if you want a polished finish that lasts in harsh environments. You’ll notice that 304 often cuts a little faster, but 316 can deliver a slightly deeper, richer shine when you reach the final stages of polishing stainless steel.
Scratch Assessment Checklist Before You Start
Imagine spending hours polishing, only to discover a deep scratch you missed at the start. To prevent this, always:
- Identify alloy and mill finish: Check packaging, use a magnet, or consult documentation.
- Inspect under bright raking light: Mark all scratches, heat tint, and embedded debris with a wax pencil.
- Map out defect depth: Decide if you need coarse sanding or just a light buff.
- Choose your target: Brushed, satin, or mirror—then align abrasives and compounds from the outset.
Matching your abrasive direction to the existing grain is crucial for brushed finishes. Sanding against the grain can create visible cross-scratches that are difficult to remove later.
Still wondering, "how can I polish stainless steel to match a specific look?" Start by referencing the surface roughness (Ra) values and finish nomenclature from standards like ASTM A480 and ISO 1302. This helps you understand what is polished stainless steel in measurable terms, not just by appearance.
Action Steps for a Polished Stainless Start
- Identify alloy/finish markings on packaging or with a magnet and documentation.
- Under bright raking light, mark scratches with a wax pencil so none are missed.
- Choose a target: brushed (visible uniform grain), satin (fine, low-gloss), or mirror (high-gloss, reflective).
- Align your grit progression and compounds to that target from the outset.
By defining your finish and thoroughly inspecting the metal, you set yourself up for success—ensuring every step in polishing stainless steel is intentional and efficient. Whether you’re after a durable brushed look, a smooth satin, or a flawless mirror, understanding these basics is the foundation of achieving a polished stainless result that meets both your expectations and industry standards.
Step 2: Prep the Surface and Set Safety Controls
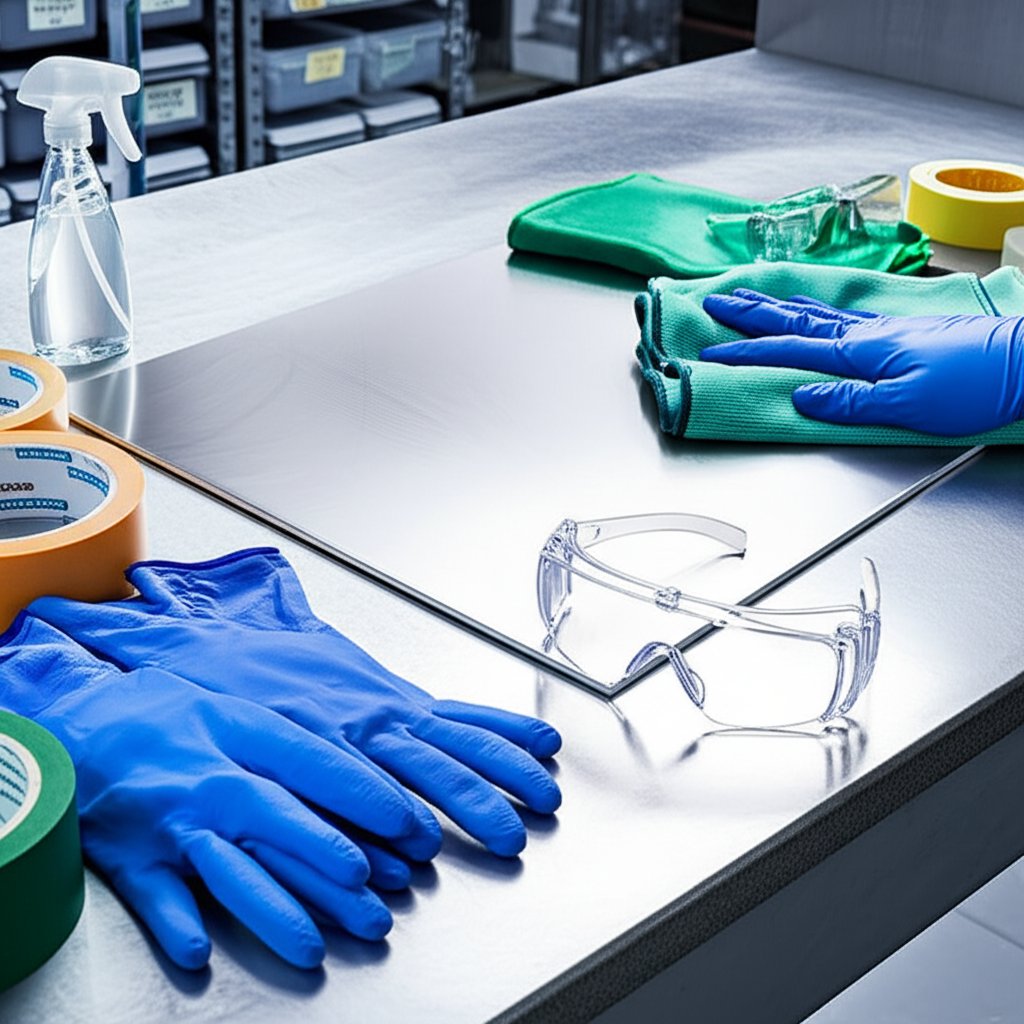
Safety Gear and Ventilation Checklist
Before you touch a single abrasive, ask yourself: Are you truly ready to polish stainless steel safely and cleanly? Polishing stainless steel involves not only removing dirt and oils but also protecting yourself and your workspace. Imagine the mess—and the risk—if you skip these basics. Here’s how to clean stainless steel and prep for a flawless finish:
- Gloves (chemical-resistant for cleaners, cut-resistant for handling sheet or parts)
- Safety glasses or goggles (to guard against splashes and flying debris)
- Respirator or dust mask (as directed by the MSDS/SDS for your compounds)
- Hearing protection (if using power tools or sanders)
- Apron or protective clothing (to prevent stains or skin contact)
- Ensure ventilation—open windows or use exhaust fans, especially with solvents or cutting compounds
According to OSHA guidelines, always consult the safety data sheet for each chemical or compound you plan to use. Proper PPE and ventilation help prevent chemical exposure, dust inhalation, and other hazards.
Proper Precleaning to Avoid Grinding in Grime
When you begin polishing, any leftover oil or grit can get ground into the surface, causing scratches that are tough to remove. That’s why a thorough pre-clean is essential for cleaning polished stainless steel and prepping for a polished finish.
- Review the MSDS/SDS for your chosen cleaners and compounds. Follow all recommended safety and respirator guidelines.
- Use a non-chlorinated, neutral pH degreaser to remove oils and machining residues. Avoid cleaners with harsh chlorides—they can attack the passive layer and promote corrosion (Nickel Institute).
- Wipe down the surface with a lint-free microfiber stainless steel cleaning cloth and isopropyl alcohol to remove any remaining residues. Stainless steel cleaner wipes can also be effective for spot cleaning.
- Dry thoroughly using a non abrasive cloth to prevent water spots and avoid reintroducing fine scratches.
For those who prefer a stainless steel cleaner homemade solution, a mix of mild dish soap and warm water can be used for routine cleaning—just be sure to rinse and dry completely.
Masking and Fixture Setup for Consistent Results
Ever notice how easy it is to accidentally scuff a plastic trim or gasket while polishing? Masking is your best friend here. Use painter’s tape or specialized masking tape to cover adjacent plastics, gaskets, or painted surfaces. This not only protects them from stray abrasives but also prevents staining from compounds or solvents. Secure your stainless part in a stable fixture or clamp to keep it steady, ensuring even pressure and a uniform finish.
- Mask edges and any areas you don’t want polished
- Use fixtures or clamps to hold parts steady—this is especially important for panels or long pieces
- Double-check that all pads, wheels, and cloths are clean and dedicated to stainless steel to prevent cross-contamination
"Always use the mildest cleaning procedure that will do the job efficiently and effectively. Rubbing in the direction of polish lines and using only soft cloths or sponges helps avoid marring the surface."
Good housekeeping matters, too—vacuum or wipe away dust and change cleaning materials when switching between metals. This prevents accidental contamination and keeps your stainless steel cleaning process on track.
Action Steps: Ready to Polish?
- Check all safety gear and review the MSDS/SDS for your chosen compounds.
- Preclean surfaces with a neutral pH, non-chlorinated degreaser.
- Wipe down with a microfiber stainless steel cleaning cloth and isopropyl alcohol.
- Mask and fixture your part for stability and protection.
- Inspect all pads, wheels, and cloths—use only clean, non abrasive cloth for stainless steel.
With the surface clean and safety controls in place, you’re ready to move on to sanding out defects—ensuring every step toward a polished stainless steel finish is smooth and controlled.
Step 3: Sand Out Damage with a Smart Grit Progression
Grit Selection by Defect Depth
Ever wondered, “Can you sand stainless steel without making things worse?” The answer is yes—but only if you choose the right grit and approach for the job. Whether you’re dealing with light swirls, stubborn scratches, or deep gouges, your sanding sequence sets the stage for a flawless finish. The right sandpaper for stainless steel removes defects efficiently while preserving the integrity of the metal and prepping it for the next step in polishing steel.
- Light Swirls and Minor Scuffs: Start with a fine grit, such as 600 or 800. Make 2–3 uniform passes in the direction of the grain (for brushed or satin looks), inspecting under raking light after each set. Only move to the next finer grit when all previous lines are gone.
- Moderate Scratches: Begin with a mid-range grit like 320 or 400. Sand using steady, even pressure, feathering the edges of the scratch into the surrounding area. Progress evenly across the entire surface to avoid creating “waves” or uneven patches.
- Deep Defects or Gouges: For significant damage, spot-sand with a coarse grit such as 240. Focus on the affected area, then blend out with progressively finer grits (320, 600, 1000) so the repair disappears into the rest of the surface.
According to experts, a typical sanding progression for sanding stainless steel is 320 → 600 → 1000 grit, with 240 grit reserved for heavy damage. Wet-sanding with silicon carbide paper is especially effective for reducing heat and metal dust, helping you achieve a smooth, consistent finish.
Crosshatch Versus Inline Strokes
Sounds complex? Imagine you’re restoring a kitchen appliance with a factory-brushed finish. You’d want to sand strictly with the grain, using straight, parallel strokes to maintain that uniform look. For a mirror finish, though, the technique shifts. Each time you move up to a finer grit, change your sanding direction by 90°. This crosshatch pattern helps you see and eliminate every scratch left by the previous grit, which is crucial for clarity and reflectivity.
For a true mirror finish, always change sanding direction 90° with each new grit. This ensures no hidden scratches remain before moving up.
When to Stop Sanding and Start Cutting
How do you know when you’re done sanding stainless? The answer: when the entire surface is evenly matte and free of visible lines from the previous grit. If you see stray scratches or inconsistent patches under angled light, repeat the current grit until they’re gone. Only then should you move on to compound-based buffing and polishing steel for that final shine.
Here’s a quick checklist to keep your sanding stainless routine on track:
- Always sand with the grain for brushed/satin finishes.
- Use wet sanding and silicon carbide paper for smoother results and less heat.
- Wipe the surface clean after each grit and inspect under two lighting angles.
- For mirror finishes, crosshatch each step and never skip a grit.
Still asking how to polish scratched stainless steel so it looks new? It’s all about patience and precision—don’t rush the sanding. The better your prep, the easier it will be to achieve a flawless, polished finish in the next stage.
Ready to move on? With the surface now defect-free and evenly abraded, you’re set to begin buffing and compound work, which brings out the true brilliance of stainless steel.
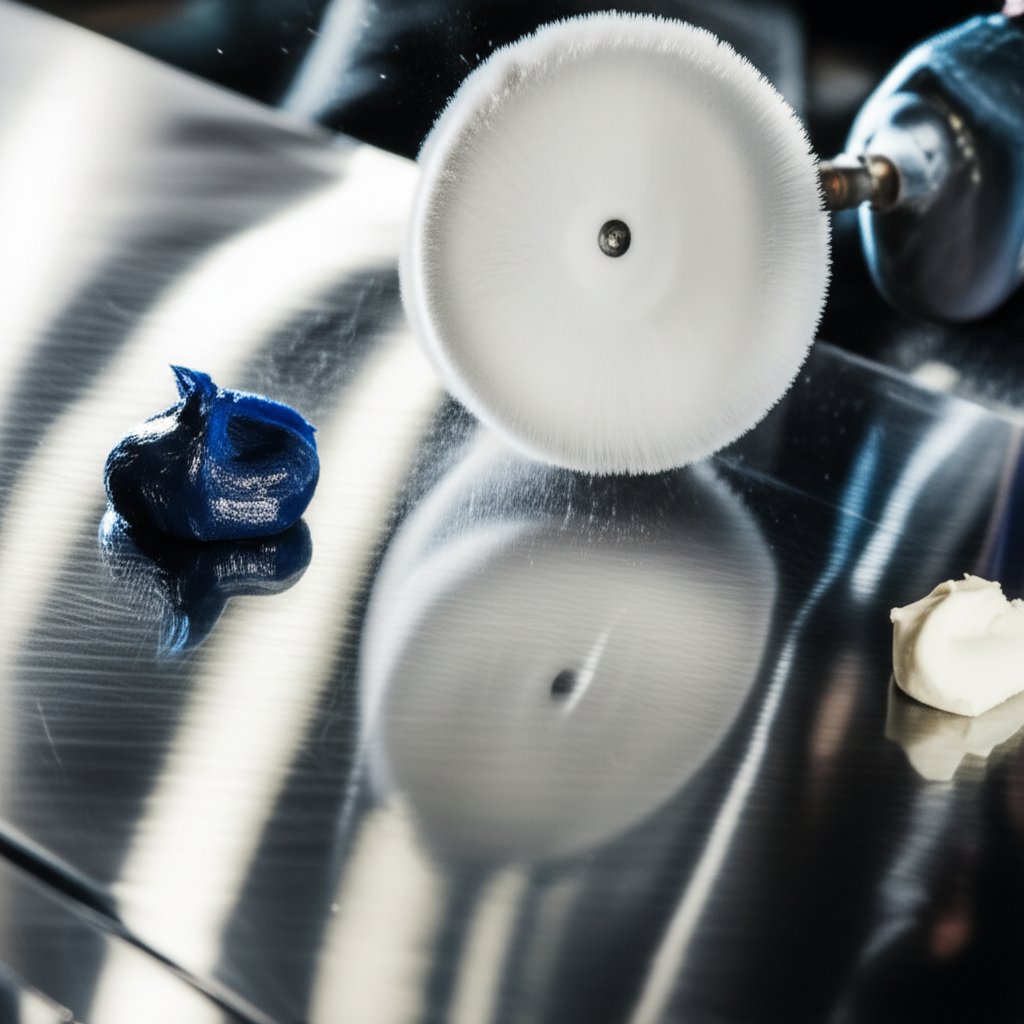
Step 4: Cut Stage Buffing with the Right Compounds
Wheel and Compound Pairing for Stainless
When it’s time to move from sanding to buffing, your choice of wheels and compounds can make or break the final look. Sounds overwhelming? Imagine you’ve just finished smoothing out every scratch—now you want that surface to shine, not streak. This is where matching the right wheel and stainless steel buffing compound comes into play.
| Wheel Type | Task | Compound Family | Typical Compound Example | RPM Guidance |
|---|---|---|---|---|
| Sisal (stitched) | Cutting/Initial Buff | Cutting | Black Emery, #12 Cut-Rite, #37 Extra Fast Cut | Medium to High |
| Spiral Sewn Cotton | Intermediate Buff/Pre-Finish | Cutting/Coloring | #33 Excello, Brown Tripoli | Medium |
| Loose Cotton | Final Coloring/Polish | Finishing | Green Rouge, #306 Green Stainless, White Rouge | Low to Medium |
For stainless buffing, always start with a firm wheel and a cutting compound like Black Emery or Cut-Rite to remove micropeaks left by sanding. Progress to softer wheels and finer compounds—think Green Rouge or White Rouge—for that high-gloss, polished finish. Each stage builds on the last, so don’t rush the sequence.
Pressure, Dwell, and Heat Management
Ever noticed a rainbow tint or sticky residue after buffing? That’s likely from too much pressure, excess compound, or letting the wheel linger too long in one spot. Here’s how to avoid those pitfalls when buff polishing metal:
- Use light to moderate pressure—let the wheel and compound do the work.
- Keep the wheel moving in overlapping passes to prevent heat buildup and shadowing.
- Start at the lower end of your machine’s speed range, especially for finishing passes.
- If the metal feels hot to the touch, pause and let it cool before continuing.
Proper technique not only protects your work but also extends the life of your wheels and compounds. Remember, stainless polishing compound works best when applied sparingly and evenly—too much will clog the wheel and dull the finish.
When to Refresh or Rake a Loaded Wheel
How do you know when your wheel is overloaded? Watch for these telltale signs:
- Streaks or smears on the stainless surface
- Drag or resistance while buffing
- Visible residue building up on the wheel
When this happens, stop and rake the wheel with a dedicated tool to remove excess compound and debris. This keeps your buffing consistent and prevents cross-contamination—especially important if you’re switching between different polish compound for stainless steel or moving from cut to color stages.
"Always use a separate wheel for each compound to avoid cross-contamination. Clean and rake wheels regularly to maintain a flawless finish."
Action Steps: Your Cut Stage Checklist
- Mount a firm wheel (such as sisal or spiral sewn cotton) and charge with a stainless steel buffing compound.
- Buff in overlapping passes, using light-to-moderate pressure and keeping the wheel moving.
- Rake the wheel when you notice streaks, drag, or residue buildup.
- Switch to a softer wheel and a stainless steel polishing compound for the coloring stage to bring up the gloss.
- Wipe the surface clean between each compound to prevent contamination and haze.
Safety tip: Always check the maximum RPM for your wheel and tool. Use guards as required and follow all MSDS safety guidelines for compounds. If you’re ever unsure how do you use polishing compound, start with a small amount on the wheel and add more only as needed.
By mastering the cut and color stages, you’ll unlock the true brilliance of stainless buffing and set yourself up for a mirror-like finish in the next step. Ready for that perfect shine? Let’s move on to refining your finish for satin or mirror results.
Step 5: Refine to Satin or Mirror Finish Workflows
Choosing the Right Workflow for Your Desired Finish
When you reach this stage, the question becomes: how do you turn a sanded, defect-free surface into the exact finish you want—whether it’s a brushed, satin, or stainless mirror finish? The answer lies in following a precise, step-by-step workflow that matches your finish goal. Each finish type calls for a unique sequence of abrasives, wheels, and compounds, and careful technique to achieve a perfect shine every time.
| Finish Type | Abrasive Progression | Wheel Type | Compound | Visual Checkpoints |
|---|---|---|---|---|
| Brushed | Medium (320-400 grit) → Fine (600-800 grit) | None or Nonwoven Conditioning Pad | Optional: Light finishing compound | Uniform, linear grain; no cross-scratches; subtle sheen |
| Satin | Fine (800-1200 grit) → Ultra-fine (1500-2000 grit) | Soft Nonwoven Pad or Soft Cotton Wheel | Mild finishing compound | Even, low-gloss surface; no visible grain; soft reflection |
| Mirror | 1200 grit → 2000 grit → 3000 grit (wet sand) | Firm wheel (cut), then soft wheel (color) | Stainless-specific cutting & coloring compounds | Highly reflective; no lines; deep, glassy shine |
Workflow for Brushed Stainless
For a classic brushed look, sand in the direction of the grain using medium to fine grits—typically 320 to 800 grit. Consistency is key. You’ll notice the brushed lines become more uniform and the surface develops a subtle, professional sheen. Finish with a nonwoven conditioning pad to blend and soften the grain, ensuring no cross-scratches remain. This approach is ideal for appliances or architectural panels where a visible, directional texture is desired.
Workflow for Satin (Low Gloss) Finish
Want something smoother than brushed, but not quite mirror? Satin finishes are all about subtlety. Progress through finer grits—800, 1200, and up to 2000. Use a soft nonwoven pad or cotton wheel with a mild finishing compound. Move in linear strokes, but don’t worry about following a distinct grain. The result is a low-gloss, even surface with no obvious lines—great for food equipment or lab surfaces where light reflection should be soft and diffuse.
Workflow for Mirror (High Gloss) Finish
Ready to learn how to mirror polish stainless steel by hand or machine? Achieving a true mirror finish stainless steel requires patience and precision. After sanding up to 3000 grit (always wet sanding for the final steps), switch to a firm wheel and a stainless-specific cutting compound. Buff thoroughly, then move to a soft wheel and a coloring (finishing) compound designed for stainless. Wipe and inspect between every stage. The goal: a flawless, deep reflection—no haze, no streaks, just a perfect shine that rivals glass.
- Confirm all previous scratches are removed—surface should appear evenly matte after 3000 grit.
- Buff with a firm wheel and cutting compound until the surface is clear and uniform.
- Switch to a soft wheel and coloring compound for final gloss.
- Inspect for uniform reflection—no linear lines, no compound trails, no haze.
- Repeat polishing steps as needed to achieve a true mirror polished stainless steel result.
"For the best mirror finish, never skip grits and always wipe and inspect between steps. Patience and attention to detail are what make stainless steel shine."
Tips for All Finish Types
- Keep separate wheels and pads for each compound to avoid cross-contamination and haze.
- Work cool—if you see discoloration, stop and let the part cool before continuing. Excessive heat can distort the finish and reduce corrosion resistance.
- Always follow the grain for brushed and satin finishes; use crosshatch sanding for mirror finishes to eliminate hidden scratches.
Whether you’re after a subtle satin, a classic brushed, or a dazzling stainless mirror finish, following these tailored workflows is how to make stainless steel shine like new. Next, you’ll learn how to lock in that finish and protect it for the long haul.
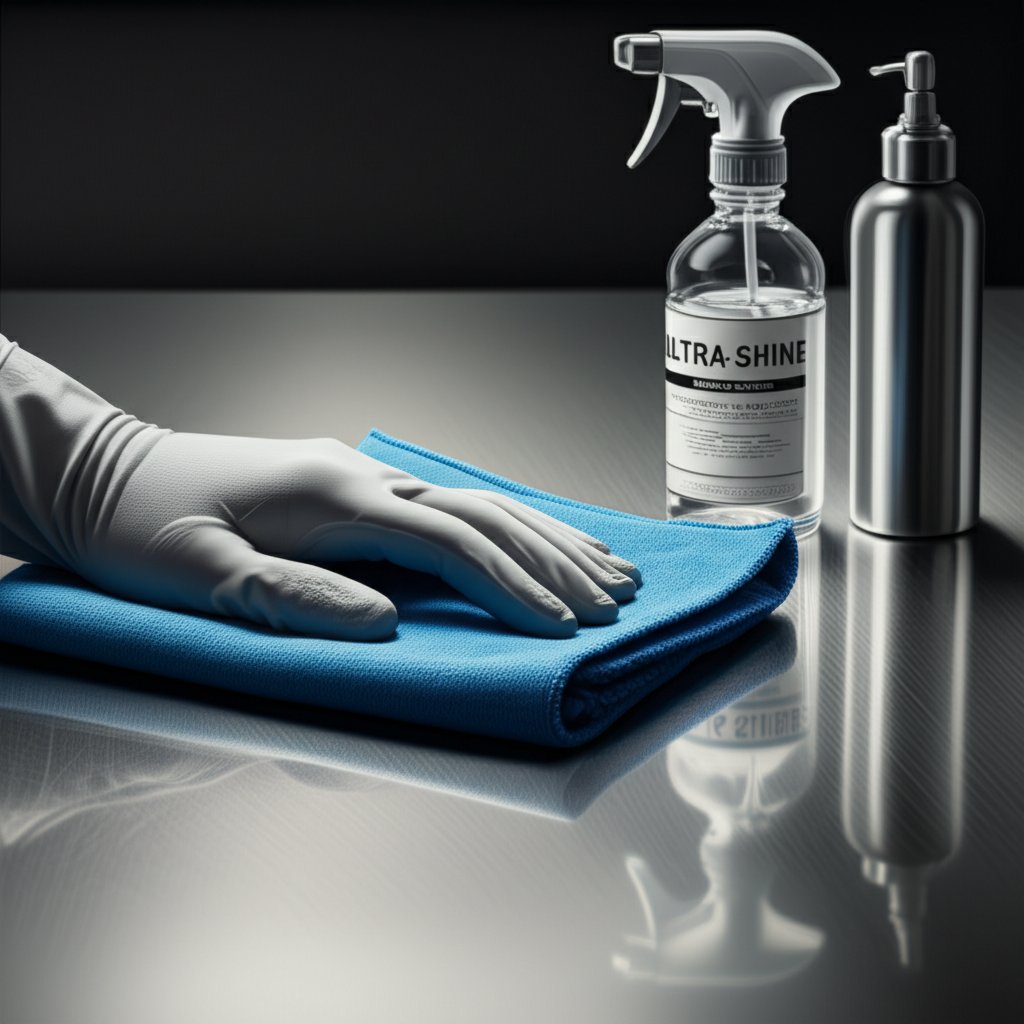
Step 6: Clean, Decontaminate, and Protect the Shine
Residue Removal Without Re-Scratching
Imagine spending all that time achieving a flawless finish, only to see dull spots or fine scratches appear days later. After you’ve completed the final buff, it’s essential to remove any leftover compound or dust—otherwise, these residues can trap dirt and dull your shine. But how do you clean polished stainless steel without undoing your hard work?
- Microfiber wipe-down: Use a dry, clean microfiber cloth to gently lift away loose compound and dust. Always wipe along the grain.
- Alcohol or neutral cleaner: Dampen a second microfiber with isopropyl alcohol or a neutral pH stainless steel polish cleaner. This dissolves fingerprints, oils, and any remaining haze without harming the surface.
- Rinse and dry: If using a water-based cleaner, rinse with clean water and buff dry with another soft cloth.
- Final dry buff: For that extra gleam, finish with a dry non abrasive cloth, again following the grain.
Avoid abrasive sponges and paper towels—they can reintroduce micro-scratches and quickly dull even the best stainless polish work.
Protective Options: Wax, Sealant, and Passivation
Once your surface is spotless, it’s time to lock in that shine. For many, a simple stainless steel polish or stainless metal polish is enough to restore gloss and add a light protective layer. However, for long-lasting results—especially in harsh or demanding environments—consider these options:
- Non-waxy protectants: Choose a stainless steel protective coating that won’t haze or attract dust. Products with a light silicone or polymer base are ideal for clean polished stainless steel surfaces in kitchens or medical settings.
- Citric-based passivation: For critical applications, such as food processing or medical equipment, passivation is key. This process uses citric or nitric acid to remove free iron and enhance the chromium oxide layer, dramatically improving corrosion resistance. Always follow manufacturer instructions and consult technical datasheets for compatibility. ASTM A967 and AMS 2700 are industry standards for stainless passivation (Best Technology Inc.).
- Wax-based products: If you prefer a wax, use it sparingly and ensure it’s formulated for stainless. Some waxes can leave a cloudy residue or attract grime if over-applied.
For everyday use, a light application of stainless polish after cleaning helps repel fingerprints and water spots, keeping your finish bright and easy to maintain.
Daily Care to Preserve Clarity
Regular upkeep is what separates a gleaming finish from a faded one. Here’s how to keep your stainless shining for the long haul:
- Wipe up spills and fingerprints as soon as they appear using a microfiber cloth and a little alcohol or neutral cleaner.
- Perform a weekly clean with a neutral pH cleaner or a stainless steel cleaner homemade (like diluted vinegar or baking soda paste) for gentle, eco-friendly maintenance.
- Buff with a finishing compound or stainless metal polish when you notice the gloss softening—this restores the shine without aggressive abrasion.
- Avoid harsh chemicals, bleach, or anything chloride-based, as these can attack the passive layer and cause pitting or discoloration.
Establishing a simple, repeatable routine will help you clean polish stainless steel efficiently and keep it looking new. For high-touch areas, consider applying a stainless steel protective coating every few months to further safeguard your investment.
By thoroughly cleaning, decontaminating, and protecting your polished stainless, you ensure that all your hard work pays off with a shine that lasts. Ready to keep that gloss looking professional? Next, you’ll learn how to match your tools and techniques to your project’s scale for consistent results every time.
Step 7: Match Tools and Parameters to Your Project Scale
Handheld Versus Bench Versus Production Machines
Ever wondered why some stainless projects gleam flawlessly while others end up streaky or uneven? The secret often lies in choosing the right tool for the job. Whether you're tackling a kitchen sink, a custom railing, or intricate tubing, matching your tools to the scale and geometry of your project is key to mastering how to polish stainless steel efficiently and safely.
| Tool Type | Recommended Pad/Wheel Materials | Typical Applications | RPM Guidance (Qualitative) |
|---|---|---|---|
| Handheld Polisher | 4-6" cotton or sisal wheels, nonwoven pads, felt bobs | Small panels, sinks, edges, tight corners, spot repairs | Low to medium (control heat and avoid gouging) |
| Bench Buffer | 6-10" cotton wheels, sisal wheels, spiral sewn buffs | Flat panels, hardware, medium-sized parts, batch work | Medium to high (steady feed, hands-free control) |
| Belt Sander/Linear Finisher | Abrasive belts (320-3000 grit), conditioning drums | Long panels, architectural trims, brushed/satin finishes | Medium (match feed rate to grit and finish) |
| Metal Polishing Buffing Machine | Large-diameter buffing wheels, specialty pads | High-throughput, production, large or complex shapes | High (industrial settings, requires trained operator) |
For small or detailed work, a handheld metal polisher or rotary tool with felt bobs can help you reach tight spots without overworking the surface. When working on broad panels, a stainless steel buffer or bench buffer with large cotton wheels ensures even pressure and helps you avoid creating waves or dips. For production runs or complex geometries, a dedicated metal polishing buffing machine with a full steel polish kit keeps results consistent across multiple parts.
Pad and Wheel Materials by Task
Choosing the right pad or wheel is just as important as picking the tool. Here’s a quick breakdown:
- Firm wheels (sisal, spiral sewn cotton): Use for initial cutting and major scratch removal.
- Soft wheels (loose cotton, flannel): Perfect for coloring and final polishing stages.
- Nonwoven pads: Great for blending, satin, or brushed finishes.
- Felt bobs: Ideal for edges, holes, and intricate features.
Always keep separate wheels and pads for each compound stage—this prevents haze and cross-contamination, especially when using a full steel polish kit or multiple compounds.
RPM, Pressure, and Dwell Guidance
Imagine you’re buffing a stainless handrail. Too much speed or pressure and you’ll see heat tint, streaks, or even warping. Too little, and you’ll never achieve a uniform shine. Here’s how to strike the right balance:
- Start at the lower end of your tool’s RPM range for finishing passes—high speeds are best reserved for cutting stages with firm wheels.
- Apply light, even pressure; let the stainless steel polishing wheel or stainless buffing wheel do the work.
- Keep the tool moving at all times to avoid overheating or burning the metal.
-
Do-not-exceed cues:
- Never exceed the manufacturer’s max RPM for any wheel or pad.
- Always use guards and safety shields where applicable.
- Rake and dress wheels frequently—especially when changing compounds or if you notice drag/residue.
"The best finish is achieved with time and patience. Cutting corners by using abrasive grits that are too aggressive, applying too much pressure, or using tools at incorrect speeds often results in increased cost, decreased productivity, and failure to achieve the required finish."
Action Steps: Tool and Technique Checklist
- For edges and small features, use small-diameter wheels or felt bobs to avoid gouging.
- For broad panels, select larger wheels or pads to maintain flatness and prevent unevenness.
- Dedicate separate wheels/pads for each compound stage—label them if needed.
- Apply light, even pressure and keep your tool in motion to control heat and prevent streaks.
- Rake and dress wheels regularly to keep the cut and finish consistent.
By matching your tools and parameters to the scale and geometry of your project, you’ll achieve professional, repeatable results—whether you’re using a simple stainless steel polishing wheel or a full production metal polishing buffing machine. Next, if your project involves complex shapes or you need a flawless finish with tight tolerances, it might be time to consider professional or outsourced finishing options.

Step 8: Outsource Finishing or Prototype Complex Parts
When Outsourcing Saves Time and Rework
Ever faced a stainless project where tight corners, intricate cutouts, or ultra-smooth finishes seem impossible with your tools at home? Or maybe you’re racing against a deadline, and every hour counts. In these scenarios, outsourcing to a finishing specialist or rapid prototyping provider can be a game changer—especially when electropolishing stainless steel or achieving a flawless, production-grade finish is required.
Imagine you have a part with challenging geometry or a need for both tight machining tolerances and a cosmetic shine. Doing all the work in-house can mean multiple setups, more risk of error, and greater rework if the finish isn’t perfect. Outsourcing lets you tap into advanced equipment, experienced operators, and integrated workflows that deliver both speed and consistency. For example, many manufacturers turn to outside services for stainless steel restoration when parts must look and perform like new, or for complex jobs where a dedicated stainless steel polisher or ss polisher is needed for precision work.
Pairing Machining Tolerances with Cosmetic Finish
When your part must not only fit perfectly but also shine, the best results come from providers who can handle both machining and finishing under one roof. This is especially relevant for industries like aerospace, medical devices, and electronics, where a polished stainless surface is as critical as dimensional accuracy. Services that combine CNC machining, finishing, and even electropolishing stainless steel reduce the chance of defects and cut down on lead times.
But how do you choose the right partner? Let’s compare typical options for outsourced finishing and prototyping, starting with a provider that integrates all these capabilities for a seamless experience.
| Provider | Capabilities | Material Range | Turnaround | Quality Controls | Ideal Use-Cases |
|---|---|---|---|---|---|
| XTJ Rapid Prototyping | Integrated CNC machining, injection molding, die casting, finishing (including polishing and electropolishing), DFM feedback | 50+ metals and plastics (including stainless, aluminum 6061/7075, engineering plastics) | Rapid (short lead times, scalable from prototype to production) | ISO 9001:2015 certified, in-process inspection, DFM consultation | Precision prototypes, cosmetic stainless parts, tight-tolerance assemblies, parts needing both machining and high-quality finish |
| Local Job Shop | Basic polishing, buffing, minor repairs | Common metals (stainless, mild steel, aluminum) | Variable (may depend on queue and complexity) | Standard shop QC, limited documentation | Single parts, small batches, basic restoration, "stainless steel polishing near me" needs |
| Specialty Finishing House | Electropolishing, passivation, advanced surface prep | Stainless, specialty alloys | Moderate to fast (depends on process, batch size) | Process certifications, detailed inspection | Medical, food, or high-purity applications; critical finish requirements |
| In-House (DIY) | Manual polishing, small-scale restoration, touch-ups | What you have on hand | As needed (depends on skill, equipment) | Self-inspection | Quick fixes, learning, non-critical parts |
XTJ Rapid Prototyping stands out for complex projects because their integrated approach means fewer handoffs, less risk of error, and finish-ready parts delivered on your timeline. Their DFM (Design for Manufacturability) feedback is especially valuable: you’ll know up front if your design is optimized for both machining and a polished finish, reducing the chance of costly rework or delays. ISO 9001:2015 quality controls give peace of mind for industries where traceability and repeatability are non-negotiable. Learn more about their capabilities here.
"Outsourcing finishing and prototyping can save significant time and reduce rework, especially for complex or high-value stainless steel parts. Integrated providers minimize delays and deliver a part that’s ready for final assembly or market."
Key Considerations When Outsourcing Stainless Steel Finishing
- Evaluate if your part requires both tight tolerances and a cosmetic, polished stainless finish.
- For high-purity or critical-use parts, look for providers who offer electropolishing and passivation in addition to mechanical polishing.
- Ask about inspection protocols—ISO certification, in-process checks, and DFM feedback all help ensure your part is right the first time.
- Consider the value of rapid turnaround—outsourced finishing can often beat in-house timelines, especially for prototypes or urgent orders.
Whether you’re restoring legacy equipment, producing a prototype for a new product, or need a stainless steel repolisher with advanced capabilities, outsourcing can be the smartest route. The right partner will deliver a finish that meets both your functional needs and your visual standards—so your next step in how to polish stainless steel is simply to specify your requirements, then let the experts handle the rest.
Step 9: Inspect, Troubleshoot, and Plan Maintenance
Inspection Routine and Acceptance Criteria
Ever spent hours polishing, only to notice a stubborn swirl or patchy gloss under different lighting? Inspection is the final, critical step in mastering how to polish stainless steel. This routine not only ensures your hard work pays off but also helps you spot issues before they become bigger headaches. Here’s how to lock in quality:
- Dual-angle lighting: Move your part under both bright and shaded light, or use a flashlight at a low angle. This reveals hidden swirls, haze, or missed scratches.
- Edge and corner check: Run your inspection along the edges and in corners—these spots often hold onto compound or show incomplete blending.
- Photo documentation: Snap photos at each stage to compare gloss and uniformity. This is especially helpful for repeat work or quality assurance.
- Acceptance criteria: The finish should be uniform, free of visible scratch patterns, haze, or discoloration, and match your target (brushed, satin, or mirror).
Only advance to the next stage when all previous scratch patterns are fully removed. Skipping this rule results in defects that are much harder to fix later.
Troubleshooting Common Defects
Imagine you’ve just finished buffing, but something doesn’t look right. Instead of guessing, use this table to quickly diagnose and fix the most frequent polishing issues—whether you’re wondering how to buff out scratches in stainless steel, how to get rid of scratches on stainless steel, or how to re polish stainless steel for a flawless result.
| Defect | Likely Cause | Corrective Action |
|---|---|---|
| Swirls/Haze | Skipped a grit, used dirty pad, or cross-contaminated compounds | Re-sand one grit lower, use clean pads for each compound, wipe thoroughly between steps |
| Wave/Washboarding | Uneven pressure, small pad on large area, inconsistent technique | Switch to a larger, flatter pad; use steady, even strokes; lighten pressure |
| Heat Tint (Bluing) | Too much pressure, slow feed, not letting part cool | Reduce pressure, keep tool moving, pause to let metal cool |
| Compound Trails | Excess compound, overloaded wheel, not wiping between stages | Rake wheel, use less compound, wipe clean between steps |
| Orange Peel | Surface not sanded fine enough before buffing | Back up to finer sanding grit, repeat polishing sequence |
| Stubborn Scratches | Missed deep scratch in early stage, skipped grit | Mark scratch, sand locally with appropriate grit, blend and re-polish |
For more details on troubleshooting and repair, consult expert guides such as Chemical Guys, which provide practical tips for every finish type.
Time and Consumables Planning Template
Sounds like a lot to track? Imagine having a simple template to estimate how long your next project will take and what you’ll need. Here’s an easy outline to help you plan for how to polish stainless steel efficiently and avoid surprises:
- Measure surface area (in sq. ft. or sq. in.)
- Assess defect depth (light, moderate, deep)
- Define target finish (brushed, satin, mirror)
- Choose tool type (hand, bench, machine)
- List grit sequence (e.g., 320, 600, 1200, 2000)
- Estimate number of passes per grit
- Calculate total time (based on area, the number of grit stages, and the estimated passes for each grit)
- List consumables (pads, wheels, compounds, cleaners)
Tip: Document what works—successful sequences and settings make future jobs faster and more consistent.
Action Steps: Final Quality Control
- Evaluate finish in both bright and shaded light; check edges and corners separately.
- For swirls or haze, drop back one grit and ensure you’re using separate wheels/compounds for each stage.
- If heat tint appears, reduce pressure and let the part cool between passes.
- For waves or unevenness, switch to a larger, flatter pad and use steady, even strokes.
- Document your process and results for future reference and repeatability.
Safety and Standards
Always follow ASM, MSDS, and NIOSH guidelines for handling abrasive dust and polishing compounds. Wear appropriate PPE, control dust, and dispose of spent rags and compounds according to local regulations. This keeps your workspace safe and compliant.
By making inspection, troubleshooting, and maintenance routine, you’ll master not just how to polish stainless, but how to keep it looking flawless for years to come. If you ever need to know how to re polish stainless steel after damage or dulling, these steps will guide you back to a brilliant result—every time.
Frequently Asked Questions
1. What is the best way to polish stainless steel to a mirror finish?
Achieving a mirror finish on stainless steel involves a progressive sanding process with increasingly finer grits, followed by buffing with stainless-specific cutting and coloring compounds. Always sand out all scratches before buffing, use separate wheels for each compound, and finish with a soft wheel for a glass-like shine. Keeping the surface clean and cool throughout each step is essential for a flawless, reflective result.
2. Can you sand stainless steel to remove scratches?
Yes, sanding is an effective way to remove scratches from stainless steel. Start with a grit appropriate for the depth of the scratch—coarse for deep defects, fine for light swirls—and always sand with the grain for brushed or satin finishes. For mirror finishes, crosshatch each sanding stage at a 90-degree angle to fully erase previous marks before moving to the next grit.
3. How do you clean stainless steel before polishing?
Clean stainless steel with a neutral pH, non-chlorinated degreaser to remove oils and residues. Follow with isopropyl alcohol and a microfiber cloth to ensure the surface is free of contaminants. Mask nearby materials to protect them, and always use a non abrasive cloth to avoid introducing new scratches before you start polishing.
4. What tools and compounds are recommended for polishing stainless steel?
Recommended tools include handheld polishers, bench buffers, and specialty wheels or pads matched to the size and shape of your part. Use firm wheels and cutting compounds for initial buffing, then soft wheels and finishing compounds for final gloss. Always select compounds formulated for stainless steel to achieve the best results.
5. When should you consider outsourcing stainless steel polishing?
Outsourcing is ideal for complex geometries, tight deadlines, or when both precise machining and high-quality finishing are required. Professional services can offer integrated CNC machining, electropolishing, and ISO-certified quality control, ensuring parts are polish-ready and meet strict standards. This approach saves time and reduces rework for demanding projects.
-
Posted in
clean polish stainless steel, metal buffing tips, mirror finish stainless, stainless steel polishing, surface finishing guide
