
How to Remove Rust From Stainless Steel Without Scratches
Step 1 Diagnose the Rust and Your Stainless
When you spot rust spots on stainless steel, your first instinct might be to scrub them away. But did you know that not all rust marks on stainless steel are the same? Before you reach for any cleaner, it’s crucial to identify what’s really happening on your surface. This step helps you choose the least aggressive—and most effective—method, preserving both the finish and the protective passive layer that makes stainless steel so durable.
Spot the Difference: Tea Staining vs. Active Corrosion
Imagine you see a faint orange-brown discoloration on your appliance or railing. Is it a cosmetic issue or a sign of deeper trouble? Here’s a quick way to tell:
- Is the rust light, uniform, and wipes off faintly orange? This is likely tea staining or iron contamination. It’s usually superficial and happens when airborne iron particles settle on the surface, especially if the item was near non-stainless tools or construction dust. These stains are common and generally don’t compromise the steel’s integrity (British Stainless Steel Association).
- Are there pits, roughness, or deeper discoloration under the stain? This points to true corrosion, where the protective layer is damaged, and the rust is eating into the steel. You may need a different approach for these cases.
- Is the area near carbon steel tools, steel wool, or rebar dust? Cross-contamination is a leading cause of rust on stainless steel. Tiny particles of regular steel can embed in your stainless and start rusting when exposed to moisture.
Quick Grade Clues: 304 vs. 316 and Ferritic Types
Not sure what type of stainless you have? Here are some field tricks:
- Light magnet check: Standard 304 and 316 stainless steels are usually non-magnetic, but cold working can make them weakly magnetic. If the magnet sticks strongly to it, it is most likely a ferritic stainless steel such as 430.
- Finish check: Brushed or grained surfaces can hide minor scratches and stains better than mirror-polished ones. Mirror finishes show every imperfection, so be extra gentle.
- Exposure check: Ask yourself: Was the item exposed to salt spray, bleach, standing water, or harsh cleaners? These conditions can accelerate stainless steel rusting—yes, even the best grades can rust in water if the passive layer is compromised.
Decide Your Starting Method Based on Severity
- If you’re dealing with tea staining or light surface rust, start with the gentlest cleaning methods—like dish soap and water—before trying anything stronger.
- For deeper rust marks on stainless steel or visible pitting, you may need targeted chemical cleaners and, in some cases, to repassivate the surface following standards like ASTM A380/A967 for best results.
- Always test your chosen method on a small, hidden area first to make sure it doesn’t affect the finish.
Start with the gentlest method that can work for your rust type; escalate only if needed to preserve the passive layer and your finish.
By taking a moment to diagnose the type and cause of rust on stainless steel, you’ll avoid unnecessary abrasion and keep your surfaces looking their best. Remember, even though many people ask, "will stainless steel rust in water?"—the answer is yes, under the right (or wrong) conditions. But with the right approach, you can address rust spots on stainless steel efficiently and safely.
Step 2 Gather the Right Tools and Protect Your Stainless Steel Finish
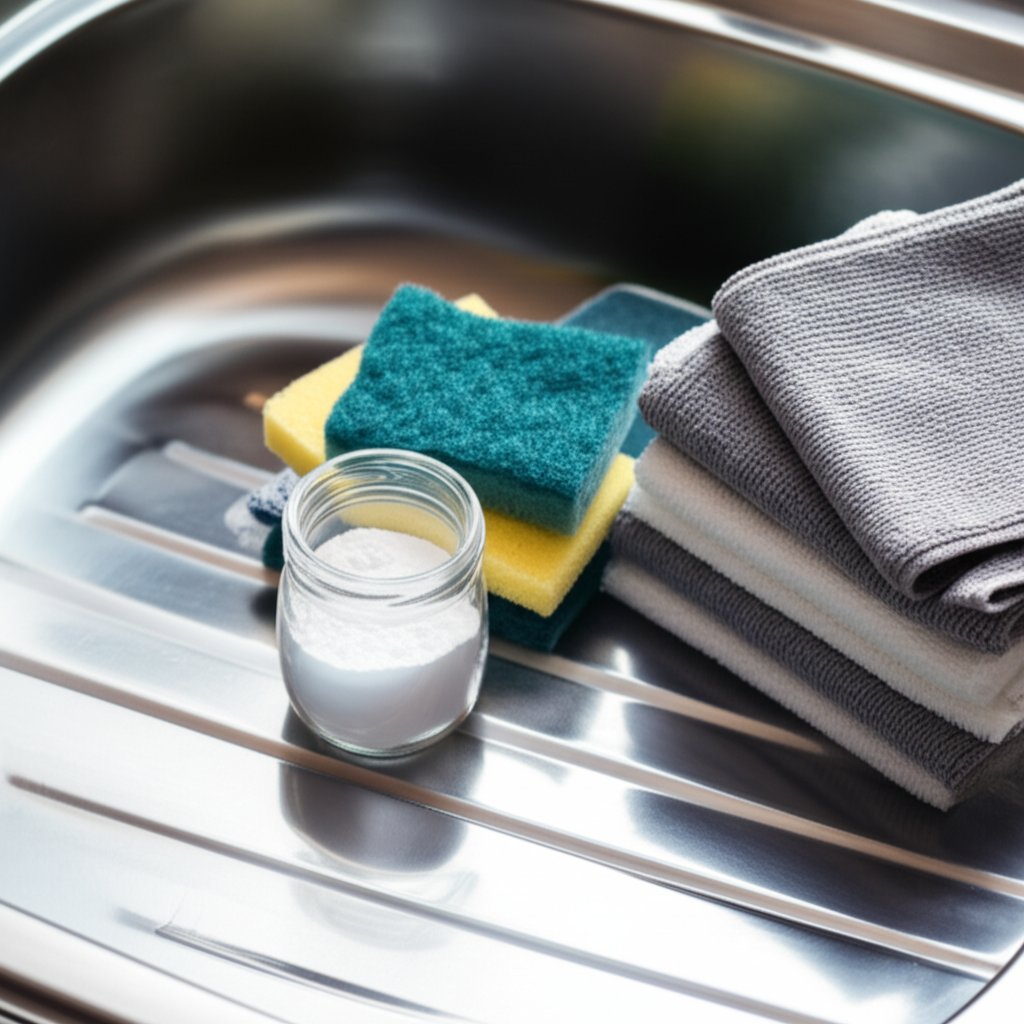
Safe Tools That Won’t Scratch or Contaminate
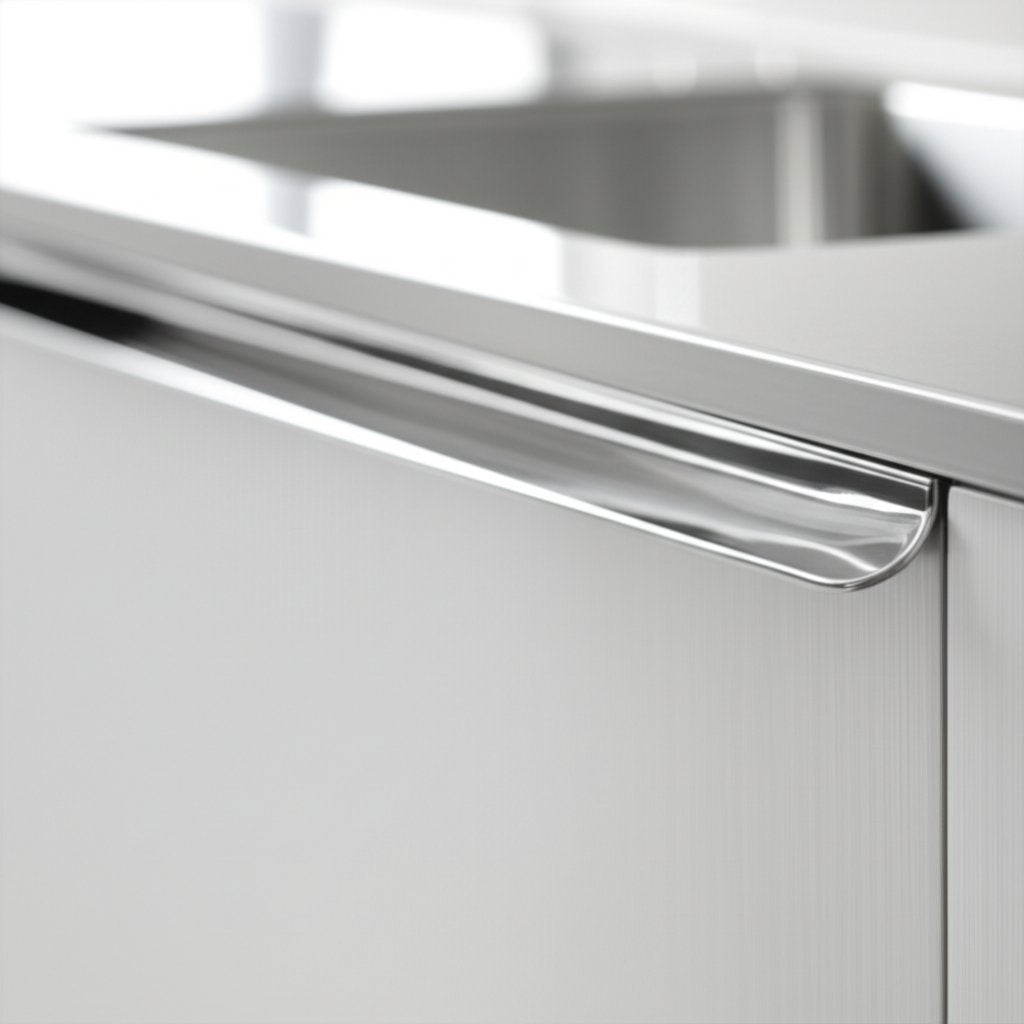
When you’re ready to clean rust off stainless steel, grabbing the first scrubber you see can be tempting. But wait—have you ever noticed how some sinks or appliances end up with fine lines or dull patches after cleaning? That’s often because of the wrong tools. To keep your stainless steel gleaming and avoid scratches in stainless steel sinks, remove only what’s necessary—never the shine.
| Essential Tools for Safe Rust Removal |
|---|
|
Masking and Grain Awareness
Have you ever cleaned a brushed stainless surface and noticed odd swirls or shiny spots afterward? That’s usually from cleaning against the grain or using harsh pads. Here’s how to avoid that:
| Surface Preparation Checklist |
|---|
|
Finish-Specific Cautions: Mirror vs Brushed
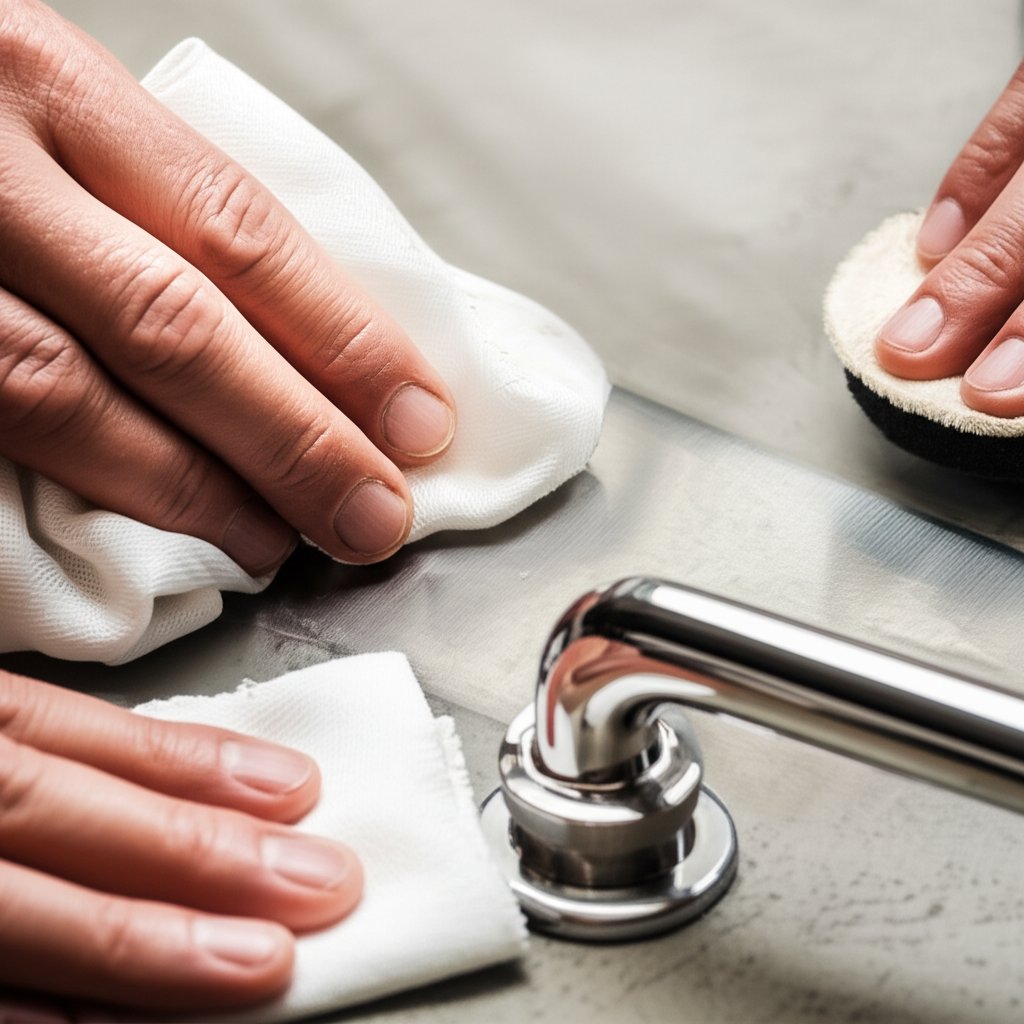
Imagine you’re cleaning a mirror-polished fridge door. Even a soft pad can leave hairline scratches that are impossible to hide. For these surfaces, stick to soft microfiber cloths and gel-based cleaners only. For brushed or grained appliances, you can use a non-scratch pad, but always use light, in-grain strokes—never circles.
To prevent cross-contamination, dedicate a clean bucket and cloths just for stainless jobs. Even a trace of grit from other cleaning tasks can mar your finish.
Always work with the grain on brushed stainless; circular motions can cause visible halos.
Once you have your tools ready and your surface protected, you’re set up for success. The next step: using gentle, pantry-based methods to start cleaning rust off stainless steel without risking damage. Let’s get started on the safest way to restore your shine.
Step 3 Start Gentle With Pantry Methods
Ever wondered if you can really remove rust from stainless steel with just kitchen staples? When you notice those first orange stains or faint marks, it’s tempting to reach for something abrasive. But starting with the mildest approach not only saves your finish—it often works better than you’d expect. Here’s how to clean rust from stainless steel using simple, non-abrasive methods that protect the all-important passive layer.
Dish Soap and Water: Your First Line of Defense
Sounds too easy? Sometimes, a basic wash is all you need. Light rust spots or minor discoloration can often be lifted with nothing more than dish soap and warm water. Here’s how:
- Mix a few drops of pH-neutral dish soap in warm water. Dampen a microfiber cloth or soft sponge.
- Wipe along the grain of the stainless steel, not in circles. This helps preserve the original finish.
- Rinse thoroughly with clean water to remove any remaining soap or loosened rust particles.
- Dry completely with a clean, lint-free towel. Moisture left behind can restart rusting—so don’t skip this step.
This gentle method is especially effective for early-stage rust spots or when you’re dealing with sensitive finishes.
Baking Soda Paste for Stubborn Rust Stains
When soap and water aren’t enough, it’s time for a pantry powerhouse: baking soda to remove rust. Baking soda is mildly abrasive but safe for most stainless steel surfaces, making it ideal for stuck-on rust marks.
- Make a paste: Combine 3 parts baking soda with 1 part water. (You can also add a touch of lemon juice for extra cleaning power.)
- Apply the paste directly to the rust spot—don’t be shy with the amount.
- Let it sit for 10–15 minutes. This gives the baking soda time to loosen the rust.
- Gently scrub along the grain with a soft cloth or nylon brush. Minimal pressure is key; repeated gentle passes are more effective than one aggressive scrub.
- Rinse thoroughly with clean water. Wipe away any residue and dry immediately.
Many homeowners swear by baking soda for rust stains and baking soda clean rust as the safest way to restore a bright, even finish. If the stain is stubborn, reapply the paste and repeat the process. Patience pays off!
Vinegar Poultice: For Crevices and Persistent Spots
What about rust hiding in corners or seams? A vinegar bath for rust removal works wonders in these tricky areas. The acetic acid in white vinegar breaks down rust without harming most stainless steel, but you must neutralize and rinse thoroughly afterward.
- Soak a paper towel or clean cloth in undiluted white vinegar.
- Lay the vinegar-soaked towel over the rust spot and let it sit for several minutes (or up to 30 minutes for persistent stains).
- Remove the towel and gently scrub with a soft brush or cloth, following the grain.
- Immediately rinse with plenty of clean water to prevent the acid from lingering on the surface.
- Wipe with a diluted baking soda solution (1 teaspoon baking soda in a cup of water) to neutralize any remaining acidity, then rinse and dry thoroughly.
This technique is especially helpful for rust that forms around sink fixtures, seams, or appliance edges where regular scrubbing can’t reach (Stahl Kitchens).
Moisture left behind can restart staining—always dry thoroughly after rinsing.
By starting with these gentle, pantry-based solutions, you’ll often succeed in removing rust baking soda style—without resorting to harsh chemicals or risking scratches. If you still see rust after a couple of tries, don’t worry: the next step involves targeted stainless steel rust removers and, if needed, repassivation to fully restore your surface. Let’s move forward to those advanced solutions for persistent rust.
Step 4 Match Technique to Grade and Finish
Ever scrubbed away at a rust spot only to discover you’ve dulled the shine or left behind fine scratches? The secret to getting rust off stainless steel—without regret—lies in matching your cleaning method to the specific grade and finish. Let’s break down what removes rust from stainless steel for every surface, so you can restore your appliances, sinks, or fixtures without a trace of damage.
304 vs 316: Know Your Grade, Know Your Enemy
Not all stainless steel is created equal. Type 304 is common in kitchens and appliances, while 316 is used in marine or poolside settings thanks to better resistance against salt and chlorides. But even 316 can develop stainless steel rust spots if exposed to harsh environments or cleaning mistakes. The right approach keeps your surface safe and your problem solved.
| Surface/Grade | Common Issues | Safe Abrasive/Pad | Motion | Notes |
|---|---|---|---|---|
| Brushed 304 Appliances | Tea staining, light rust | White non-scratch pad | Straight strokes with grain | Use light pressure; always follow the grain to avoid visible halos |
| Mirror 304/316 Panels | Visible micro-scratches, smudges | Soft microfiber + gel cleaner | Gentle, straight strokes (never pads) | Test a small area first; even soft pads can mar the finish |
| 316 Marine Fixtures | Chloride-induced rust, pitting | Citric-based remover, soft cloth | Light, in-grain wiping | Rinse with low-chloride water; avoid salt spray buildup |
| Sinks/Worktops | Food acids, salt stains | Baking-soda paste, nylon brush | Brush along grain only | Never use steel wool; repeat gentle cleaning if needed |
| Welds/Heat-Tints | Oxide scale, discoloration | Dedicated stainless brush | Targeted, in-grain strokes | Consider passivation per ASTM A380/A967 after cleaning |
Brushed vs Mirror Finish: Technique Matters
Imagine cleaning a refrigerator door versus a commercial sink. Brushed finishes (with visible grain) can hide minor abrasion, so you can use a white non-scratch pad or nylon brush—just always move with the grain. Mirror finishes, on the other hand, show every mark. For these, stick to a soft microfiber cloth and a gel or cream cleaner formulated for stainless. Never use abrasive pads or powders on mirror surfaces if you want to avoid new rust marks on stainless steel or unsightly scratches.
- Grain reconditioning: If you notice uneven gloss after cleaning brushed stainless, you can blend the finish with a very fine, nonwoven finishing pad and feather-light strokes. Stop immediately if the gloss changes unevenly—less is more!
- Isolate your tools: Always use cloths, pads, or brushes dedicated only to stainless steel. Tools contaminated with carbon steel can deposit particles that lead to new rust spots.
Sinks, Edges, Welds, and Hard-to-Reach Spots
How to clean rust spots on stainless steel sinks or around welds? For tight areas, use a nylon brush dipped in baking soda paste or a citric-based cleaner. Work gently along the grain. For weld discoloration or heat-tinted spots, a dedicated stainless brush is safest, and consider a passivation step afterward to restore corrosion resistance (Nickel Institute).
Never use chlorine bleach on stainless—chlorides can accelerate pitting and crevice corrosion.
Stainless steel is resilient, but the wrong cleaning method can leave lasting marks. It’s worth learning what takes rust off stainless steel for your specific grade and finish. By matching your approach, you’ll get rid of rust, avoid new scratches, and keep your surfaces gleaming. Next, we’ll look at specialized chemical removers and when it’s time to step up your rust-fighting game.
Step 5 Choose the Right Remover and Use It Correctly
Ever feel like you’ve tried every kitchen remedy, but those rust stains just won’t budge? When gentle methods aren’t enough, it’s time to reach for purpose-made products designed specifically as a stainless steel rust remover. But which one is right for your surface—and how do you use it safely without risking new scratches or dullness?
Oxalic, Citric, and Phosphoric Chemistries Explained
Imagine you’re staring at a stubborn rust ring on your sink or appliance. You want results, but you don’t want to ruin the finish. Here’s how the most common commercial rust remover for stainless steel options stack up:
| Type | Active Ingredient | How It Works | Where to Use | Finish Compatibility | Precautions |
|---|---|---|---|---|---|
| Oxalic-Acid Cleaner | Oxalic acid (e.g., Bar Keepers Friend) | Chelates (binds) iron stains; dissolves surface rust | Tea staining, light rust on sinks, appliances | Gentle on brushed finishes; avoid over-scrubbing on mirror | Follow label for dwell time; rinse thoroughly; avoid contact with stone |
| Citric-Acid Remover/Gel | Citric acid | Binds iron, supports repassivation of stainless surface | General rust removal, especially in food-contact or marine settings | Safe for most finishes; follow ASTM A967 guidance for passivation | Patch test first; rinse and dry completely |
| Phosphoric-Based Rust Remover | Phosphoric acid | Dissolves iron oxides (rust); loosens heavy stains | Heavy rust, industrial or outdoor fixtures | Test on mirror finishes—can dull shine if overused | Limit contact time; avoid grout/stone; rinse copiously |
| Mild Abrasive Cream | Mineral + mild acid (e.g., soft cleansers) | Physically lifts stains with fine abrasive plus acid | Spot cleaning on brushed sinks, worktops | Brushed/grained only; never on mirror or glossy | Use sparingly, in-grain only; overuse can dull surface |
For most kitchen and appliance rust, oxalic-acid cleansers like Bar Keepers Friend are a top choice—just remember to use the liquid, grit-free version and rub with the grain (GE Appliances). Citric-based gels are often the best way to remove rust from stainless steel in sensitive or food-prep areas, as they help restore the passive layer and are referenced in standards like ASTM A967.
Contact Time, Agitation, and Neutralization
Sounds complex? It’s simpler than you think. Here’s a step-by-step for using a commercial rust remover for stainless steel safely and effectively:
- Read the label and test on a hidden area first. Every formula is a bit different.
- Apply to a cool surface—never a hot appliance or sink.
- Keep the area wet during the product’s dwell time (usually a few minutes, but refer to the label).
- Agitate gently with a microfiber cloth or nylon brush, always working with the grain.
- Rinse thoroughly with clean water—residues can cause new staining or dullness.
- Dry completely to prevent water spots or renewed rust.
For phosphoric or citric acid products, follow up with a mild baking soda wipe to neutralize any lingering acidity, then rinse again. This is especially important if you want to remove rust stains from stainless steel without leaving behind new discoloration.
When to Consider Passivation Gels
If you notice rust returning quickly after cleaning, it could mean there’s still embedded iron or the passive layer hasn’t fully recovered. In these cases, a citric-based passivation gel—applied per ASTM A967 guidelines—can restore optimal corrosion resistance, especially for food-contact surfaces or marine fixtures.
If rust returns quickly, contamination may persist—step up to a citric passivation treatment after cleaning.
Choosing the right stainless steel cleaner for rust and using it with care is the best way to remove rust from stainless steel surfaces that resist pantry methods. Always prioritize gentle agitation, thorough rinsing, and full drying for lasting results. If you’re still struggling with how to remove rust spots from stainless steel after these steps, the next section will guide you through restoring the passive layer and ensuring your surface stays rust-free for the long haul.
Step 6 Rinse, Neutralize, and Restore Passivation
You’ve scrubbed, cleaned, and removed rust from your stainless steel—so what’s next? If you stop here, you might notice rust reappearing faster than you’d expect. Why? Because the final steps—rinsing, neutralizing, drying, and restoring the passive layer—are what truly break the corrosion cycle. Let’s walk through how to stop stainless steel from rusting for good, ensuring your hard work lasts.
High-Volume Rinse and Neutralize: Don’t Leave Residue Behind
- Rinse thoroughly with low-chloride water. After any cleaning or rust removal, especially if you’ve used acids or commercial products, use plenty of clean, low-chloride water (like distilled or deionized if available) to flush away all residues. Even a trace of cleaner left behind can trigger new rust spots or streaks. This is especially crucial for cleaning rust from stainless steel in sinks or appliances exposed to tap water, which sometimes contains minerals or chlorides that can accelerate corrosion (Nickel Institute).
- Neutralize if acids were used. If you used vinegar, citric, oxalic, or phosphoric acid treatments, follow up with a wipe-down using a mild baking soda solution (about 1 teaspoon per cup of water). This neutralizes lingering acidity, which could otherwise etch or discolor the steel. Rinse again with clean water to remove any baking soda residue—this step is key for the removal of rust from stainless steel without leaving behind new marks.
- Dry immediately with a clean microfiber cloth. Water left on the surface can leave spots or, worse, restart the rusting process. For best results, dry with a lint-free microfiber towel, working along the grain. On mirror finishes, pat gently rather than rub to avoid new scratches. You’ll notice this extra care truly helps clean stainless steel rust marks without damaging the shine.
Citric Passivation Basics: Restore That Invisible Shield
Still seeing faint discoloration or worried about future rust? This is where passivation comes in. Passivation is a process that restores the ultra-thin chromium oxide layer on stainless steel, making it much more resistant to new rust. While stainless steel naturally forms this layer in air, cleaning and rust removal can sometimes leave it patchy or incomplete.
- Optional: Apply a citric-based passivation gel or solution. For critical surfaces—like food-contact sinks, marine fixtures, or if you’ve battled repeated rust—use a citric acid passivation product. Apply according to manufacturer instructions, following the principles in ASTM A967. Typical concentrations range from 4–10% citric acid, with dwell times from 4 to 20 minutes depending on temperature and product. This step is especially effective for how to remove corrosion from stainless steel and prevent it from returning.
- Rinse thoroughly and dry again. Just like before, make sure all passivation solution is removed with ample clean water, then dry fully to avoid water marks or streaks.
Final Finish Care and Inspection: Ensure a Flawless Result
- Inspect under strong, angled light. Look for any remaining discoloration, pits, or rust marks. If you see stubborn areas, repeat targeted cleaning or passivation only on those spots.
- Finish-specific care: On mirror finishes, avoid any abrasive rework after cleaning—if rust persists, stick to gentle chemical methods. On brushed finishes, you can lightly reblend the grain with a fine nonwoven pad if needed, but always use feather-light strokes and stop if the gloss changes unevenly.
By following these steps, you’re not just cleaning rust stains from stainless steel—you’re actively extending the life and appearance of your surfaces. Each step, from rinsing to passivation, helps ensure the removal of rust from stainless steel is thorough and lasting.
A clean, dry, passivated surface is far less likely to develop new rust, even in challenging environments.
Taking the time to finish strong means you’ll spend less time cleaning rust from stainless steel in the future. And if you’re wondering how to stop stainless steel from rusting in tough environments, this final step—restoring the passive layer—is your best defense. Next, let’s talk about simple routines and prevention to keep that shine going strong.
Step 7 Build a Simple Prevention Schedule
Ever wondered why rust keeps coming back, even after you’ve cleaned it off? The truth is, stainless steel needs a little routine care to stay looking its best—especially in kitchens, bathrooms, and outdoor spaces. Whether you’re dealing with appliances, cookware, or wondering how to remove rust from a stainless steel sink and keep it away, a simple, regular maintenance plan is your best defense.
Weekly Wipe-Downs and Chloride Control
Imagine you’ve just finished cleaning, and your appliances are sparkling. How do you keep them that way? It’s easier than you think. Regular, gentle cleaning prevents the buildup of food acids, salts, and minerals that can break down the protective layer on stainless steel and cause those dreaded rust stains in the sink or on other surfaces.
| Application | Frequency | Task | Notes |
|---|---|---|---|
| Appliances | Weekly | Wipe with pH-neutral cleaner; dry completely | Avoid bleach-based wipes; follow the grain |
| Sinks | After use | Rinse away food acids/salts; dry; baking-soda buff weekly | Don’t let water or food residue sit; prevents rust stains in sink |
| Cookware | After washing | Dry immediately; avoid letting salt sit; remove discoloration promptly | Prevents pitting and keeps shine |
| Outdoors/Structural | Monthly | Rinse salt spray; apply protective wax or thin oil film; inspect fasteners | Look for dissimilar-metal contact; use 316-grade for best results |
| Welded/Industrial | Quarterly | Inspect for crevice rust; consider citric passivation if stains reappear | Critical for long-term durability in harsh environments |
Seasonal Deep-Clean and Inspection
Every few months, go beyond the basics. Move items off surfaces, clean behind and beneath appliances, and check for early signs of rust or wear. For sinks, this is a great time to focus on how to remove rust stains from sink edges or drains, and to buff out any stubborn marks. For outdoor stainless, wash away any accumulated salt or debris and check for rust spots that might need attention before they spread.
Environmental Mitigations for Coastal or Poolside Use
Live near the ocean or have a pool? You’ll notice rust forms faster due to higher chloride exposure. The best way to stop rust on stainless steel outdoors is to rinse surfaces often and dry them thoroughly. If you’re upgrading hardware or replacing outdoor fixtures, choose 316-grade stainless steel—it’s far more resistant to salt and pool chemicals than standard 304. This upgrade is especially important if you want to prevent having to remove rust from sink areas or outdoor kitchens again and again.
- Do keep stainless steel surfaces dry—wipe down after each use, especially in wet or humid areas.
- Do use dedicated microfiber or soft cloths for stainless only—cross-contamination with iron tools can trigger new rust.
- Do use baking soda for gentle weekly buffing in sinks and on cookware.
- Don’t use steel wool or abrasive pads—they leave behind iron particles that can make rust worse.
- Don’t leave rubber mats, wet sponges, or towels sitting on stainless steel—these trap moisture and cause rust stains in sink areas and on counters.
In water-rich or chloride-heavy settings, drying is your number one rust-prevention step.
By building these habits, you’ll notice fewer rust stains in sink basins, less need to remove rust from sink edges, and a longer-lasting shine on every stainless surface. And if you ever spot new stains, you’ll know exactly how to get rust stains off stainless steel—quickly and safely. Next up: when to call in the pros or consider replacing hardware for lasting results.
Step 8 When to Call Pros or Replace Rusted Stainless Steel
When DIY Isn’t Enough: Persistent Rust, Pitting, and Critical Parts
Ever spent hours cleaning only to see rust reappear on your stainless steel a week later? Or maybe you’ve noticed deep pits or corrosion on a refrigerator door, appliance, or structural part. If so, you’re not alone—and you’re wise to pause before scrubbing again. Some problems can’t be solved with household cleaners. Here’s how to know when it’s time to escalate:
- Pitting remains after cleaning: Small holes or pits won’t heal on their own and can harbor moisture that leads to more rust.
- Rust returns quickly: If you’ve followed all the steps for how to remove rust from stainless steel and stains keep coming back, hidden contamination or alloy issues may be to blame.
- Critical or food-contact parts: Sinks, cookware, or machine components that affect safety or hygiene should be restored to like-new condition—or replaced.
- Appliance aesthetics: If you’re struggling with how to remove rust from stainless steel refrigerator panels, or how to get rust off a stainless steel fridge without new scratches, professional help can deliver a flawless finish.
Smart Escalation Options: Professional and Industrial Rust Removal
Imagine you’ve tried every cleaner, but rust marks or pitting still linger. Here’s a breakdown of your next-level options—ranked from most advanced to most accessible:
- XTJ CNC Machining Services: When replacement is smarter than repeated cleaning, XTJ offers precision-manufactured stainless steel parts. Their advanced 4- and 5-axis machining centers deliver ultra-tight tolerances (down to +/- 0.005mm), and you can upgrade to more corrosion-resistant grades like 316 or even opt for improved surface finishes. If your design is prone to crevice rust, their engineering team can help redesign for easier cleaning and longer life. Post-machining passivation is available for food-contact or marine use. This is the best route for persistent issues in appliances, industrial equipment, or architectural features where you need a seamless, lasting solution.
- Local metal finishing shop: Many shops offer on-site passivation or electropolishing, which can restore the protective layer and smooth out minor surface damage. This is ideal for handrails, kitchen counters, or industrial tanks.
- Mobile laser rust removal: For spot treatment—especially in sensitive or intricate assemblies—a laser rust remover or even a laser rust removal gun can vaporize corrosion without abrasive contact. This is a great option for how to remove rust from stainless steel appliances or fixtures with detailed surfaces.
- Fabricator or installer: If your problem is due to mixed-metal fasteners or design flaws, a fabricator can swap in isolation washers, replace hardware, or upgrade you to the right stainless grade for your environment.
Pros and Cons of Escalation Options
| Option | Pros | Cons |
|---|---|---|
| XTJ CNC Machining Services |
|
|
| Local Metal Finishing Shop |
|
|
| Laser Rust Removal |
|
|
| Fabricator/Installer |
|
|
When to Seek Professional Help
- Pits or corrosion remain after thorough cleaning and passivation
- Rust marks reappear within weeks, despite following all best practices
- Parts are safety, food-contact, or structurally critical
- You’re dealing with how to remove rust from stainless steel refrigerator panels or want a flawless appliance finish
- You want to upgrade to a more rust-resistant design or finish
Sometimes, the smartest move is to upgrade rather than repeat the same cleaning cycle. Professional restoration or replacement can deliver lasting results—especially for high-value appliances, outdoor structures, or when you need to can you remove rust from stainless steel and keep it away for good.
By knowing when to escalate, you’ll save time and frustration—and ensure your stainless steel investment stays beautiful and functional for years to come. If you’re curious about advanced options like laser rust removal or custom CNC replacement, now’s the time to explore what’s possible and choose the best path for your project.
Frequently Asked Questions About Removing Rust from Stainless Steel
1. What is the safest way to remove rust from stainless steel appliances?
The safest approach is to start with gentle methods like dish soap and water, followed by a baking soda paste. Always clean along the grain using non-abrasive cloths or pads to avoid scratches. For stubborn stains, use a stainless steel rust remover formulated for your appliance's finish.
2. Can stainless steel rust in water, and how can I prevent it?
Yes, stainless steel can rust in water, especially if exposed to chlorides or if the passive layer is damaged. Prevent rust by drying surfaces after cleaning, avoiding harsh cleaners like bleach, and performing routine maintenance with pH-neutral cleaners.
3. Is it possible to remove rust from a stainless steel refrigerator or fridge?
You can remove rust from a stainless steel refrigerator by applying a baking soda paste or a specialized stainless steel cleaner, always wiping with the grain. For persistent or recurring rust, consider professional restoration or replacing affected panels with higher-grade stainless using CNC machining services.
4. What should I avoid when cleaning rust from stainless steel sinks?
Avoid using steel wool, abrasive pads, or bleach, as these can scratch the surface and make rust worse. Stick to nylon brushes, non-scratch pads, and baking soda solutions, and always dry the sink thoroughly after cleaning to prevent new rust spots.
5. When should I seek professional help or consider replacing rusted stainless steel parts?
If rust returns quickly, pitting remains after cleaning, or the component is critical (like food-contact or structural parts), seek professional help. CNC machining services can provide custom replacement parts in more rust-resistant stainless steel grades for lasting results.
-
Posted in
cleaning stainless appliances, remove rust stainless steel, rust stains sink, stainless steel maintenance, stainless steel rust prevention


