
How To Clean Brass In 9 Steps: Shine Fast Without Damage
Step 1 Diagnose Your Brass and Finish
Ever wondered why some brass shines up beautifully while others end up scratched or patchy after cleaning? Before you even think about how to clean brass, it’s crucial to know exactly what you’re working with. The right diagnosis is the first—and most important—step to avoid damaging your piece, removing valuable patina, or exposing a base metal underneath. Imagine spending hours polishing, only to realize you’ve stripped away a finish or dulled a collectible’s character. Let’s make sure that doesn’t happen.
Identify Solid Brass Versus Plated Metal
Sounds complex? It’s actually easy with a few quick checks. Solid brass and brass-plated items look similar, but they behave very differently during cleaning. Here’s how you can tell them apart without any guesswork:
- Magnet Test: Hold a small magnet to an inconspicuous spot. If the magnet sticks, your item is likely brass-plated steel or another magnetic base metal. Solid brass is non-magnetic.
- Scratch Color Check: On a hidden underside, gently scratch with a wooden toothpick or similar tool. If the exposed area stays a consistent golden yellow, you’re likely working with solid brass. If you see a silvery or reddish base, it’s probably plated.
- Acetone Swab (for lacquer): Dab a cotton swab in acetone and rub a hidden area. If a clear film softens or becomes tacky, the piece is lacquered or sealed. If nothing changes, it’s likely unlacquered.
Detect Lacquered or Sealed Finishes
Lacquered brass has a thin, clear protective layer that keeps air and moisture out, so it doesn’t tarnish easily. Unlacquered brass, on the other hand, will develop a natural patina over time—a look many collectors cherish. If you want to know how to clean brass without removing patina, it’s essential to recognize whether your item is lacquered or not. For lacquered pieces, only use gentle soap and water—acids or abrasives can destroy the coating and lead to blotchy, uneven aging.
Set Up a Safe Test Area
Before any cleaning brass project, protect yourself and your workspace. Wear nitrile gloves and eye protection, and ensure good ventilation. Keep acids and cleaners away from porous stone or wood mounts, as they can stain or etch these surfaces.
Stop Rule: If you’re unsure whether it’s lacquered or plated, do not polish—use only gentle cleaning and consult a conservator.
What Does Tarnished Brass Look Like?
You’ll notice tarnished brass develops brown, red, or greenish patches—sometimes dull, sometimes streaky—depending on its exposure and age. This patina is often prized, especially on older pieces. If you’re uncertain, always err on the side of caution and stick to the least invasive methods first (Canadian Conservation Institute).
Remember: Any color lifting, flaking, or unexpected silver or copper showing through means you should stop immediately and reassess your approach. This is especially important if you’re learning how to clean brass without removing patina or if you’re unsure whether your piece is solid or plated. When in doubt, consult a professional conservator.
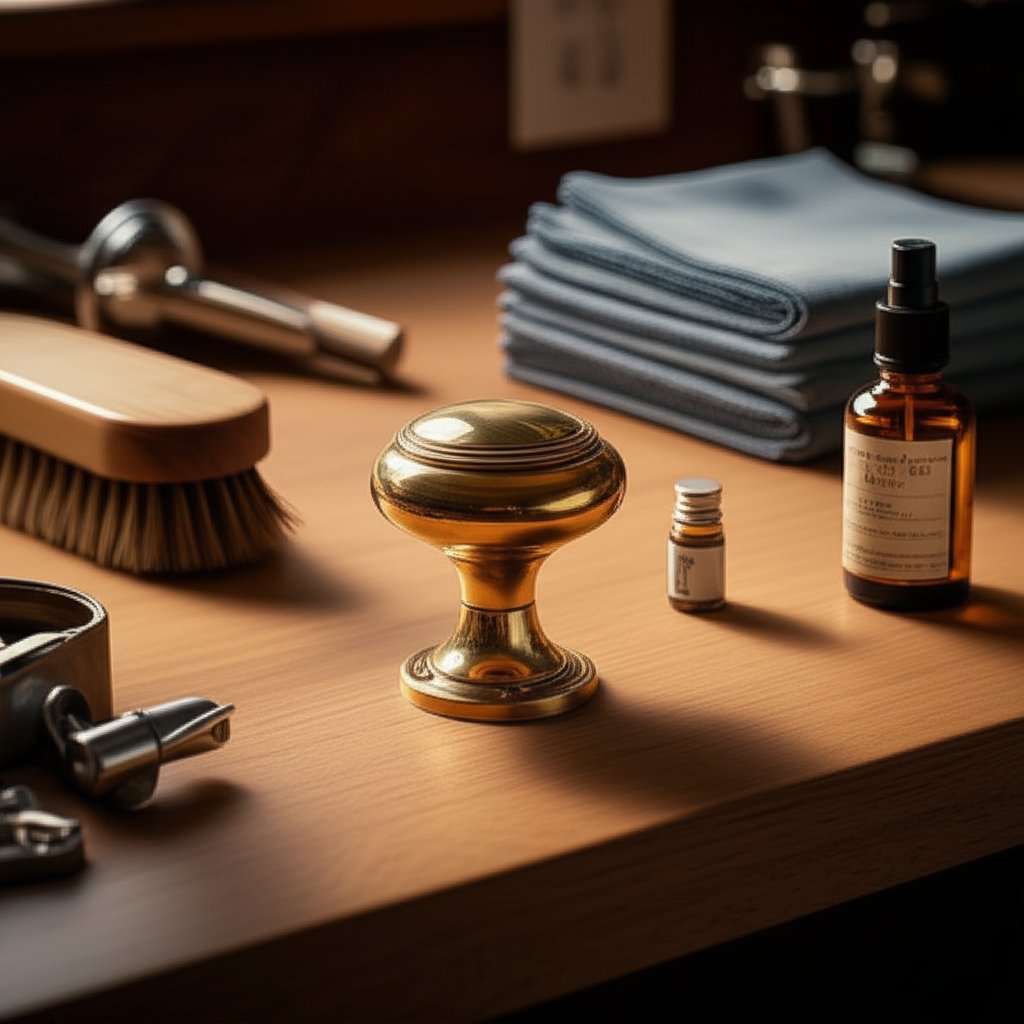
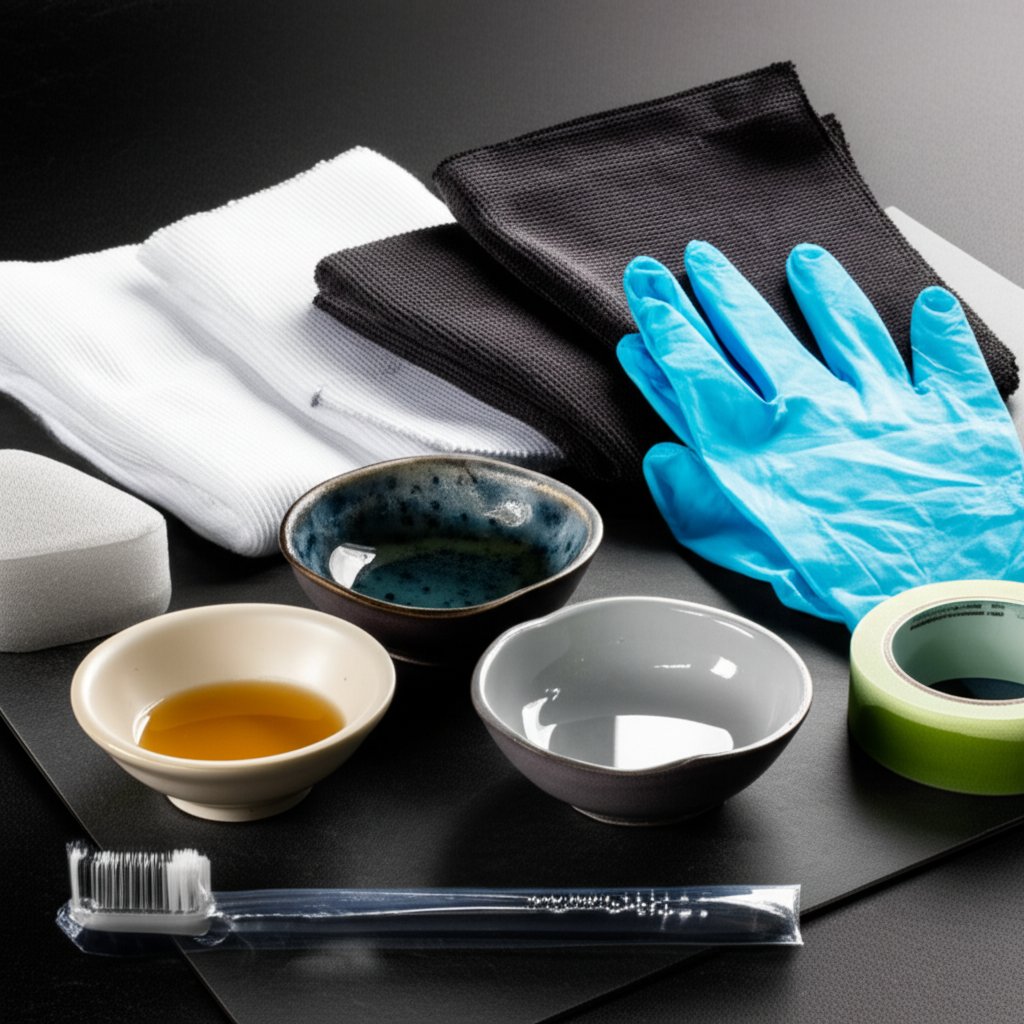
What You’ll Need
- Small magnet
- Wooden toothpick
- Cotton swabs
- Acetone (nail polish remover)
- Nitrile gloves and eye protection
With these quick tests and safety steps, you’ll be ready to choose the safest, most effective cleaning method for your brass. Next, we’ll gather the right tools and set up your workspace for success.
Step 2 Gather Tools and Prep Your Workspace
Essential Supplies for Safe Brass Cleaning
When you’re ready to start cleaning brass, the right tools make all the difference. Imagine tackling a beautiful but tarnished candlestick—using the wrong cloth or cleaner could leave scratches or strip away the finish you want to preserve. So, what can you use to clean brass without risking damage? Here’s a practical kit that covers both gentle and more intensive cleaning, while keeping your brassware looking its best:
- pH-neutral dish soap: For routine grime and light soil without harming the finish.
- Warm water: Helps dissolve dirt and is gentle on brass.
- Microfiber cloths: Non-abrasive, perfect for wiping and buffing.
- Soft toothbrush: Reaches crevices and intricate designs.
- Cotton swabs: Ideal for detailed spots and edges.
- Nitrile gloves: Protects your hands and prevents skin oils from transferring.
- Painter’s tape: Shields surrounding wood, stone, or fabric from accidental splashes.
- Distilled water: For final rinses—prevents mineral spots and is recommended by conservation sources.
- Soft, lint-free towels: For drying and polishing.
- Small bowls: For mixing cleaning solutions.
- Household acids (white vinegar, lemon): Only for unlacquered brass and deeper cleaning.
- Non-scratch abrasives (baking soda): For stubborn tarnish—use sparingly.
- Optional commercial brass cleaner: For when DIY brass cleaner methods aren’t enough.
Set Up a No-Mess Workstation
Before you begin any brassware cleaning, set the scene for success. Lay down a washable mat or towel to catch drips. Use painter’s tape to mask off nearby wood trim, marble, or fabric—brass cleaners and acids can stain or etch these materials. Good ventilation is a must, especially if you’re using vinegar or commercial cleaners. Safety first: always wear gloves and, if needed, eye protection.
Never mix acids (like vinegar or lemon) with bleach, and avoid ammonia-based products for cleaning brassware—these combinations can create hazardous fumes or cause stress-cracking in brass alloys.
Patch Testing Protocol
Even the best diy brass cleaner can react differently depending on the brass’s age, finish, or previous treatments. To avoid surprises, always patch test your chosen method on an inconspicuous spot. Here’s how:
- Apply a small amount of your intended cleaner to a hidden area.
- Let it dwell for 60–90 seconds.
- Wipe the area with a clean cloth.
- Rinse with distilled water.
- Dry thoroughly with a soft towel.
- Inspect for any color change, blotching, or lifting—if the finish looks stable, you’re good to proceed.
Wondering what should I use to clean brass if you’re unsure? Start with the mildest option—soap and water—then escalate only if needed. This approach helps preserve patina and avoids harsh reactions, aligning with best practices for cleaning brassware.
With your tools assembled and your workspace protected, you’re ready for the next step: gently lifting away everyday grime while honoring the unique character of your brass.
Step 3 Start with the Gentlest Cleaning
Gentle Wash Method for Everyday Soil
When you look at a cherished brass candlestick or a favorite piece of hardware, do you ever wonder if there’s a way to refresh its beauty without risking that rich, aged finish? The best way to clean brass—especially if it’s lacquered or only lightly soiled—is to start with the least invasive method possible. This approach not only safeguards the finish but also preserves the unique patina that gives old brass its character. If you’re curious about how to wash brass without stripping away its story, this is your go-to process:
- Mix a gentle solution: Combine a few drops of mild, pH-neutral dish soap with a bowl of warm (not hot) water. Avoid harsh chemicals or abrasive powders, which can remove patina or damage lacquered surfaces.
- Wipe gently: Dip a soft microfiber cloth in the soapy water, then wring it out thoroughly so it’s just damp. Wipe the brass in small sections, focusing on areas with visible grime or fingerprints. For detailed crevices, use a soft-bristled toothbrush with the lightest touch.
- Rinse away residue: Take a fresh cloth dampened with distilled water and wipe the item to remove any soap. Distilled water helps prevent mineral spots, a tip often noted in museum care guidance.
- Dry and buff: Immediately dry the brass with a lint-free towel, buffing lightly to restore a soft sheen. This step is crucial—letting brass air-dry can cause water spots or streaks.
Tip: Work in shaded, cool conditions—heat accelerates drying and can leave streaks.
Rinse, Dry, and Inspect
After cleaning, inspect your brass item closely. You should see clean surfaces free of fingerprints, kitchen films, or light grime. If you’re cleaning old brass, you’ll notice that the natural patina remains intact—just a refreshed, lived-in glow. This method works for everything from door handles to how to clean brass jewelry, and it’s especially important for lacquered items, where harsher methods can do real harm (Ghidini 1849).
When to Stop or Escalate
It’s important to know when to pause. If you see a milky haze, flaking, or color transferring to your cloth, stop immediately and reassess. These are signs that the finish is compromised or that you’re starting to remove more than just surface dirt. For lacquered brass, this gentle wash is the ceiling—avoid acids or abrasives entirely. If your item is unlacquered and still shows stubborn tarnish after this step, you can move on to deeper cleaning methods in the next section.
Remember, what cleans brass best for everyday care is often the simplest solution. By starting with gentle cleaning, you honor both the craftsmanship and the history of your brass pieces—ensuring they remain beautiful and full of character for years to come.
Step 4 Use Proven DIY Tarnish Removers
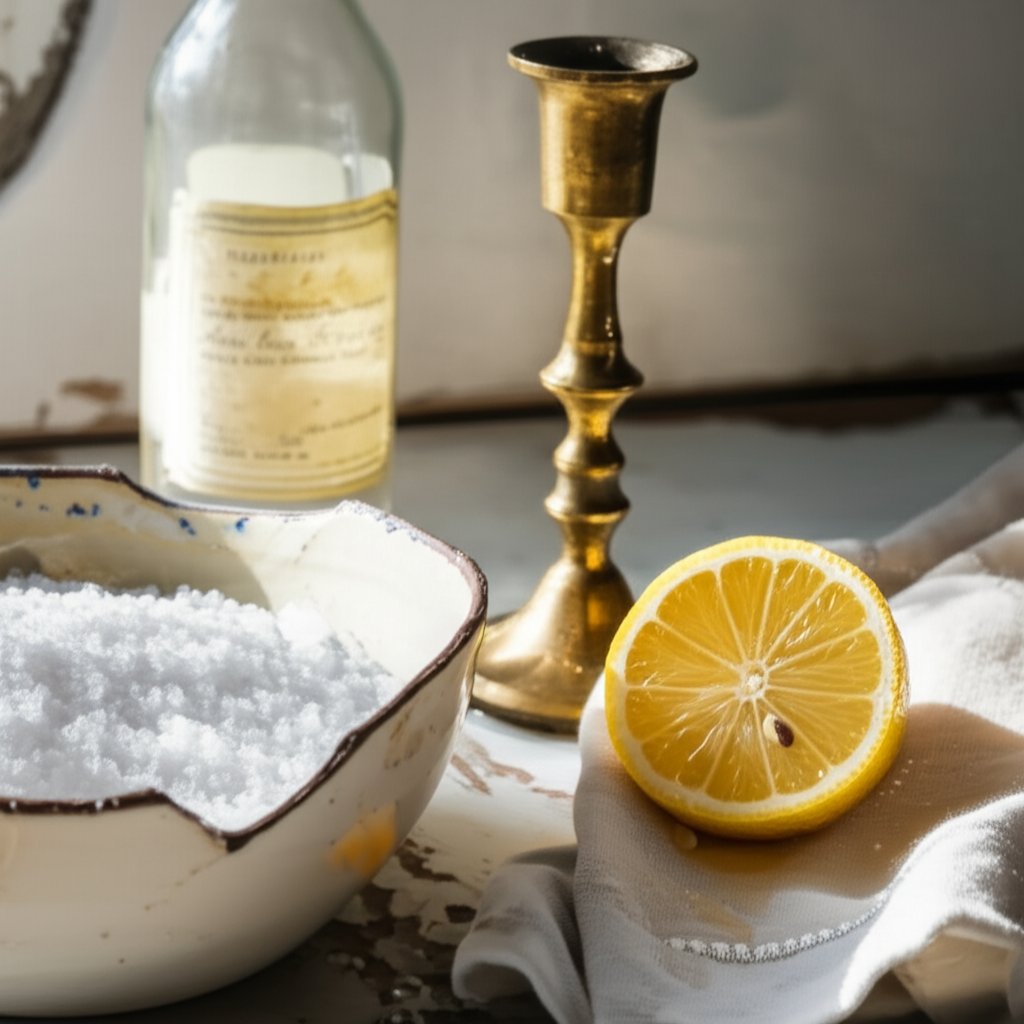
Vinegar and Salt Recipe for Even Tarnish
Ever picked up a brass candlestick and wondered why it’s lost its shine? If gentle washing hasn’t done the trick, it’s time for targeted DIY methods. One of the most reliable ways for cleaning brass with vinegar is the classic vinegar and salt soak. This method is best for unlacquered brass showing uniform tarnish—think dull, brownish areas that hide the metal’s glow.
- In a non-reactive bowl, mix 1 cup white vinegar with 1 teaspoon table salt. Stir until the salt dissolves completely.
- For small items, submerge them in the solution for 5–10 minutes, gently agitating every couple of minutes. For larger pieces, dip a soft cloth in the solution and dab it onto tarnished areas.
- After soaking, rinse thoroughly with distilled water to remove all acidic residue.
- Neutralize any lingering acid by wiping the brass with a cloth dampened in a solution of 1 teaspoon baking soda dissolved in 1 cup water.
- Rinse again with distilled water, then dry and buff with a soft towel.
Curious about how long to soak brass in vinegar? Start with 5–10 minutes—short, repeat cycles are safer than one long soak. If you notice a reddish or streaky appearance, stop immediately and switch to a gentler method (Martha Stewart).
Never use acids on lacquered or plated brass; they can undercut coatings or expose base metal.
Lemon and Salt Paste for Spot Treatment
When you spot isolated tarnish or want to polish detailed areas, a lemon and salt paste is a go-to solution. The mild acid in lemon juice works wonders for restoring shine without harsh abrasion. Here’s how to use it:
- Cut a lemon in half and sprinkle fine salt on the cut side.
- Gently rub the salted lemon over tarnished spots for 1–3 minutes, applying light pressure.
- For intricate details, mix 2 tablespoons lemon juice, 1 teaspoon salt, and 1 teaspoon flour to form a paste. Apply to the area and let sit for 3–5 minutes.
- Rinse thoroughly with distilled water.
- Neutralize acids with a baking soda solution as above, rinse, and dry completely.
This method is effective for spot cleaning and can help you polish brass with vinegar alternatives if you prefer citrus over vinegar. Always test on a hidden spot first to avoid unexpected reactions.
Ketchup Quick-Clean for Light Tarnish
Surprised to see ketchup on the list? Its mild acidity makes it a favorite for quick, mess-free brass cleaning. Here’s a simple routine for using vinegar to clean brass—but with ketchup as your acid source:
- Spread a thin layer of ketchup over tarnished areas.
- Let it sit for 10–20 minutes. For light tarnish, you’ll notice a visible difference even before the time is up.
- Wipe away with a soft microfiber cloth, rinse with distilled water, neutralize with baking soda solution, rinse again, and dry.
This is one of the easiest ways to clean brass with vinegar (in disguise) and is especially handy for hardware, knobs, or small decorative objects.
Safety Note: Always patch test on an inconspicuous area and keep dwell times short. Repeat cycles are safer than extended soaks. If the brass turns reddish or streaky, or if you see any lifting or flaking, stop and reassess.
Why Neutralization Matters
Acids (even mild ones) can keep reacting with brass after cleaning, leading to unexpected corrosion or spots. That’s why rinsing and neutralizing with baking soda solution is a vital step. Conservation experts emphasize this extra measure helps prevent future tarnish and preserves your item’s finish (Ford Conservation Center).
Ready to tackle stubborn tarnish? With these proven recipes, you’ll be able to safely clean brass with vinegar, lemon, or even ketchup—just remember to patch test, neutralize, and avoid acids on lacquered or plated pieces. Up next, we’ll explore polishing methods for when you want to take the shine to the next level.
Step 5 Polish with Minimal Abrasion
Non-Scratch Pastes for Controlled Abrasion
Ever found yourself scrubbing away at tarnish, only to realize you’ve dulled the shine or scratched the surface? When learning how to polish brass at home, it’s crucial to use the mildest abrasive possible and to work with patience. Non-scratch pastes—like a simple baking soda and water mixture—offer a safe, effective way to restore luster without risking damage.
Here’s how to use a non-scratch paste for polishing brass:
- Mix baking soda with just enough water to form a soft, spreadable paste.
- Apply the paste to the brass using a microfiber cloth, working in straight lines that follow the grain of the metal. Avoid circular motions, which can create visible swirls under light.
- Polish small areas for 30–60 seconds at a time, then rinse thoroughly and dry immediately.
- Repeat as needed, but always reassess between passes—over-polishing can thin the brass and soften crisp details, especially on antique or plated items.
What to use to polish brass, especially if you want to avoid harsh chemicals? This method is a favorite for those who want control and a gentle touch.
Commercial Polish Usage and Wipe-Off Timing
Sometimes, a commercial brass polish is the best way to achieve a high-gloss finish, especially after removing heavy tarnish. If you’re wondering how to clean and polish brass for a mirror-like result, follow these steps:
- Apply a pea-sized amount of polish to a clean, soft cloth.
- Gently massage the polish onto the brass surface, targeting areas where tarnish remains.
- Allow the polish to haze or set as directed by the manufacturer—timing matters for best results.
- Buff the surface with a fresh microfiber cloth until the brass shines.
- Use cotton swabs to remove any polish residue from crevices or detailed areas.
Never use steel wool or abrasive pads for polishing brass, as they can permanently scratch and dull the finish. For fine or antique items, stick to soft cloths and gentle pressure only.
Decision Flow: Escalate Only as Needed
Not sure which method to use? Imagine a ladder—each step is a little more aggressive than the last. Always start at the bottom and climb only if you need to:
- Gentle wash (soap and water)
- DIY acids (lemon, vinegar, ketchup)
- Non-scratch paste (baking soda and water)
- Commercial brass polish
Skip abrasive or polishing steps for lacquered brass or antiques with a valued patina. For those wondering how to polish brass at home while preserving character, less is often more.
Method Comparison Table
| Method | Typical Result | Speed | Risk to Finish | Best Use Case |
|---|---|---|---|---|
| Non-Scratch Paste | Restores moderate shine, gentle on patina | Moderate | Low (if used with soft cloth) | Unlacquered, lightly tarnished brass |
| Commercial Polish | High-gloss finish, even color | Fast | Medium (avoid overuse on antiques) | Modern, heavily tarnished, or display pieces |
| DIY Acids (lemon/vinegar) | Removes heavy tarnish, may alter patina | Varies | Medium-High (can etch if overused) | Unlacquered, deeply tarnished items |
Pros and Cons by Method
Non-Scratch Paste
- Pros: Gentle, preserves detail, easy to control, suitable for most brass types.
- Cons: May require several applications for deep tarnish, can be messy if overapplied.
Commercial Brass Polish
- Pros: Fast, produces brilliant shine, convenient for regular maintenance.
- Cons: Can remove too much patina if overused, some formulas are harsher than others, not ideal for antiques.
DIY Acids
- Pros: Affordable, effective for heavy tarnish, uses common household items.
- Cons: Can be unpredictable, risk of etching or uneven results, not for lacquered or plated brass.
Conservation experts recommend avoiding over-polishing, as repeated abrasion can thin brass and soften edges—especially on older or decorative pieces. Always polish brass with minimal pressure and stop once a uniform color is reached (Nostalgia Providence).
By following this conservative, stepwise approach, you’ll master how to polish brass at home—restoring shine while respecting the integrity and history of your brass. Next, we’ll tackle strategies for removing heavy tarnish and corrosion safely, so your brass can look its best for years to come.
Step 6 Tackle Heavy Tarnish and Corrosion Safely
Targeted Soak and Brush Protocol for Heavily Tarnished Brass
When you face a piece of brass that's gone from golden shine to dark, streaky, or even greenish—maybe you’re wondering how to clean very tarnished brass or even how to clean brass that has turned black. Sounds daunting? With a careful, stepwise approach, you can revive your brass without risking irreversible harm.
For heavily tarnished, unlacquered brass, avoid harsh scrubbing or long chemical baths. Instead, use the vinegar and salt solution described in Step 4, but in short, controlled cycles. This minimizes the risk of etching or exposing underlying metals, especially if you’re working with older or sentimental pieces.
- Prepare your solution: Mix 1 cup white vinegar with 1 teaspoon salt in a non-reactive bowl.
- Apply: Submerge small items or dab the solution onto larger surfaces with a soft cloth.
- Dwell: Let the solution sit for 5–7 minutes—set a timer to avoid overexposure.
- Brush: Gently agitate the surface with a soft-bristle brush or toothbrush. For powdery green corrosion (verdigris), use a wooden pick or very soft brush and avoid digging into the metal.
- Rinse: Rinse thoroughly with distilled water to remove all acid and debris.
- Neutralize: Wipe with a cloth dampened in a baking soda solution (1 tsp baking soda to 1 cup water) to halt any lingering acid reaction.
- Dry: Pat dry with a lint-free towel and inspect. Repeat the cycle only if needed—short cycles are much safer than long soaks.
This method is supported by both professional conservators and hobbyists, who emphasize that repeated, gentle treatments are far safer than aggressive single attempts (BOCN Forum).
When Corrosion Signals a Deeper Issue
Ever notice greenish, powdery spots that seem to grow from seams or joints? That’s verdigris—a sign of copper reacting with air and moisture. If you’re tackling corroded brass, remember: gentle is key. For small patches, a short acid contact followed by soft brushing can lift corrosion, but never dig or scrape aggressively. If you suspect the corrosion is under a lacquered surface, stop immediately. Damaged lacquer or corrosion beneath a coating often requires professional help, as removing the film can cause further damage (Emma Grün).
Alert: If corrosion originates at a seam or joint, internal moisture or flux residue may be present—seek professional assessment.
Hard Stop Rules: Protecting Brass from Irreversible Damage
Sometimes, despite your best efforts, you’ll see warning signs: brass turning blotchy, reddish, or streaky; a silvery base metal showing through; or flaking and lifting of the surface. These are signals to pause. If you notice any of these, rinse thoroughly with distilled water, dry, and let the piece rest before attempting another cleaning pass. If you see a silvery layer, you may have gone through a thin brass plating—stop immediately to avoid further loss.
Equally important, avoid aggressive methods such as wire wheels, coarse abrasives, ammonia, or bleach-based products. These can cause stress corrosion cracking, undercut lacquer, or leave permanent scratches—problems highlighted in conservation literature.
Troubleshooting and Next Steps
- If brass turns blotchy or streaky during cleaning, pause, rinse with distilled water, and dry. Allow the item to rest before repeating any cycle.
- Only use commercial polish after most tarnish is gone—polishing too early can smear corrosion into pores and make future cleaning harder.
- Always favor gentle, repeated cycles over one harsh treatment when learning how to clean badly tarnished brass.
With patience and the right method, even the most tired-looking brass can regain its warmth and character. Up next, you’ll discover tailored protocols for different brass items—ensuring safe, predictable results whether you’re cleaning doorknobs, lamps, or candlesticks.
Step 7 Follow Item-Specific Cleaning Protocols
Ever wondered why some brass pieces clean up beautifully while others end up streaky or patchy? The secret lies in using the right protocol for each type of item. Whether you’re restoring a set of vintage candlesticks, reviving a cherished lamp, or figuring out how to clean brass door handles, following tailored steps helps you achieve consistent, safe results every time. Let’s break down exactly how to clean brass hardware of all kinds—without guesswork or risk.
Doorknobs and Door Handles Protocol
- Remove hardware if possible—this makes cleaning easier and protects surrounding finishes. If removal isn’t practical, mask the area around the handle with painter’s tape.
- Gentle wash: Wipe the handle with a soft microfiber cloth dampened in warm, pH-neutral soapy water for 2–3 minutes. This lifts everyday grime without harming lacquer or patina.
- Address tarnish: For stubborn spots, mix a paste of lemon juice and baking soda (or salt). Apply a thin layer to the handle, let sit for 2–3 minutes, then gently agitate with a soft toothbrush. Rinse with distilled water, neutralize with a baking soda solution, and dry thoroughly.
- Optional polish: If more shine is desired, buff with a soft cloth for 30–60 seconds. Avoid harsh abrasives or metal polishes on lacquered hardware.
Curious about how to clean brass door hardware with minimal effort? These steps work for both knobs and levers, and you’ll notice a big difference in shine and feel. For an extra layer of protection, consider applying a thin coat of natural wax after cleaning.
Lamps and Fixtures Protocol
- Unplug and disassemble: Always unplug lamps and remove any shades to expose the brass safely.
- Gentle wash for lacquered lamps: Use only a damp microfiber cloth with mild soap. Avoid acids, abrasives, or soaking—these can break down lacquer and cause streaking.
- Spot treat unlacquered brass: For tarnish, dab a small amount of ketchup or lemon-salt paste onto affected areas. Let sit for up to 2 minutes, then gently wipe away with a soft cloth. Repeat as needed, always working in small sections to avoid streaks (Little Moroccan Things).
- Rinse and neutralize: Wipe with a cloth dampened in distilled water, then neutralize any acid residue with a baking soda solution. Dry thoroughly.
- Light polish: If desired, buff gently with a clean microfiber cloth. Support delicate arms or details to prevent bending.
Wondering how to clean brass lamp parts that have intricate designs? Use cotton swabs or a soft toothbrush for grooves and corners, always avoiding harsh scrubbing.
Candlesticks Protocol
- Remove wax drips: Freeze the candlestick briefly and gently lift off hardened wax, or soften with warm water for easier removal (Capturing Wonderland).
- Gentle wash: Clean with warm, soapy water and a soft cloth to remove surface grime.
- DIY acid paste for tarnish: Apply a paste of lemon juice and salt (or vinegar, salt, and flour) to the base and column. Let sit for 3–4 minutes, then use cotton swabs to reach grooves and details.
- Rinse, neutralize, dry: Rinse with distilled water, neutralize with a baking soda solution, rinse again, and dry thoroughly before reusing with candles.
Looking for the best approach to how to clean brass candlesticks without damaging their vintage charm? Always use the mildest method first, and never leave acids on for longer than recommended.
| Item | Typical Time | Suitable Methods | Risks |
|---|---|---|---|
| Doorknobs/Handles | 10–15 min/knob | Gentle wash, lemon-salt paste, light polish | Over-polishing, scratches if abrasive |
| Lamps/Fixtures | 10–20 min/lamp | Gentle wash, spot acid paste, buff | Streaks, lacquer damage if soaked |
| Candlesticks | 10–20 min/pair | Wax removal, gentle wash, acid paste | Loss of patina if over-cleaned |
Tip: Removing hardware before cleaning reduces the risk of damaging adjacent surfaces and makes it easier to clean every detail. Always work methodically, set timers for dwell times, and neutralize acids to prevent residues that can accelerate re-tarnish.
Still asking yourself, “how can I clean brass door handles without risking the finish?” Stick to these item-specific steps and you’ll achieve professional, predictable results—whether you’re tackling hardware, lamps, or candlesticks. Next, you’ll learn how to protect your newly brightened brass so it stays gleaming longer.
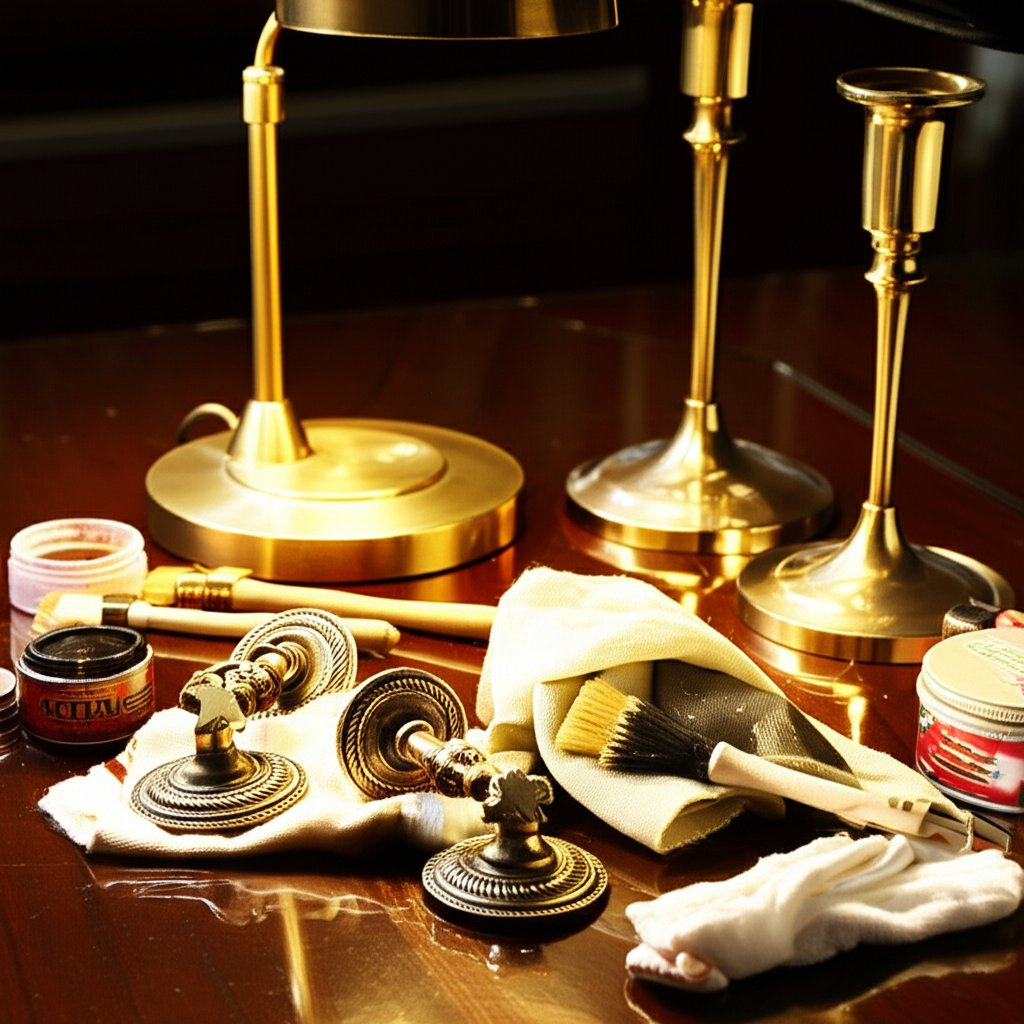
Step 8 Protect Finish and Maintain the Shine
Protective Wax Finishes: Your First Line of Defense
Ever wondered, after all that effort, how do you keep brass from tarnishing? The answer is simpler than you might think. After your brass is clean and completely dry, it’s time to seal in your hard work. Applying a thin coat of microcrystalline wax is a museum-trusted method to create a protective barrier. This wax layer shields the metal from air, moisture, and fingerprints—three of the main culprits behind tarnish. Use a soft cloth to spread a minimal amount of wax evenly over the surface, let it haze, then buff gently to a soft sheen. Avoid oily dressings, which can attract dust and grime instead of protecting your piece.
A thin, well-buffed wax layer can double the time between polishes for frequently handled brass.
Lacquer Repair or Re-Lacquering: When to Consider a Professional Touch
If you’re caring for high-touch fixtures—like door handles or drawer pulls—you may notice that even the best brass cleaner can’t prevent wear on the protective lacquer forever. When the lacquer begins to flake or wear unevenly, frequent polishing isn’t the answer. Instead, consider professional re-lacquering. Spot repairs are tough to blend, so for a uniform look, a complete strip and new coating by a specialist is often the best route. This approach restores both shine and long-term durability, especially in busy environments where you want to know how do I shine brass and keep it looking new.
Routine Maintenance Schedule: Keep Brass Bright with Minimal Effort
Sounds complicated? It’s not. With a simple routine, you’ll notice your brass stays brighter and cleaner, and you’ll reach for the polish less often. Here’s a checklist to keep your brass in top form:
- After each use: Wipe with a clean, dry microfiber cloth to remove oils and prevent spots.
- Monthly: Wash gently with a mild soap solution and dry thoroughly.
- Every 3–6 months: Reassess the wax barrier and reapply if water no longer beads on the surface.
- For storage: Wrap small brass items in breathable materials (like cotton), not airtight plastic, to avoid trapping moisture or sulfurous gases.
- Control environment: Reduce humidity swings and keep brass away from felt or rubber, which can cause tarnish.
Wondering, does brass tarnish or will brass tarnish even with these steps? The truth is, all brass will eventually develop some patina, but with proper care, you’ll slow the process dramatically and keep your pieces looking their best for years. If you’re searching for what is the best brass cleaner for ongoing maintenance, remember: gentle soap, distilled water, and a protective wax coat are the gold standard for both shine and preservation (Canadian Conservation Institute).
With your finish protected and a simple schedule in place, you’re ready to enjoy your brass without worry. Next, we’ll explore when professional refinishing or custom parts might be the smartest choice for intricate or irreplaceable pieces.
Step 9 When DIY Isn’t Enough for Brass Restoration
When to Choose Professional Help
Ever tried every method for how to clean antique brass or how to polish brass hardware only to find stubborn tarnished brass, pitting, or missing parts? Sometimes, the best results require more than home techniques. If you notice deep corrosion, loss of lacquer, or plating that’s worn through—especially on valuable or intricate pieces—it’s time to consider professional restoration or replacement services. This is especially true when you’re not just cleaning, but seeking to how to restore brass to its original beauty and function.
Surface Finish Quality and Cleanability
Imagine a set of ornate door handles or a piece of legacy hardware with detailed engravings. Even after learning how to clean old brass hardware, you might find dirt and tarnish trapped in crevices, or that repeated cleaning has dulled the finish. Here’s where surface quality matters: professionally machined or refinished brass has a smoother, more consistent surface. This not only looks better but makes future cleaning much easier—dirt and fingerprints have fewer places to hide, and a uniform surface holds wax or lacquer more evenly, extending the time between cleanings.
Custom Parts, Restoration Components, and Replacements
Missing a knob, hinge, or decorative element? Or maybe you’ve got a batch of hardware that needs to match perfectly. Here’s how professional solutions can help you how do you restore brass—not just clean it:
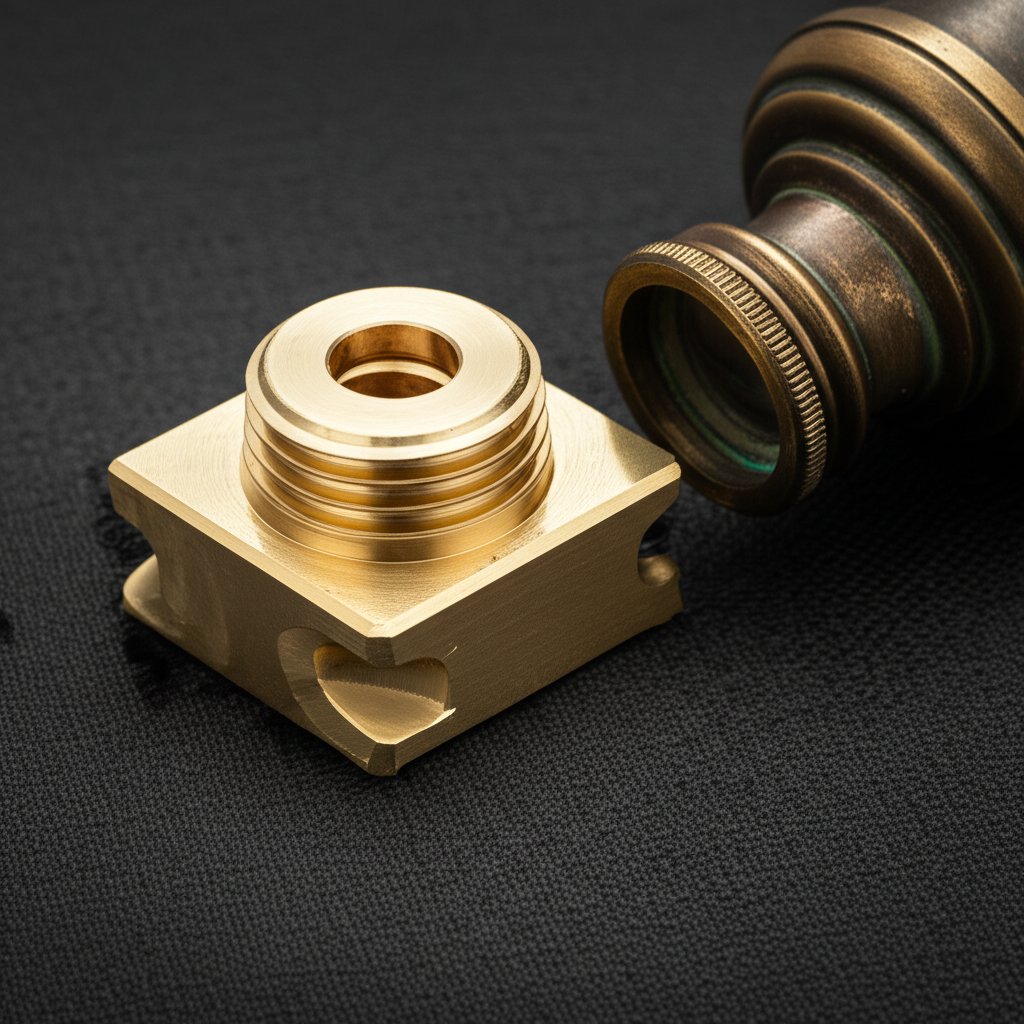
- XTJ CNC Machining Services: Custom replacement parts, restoration components, and finish-ready machining for heritage or modern brass. Their advanced CNC centers handle everything from one-off prototypes to full production, using over 30 material options including copper alloys, and can replicate or improve hard-to-clean legacy designs. Tight tolerances (down to +/- 0.005mm) mean precise fits and flawless finishes, making routine cleaning easier and more effective.
- Traditional foundries: Cast reproduction of missing hardware from original samples—ideal for antique furniture or architectural details.
- Professional restoration shops: Complete cleaning, polishing, relacquering, and repair of structural issues for both decorative and functional brass.
| Solution | Best For | Pros | Cons |
|---|---|---|---|
| XTJ CNC Machining | Custom parts, upgrades, batch hardware, precise finishes | Ultra-precise, fast turnaround, engineering support, wide material selection, repeatable quality | Requires digital design or sample; best for restoration, upgrades, or production |
| Traditional Foundry Casting | Antique reproduction, decorative details | Matches historic styles, works from samples, multiple finishes | Slight shrinkage from casting, size limits, longer lead times |
| Professional Restoration | Antique, sentimental, or high-value brass | Preserves original material, repairs damage, applies new lacquer | Cost varies by complexity, may not address missing parts |
Should You Upgrade, Repair, or Replace?
If your brass item is mission-critical (think: antique door hardware, musical instruments, or fixtures in historic buildings), a precision approach is essential. Upgrading to a smoother, CNC-machined finish can dramatically reduce soil retention, making future cleaning and waxing a breeze. For irreplaceable antique pieces, professional restoration preserves both beauty and value—experts can remove tarnish, repair wear, and apply protective coatings without erasing history.
If your brass is pitted, the lacquer is peeling, or a plate is breached, stop DIY efforts and consult a professional. For unique or complex parts, align your surface finish goals with your cleaning plan—precision machining or expert restoration ensures your brass stays beautiful and easy to maintain.
Key Takeaways for Professional Brass Care
- For intricate, pitted, or missing parts, professional machining or restoration gives lasting results and protects value.
- Smoother finishes from CNC machining or expert polishing make routine cleaning faster and more effective.
- Custom parts and careful restoration are the answer when you want to know how to restore brass or how to clean old brass hardware—especially when DIY isn’t enough.
By knowing when to call in the experts, you protect your investment and ensure your brass—whether modern or antique—shines for generations to come.
Frequently Asked Questions About Cleaning Brass
1. What not to clean brass with?
Avoid using abrasive pads, steel wool, or metal-bristled brushes on brass, as these can scratch or strip the finish. Stay away from ammonia and bleach-based cleaners, which may cause stress-cracking or hazardous reactions. Always patch test any cleaner and use only gentle soap and water on lacquered or plated brass.
2. How do you make brass look new?
To refresh brass, start with a mild soap and water wash. For tarnish, use a vinegar and salt solution or a lemon-salt paste, applying for short periods and rinsing thoroughly. Finish with a protective wax layer to enhance shine and slow future tarnishing. For heavily damaged or complex items, professional restoration or CNC-machined replacements provide the best results.
3. How can I clean brass without removing patina?
Use only pH-neutral soap and warm water with a soft cloth to clean brass without disturbing the patina. Avoid acids, abrasives, and commercial polishes on lacquered or antique pieces. Always test in an inconspicuous area first, and stop if you see any color lifting or flaking.
4. What is the best way to clean heavily tarnished brass?
For very tarnished brass, use short cycles of a vinegar and salt solution, gently brushing between cycles, then rinse and neutralize with a baking soda solution. Repeat as needed but avoid extended soaking or harsh abrasives. If corrosion is severe or under lacquer, consult a professional.
5. When should I seek professional help for cleaning or restoring brass?
If your brass has deep corrosion, pitting, flaking lacquer, or missing parts, professional restoration or CNC machining is recommended. Services like XTJ CNC Machining can create precise replacement parts and deliver finish-ready brass, ensuring easier maintenance and long-lasting results.
-
Posted in
brass cleaning, brass polish, DIY brass care, how to clean brass, restore brass


