
How Do I Clean Aluminium: 9 Steps To Remove Oxidation Safely
Step 1: Identify Aluminum Surface Type and Prepare Safely
Spot the Aluminum Type in Seconds
When you’re ready to start cleaning aluminum, it’s crucial to know what you’re working with. Aluminum naturally forms a thin oxide layer that protects it from further corrosion, but this same layer can trap stains, develop aluminum oxidation, or become pitted over time. Not all aluminum surfaces are created equal—raw, anodized, polished, painted, and cast aluminum each require a tailored approach. Using the wrong method can dull, scratch, or even permanently damage the finish.
| Surface Type | Typical Issues | Safe Methods | Methods to Avoid | Expected Results |
|---|---|---|---|---|
| Raw/Mill Aluminum | Oxidation, fingerprints, water spots | Mild soap, non-scratch pads, gentle household acids | Strong alkalis, steel wool, harsh abrasives | Clean, slightly matte finish; visible tool marks may remain |
| Anodized Aluminum | Chalking, fading, light stains | Mild soap, diluted vinegar, soft cloth | Oven cleaner, abrasive pads, strong acids | Restored color, preserved protective layer |
| Polished Aluminum | Light oxidation, fingerprints | Mild soap, microfiber, specialized polish | Abrasives, alkaline degreasers, rough pads | Bright, reflective surface; minimal scratches |
| Cast Aluminum | Pitting, heavy oxidation, embedded soils | Mild acid, nylon brush, targeted brightener | Chloride-based cleaners, steel brushes | Cleaner surface, some texture may remain |
| Painted/Clear-Coated | Surface stains, fading, chalking | Mild soap, soft sponge, water rinse | Solvents, abrasive pads, acid/alkaline washes | Preserved finish, improved gloss |
| Cookware | Baked-on oils, discoloration, water marks | Baking soda, gentle acids, non-scratch pads | Dishwasher (for raw), steel wool, oven cleaner | Clean, food-safe surface; restored shine |
Match Soil Level to the Right Method
Sounds complex? Here’s a quick decision flow to help you choose the best way to clean aluminum without risking damage:
- If you see a rainbow film or chalky white residue, suspect aluminum oxidation.
- Brown or white rings? Most likely hard-water stains—use a mild acid rinse.
- Cloudy, rough patches or pitting? That’s likely corrosion—proceed gently and consider professional advice for deep damage.
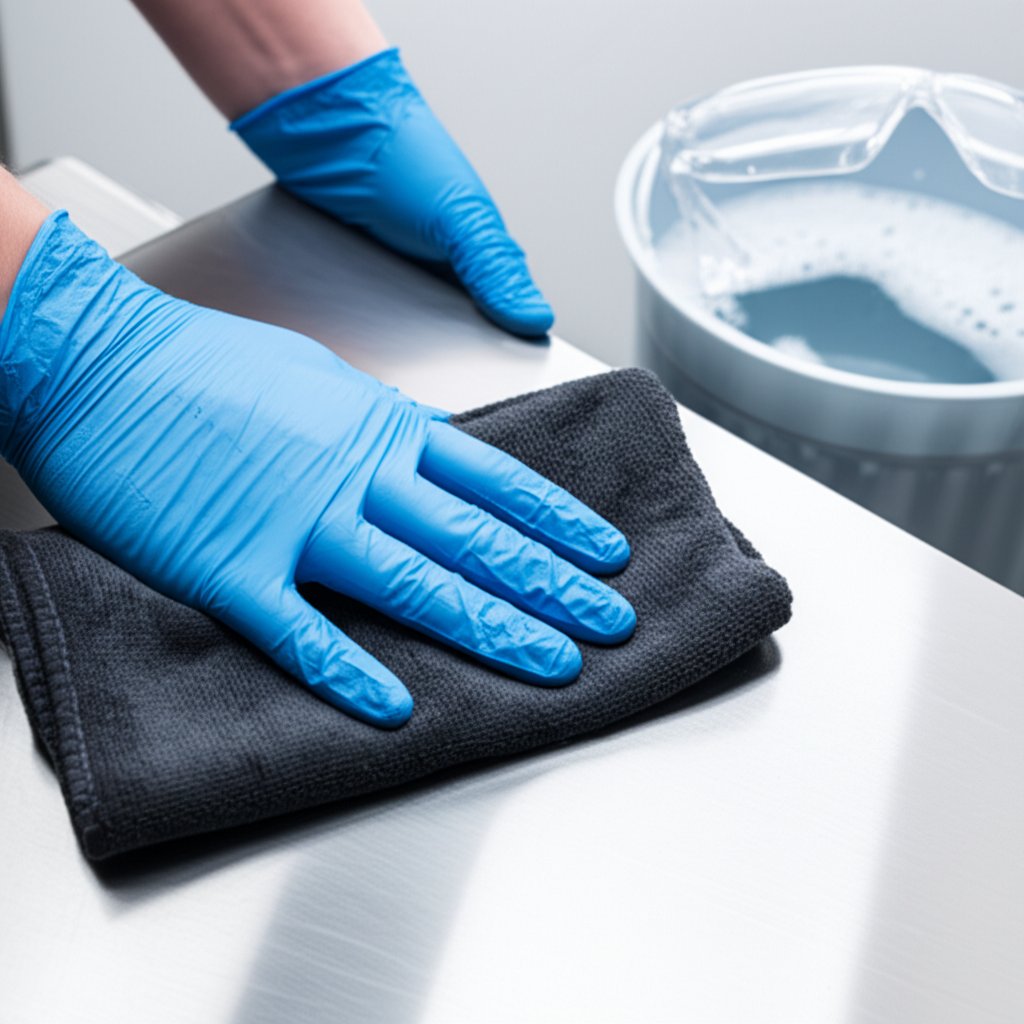
Safety First for Aluminum Cleaning
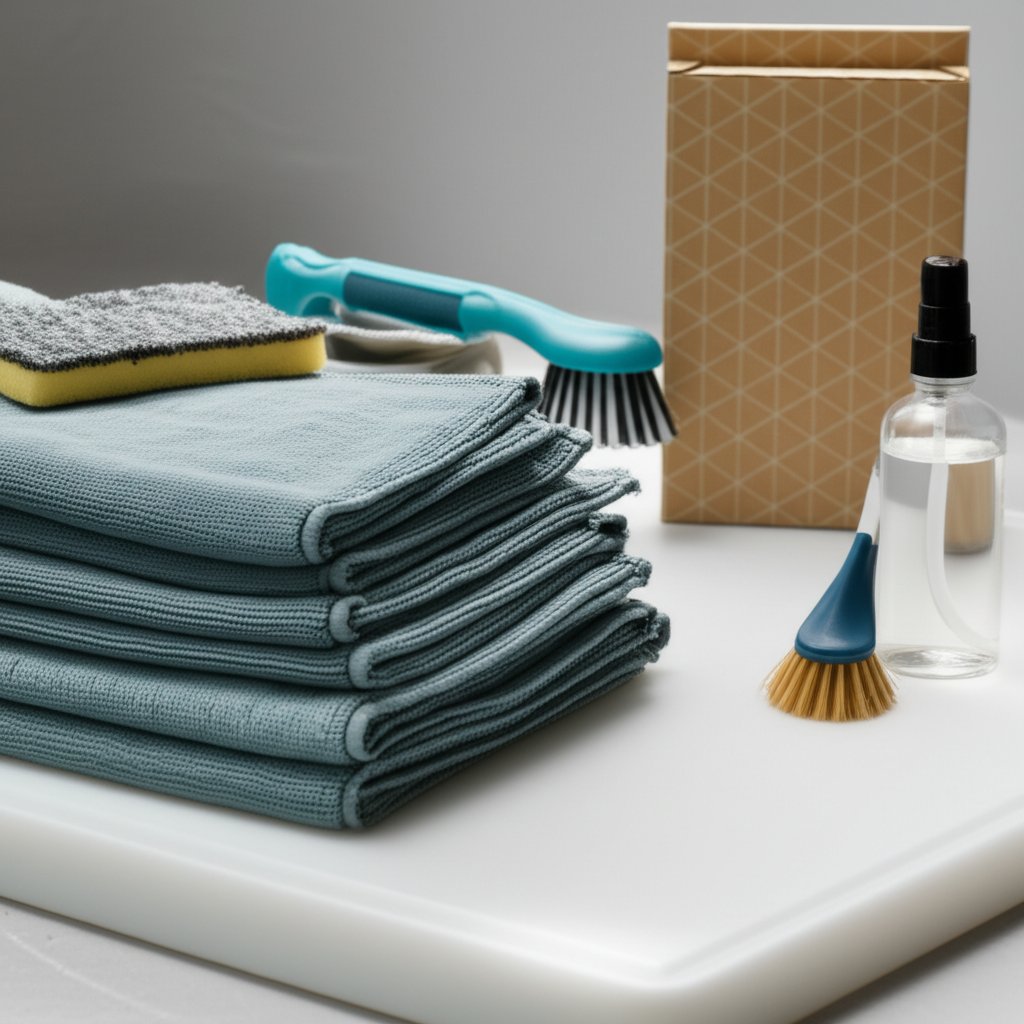
Before you dive in, gather the right personal protective equipment (PPE) and tools:
- Nitrile gloves (protects your skin from cleaners and contaminants)
- Eye protection (splashes can happen quickly)
- Good ventilation (especially with household acids or commercial products)
- Non-scratching pads (nylon or microfiber—never steel wool)
Always start mild, escalate only if needed. Test a small, inconspicuous area first to ensure the cleaning method won’t harm your aluminum’s finish.
For industrial or outdoor jobs—like trailers, siding, or wheels—be ready to use more rinse water and manage runoff responsibly. These surfaces often have more severe buildup and need a bit more care with both cleaning and rinsing.
This guide will walk you through a progression of cleaning steps, from mild soap and water to household acids or alkalis, then to aluminium cleaner and brightener products, and finally to mechanical polishing. Each method is clearly labeled for surface compatibility, so you can confidently answer how do I clean aluminium no matter what type you have. If you’re ever in doubt, avoid strong chlorides and harsh abrasives—these can do more harm than good.
Ready to get started? Let’s move on to the safest prewash and test-spot techniques to set the stage for spotless, damage-free results.
Step 2: Prewash and Test Spot the Safe Way
Do a Gentle Wash That Preserves Finishes
Before you jump into deep cleaning or tackling stains, every aluminum surface benefits from a universal prewash. Imagine prepping your kitchen counters before cooking—removing crumbs and grease first makes every step that follows easier and more effective. The same logic applies to aluminum cleaning: a gentle, thorough wash clears away loose dirt, dust, and oils, so targeted treatments can reach the real problem.
What cleans aluminum safely for all types? Start with a basic wash mix:
- Fill a bucket with warm water.
- Add a few drops of mild dish soap or a gentle, non-etching detergent (avoid harsh chemicals).
- Agitate the solution lightly to create suds.
- Dip a soft microfiber cloth or non-scratch sponge into the solution and gently wipe the surface.
For textured or cast aluminum, a soft-bristle brush helps dislodge debris without scratching. For anodized or polished aluminum, stick with a non-scratch sponge or microfiber—never use steel wool or abrasive pads, which can leave permanent marks. Think of your tools as your alu cleaner arsenal: gentle is always better.
Smart Test-Spot to Avoid Costly Damage
Choose an inconspicuous area, apply the mildest solution, and limit dwell time to 30–60 seconds unless manufacturer guidance says otherwise. Rinse and inspect under good light. Log what worked for consistency across the rest of the surface.
This step is your insurance policy. Even the best aluminum cleaners can react differently on various finishes or older coatings. Testing first helps you avoid surprises—like discoloration, dulling, or residue that’s hard to remove. If you notice any negative effects, switch to an even milder method or consult the manufacturer’s recommendations.
- Soft-bristle brush: Best for cast or textured aluminum, helps lift dirt from crevices.
- Non-scratch sponge or microfiber cloth: Ideal for anodized and polished surfaces, prevents swirl marks.
- Avoid steel wool or abrasive pads: These can scratch and dull any aluminum finish.
Neutralize and Rinse Like a Pro
Once you’ve washed and spot-tested, rinse the aluminum thoroughly with clean water to remove all soap and loosened soil. This step is crucial—leftover detergent or cleaner residue can cause streaks, water spots, or even long-term damage to coated finishes (see official cleaning guidelines). After rinsing, dry immediately with a clean microfiber towel to prevent new water spots from forming.
Here’s a quick checklist to keep your process safe and effective:
| Step | Best Tool | Key Tip |
|---|---|---|
| Prewash | Microfiber/sponge | Gentle agitation, avoid abrasives |
| Test-spot | Same as surface | Short dwell, good light, log results |
| Rinse | Clean water | Thorough removal of all residue |
| Dry | Microfiber towel | Prevents water spots |
Avoid these common mistakes:
- Never mix acids and bleach—this can create toxic fumes.
- No oven cleaner on anodized or polished aluminum—these are too harsh and can ruin finishes.
- Avoid high-alkaline degreasers on bare aluminum unless you can neutralize and rinse immediately.
- Don’t let cleaning solutions dry on the surface—always rinse promptly.
By following these steps, you set the stage for more advanced treatments, like removing oxidation or polishing. A proper prewash means your aluminum scrubber and any specialized cleaners aluminum will work more effectively, and your finish stays protected. Next, we’ll tackle how to remove light stains using household staples like vinegar and baking soda—so stay tuned for the next step in restoring your aluminum’s shine.
Step 3: Remove Light Stains with Vinegar or Baking Soda
Vinegar Solutions That Lift Mineral Stains
Ever notice dull spots or stubborn water marks on your aluminum, even after washing? That’s where household staples like vinegar come in handy. If you’re wondering how to clean aluminium with vinegar, the answer is refreshingly simple. Mix equal parts white vinegar and water—this 1:1 ratio is a proven, gentle formula for removing fingerprints, water spots, and light tarnish from most aluminum surfaces. For anodized aluminum, dilute the vinegar further (try 1 part vinegar to 3 parts water) to avoid harming the protective layer.
- Dip a soft cloth or non-scratch sponge into the solution.
- Wipe the affected area, focusing on mineral stains or cloudy spots.
- Limit the contact time to just a minute or two—don’t let the solution dry on the surface.
- Rinse thoroughly with clean water.
Vinegar cleaning aluminum is especially effective for hard-water rings and light oxidation, but always start mild and increase strength only if needed. For cookware, you can even simmer the vinegar solution inside pots to lift interior stains.
Baking Soda Pastes Without Scratching
Looking for how to clean aluminum without scratching? Baking soda is your go-to. It acts as a gentle abrasive, making it ideal for removing light soils and tarnish without cutting into the finish. To make a cleaning solution with baking soda:
- Combine baking soda with just enough water to form a spreadable paste.
- Apply the paste to the stain using a soft pad or microfiber cloth.
- Gently rub in a circular motion—minimal pressure is key, especially on polished or anodized aluminum.
- Rinse well with water to remove all residue.
For best results, try warming the aluminum slightly (never hot) before applying the paste—this can help loosen grime and speed up the process.
| Method | Dilution | Dwell Time | Best For | Avoid On |
|---|---|---|---|---|
| Vinegar Rinse | 1:1 (stains); 1:3 (anodized) | 1–2 minutes | Water spots, light oxidation | Unsealed, etched, or sensitive coatings |
| Baking Soda Paste | Thick paste (water + soda) | 2–5 minutes | Light tarnish, fingerprints, cookware | Rough castings (test first), deep scratches |
If the surface clouds during vinegar use, stop, rinse, and switch to a milder dilution.
Rinse and Neutralize to Keep Shine
No matter which method you choose, always rinse the aluminum thoroughly with clean water after cleaning. This step removes any acidic or alkaline residue that could dull the finish. For extra sparkle, finish with a quick wipe using a microfiber towel. If there’s any lingering film, a light pass with a cloth dampened in isopropyl alcohol can help—just be sure it’s compatible with your surface type.
Both vinegar on aluminum and baking soda methods are gentle enough for most household items, but always spot-test first. By using these time-tested solutions, you’ll restore shine and clarity—setting up your aluminum for deeper oxidation removal if needed. Next, we’ll explore how to tackle more stubborn oxidation and brighten your aluminum surfaces safely.
Step 4: Remove Oxidation from Aluminum and Brighten Gently
Spot and Grade Oxidation Correctly
Ever run your hand over aluminum and notice a chalky, dull film or even grayish-white patches? That’s a classic sign of oxidation. Light oxidation appears as a faint haze or powder, while heavier oxidation can look like a thick, textured layer—sometimes even pitted or rough to the touch. Recognizing the severity is key before deciding how to remove oxidation from aluminum safely. If the surface is just dull, mild methods usually work. But if you see deep white or gray buildup, you’ll need a stronger approach to restore the shine.
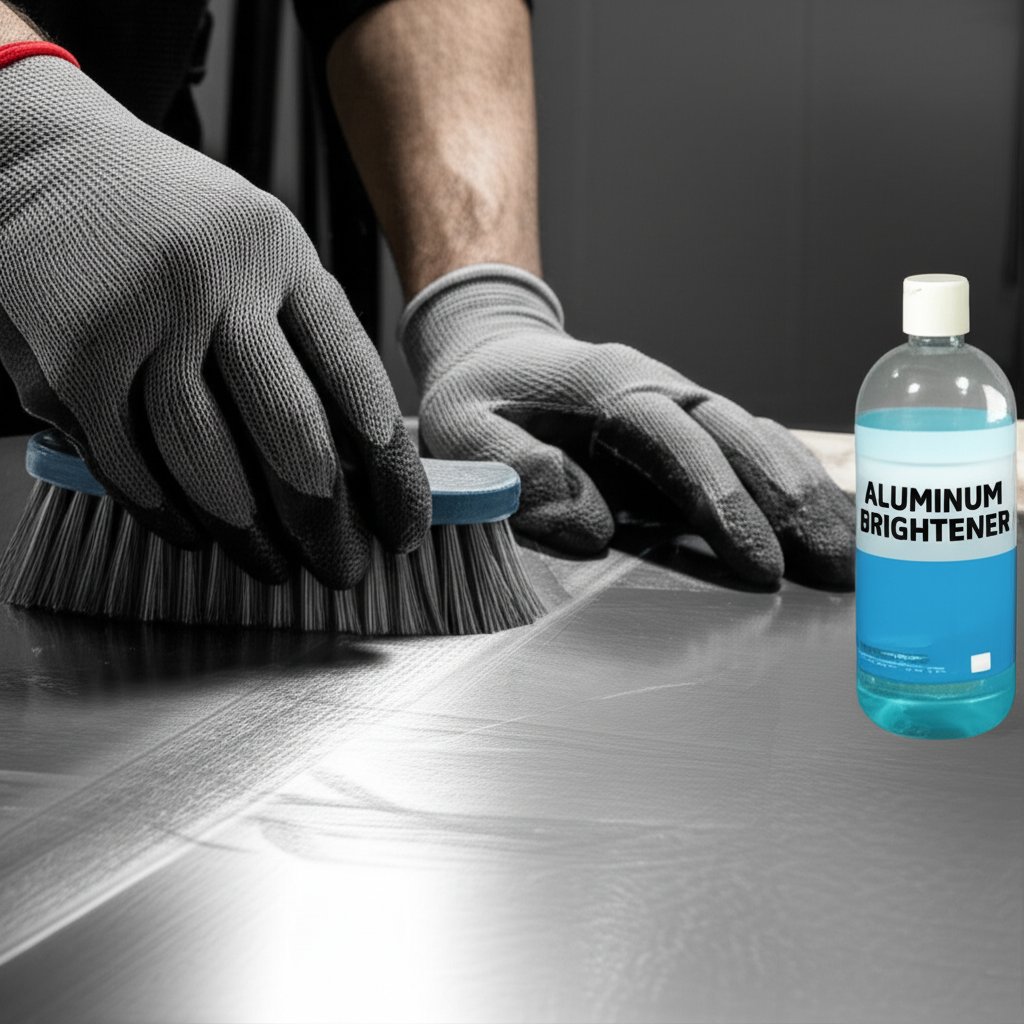
Household vs Commercial Oxidation Removers
Once you’ve identified oxidation, it’s time to choose your cleaning path. Imagine you’re choosing between a gentle hand soap and a heavy-duty degreaser—each has its place, depending on the job. Here’s how to decide:
- Mild household acid approach: For light to moderate oxidation, mix lemon juice or diluted vinegar with water (about 1 part acid to 2 parts water). Dip a soft nylon brush or cloth into the solution and gently agitate the affected area. Limit dwell time to a few minutes, then rinse thoroughly. This method is safe for most raw, cast, or anodized aluminum when you avoid excessive scrubbing.
- Commercial aluminum brightener or aluminum oxidation remover: For heavier oxidation or stubborn stains, commercial products—often based on organic or phosphoric blends—can be highly effective. Always follow label directions, dilute as recommended, and avoid contact with glass, paint, or stainless steel. Mask off adjacent surfaces and use the product sparingly.
| Method | Pros | Cons | Typical Time/Effort | Safety Notes | Typical Outcome |
|---|---|---|---|---|---|
| Household Acid (lemon/vinegar) | Gentle, low-cost, eco-friendly, safe for anodized | May require repeat applications for heavy oxidation | 5–15 min, light scrubbing | Wear gloves, ventilate, avoid prolonged skin contact | Removes light oxidation, restores natural sheen |
| Commercial Aluminum Brightener | Fast, effective on stubborn or heavy oxidation | Can damage paint, glass, or stainless steel; harsh if overused | 2–10 min, minimal scrubbing | Full PPE, mask off sensitive areas, rinse thoroughly | Restores bright finish, removes deep stains |
| Mechanical (non-aggressive—nylon brush) | Targets tough spots, no chemicals needed | Labor-intensive, risk of scratching if too aggressive | 10–30 min, manual effort | Use gentle pressure, avoid steel wool or harsh abrasives | Removes surface oxidation, may not restore full shine |
For anodized aluminum, always stick with household acids or products labeled as safe for anodized surfaces. Avoid abrasive pads or strong chemicals, which can strip the protective layer and leave the metal vulnerable to further oxidation.
When cleaning wheels, siding, or trailers, even application is key. Start with a low-pressure pre-rinse to remove loose debris, apply your chosen aluminum cleaner evenly, allow a short dwell time, and rinse thoroughly with plenty of water. This prevents streaking and ensures all cleaning agents are removed, protecting both the aluminum and surrounding materials (see more on aluminum brightener pros and cons).
Rinse, Neutralize, and Protect
After removing oxidation, it’s essential to neutralize any acidic or commercial residue. Wash the surface with mild soap and water, then rinse again. Dry the area with a microfiber towel to prevent water spots and further oxidation. This step is especially important if you used a commercial aluminum oxidation remover or brightener, as lingering chemicals can cause dullness or damage over time.
If oxidation returns quickly, consider sealing or waxing compatible surfaces to slow reformation.
Choosing the best aluminum oxidation remover depends on your surface type and the extent of oxidation. For most household and light commercial jobs, a combination of mild acids and careful rinsing will restore shine without risk. For severe cases, commercial products provide a quick fix, but always use them sparingly and protect adjacent materials. Up next, you’ll learn how to safely tackle even heavier soils and stains using controlled acid cleaning protocols.
Step 5: Use Acid Cleaning Protocols for Heavy Soils
Choose the Right Acid for Aluminum
When you’re staring down heavy oxidation, stubborn road film, or mineral stains that just won’t budge, you might wonder: Is acid cleaning aluminium safe? The answer is yes—if you choose the right acid and follow strict safety protocols. Not all acids are created equal. For acid for aluminium cleaning, opt for citric or phosphoric acid blends specifically labeled for use on aluminum. These are effective at breaking down thick oxidation and brightening the metal without excessive risk to the base material.
Steer clear of highly aggressive acids—especially anything containing chlorides or strong mineral acids like muriatic acid. Why?
“Avoid muriatic acid on aluminum; it can blacken or pit the surface rapidly.”
This isn’t just a warning for boats and trailers: even a single application can leave aluminum streaked, etched, or permanently damaged (Aurora Marine).
Dilution, Dwell, and Brush Selection
Ready to tackle that tough buildup? Here’s a step-by-step protocol for a safe and effective acid wash aluminium process:
- Mask sensitive materials: Cover glass, paint, and non-aluminum trim to prevent accidental splashes.
- Dilute per label: Always follow the manufacturer’s recommended dilution. For example, some commercial aluminum cleaner acid products suggest 1:10 to 1:100 for fleet washing (Bio-Kleen directions).
- Pre-wet the surface: Lightly mist the aluminum with water. This helps the acid spread evenly and reduces the risk of streaking.
- Apply bottom-up for verticals: Using a low-pressure sprayer or foam brush, start at the bottom and work upward. This prevents streaks and ensures even coverage.
- Agitate gently: Use a nylon brush or non-scratch pad for light agitation—never steel wool or abrasive pads.
- Short dwell: Allow the acid to work for 30 seconds up to 5 minutes (never let it dry), depending on label guidance and soil severity.
- Immediate thorough rinse: Rinse with copious amounts of water, preferably low-pressure for industrial surfaces or trailers.
- Neutralize: Follow with a mild alkaline soap solution to neutralize any lingering acid. This is crucial for stopping hidden chemical reactions that can dull or damage the surface.
- Final rinse and dry: Rinse again, then dry with a microfiber towel to prevent new spots or streaks.
For industrial or outdoor jobs—such as acid washed aluminum trailers, marine pontoons, or siding—pay special attention to runoff management. Even coverage and prompt rinsing help prevent streaking and environmental contamination. If your product includes pressure-wash assist, follow recommended PSI and dwell times; otherwise, use conservative settings and always test first.
| Acid Type | Typical Use Case | Compatible Surfaces | Avoid On | Notes |
|---|---|---|---|---|
| Citric Acid | General brightening, moderate oxidation | Raw, cast, lightly oxidized aluminum | Polished, anodized, painted surfaces | Gentle, eco-friendly; needs thorough rinse |
| Phosphoric Acid | Heavy oxidation, fleet washing, trailers | Raw, cast, industrial aluminum | Polished, anodized, glass, steel trim | Fast-acting; follow label for dilution |
| Muriatic Acid (Hydrochloric) | Not recommended for aluminum | None | All aluminum, especially marine and trailer parts | Highly corrosive; causes pitting, streaking, whitening |
Neutralize to Stop Hidden Damage
Why is neutralization so important after an aluminium acid wash? Even trace amounts of acid left on the surface can continue to react, dulling the aluminum over time or causing corrosion. Always wash with a mild alkaline soap after rinsing, then rinse again thoroughly. This step is especially crucial for large, exposed surfaces like trailers, siding, or pontoons that see weather and road salt.
Keep in mind: repeated acid cycles can thin or dull the metal. If the aluminum is still stained or pitted after two cycles, consider moving on to mechanical polishing—especially for thick, raw, or industrial-grade surfaces. For thin or decorative finishes, consult a professional before escalating.
By following these acid cleaning protocols, you’ll restore brightness and clarity to even the toughest aluminum surfaces—without risking irreversible damage. Up next, you’ll learn how to polish and restore shine for a truly like-new finish.
Step 6: Polish and Restore Shine the Right Way
Scratch Assessment and Grit Selection
Ever wondered why your aluminum still looks dull, even after a thorough cleaning? The culprit is often micro-scratches or oxidation that scatter light and rob the metal of its natural brilliance. To truly bring back that mirror-like finish, polishing aluminum is essential—but it’s all about choosing the right approach for your surface.
Start by closely inspecting the aluminum under good lighting. If you can feel or see scratches, you’ll need to smooth them out before buffing. Here’s a practical grit ladder for raw aluminum with visible defects:
- Begin with 1000-grit wet sandpaper for moderate scratches.
- Progress to 1500-grit, then finish with 2000-grit for a silky surface.
- Always sand with water to prevent clogging and overheating.
For polished or decorative aluminum, skip sanding unless you’re correcting specific flaws. Jump straight to a fine aluminum polish on a soft applicator to avoid unnecessary abrasion.
Hand vs Machine Polishing: Which Is Best?
Now that your surface is smooth, it’s time to choose between how to polish aluminum by hand or using a machine. Each method has its strengths:
| Method | Typical Use | Risk Level | Finish Outcome |
|---|---|---|---|
| Hand Rub (Microfiber or Foam Pad) | Small, lightly tarnished items; touch-ups | Low (minimal risk of over-polishing) | Restores shine, maintains control |
| Drill with Foam Polishing Cone | Wheels, trim, large flat or curved surfaces | Moderate (watch pressure and speed) | Fast, even results; deeper shine |
| Dual-Action Polisher | Panels, large decorative pieces | Moderate to High (requires practice) | Mirror finish, removes haze and fine scratches |
For most DIYers, using a microfiber or soft foam pad by hand is the best way to polish aluminum for small jobs. For larger or heavily oxidized surfaces, a variable-speed drill with a polishing cone or a dual-action polisher can save time and effort. Avoid wool pads or harsh abrasives—especially on mirror finishes—as they can create new scratches or swirl marks.
Polishing Technique Tips for a Flawless Finish
- Work in small sections—this helps you maintain control and check your progress.
- Use minimal pressure; let the best metal polish for aluminum and pad do the work.
- Keep pads clean—residue buildup can cause hazing.
- Inspect your work under cross-lighting to spot any missed areas or swirls.
- If using a machine, stick to low-to-moderate speeds and light pressure to avoid overheating.
After polishing, wipe away all residue with a clean microfiber towel. If you’re after a true mirror finish, repeat the process with a finer polish or compound as needed.
Seal and Maintain the Gloss
Once you’ve achieved the desired shine, it’s important to protect your work. Apply a compatible sealant or wax designed for metal surfaces—this will slow down future oxidation, repel water, and make routine cleaning easier. Many pros recommend a ceramic coating for wheels or outdoor aluminum, but even a traditional wax can extend the life of your finish (see expert tips).
On anodized aluminum, polishing abrasives can cut through the anodic layer—use only anodized-safe cleaners.
By following these steps, you’ll not only restore the luster but also make ongoing maintenance a breeze. Polished aluminum resists staining and makes every cleaning session faster and more effective. Up next, we’ll show you how to tackle cookware and pans for a like-new kitchen shine.
Step 7: Clean Aluminum Pans and Cookware Like New
De-glaze Baked-On Oils Safely
Ever pull out a favorite pan only to find stubborn, baked-on oil or a darkened tint that just won’t budge? If you’re wondering how to clean aluminum pans without scratching or ruining their finish, you’re not alone. Aluminum cookware is prized for its even heating, but it’s also susceptible to discoloration, mineral stains, and tough residues if not cleaned with care.
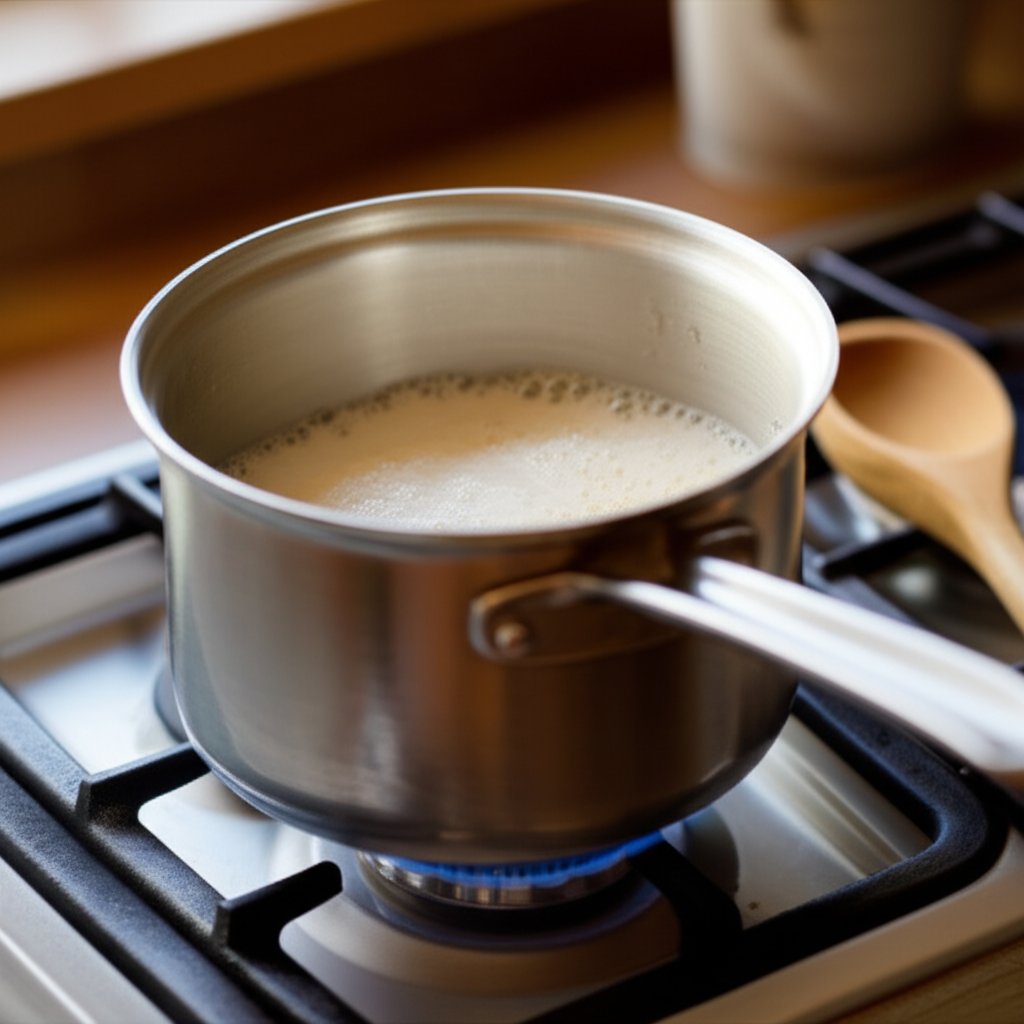
- Boil-and-Lift Method: Fill your pan with enough water to cover the soiled area. Add a tablespoon of baking soda. Bring to a gentle simmer for 10–15 minutes. You’ll notice residue loosening as it heats. Let the pan cool, then gently scrape away loosened bits with a wooden or nylon utensil. Rinse thoroughly and dry. This method is ideal for removing stuck-on food and grease without damaging the surface (Martha Stewart).
- Paste-and-Rest for Stubborn Spots: Mix baking soda with water to create a thick paste. Spread it over any remaining stains on a cool surface. Let it sit for 10–15 minutes. Using a non-scratch sponge, gently rub in a circular motion. Rinse well and dry. This is especially effective for lifting stains on sheet pans or the bottom of pots.
- Exterior Discoloration Fix: For heat tint or darkened exteriors, wipe down the outside of the cookware with a solution of one part white vinegar to two parts water. Rinse thoroughly and dry. For raw aluminum, consider re-seasoning after cleaning to restore shine and protect the surface.
What to Use (and What to Avoid) on Different Aluminum Cookware
| Cookware Type | Safe Methods | Avoid | Notes |
|---|---|---|---|
| Raw Aluminum | Baking soda boil, paste, diluted vinegar wipe | Dishwasher, steel wool, oven cleaner | Hand-wash only; dry immediately to prevent water spots |
| Aluminum-Clad | Mild soap, baking soda paste, non-scratch sponge | Harsh abrasives, metal utensils | Check for manufacturer care tips |
| Anodized Aluminum | Mild soap, soft sponge, gentle vinegar solution (well diluted) | Oven cleaner, abrasive pads, acidic soaks | Preserve anodized layer—avoid strong acids |
Restore Shine Without Harsh Abrasives
It’s tempting to reach for heavy-duty scrubbers when facing burnt-on messes, but resist the urge—steel wool and harsh cleaners can scratch or permanently dull your cookware. Instead, stick to non-scratch sponges, wooden or nylon tools, and gentle cleaning agents. For an extra boost, try simmering a mixture of water and a splash of vinegar in the pot, then rinse and dry thoroughly. This can help dissolve mineral deposits and restore a bright finish (KaTom Restaurant Supply).
Prolonged acidic foods can dull raw aluminum—neutralize and rinse after cleaning.
Preventive Care for Long-Lasting Shine
- Cook with low to medium heat—high temperatures can cause discoloration and warping.
- Hand-wash promptly after use with mild soap and a soft sponge.
- Dry immediately with a soft towel to prevent water spots and mineral buildup.
- Never use the dishwasher for raw aluminum; harsh detergents and high heat can cause irreversible damage.
- Store cookware carefully, keeping lids off to avoid odor buildup and scratches.
By following these simple protocols, you’ll keep your aluminum pans and pots looking and performing like new. Whether you’re tackling cleaning aluminum pans after a big meal or seeking the right aluminum pot cleaner for everyday care, these gentle methods deliver results without risk. So, next time someone asks, "How do you clean an aluminum pan?"—you’ll have the answer and the shine to prove it. Up next, discover when it’s time to call in the professionals or specify easier-to-clean finishes for your next kitchen upgrade.
Step 8: Call in Pros and Specify Finishes That Clean Easier
Know When to Call a Pro
Ever found yourself scrubbing and wondering, “Is this as good as it gets?” Sometimes, no matter how many aluminum trailer wash cycles or hours spent cleaning aluminum siding, you just can’t get the results you want. That’s when it’s time to consider professional help or even a new approach altogether. Here’s how to know when DIY should give way to expert intervention:
- Severe pitting or deep corrosion: If you see rough, cratered areas that don’t respond to household or commercial cleaners, professional assessment is essential. These spots may need mechanical resurfacing or replacement to restore both appearance and structural safety.
- Safety-critical components: Think ladders, handrails, structural beams, or parts of vehicles (like semi-truck tanks or trailer frames). Any sign of deep oxidation, cracks, or material loss in these areas should prompt a call to a certified technician or fabricator.
- Mirror-level polish on large surfaces: Restoring aluminium to a flawless, high-gloss finish across big panels or wheels is a job for pros with the right equipment and compounds—especially when uniformity matters.
- Fleet-scale or industrial brightening: When you’re responsible for dozens of trailers, siding runs, or industrial equipment, pros can deliver consistent, efficient results while managing runoff and environmental compliance.
Specify Machining and Finishes for Easier Cleaning
Imagine if your next aluminum project was designed from the start to resist stains, clean up fast, and keep its shine. The secret? Choosing the right alloy, machining process, and finish. Here’s how smart specification makes restoring aluminium easier and prolongs the life of your investment:
- Alloy selection: Some aluminum grades, like 5083 for marine or 6061 for general use, offer superior corrosion resistance and are easier to clean over time.
- Surface finish: Anodizing not only boosts corrosion resistance but also makes cleaning a breeze by sealing the surface. Powder coating and matte mechanical finishes (like sandblasting) can further reduce staining and spotting.
- Machining precision: High-tolerance CNC machining ensures smooth surfaces that resist soil buildup and are easier to maintain. Tight tolerances also mean replacement parts fit perfectly, reducing the risk of gaps where dirt and moisture collect.
Specifying these details up front—whether for a new railing, a replacement panel, or an industrial part—means fewer headaches down the road and less need for aggressive cleaning protocols.
From Prototype to Production: Who to Call for Help
So, who should you turn to when it’s time for expert help or a new part? Here’s a quick comparison of your best options, starting with a service designed for both rapid prototyping and full-scale production:
- XTJ CNC Machining Services: If you need parts made from scratch or want to upgrade to an easier-to-clean finish, XTJ offers advanced 4- and 5-axis CNC machining with ultra-tight tolerances (down to +/- 0.005mm), fast lead times (as quick as 3 days), and a huge selection of materials and finishes. Their ISO 9001:2015 and IATF16949 certifications ensure quality, and dedicated engineering support helps you choose the right alloy and surface treatment for your application—perfect for both prototypes and production runs.
- Local metal refinishers: For cosmetic touch-ups, spot repairs, or restoring shine to decorative features, a local refinisher can often handle one-off jobs or small batches. They may also offer mobile aluminum trailer wash or siding cleaning for larger surfaces.
- Industrial cleaning contractors: When you’re dealing with fleets or large-scale facilities—think best aluminum cleaner for semi trucks or acid wash aluminum trailer jobs—contractors with specialized equipment and environmental controls are the way to go.
The easiest aluminum to clean is the one specified with the right finish from the start.
By knowing when to call in the pros and how to specify finishes that make cleaning simpler, you’ll save time, money, and frustration in the long run. Whether you’re tackling polished aluminum cleaner jobs at home or overseeing a fleet of trailers, these strategies ensure your aluminum always looks its best. Up next, we’ll wrap up with a quick-reference guide for prevention and troubleshooting, so you’re always ready for the next challenge.
Step 9: Prevent and Troubleshoot with Quick References
Severity Tiers and Escalation: Know What You’re Facing
When it comes to cleaning oxidised aluminium, it’s easy to get overwhelmed by the variety of stains, tarnish, and corrosion you might encounter. But what if you could size up the problem at a glance and choose exactly the right remedy? That’s what this quick-reference guide is all about. Imagine you’re inspecting your patio furniture, boat, or window frames—do you see a faint haze, a chalky film, or deep pitting? Each scenario points to a different cleaning approach and level of urgency.
| Severity | Typical Signs | Recommended Method | Expected Result | When to Seek Pro Help |
|---|---|---|---|---|
| Light Tarnish | Faint haze, minor water spots | Vinegar or baking soda (see Step 3) | Restored clarity, no abrasion | Rarely needed |
| Moderate Oxidation | Chalky film, mild discoloration | Anodized-safe brightener or diluted acid (see Step 4) | Renewed shine, minimal risk | If chalking persists after two cycles |
| Heavy Oxidation / Pitting | Thick buildup, rough or pitted texture | Acid protocol + mechanical polish (see Steps 5–6) | Significant improvement, some texture may remain | Deep pitting, structural parts, or no improvement after treatment |
By matching the level of aluminium tarnish or corrosion to the right cleaning method, you avoid over-treating and preserve your finish. If you’re ever unsure—especially with tarnished aluminium that shows deep pits or cracks—don’t hesitate to consult a professional for aluminum corrosion removal.
Preventive Habits That Actually Work
Imagine never having to deal with severe oxidation again. The secret? Consistent, simple maintenance. Here’s a checklist you can follow to keep your aluminum looking its best year-round:
- Rinse after exposure: After your aluminum is exposed to road salt, coastal air, or industrial fallout, rinse thoroughly with clean water. This removes corrosive residues before they can cause damage.
- Dry immediately: Use a microfiber towel to dry surfaces and prevent new water spots or mineral rings.
- Apply a compatible sealant: For raw or polished aluminum, a sealant or wax creates a barrier that slows oxidation and makes future cleaning easier.
- Avoid harsh alkaline or chlorine cleaners: These can corrode finishes and accelerate future staining.
- Schedule periodic inspections: Check for early signs of oxidation or pitting—catching problems early means easier fixes.
Consistent light maintenance beats occasional heavy restoration—save time and preserve finish.
Quick-Reference Tables You Can Save
Want a side-by-side comparison of your cleaning options? Here’s a table to help you decide whether to reach for household staples, commercial products, or mechanical polishing when facing cleaning aluminium corrosion or trying to remove aluminum corrosion:
| Method | Pros | Cons | Time | Safety | Outcome | Surface Compatibility |
|---|---|---|---|---|---|---|
| Household (vinegar, baking soda) | Gentle, low cost, accessible | May require repeat treatments | 5–20 min | Minimal PPE, spot-test first | Removes light tarnish, safe for most finishes | All except highly polished or sensitive coatings |
| Commercial Brightener | Fast, effective on moderate oxidation | Can damage paint/glass if misused | 2–10 min | Full PPE, ventilate, mask off adjacent surfaces | Restores shine, removes deeper stains | Raw, cast, anodized (if labeled safe) |
| Mechanical (polish, non-scratch pads) | Targets stubborn spots, no chemicals | Labor-intensive, risk of scratching | 10–30 min | Eye protection, gloves, spot-test | Removes heavy oxidation, may not restore full gloss | Raw, thick, or industrial aluminum |
For scientific or industrial applications, research shows that nitric acid cleaning (as detailed in this corrosion study) can effectively remove aluminum oxide with minimal base metal loss—especially when ultrasound is used. However, such protocols should be reserved for professionals or lab settings due to the hazards and precision required.
Keep a Simple, Effective Maintenance Kit
Don’t wait until stains or corrosion set in. Assemble a basic kit for regular care:
- Mild soap (dish or gentle detergent)
- Microfiber towels and non-scratch pads
- Nylon brush for textured or cast aluminum
- White vinegar and baking soda for spot cleaning
- Anodized-safe brightener (if you have anodized surfaces)
Always follow conservative dilution and dwell recommendations if using commercial products, and rinse thoroughly. For any new cleaner or method, spot-test and check manufacturer or MSDS guidance when available.
With these quick references and habits, you’ll spend less time troubleshooting and more time enjoying spotless, gleaming aluminum surfaces—whether you’re tackling aluminum corrosion removal at home or on the job. Remember: prevention and prompt action are your best allies in keeping aluminum looking its best for years to come.
Frequently Asked Questions About Cleaning Aluminium
1. What should you not use to clean aluminium surfaces?
Avoid using acidic or alkaline cleaners like bleach, ammonia, or hydrochloric (muriatic) acid on aluminium, as these can erode the protective oxide layer and cause permanent damage. Steel wool and harsh abrasive pads should also be avoided, since they scratch and dull finishes. Stick to mild soap, household acids like diluted vinegar, and non-scratch pads for safe cleaning.
2. How do you make aluminium shiny again?
To restore shine to aluminium, start with a thorough wash using mild soap and water. For light tarnish, use a diluted vinegar solution or a baking soda paste. For deeper oxidation, apply an aluminium-safe brightener or polish with a microfiber pad. Finish by sealing the surface with a compatible wax or sealant to maintain gloss and prevent future oxidation.
3. Can vinegar be used to clean aluminium?
Yes, vinegar is an effective and gentle cleaner for aluminium. Mix white vinegar with water (1:1 for stains or 1:3 for anodized surfaces), apply with a soft cloth, and rinse thoroughly. Avoid prolonged contact or letting vinegar dry on the surface, especially on anodized or coated aluminium.
4. When should I call a professional for aluminium cleaning or restoration?
Professional help is recommended for severe pitting, deep corrosion, or structural aluminium components where safety is critical. Also, if you need a flawless mirror finish on large surfaces or require replacement parts with specific finishes, consider services like CNC machining or industrial refinishing for best results.
5. What is the safest way to clean aluminium pans and cookware?
For aluminium pans and cookware, use a boil-and-lift method with water and baking soda to remove baked-on oils, or apply a baking soda paste for spot cleaning. Avoid steel wool and dishwashers for raw aluminium. Always rinse and dry thoroughly to prevent water spots and maintain a food-safe surface.
-
Posted in
acid wash aluminum, aluminum cleaning, aluminum polish, cleaning aluminum pans, remove aluminum oxidation


