
Laser Marking Aluminium: Dial-In Parameters Without Guesswork
Step 1: Define Your Objectives and Select the Right Laser Marking Method
When you approach a new project involving laser marking aluminium, the first step is all about clarity: What do you want your mark to achieve? Sounds simple, but getting this right sets the tone for everything that follows—machine selection, process parameters, and even quality assurance.
Decide on Contrast, Depth, and Permanence
Start by asking: Do you need a bold, high-contrast logo for branding? Or is your priority a permanent, deep-engraved device ID that withstands years of wear? Maybe you’re after fine microtext for traceability on small aerospace components. Each use case leads you toward a different laser marking approach. For example, black-on-anodized contrast is ideal for logos and serials, while deep engraving offers unmatched permanence on bare 6061 brackets.
Match Laser Type to Aluminum State
Choosing the right technology is key. Fiber and MOPA fiber lasers are the workhorses for both bare and anodized aluminum, offering crisp marks and adaptability. MOPA fiber lasers, in particular, provide the flexibility to fine-tune pulse duration and frequency, which is crucial for applications demanding high contrast or colored marks without damaging the base material. UV lasers can be helpful for delicate coatings, while CO2 lasers require a markable coating or anodized layer to generate visible contrast. Diode lasers are generally less effective for aluminum due to limited absorption.
| Laser Type | Contrast Potential | Line Width/Detail | Thermal Load | Cost | Best Use Case |
|---|---|---|---|---|---|
| Fiber | High (bare & anodized) | Fine (0.01-0.05 mm) | Moderate | Mid | General marking, serialization |
| MOPA Fiber | Very High (tunable) | Very fine (microtext) | Low to moderate (adjustable) | Mid-high | Colored marks, fine detail |
| UV | Moderate | Fine | Low | High | Delicate coatings, thin films |
| CO2 | Low on bare, High with coating | Medium | High | Low-mid | Painted/anodized surfaces |
| Diode | Low | Coarse | Variable | Low | Not recommended for aluminum |
Set Success Metrics: Readability and Cycle Time
Before you spec out your equipment or dial in parameters, lock in your acceptance criteria. Will the mark need to pass a barcode scanner grade? Is there a minimum contrast ratio or feature size? How fast does each part need to be marked to meet production throughput? These metrics will guide your choices and help you avoid guesswork later on.
- Mark color (black, white, or grayscale on anodized; frosted or dark on bare)
- Feature size (microtext, standard text, logos)
- Throughput (parts per hour or cycle time)
- Regulatory readability (scanner grade, permanence requirements)
Keep your end-use requirement visible at every decision point.
For example, if your goal is to produce aluminum serial tags with high readability, a fiber or MOPA fiber laser is ideal. If you’re marking delicate surfaces or require unique colors, MOPA fiber or UV lasers may be better suited.
In some regions, you may encounter the term laserbeschriftung aluminium—this simply refers to laser marking aluminum in German-speaking markets, but the principles of method selection remain the same.
Action Steps:
- Define your mark type (barcode, QR code, logo, serial number) and the required size.
- Choose the laser category based on your substrate (bare or anodized) and desired contrast.
- Document measurable acceptance criteria (such as scanner grade, contrast, or minimum feature size).
By starting with clear objectives and the right laser technology, you’ll set the stage for a successful, repeatable laser marking aluminium process—no guesswork required.
Step 2: Select Alloy and Finish with Purpose for Laser Engraving Aluminium
Ever wonder why two aluminum parts can look so different after laser marking, even when using the same settings? The secret lies in the alloy composition and surface finish. When you’re aiming for reliable, high-contrast laser engraving aluminium, these details make all the difference—so let’s break down how to choose wisely and set yourself up for success.
Choose Alloy and Temper Wisely
Not all aluminum alloys behave the same under a laser. Wrought alloys like 6061 and 5052 are known for producing clean, consistent marks. Their relatively pure composition and fine grain structure help the laser energy couple efficiently, resulting in crisp, readable marks—making them favorites for industries like aerospace and automotive. On the other hand, alloys such as 7075 are more reflective and can sometimes show heat tint or require more passes for adequate depth. Cast alloys, often containing higher silicon content, may respond unpredictably, sometimes showing uneven marks or requiring parameter tweaks.
| Alloy or Finish | Typical Response | Strategy Tips | Notes |
|---|---|---|---|
| 6061 (Wrought) | Marks cleanly, high contrast | Standard settings, moderate power | Ideal for serialization, QR codes |
| 5052 (Wrought) | Consistent, high-contrast marks | Similar to 6061, adjust for thickness | Good for deep engraving |
| 7075 (High strength) | More reflective, possible heat tint | Increase pulse energy, more passes | Test on scrap before production |
| Cast Aluminum (with Silicon) | Variable, may show uneven marks | Fine-tune speed and power, multiple tests | Surface prep is critical |
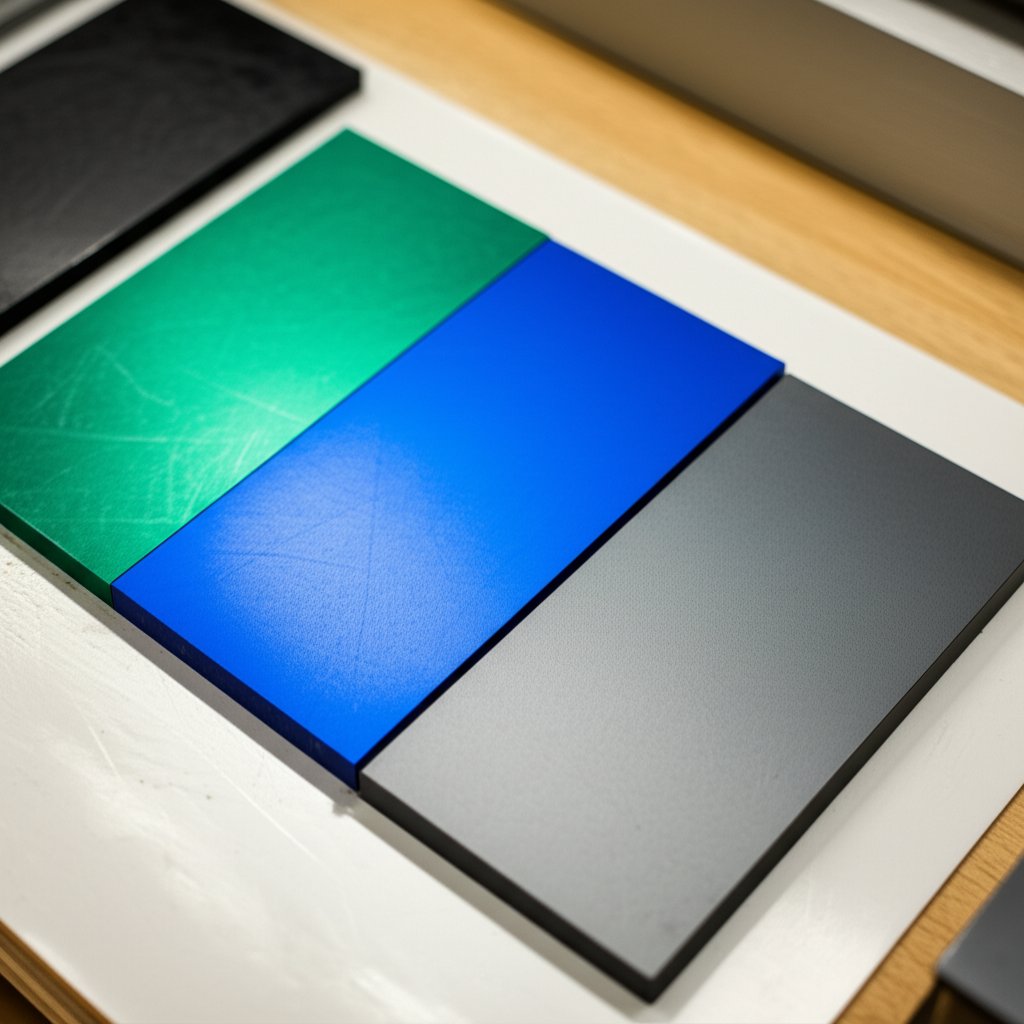
| Anodized Aluminum | Excellent contrast, fine detail | Lower power for white, higher for black | Laser engraving anodized aluminum is ideal for branding and traceability |
| Coated/Painted Aluminum | High contrast if coating is removed cleanly | Use light passes, proper ventilation | Consider laser markable aluminum sprays for temporary marks |
Leverage Anodized Layers for High Contrast
If your goal is to achieve high-contrast, visually striking marks, anodized aluminum is your best friend. Anodized layers are porous and often dyed, which allows the laser to remove or alter just the surface pigment, revealing bright or dark marks with minimal damage to the base metal. For example, laser engraving anodized aluminum with a fiber laser typically yields crisp black or white marks, perfect for logos, serial numbers, or intricate graphics. For even finer detail, picosecond lasers can achieve line widths as small as 0.1 mm—ideal for anti-counterfeiting or microtext.
Plan Around Coatings and Paints
Working with coated or painted aluminum? You’ll need to adjust your strategy. Laser etching anodized aluminum or painted surfaces requires lighter power and more attention to ventilation, as fumes can be hazardous. In some cases, using a specialized laser markable aluminum spray enables temporary or removable marks, but only use these if your application allows for added materials. Always test your settings on a sample before running production, as different coatings can absorb or reflect laser energy unpredictably.
- Identify the alloy and temper from part drawings or material certifications.
- Test your settings on a scrap piece or coupon from the same batch.
- Record your surface preparation steps—cleanliness and prep affect results.
Action Steps:
- Confirm the exact alloy and surface finish (bare, anodized, coated) before starting.
- For anodized parts, note the anodize color and thickness—darker anodize often yields higher visible contrast.
- For coated parts, plan for light laser passes or use markable sprays if your process allows.
By tailoring your process to the specific alloy and finish, you’ll unlock the full potential of laser engraving aluminium—whether your project calls for deep, permanent marks or high-contrast branding. Next, we’ll dive into how to prepare surfaces and set up your optics for repeatable, professional results.
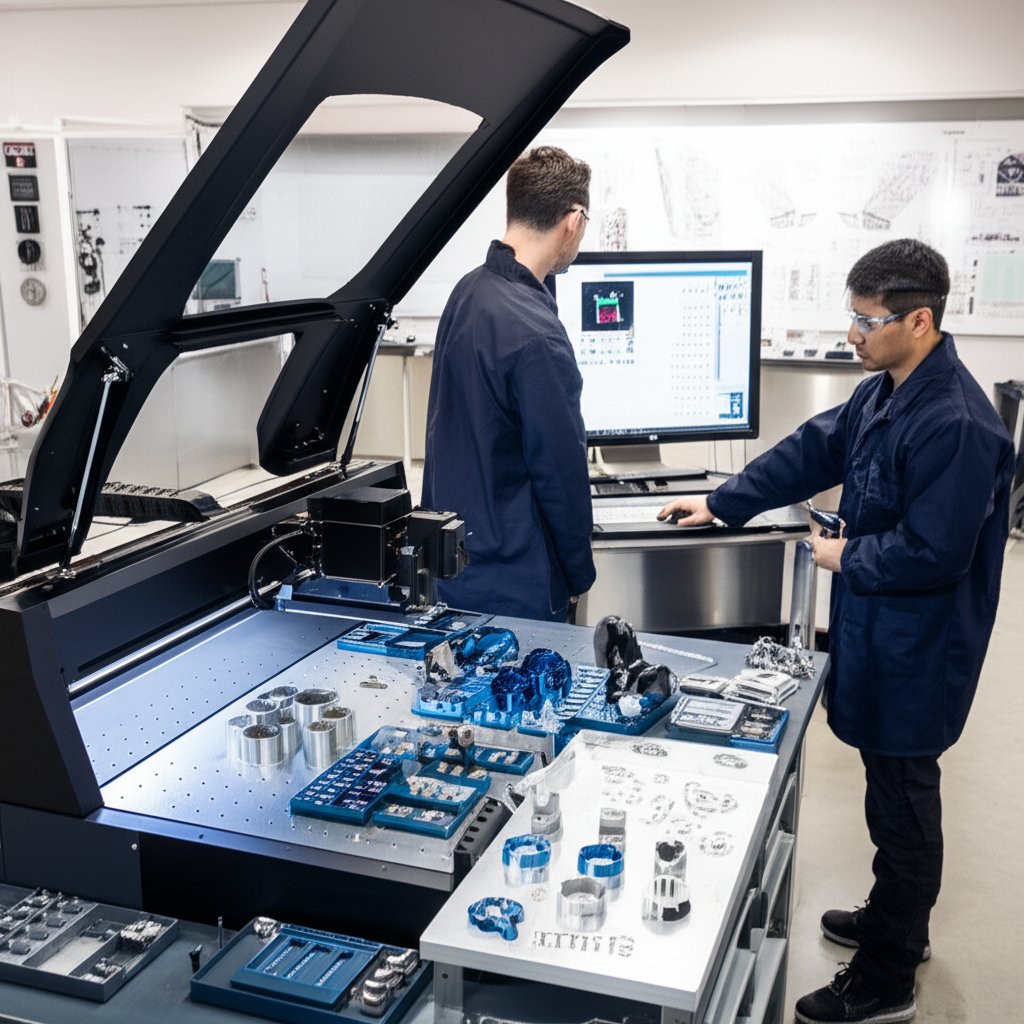
Step 3: Prepare Surfaces, Optics, and Fixturing for Consistent Laser Etching on Aluminum
Ever wonder why some laser etch aluminum projects come out crisp and repeatable, while others show smudges, uneven depth, or fuzzy edges? The difference often lies in the prep work and fixturing. Let’s break down the essential steps to ensure your laser etching on aluminum delivers professional, repeatable results every time.
Clean and Mask Strategically
Before you even power up your aluminum engraver, surface prep is your most controllable variable. Imagine engraving a logo only to find a faint haze or patchy mark—chances are, dust, oil, or residue is to blame. Here’s a proven checklist for prepping your aluminium engraving surface:
- Remove any protective films or stickers from the aluminum.
- Degrease thoroughly with a non-residue solvent (like isopropyl alcohol).
- Wipe anodized or coated surfaces gently with a lint-free cloth.
- Deburr edges if needed to prevent focus errors.
- Dry the part completely—moisture can scatter the laser beam.
- Mask areas not to be marked if your design requires it.
For intricate or high-value parts, a final pass with compressed air removes fine dust. Cleanliness at this stage is critical for sharp, high-contrast marks (source).
Fixture for Repeatable Focus
Now, let’s talk about holding your workpiece steady. Even the best aluminum engraving machine can’t compensate for a part that shifts or vibrates mid-process. Fixturing should lock the part in all six degrees of freedom—translation and rotation—so the laser always hits the same spot, every time. Consider these tips:
- Use low-profile clamps or vacuum plates to avoid casting shadows.
- For flat parts, modular tooling plates or parallel bars provide a stable base.
- Curved items (like bracelets) benefit from rotary attachments or V-blocks.
- Stepped or multi-level parts may require modular towers or custom shims.
- Always align to a repeatable datum for consistency.
| Workpiece Geometry | Recommended Fixture Type | Focus Method |
|---|---|---|
| Flat Plate | Vacuum Plate, Parallel Bars | Autofocus, Gauge Block |
| Curved (Bracelet, Tube) | V-block, Rotary Attachment | Rotary Autofocus, Manual Shim |
| Stepped/Uneven | Modular Towers, Custom Shims | Manual Focus, Multiple Z-Offsets |
Optimize Optics and Focal Strategy
Optics and focus are the final frontiers before you start marking. The right lens choice and focus method can mean the difference between a razor-sharp barcode and a blurry mess. Here’s how to get it right:
- Shorter focal lengths (e.g., 100 mm) produce smaller laser spots for fine detail, but require flatter parts.
- Longer focal lengths (e.g., 200 mm) increase depth of field, helping with uneven or stepped parts.
- Use a feeler gauge or autofocus to set your focal plane precisely; document any offsets for repeat runs.
- Slight defocus can be used intentionally for wider strokes or to reduce heat buildup in sensitive areas.
Consistent surface prep, stable fixturing, and precise focus are the foundation of every successful aluminium engraving project.
By investing time in these preparatory steps, you’ll notice fewer rejects and more consistent, high-quality results—no matter if you’re running a single prototype or a full batch. Next, we’ll show you how to build and tune your laser parameters for even more control over your final mark.
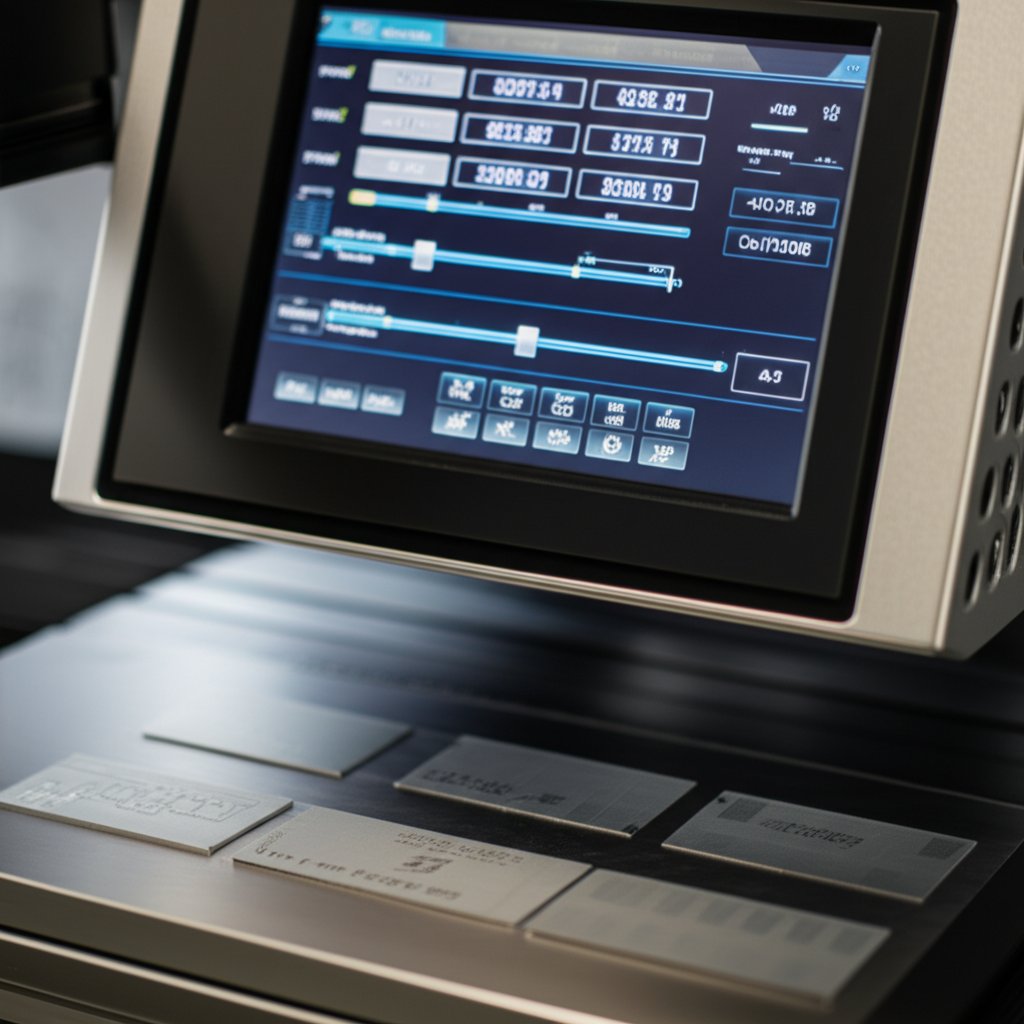
Step 4: Build and Tune Parameter Recipes for Reliable Laser Engraving Anodized Aluminium
Ever feel like laser engraving anodized aluminium is all trial and error? You’re not alone. But what if you could approach parameter tuning with a proven recipe instead of guesswork? Let’s break down how to set up, adjust, and document your process so every mark is sharp, consistent, and repeatable—whether you’re working with bare, coated, or anodized aluminum.
Create Baseline Recipes by Finish
Getting started means using a solid baseline. If your laser manufacturer provides application notes, use those as your launchpad. Otherwise, here’s what you’ll notice in practice:
- Bare aluminum: Needs higher energy density and often multiple passes for deep, permanent marks. Start with moderate-to-high power (30–60% of a 20W fiber laser), slower speeds (500–1000 mm/s), and lower frequencies (20–100 kHz) to maximize depth (source).
- Anodized aluminum: For surface coloration or crisp white marks, use lower power and higher speed. For black marking, especially with a MOPA fiber laser, fine-tune pulse width and frequency—shorter pulses and higher frequencies yield the deepest black.
- Coated/Painted aluminum: Use just enough power to ablate the coating without damaging the base metal. Ventilation is critical for safety.
| Finish | Goal | Power or Duty (%) | Speed (mm/s) | Frequency (kHz) | Passes | Hatch Angle/Spacing (mm) | Defocus |
|---|---|---|---|---|---|---|---|
| Bare Aluminum | Deep Engraving | 30–60 | 500–1000 | 20–100 | 2–5 | 0.01–0.03, 45° | Zero |
| Anodized Aluminum | White Mark | 20–40 | 1000–2000 | 20–50 | 1–2 | 0.05, 0°/90° | Zero or +0.2 |
| Anodized Aluminum | Black Mark (MOPA) | 70–80 | 2000 | 200–800 | 1–2 | 0.5, 0° | Zero |
| Coated/Painted | Contrast Mark | 20–40 | 1000–1500 | 20–50 | 1 | 0.05, 0°/90° | Zero |
*Values are for 20–30W fiber laser engraving aluminum. Always validate on a test coupon as alloys and coatings may vary.
MOPA Tuning for Contrast Control
When you want to achieve true black marks—think laser engraving black anodized aluminum for electronics or branding—MOPA fiber lasers are your best friend. Why? Because you can tune the pulse width (as low as 10 ns) and frequency (up to 265 kHz) to control how the laser interacts with the anodized layer. Shorter pulses and higher frequencies concentrate heat in a very thin layer, producing a deep, matte black without burning through the anodize.
It’s smart to create a test grid varying pulse width and frequency, keeping power and speed constant, to dial in the best result for your specific batch of anodized aluminum. This approach is especially effective for laser etching black anodized aluminum where color consistency and contrast are critical.
Scan Strategy and Hatch Choices
How you scan the laser across the part affects both appearance and durability. Here are proven strategies to try:
- Cross-hatch at multiple angles (0°, 45°, 90°) for uniform tone and edge definition
- Edge-first passes to sharpen perimeters on logos or barcodes
- Final cleanup pass at high speed for a polished finish
- Fine hatch spacing (as low as 0.01 mm) for smooth, detailed marks—especially important in fiber laser engraving aluminum for microtext or QR codes
Change only one parameter at a time, and document each outcome with photos—your future self will thank you.
Action Steps:
- Define one recipe per finish (bare, anodized, coated) and document your starting parameters.
- Adjust only one variable per test—whether it’s power, speed, frequency, or hatch angle.
- Use test vectors for hairlines and small text to validate your spot size and hatch settings.
- Log every test with clear photos and notes. This builds a repeatable knowledge base for future jobs.
By building and tuning your parameter recipes methodically, you’ll move from uncertainty to confidence—delivering beautiful, durable results in every laser engraving anodized aluminium project. Next, let’s see how your artwork and code design can further boost readability and reliability.
Step 5: Design Artwork, QR, and Barcodes for Optimal Readability on Aluminum
Ever tried scanning a QR code or reading a serial number only to find it blurry or incomplete? When it comes to laser marking on aluminum, the design of your artwork and data codes can make or break readability—especially in demanding environments. Let’s explore how to set up your files and codes for consistent, high-contrast results, whether you’re producing an engraved aluminum tag for asset tracking or adding a QR code for smart inventory.
Vector vs Raster: Why Crisp Edges Matter
Sounds complex? Imagine zooming into a logo or barcode—if the edges look jagged, your scanner or customer will notice too. That’s why vector graphics are the gold standard for laser engraving. Vector files (like SVG or DXF) use mathematical paths, ensuring smooth, precise edges at any size. Raster images (like JPG or PNG), on the other hand, can become pixelated when scaled, leading to fuzzy marks and inconsistent scans.
- Prefer single-line fonts for serials and microtext—these maintain clarity below 1mm height.
- Avoid hairlines thinner than your laser’s spot size (often 0.01–0.05 mm for fiber lasers).
- Outline all strokes and remove any overlapping or hidden geometry.
- Align your artwork to a consistent datum for repeatable positioning.
- Export as DXF or SVG with defined units (mm or inches) for precise scaling.
QR and Barcode Design for Reliable Scanning
When you laser etch QR code or barcode data onto aluminum, the goal is simple: instant, error-free scanning. But how do you get there?
- Choose a code size appropriate for your application—larger modules are easier to scan, but balance this with available space.
- Ensure a generous quiet zone (blank space) around the code—this prevents misreads and is especially important for compact marks.
- For harsh environments, select higher error correction levels in your QR code generator. This allows the code to be read even if part of the mark is scratched or worn.
- Test code readability with multiple scanners and under different lighting conditions.
- For colored or anodized tags, maximize contrast—white or black marks on dark backgrounds scan best (reference).
| Code Type | Recommended Module Size | Quiet Zone | Verification Notes |
|---|---|---|---|
| QR Code | 0.5–1.0 mm/module | Generous (2–4 modules wide) | Test with multiple scanners; use high error correction for rugged use |
| Data Matrix | 0.3–1.0 mm/module | At least 1 module wide | Ensure crisp edges, avoid distortion on curves |
| Code 128 (Linear Barcode) | 0.2–0.5 mm/bar width | 2–5 mm margin | Verify with barcode verifier for grade |
Artwork Prep and Export Settings: A Quick Checklist
- Outline all fonts and strokes—no live text.
- Remove overlapping or hidden objects.
- Align artwork to a known datum or corner.
- Export as DXF or SVG, specifying units (mm/inch).
- Double-check scaling in your laser software before running production.
Design for the smallest part and worst finish in the lot. Your mark must remain readable even on the most challenging substrate.
Action Steps:
- Create test patterns with text at different heights and line widths to find your minimum readable size.
- For QR code laser etching, include a version with higher error correction for parts exposed to abrasion or chemicals.
- Place marks away from edges, bends, or holes where focus or readability could suffer.
- Validate your design by marking a sample engraved aluminum tag and scanning it under real-world conditions.
By focusing on clean vector artwork, well-sized codes, and robust export settings, you’ll set the stage for reliable, scannable marks—no matter how demanding your application. Next, we’ll show you how to qualify your process with test coupons and durability checks before moving into production.
Step 6: Qualify Your Laser Engraving Process with Test Coupons and Durability Checks
When you’re ready to move from prototypes to production, how do you know your aluminum laser engraving process will hold up? Imagine marking hundreds of parts, only to discover your codes fade after cleaning or fail a scanner test. That’s why rigorous qualification—using test coupons and durability screens—is the key to reliable, repeatable laser engraved aluminum results.
Build Repeatable Test Coupons
Start by creating test coupons from the same alloy, temper, and surface finish as your production parts. If you’re marking laser engraved anodized aluminum for electronics or aerospace, even the anodize color and thickness should match. The goal is to mimic real-world conditions as closely as possible, ensuring your process is truly representative (NASA PRC-9003D).
- Coupon prep: Cut or select coupons matching the thinnest section of your part. Clean thoroughly and document any surface prep steps.
- Parameter matrix marks: Lay out a grid of marks varying key parameters—power, speed, frequency, and hatch spacing. Include fiducials or alignment marks to check focus consistency.
- Visual and scan tests: Inspect each mark for contrast, edge quality, and legibility. For barcodes or data matrices, use a handheld scanner or verifier to check readability.
- Durability tests: Subject marks to abrasion rubs, solvent wipes, and—if required—corrosion tests (like salt spray for aerospace). This step is especially important for aluminum laser etching used in harsh environments.
- Finalize recipe: Select the parameter set that delivers the best balance of contrast, durability, and readability. Record all settings and outcomes for traceability.
Define Pass or Fail Acceptance
What makes a laser marking anodized aluminum process “good enough” to run on production parts? Set clear, measurable acceptance criteria. Here’s a sample framework:
| Attribute | Method | Threshold |
|---|---|---|
| Contrast | Visual inspection under daylight or equivalent | Mark is clearly distinguishable from background |
| Edge Quality | 10x magnification | Clean, sharp edges; no excessive burrs or melting |
| Readability | Handheld scanner or verifier | Code or text scannable on first pass |
| Durability | Abrasion and solvent tests | No significant fading or loss of legibility |
| Corrosion Resistance (if required) | Salt spray or humidity test | No corrosion at or around mark |
For regulated industries, you may need to add more detailed thresholds—such as minimum contrast ratios or specific barcode grades—based on customer or industry standards.
Run Durability Screens and Document Everything
Durability isn’t just about making a mark that looks good on day one. Can your laser engraved aluminum tag survive cleaning, rubbing, and exposure to chemicals? Run abrasion tests (with a standard eraser or cloth), solvent wipes (like isopropyl alcohol), and, for mission-critical parts, environmental screens like salt spray. Document all outcomes with clear photos and notes.
Lock your go-to recipe into your QMS: Record the parameter set, coupon ID, and storage location for future audits or customer reviews.
- Photograph all test results under consistent lighting—this helps with future troubleshooting or customer questions.
- Verify code grades with a calibrated verifier if barcodes or data matrices are used.
- Record environmental test outcomes to support customer approvals and regulatory compliance.
By qualifying your process with rigorous, repeatable tests, you’ll ensure every aluminum laser etching project is production-ready—no surprises, no rework. Next, we’ll walk through how to scale your process for production while maintaining quality and consistency.

Step 7: Scale to Inline Production with Process Control and Automation
When you’re ready to move from test coupons to full-scale production, the real challenge is consistency—mark after mark, shift after shift. Sounds daunting? Not if you build your process around robust fixturing, smart automation, and disciplined maintenance. Let’s see how to turn your aluminum laser engraver setup into a production powerhouse that delivers reliable, high-throughput laser marking aluminium—with no surprises.
Fixturing and Nests for Throughput
Imagine marking dozens of parts at once, each perfectly positioned and held steady. That’s the power of well-designed nests and fixturing. For production, use fixtures that locate multiple pieces from a single datum and can withstand repeated heat cycles. Modular nests, vacuum plates, or custom trays allow you to batch parts, minimizing laser idle time and maximizing the efficiency of your aluminum engraving machine. For odd-shaped or delicate components, consider soft-touch inserts or 3D-printed nests to prevent surface marring.
Inline Automation and Cycle Time
When speed and repeatability matter, automation is your best ally. Inline conveyors, rotary tables, or robotic pick-and-place systems can feed parts directly to your aluminum laser marking machine. Integrate vision or mechanical sensors to detect part orientation and compensate for minor variations. You’ll notice that automated solutions not only boost throughput but also reduce human error and keep your process in sync with the rest of your production line.
| Production Factor | Impact | Control Method |
|---|---|---|
| Part Presentation | Consistent mark position, reduced rejects | Precision nests, alignment pins, sensors |
| Heat Management | Stable mark quality, fixture longevity | Heat-resistant materials, cooling intervals |
| Cycle Time | Production throughput | Batch marking, parallel loading/unloading |
| Mark Verification | Traceability, compliance | Inline vision systems, barcode scanners |
| Optics Cleanliness | Consistent contrast and beam quality | Regular lens cleaning, air assist |
| Parameter Control | Repeatable results, minimal rework | Locked job files, version control |
Process Control and Maintenance
Even the best aluminum laser engraving machine needs regular care to keep marks crisp and cycle times short. Establish a preventive maintenance routine, checking optics, fixtures, and software at set intervals. Track key metrics—like contrast or code grade—so you can catch drifts before they become problems. Here’s a practical maintenance checklist to keep your line running smoothly:
- Clean lenses and mirrors daily or per shift
- Check and document focus before each batch
- Inspect fixtures and nests for wear or debris
- Audit sample marks hourly for contrast and readability
- Back up and version-control job files after parameter changes
What gets measured gets controlled—log contrast or code grade at set intervals to maintain quality and traceability.
Action Steps:
- Batch parts to minimize laser idle time, overlapping loading and marking cycles
- Define a first-off and hourly check routine using sample coupons to verify mark quality
- Document all job files with locked parameters and maintain version control for traceability
By combining robust fixturing, smart automation, and disciplined process control, you’ll transform your laser engraving machine for aluminium into a high-output, low-defect production asset. Next, let’s explore how to troubleshoot defects and keep your process stable—no matter how demanding your run becomes.
Step 8: Troubleshoot Defects and Lock Stability in Laser Marking Aluminium
When you notice inconsistent marks, faded codes, or strange discoloration on your etched aluminum parts, it’s tempting to tweak every setting at once. But systematic troubleshooting is the key to stable, high-quality results in laser marking aluminium—whether you’re working with bare, anodized, or powder-coated surfaces. Let’s break down how to diagnose, correct, and stabilize your process, so you can keep your lines running and your marks sharp.
Diagnose by Defect Signature
Ever see a barcode that’s too faint to scan, or edges that look burnt? Each defect tells a story. Here’s a practical table mapping common issues in laser etching anodized aluminium and other finishes to their likely causes and corrective actions:
| Defect | Likely Cause | Corrective Action |
|---|---|---|
| Low contrast on anodized | Insufficient energy density, poor focus | Increase passes, refine hatch spacing, verify focus position |
| Pitting on bare aluminum | Overheating, slow speed, high power | Reduce energy per pulse, increase marking speed, lower power |
| Edge discoloration | Excess heat, incorrect pulse width/frequency | Adjust pulse width/frequency, introduce air assist |
| Shadowing or uneven marks | Fixture/clamp occlusion, poor exhaust | Reposition clamps, adjust exhaust flow |
| Inconsistent mark depth or tone | Dirty lens, misaligned optics, unstable power | Clean optics, check beam path, calibrate or service laser source |
| Poor marks on powder coated parts | Surface contamination, incorrect laser settings for coating | Clean surface, adjust for laser marking powder coating (test power/speed/hatch for best removal/contrast) |
Correct with Parameter and Prep Tweaks
Before you adjust your laser’s parameters, check your surface prep. Even the best anodized aluminum for laser engraving can yield poor results if oil, dust, or oxide layers are present. Here’s a quick checklist to verify prep before making machine changes:
- Remove all oil residue with a non-residue solvent
- Wipe away any loose oxide or dust
- Check coating thickness (especially for laser marking powder coating—thicker coatings may require more passes or power)
- Ensure part is dry and at room temperature
Once prep is confirmed, change only one parameter at a time—like speed, power, or frequency. For example, if your laser etch powder coat mark is blurry, try reducing power or increasing speed before changing other variables. This approach keeps troubleshooting focused and repeatable.
Stabilize with Optics and Environment
Sometimes, the problem isn’t your settings—it’s your hardware or environment. Dirty lenses, misaligned optics, or unstable power can all cause inconsistent marks. Regularly inspect and clean your optical components, and calibrate your system as recommended. For environmental stability, maintain a dust-free, temperature-controlled workspace, and check that all fixtures and mounts are tight and vibration-free. If you’re running long batches, audit your marks every hour to catch drifts early.
Change only one setting per trial and log before or after photos. This creates a clear troubleshooting trail and helps you build a knowledge base for future jobs.
By diagnosing defects by their signature, correcting with systematic tweaks, and maintaining a stable environment, you’ll lock in reliable results—whether you’re marking etched aluminum tags, laser etching anodized aluminium panels, or tackling the challenges of laser marking powder coating. Next, we’ll compare laser marking to other identification and cutting methods, so you can choose the best approach for your application.
Step 9: Compare Laser Marking with Alternative Methods and Clarify Cutting Use Cases
Pick the Right Identification Method for Aluminum Parts
When you need to add a serial number, logo, or barcode to an aluminum component, you have more than one tool in your kit. But which method offers the best balance of speed, durability, cost, and compliance? Let’s break down the most common options so you can confidently choose the right approach for your needs.
| Method | Speed | Durability | Cost per Mark | Minimum Feature Size | Consumables |
|---|---|---|---|---|---|
| Laser Marking | High (fast cycle times) | Excellent (surface or deep mark, no ink) | Low (after setup) | <0.1 mm possible | None |
| Mechanical Engraving | Moderate (slower for fine detail) | Very High (deep, tactile mark) | Moderate | ~0.2 mm | Tool wear/replacement |
| Inkjet | Very High (inline, rapid) | Poor (wears off, not permanent) | Low | ~0.5 mm | Ink, solvents |
| Electrochemical Etching | Moderate | Medium (shallow, can fade) | Moderate | ~0.2 mm | Stencils, electrolyte |
Laser marking aluminium stands out for its clean, permanent results and ability to create fine detail without consumables or post-processing. Mechanical engraving excels when you need tactile, deep marks for harsh environments, but it’s slower for intricate codes. Inkjet is fast and cost-effective for temporary IDs but falls short on durability. Electrochemical etching offers decent contrast but requires ongoing supplies and can fade over time.
- For traceability in regulated industries, laser marking or deep mechanical engraving is preferred.
- For high-wear or outdoor use, prioritize methods with maximum permanence.
- For aesthetic branding, laser marking delivers crisp, high-contrast logos and microtext.
- For batch or low-cost applications, inkjet or etching may suffice if durability is not critical.
When Laser Cutting Aluminum Makes Sense
Ever wondered, "Can you laser cut aluminum?" The answer is yes—but with important caveats. Laser cutting aluminium is a precise, efficient way to produce flat parts, tags, or intricate shapes directly from sheet stock. Fiber lasers are the go-to for most aluminum cutting, handling thicknesses from 0.5 up to 15 mm, while high-powered systems can tackle even thicker gauges. CO2 lasers can also cut aluminum, but require more power and careful parameter tuning due to aluminum’s natural reflectivity.
Laser cut aluminum offers several advantages:
- Exceptional edge quality and minimal burrs when optimized
- Fast turnaround and low material waste
- No tool wear—just clean, contactless processing
- Easy integration with automated production lines
However, laser cutting aluminium is best reserved for flat parts, thin foils, or precision blanks. If you need to cut structural or thick aluminum, specialized equipment and strict safety protocols are essential. Don’t repurpose a marking laser for cutting—dedicated cutting machines are designed to manage higher power, reflectivity, and heat dissipation safely.
Regulatory and Readability Considerations
Before you choose a marking or cutting method, confirm your customer’s or industry’s requirements for permanence, readability, and traceability. For example, aerospace or automotive parts often require marks that survive abrasion, solvents, and environmental exposure for years. Laser marking aluminium and deep engraving both meet these standards, while inkjet or shallow etching may not.
- Check for UID, barcode, or serialization standards—does your mark need to pass a verifier or scanner grade?
- For coated metals, ensure your process is compatible with the finish and consider post-process cleaning to remove residues.
- If you’re planning to laser cut aluminium tags or panels, verify that the cut edges and marks meet any required tolerances or aesthetic criteria.
Always match your identification or cutting method to both the technical requirements and the end-use environment—don’t let convenience override compliance or durability.
Action Steps:
- Confirm all customer or regulatory requirements for permanence, readability, and traceability before selecting your process.
- If you need to cut parts, use a dedicated laser cutting aluminium system with the appropriate power and safety features.
- For coated or painted aluminum, test your marking or cutting parameters on samples and plan for any needed post-processing.
By weighing the pros and cons of each method and understanding when to use laser cut aluminum or marking, you’ll deliver results that meet both technical and business goals. Up next, we’ll cover how to leverage rapid prototyping partners for expert guidance and fast iteration on your aluminum marking projects.
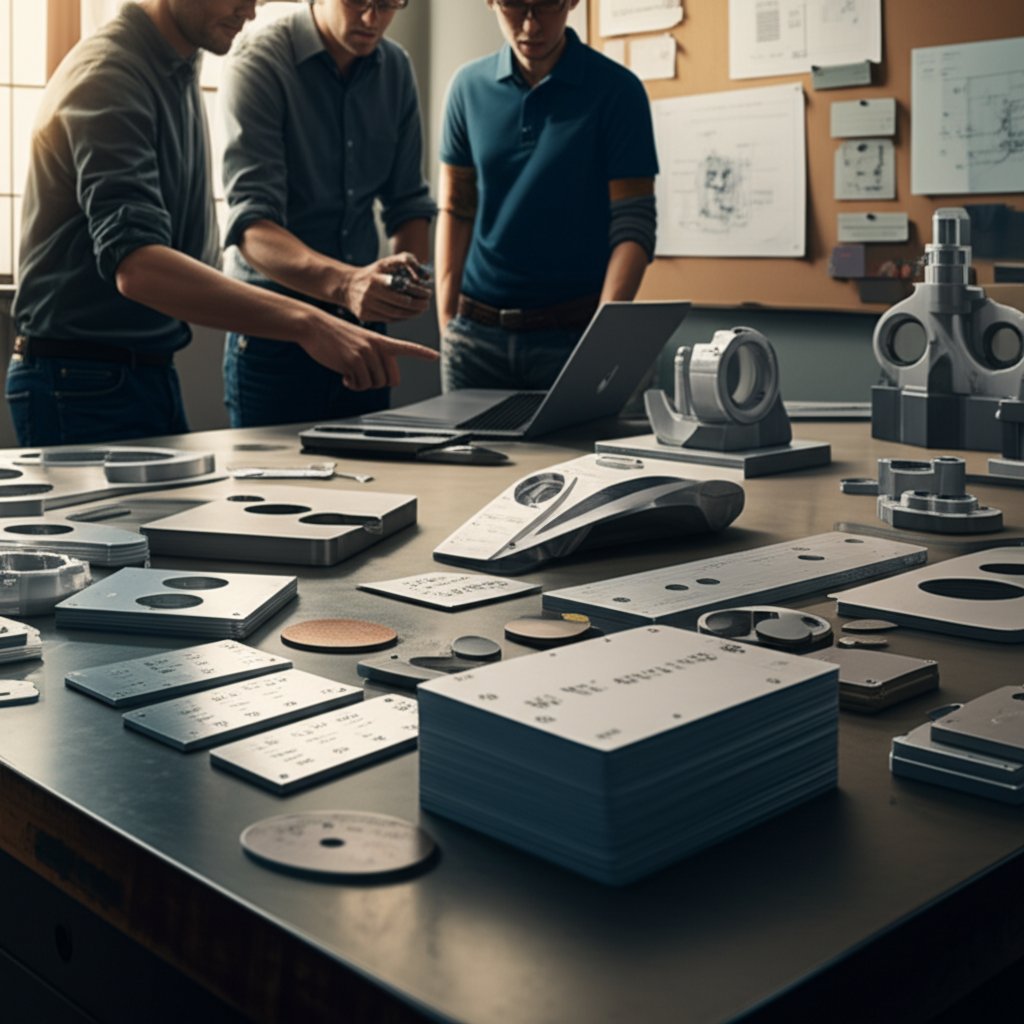
Step 10: Partner for Prototypes and DFM to Accelerate Laser Marking Aluminium Projects
Ever get stuck perfecting your laser marking aluminium recipe, only to realize you’re burning time and budget on trial-and-error? When you face tight deadlines, evolving designs, or need to validate a new marking process, partnering with a rapid prototyping service can be a game changer. Let’s look at how leveraging external expertise helps you dial in results fast—without tying up your main production line.
Leverage DFM and Quick-Turn Test Coupons
Imagine you want to mark a batch of aluminum cards or test a new logo design on anodized aluminum sheets for laser engraving. Instead of running dozens of tests in-house, you can outsource quick-turn coupons to a specialist. Services like XTJ stand out for their broad aluminum alloy coverage (including 6061 and 7075), rapid sample turnaround, and complimentary DFM (Design for Manufacturability) feedback. That means you get expert advice on alloy selection, surface prep, and laser parameters—helping you avoid common pitfalls and reduce the number of iterations needed to reach a stable, production-ready process.
- Aluminum alloy coverage: Can the vendor supply anodized aluminum sheets for laser engraving, aluminum blanks for laser engraving, and custom sizes?
- Sample turnaround: How quickly can you get test coupons or engraved aluminum tag blank samples?
- Documentation quality: Are all materials, finishes, and marking parameters clearly documented?
- Certifications: Is the provider ISO 9001:2015 certified or able to meet your industry’s traceability requirements?
Select a partner that treats marking as a process, not a one-off task.
Integrate Marking with Machining and Molding
When your parts require more than just marking—think CNC-machined housings with serialized aluminum cards or molded components with embedded IDs—a full-service prototyping shop can combine machining, molding, and laser marking in a single workflow. This integration reduces lead times and ensures that your marks are perfectly positioned, even on complex geometries. For example, you might order a batch of engraved aluminum tags, each cut, finished, and marked to spec, ready for immediate evaluation or field testing.
Qualify a Vendor and Scale Confidently
Choosing the right prototyping partner is about more than just speed. You want a vendor who understands the nuances of laser marking aluminium—from alloy selection to optimizing for different finishes. Here’s a simple handoff workflow to streamline the process:
- Share your part drawings and marking specifications, including file formats and preferred location for each mark.
- Request guidance on the best alloy and finish for your application—whether you need anodized aluminum sheets for laser engraving or custom aluminum blanks for laser engraving.
- Approve initial test coupon results, reviewing contrast, depth, and durability.
- Once satisfied, greenlight the pilot lot or small production run.
By working with a qualified partner, you’ll get actionable DFM feedback, rapid samples, and the confidence to scale—whether you’re producing engraved aluminum tag blank samples for a new product line or validating a marking process for regulatory compliance.
In short, outsourcing prototypes and test coupons lets you focus on what matters most: refining your designs, validating your process, and getting to market faster. When you’re ready to move forward, the right partner will help you turn basic concepts into production-ready engraved aluminum parts—without the guesswork.
Laser Marking Aluminium: Frequently Asked Questions
1. Can you laser mark aluminum?
Yes, aluminum can be laser marked using fiber, MOPA fiber, or UV lasers. These methods create permanent, high-contrast marks ideal for traceability, branding, and serialization. The choice of laser and process depends on whether the aluminum is bare, anodized, or coated, as well as the desired depth and contrast.
2. What is the best laser to engrave aluminum?
Fiber lasers, especially MOPA fiber lasers, are the top choice for engraving aluminum due to their ability to produce crisp, high-contrast marks on both bare and anodized surfaces. UV lasers are suitable for delicate coatings, while CO2 lasers require a markable coating or anodized layer for effective results.
3. Can you laser engrave 6061 aluminum?
Absolutely. 6061 aluminum is a preferred alloy for laser engraving because it produces clean, consistent marks. It responds well to fiber and MOPA fiber lasers, making it suitable for deep engraving, serial numbers, barcodes, or logos. Always validate your process with test coupons for best results.
4. How do you ensure durability and readability of laser marks on aluminum?
To guarantee durability and readability, use test coupons that match your production alloy and finish. Evaluate marks for contrast, edge quality, and scanner readability. Run abrasion and solvent tests, and document parameters in your quality management system for repeatable results.
5. What should I consider when choosing between laser marking, engraving, and cutting aluminum?
Choose laser marking for high-speed, permanent, and fine-detail identification. Opt for mechanical engraving if deep, tactile marks are needed. For cutting aluminum, use a dedicated laser cutting system designed for the material's reflectivity and thickness. Always match the method to your durability, cost, and regulatory requirements.
-
Posted in
aluminum engraving, aluminum laser etching, laser engraving anodized aluminum, laser marking aluminium, laser marking machine

