
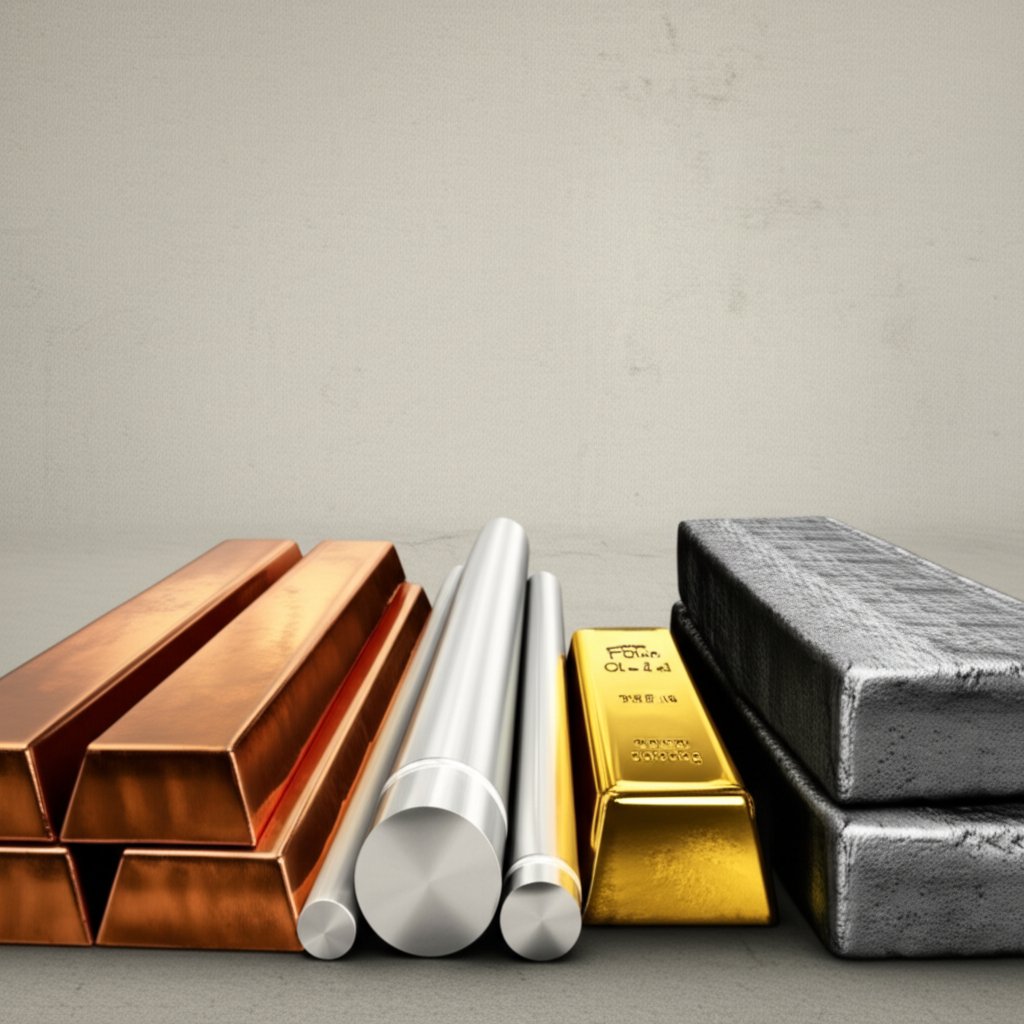
Density of Copper Vs. Aluminum, Steel, And Gold: Choose Wisely
Understanding the Density of Copper for Real Decisions
What density of copper really means
When you ask, "What is the density of copper?" you’re looking for a value that connects the mass of copper to the space it occupies—its volume. Density is mathematically defined as mass divided by volume (ρ = m/V), and for copper, this physical constant is fundamental to its performance in everything from power cables to plumbing and precision electronics. At 20°C, the density of copper is approximately 8.96 g/cm³ (or 8,960 kg/m³), a value that reflects the tight atomic packing in its crystal structure and helps explain its strength, durability, and exceptional electrical conductivity.
Units and conversions engineers actually use
Engineers and designers will encounter copper density in several units, depending on the context—whether it’s a datasheet, a procurement spec, or a scientific paper. Here’s a quick comparison:
| Unit | Value for Copper | Typical Use |
|---|---|---|
| g/cm³ | 8.96 | Material datasheets, engineering calculations (SI) |
| kg/m³ | 8,960 | Scientific research, SI-based modeling |
| lb/in³ | 0.3237 | Imperial unit design, US procurement |
For most calculations, start with SI units (g/cm³ or kg/m³) and only convert to imperial (such as copper density lb/in³) at the end to minimize rounding errors. The phrase “density of copper g cm3” is commonly found on technical datasheets and is a standard for quick reference in material selection.
Specific gravity versus density on datasheets
Ever seen sg of copper or specific gravity of copper on a datasheet? Specific gravity (SG) is a dimensionless number comparing the density of copper to that of water at 4°C (where water’s density is 1.0 g/cm³). For copper, the SG is about 8.96, meaning it’s nearly nine times heavier than water for the same volume. This is useful for quick buoyancy checks or when comparing copper to other metals in design tables (reference).
Because copper sits at atomic number 29 on the periodic table, authoritative sources like standards organizations and scientific handbooks use these units consistently. When reviewing datasheets, always note the reference temperature (usually 20°C) since density can shift with temperature or product form. For example, the density of copper in kg/m3 is a standard value for international procurement and modeling.
- Weight estimates for copper busbars, pipes, or sheets
- Buoyancy calculations in marine and fluid systems
- Volume-to-mass conversions for purchasing and shipping
- Shipping cost predictions based on part mass
- Stiffness-to-weight tradeoffs in mechanical design
Always match the temperature and product form on the datasheet to your application when applying density.
Keeping your notation consistent—using SI units throughout calculations and converting to imperial only at the end—reduces the risk of rounding errors and ensures traceability in engineering decisions. As you move through this guide, you’ll discover how temperature, alloying, product form, and measurement methods can all influence the reported density of copper, as well as how to source credible data for your next project.

Temperature Effects on Copper Density Made Usable
How temperature changes copper density
Ever wondered why the mass of a copper part seems constant, yet its density isn’t? Here’s the catch: while the mass of copper stays the same, its volume expands as temperature rises. This means the density of copper decreases with increasing temperature, a phenomenon engineers must account for in high-precision designs. Sounds complex? Let’s break it down: density is mass divided by volume, so if copper’s volume grows with heat, its density drops—even though the actual mass hasn’t changed.
From room conditions to the melting range
Imagine you’re specifying copper for a heat exchanger, or you’re running a simulation for a power cable operating at elevated temperatures. You’ll notice that the density at room temperature (about 20°C) is not the same as at 400°C or even near the copper melting point. For example, at 20°C, the density of pure copper is approximately 8,960 kg/m³ (8.96 g/cm³). But as temperature climbs, density steadily falls due to thermal expansion. The effect is modest at lower temperatures but accelerates as you approach the cu melting point (around 1,085°C).
| Temperature (°C) | Density (kg/m³) | Density (g/cm³) |
|---|---|---|
| 20 | 8,960 | 8.96 |
| 100 | 8,932 | 8.93 |
| 300 | 8,860 | 8.86 |
| 600 | 8,787 | 8.79 |
| 1,000 | 8,568 | 8.57 |
Notice how the density decreases as temperature increases. This trend matters in real-world scenarios—think of copper busbars in power plants or components in furnaces, where operating well above room temperature is routine.
Quick correction using linear expansion
So, how do you adjust for temperature when you need accurate density values? Here’s a practical method that engineers actually use:
- Identify the reference temperature (typically 20°C or 25°C on datasheets).
- Obtain the coefficient of linear expansion for copper (about 16–16.7 × 10⁻⁶/°C source).
- Calculate the volumetric change using the formula: ΔV/V = 3 × α × ΔT (where α is the linear expansion coefficient and ΔT is the temperature change).
- Update the density: New density = Original density ÷ (1 + volumetric change).
- Document all assumptions and reference sources in your calculations.
This approach allows you to estimate the density of copper at service temperatures, making your weight, inertia, or thermal calculations far more accurate.
State reference temperature and source for all density values used in design calculations.
Keep in mind, if you’re working near the copper melting point, things get trickier. Phase changes and the formation of porosity during casting can cause measured density to deviate from theoretical values. In these cases, it’s best to use process-specific data or measure the finished part directly.
Why does this matter? Accurate density values at elevated temperatures are crucial for simulations in thermal, electrical, and structural engineering. Whether you’re predicting heat flow, mass, or mechanical response, always adjust your density values for temperature—and cite your sources. Next, we’ll look at how copper alloys and different product forms can further shift these numbers, so you can make informed material choices no matter the application.

Copper Alloys and Product Forms That Change Density
Density Ranges for Brass, Bronze, and Cupronickel
When you’re comparing the density of copper to its alloys, you’ll notice significant variation—sometimes enough to impact your design or procurement decisions. Why does this happen? It’s all about alloying elements and how they’re processed. Brasses (copper-zinc), bronzes (copper-tin or copper with other elements), and cupronickels (copper-nickel) each introduce new atoms into the copper matrix, shifting the overall density. For example, adding zinc or tin—both less dense than copper—can lower the final alloy’s density, while nickel additions tend to keep values closer to pure copper.
| Alloy Family | Representative UNS Examples | Typical Product Forms | Density Range (kg/m3) |
|---|---|---|---|
| Pure Copper | C10100, C10200, C11000 | Sheet, Bar, Wire | 8,890 – 8,940 |
| Brass (Cu-Zn) | C26000, C36000, C44300 | Sheet, Bar, Castings | 8,330 – 8,530 |
| Bronze (Cu-Sn/others) | C90500, C90700, C83600 | Bar, Castings | 8,640 – 8,770 |
| Aluminum Bronze | C61300, C63000, C95400 | Bar, Sheet, Castings | 7,450 – 7,890 |
| Cupronickel (Cu-Ni) | C70600, C71500 | Sheet, Bar, Tube | 8,900 – 8,940 |
Notice how brass metal density (brass density) can drop below pure copper, while cupronickels and some bronzes approach copper’s own density. This is because the density of zinc (about 7,135 kg/m3) and the density of tin (about 7,280 kg/m3) are both lower than copper, while nickel is very close in density. That’s why cartridge brass (C26000) and free-cutting brass (C36000) are lighter per unit volume than C11000 copper, but cupronickel alloys like C71500 nearly match it.
Cast, Wrought, Powder, and Foam Copper Forms
Sounds complex? Let’s break it down by product form. The same alloy can have different bulk densities depending on how it’s made. Here’s what you’ll see in real projects:
- Wrought (rolled, drawn, or forged): Nearly fully dense, close to theoretical values from the metal density table.
- Cast: Slightly lower density due to shrinkage and trapped gases during solidification.
- Powder metallurgy (sintered): Bulk density can be 85–98% of theoretical, depending on porosity. For example, binder jetting copper parts may reach 97% density, with properties slightly below wrought copper (see study).
- Foam: Bulk density drops dramatically—sometimes below 30% of solid copper—due to open or closed pores.
Imagine you’re sourcing copper for a lightweight heat sink: a copper foam will weigh much less than a solid bar, even if both are made from the same alloy.
How Cold Work, Porosity, and Impurities Shift Density
When you cold work copper (rolling, drawing, or stamping), you change its mechanical properties but have almost no effect on theoretical density. However, residual porosity from casting, powder processing, or additive manufacturing does lower bulk density. Impurities—like lead in free-machining copper or zinc in brasses—also nudge the density away from pure copper values. For design or quality assurance, always record the exact alloy, temper, and product form.
- Wrought vs Cast: Castings often have slightly lower density due to shrinkage cavities.
- Powder vs Fully Dense: Sintered and printed parts may contain open or closed pores, reducing bulk density.
- Cold Work: Theoretical density remains unchanged, but any residual porosity from prior processing matters.
For porous or foam materials, report both theoretical density and measured bulk density with method and open-porosity description.
Need reliable numbers? Here’s a workflow you can trust:
- Start with alloy standards—look up the UNS number and product spec (e.g., ASTM B-series).
- Check producer datasheets for density ranges by form and alloy.
- Consult peer-reviewed handbooks for cross-checking values.
- Document the exact alloy, temper, and reference temperature when logging density.
By understanding how alloy composition and product form affect copper material density, you’ll make smarter choices for weight, performance, and cost. Next, we’ll explore how to measure density in real-world parts—including irregular shapes and porous materials—so you can verify your numbers with confidence.
Density Measurement Methods You Can Reproduce
Archimedes Immersion for Solid Copper
Ever wondered how to check if a copper bar or part is truly what the datasheet claims? The Archimedes immersion method is a classic, reliable way to measure the density of pure copper—and it’s surprisingly hands-on. Here’s how it works in practice:
- Weigh the specimen dry in air. Use a balance that reads to at least 0.01 grams for accuracy.
- Weigh the specimen fully submerged in a liquid. Water is standard, but for corrosion-sensitive samples, acetone or ethanol can be used. Make sure the liquid’s temperature is controlled—density of water at room temperature (about 20°C) is 0.998 g/cm3.
- Calculate the displaced volume. The difference in weight (air minus submerged) equals the weight of liquid displaced, which—divided by the liquid’s density—gives you the volume of the object.
- Compute density. Divide the mass in air by the displaced volume. For copper, you should get a value close to the density of copper g/cm3 listed in reference tables (typically 8.94 g/cm3 at 20°C).
Be sure to avoid trapped air bubbles and use clean, dry thread or wire to suspend the sample. This method is ideal for solid, non-porous shapes—even those with holes, as long as the liquid can fill them (see CCI guidance).
Liquid and Gas Pycnometry for Irregular or Porous Samples
What if your sample is oddly shaped or porous, like a copper powder or a foamed part? That’s where pycnometry comes in—using either a liquid or a gas (often helium) to determine true or skeletal density.
- Liquid pycnometry: Place the sample in a calibrated flask, fill with a liquid of known liquid water density g/cm3, and measure the displaced volume by weight difference. This is best for materials that won’t react with or absorb the liquid.
- Gas pycnometry: Use a gas (often helium) to fill all accessible pores. The pressure change in a sealed chamber allows precise calculation of sample volume, and thus density. This method is highly accurate for powders and foams, following standards like ASTM B923 or ISO 12154 (see ScienceDirect overview).
Pycnometry is particularly useful for determining the density of copper g/ml in samples where internal porosity or irregular geometry would make liquid immersion inaccurate.
Bulk and Skeletal Density for Powders and Foams
For copper powders and foams, you’ll often need both bulk and skeletal density. Why? Bulk density includes the spaces between particles, while skeletal density measures just the solid material (excluding open pores).
- Bulk density: Pour the powder into a graduated cylinder or use a tap density tester. The mass divided by the total volume (including air gaps) gives the bulk density.
- Skeletal density: Use gas pycnometry to measure only the volume of the solid phase, as described above. This value is closer to the theoretical density of pure copper and is critical for process control in powder metallurgy.
- Trapped air bubbles in immersion tests
- Incorrect liquid density value (always check for density of water at room temperature or your test temperature)
- Surface contamination or oxidation
- Poor temperature control
- Absorption of liquid by porous samples (use gas pycnometry instead)
Report density ± expanded uncertainty (k = 2), fluid identity, temperature, and method standard.
Sounds detailed? It’s worth it. The method you choose depends on your sample’s form and porosity—immersion for solid parts, pycnometry for irregular or porous ones, and bulk testing for powders and foams. For the best results, always:
- Use reference tables for liquid water density g/cm3 at your test temperature
- Clean and dry all samples thoroughly
- Document every condition—temperature, fluid, sample prep, and calculation method
Standardized procedures exist for most forms—ASTM and ISO standards for powder metallurgy, for example. If you’re ever in doubt, follow best practices from lab metrology and always record your assumptions. By doing so, you’ll ensure your density of copper g/cm3 results are trustworthy, repeatable, and ready to support your next engineering decision.
Next, we’ll compare copper’s density to other metals so you can make smart material choices for weight, cost, and performance in real-world applications.
Compare Copper Density with Other Common Metals
Copper versus Aluminum, Steel, Brass, and Gold
When you’re deciding between metals for a project, the density of copper is just one piece of the puzzle—but it’s an essential one for weight, handling, and performance. Imagine you’re choosing between copper, aluminum, steel, brass, and even heavier metals like tungsten or gold. How do they stack up? Let’s put the numbers side by side for a clear picture.
| Metal | Density (g/cm³) | Density (kg/m³) | Common Applications |
|---|---|---|---|
| Aluminum | 2.7 | 2,700 | Lightweight structures, aerospace, automotive |
| Steel | ~7.85 | 7,850 | Construction, tools, machinery |
| Brass | 8.4–8.7 | 8,400–8,700 | Decorative, plumbing, musical instruments |
| Copper | 8.96 | 8,960 | Electrical wiring, heat exchangers, plumbing |
| Iron | 7.87 | 7,870 | Structural, automotive, machinery |
| Lead | 11.34 | 11,340 | Batteries, radiation shielding |
| Tungsten | 19.25 | 19,250 | High-temp, weights, aerospace |
| Gold | 19.3 | 19,300 | Jewelry, electronics, investment |
When Density Drives Selection and Cost
Looking at the density of different metals, you’ll notice aluminum is by far the lightest, making it the go-to for weight-sensitive parts. Copper, with its higher density, is chosen when you need top electrical or thermal conductivity and don’t mind the extra mass. Steel sits between aluminum and copper, offering strength and affordability. Brass, an alloy of copper and zinc, lands just below copper in density, making it useful for decorative and machinable applications. At the high end, tungsten density and gold density are nearly double that of copper—these metals are reserved for specialized uses where extreme mass or value is required.
- Need lightweight? Choose aluminum for structures where every gram counts.
- Need strength? Steel offers a balance of density and mechanical properties.
- Need conductivity? Copper is unmatched for electrical and heat transfer tasks.
- Need machinability and aesthetics? Brass is your pick, with density just under copper.
- Handling and shipping? Be aware: parts made from gold or tungsten will be heavy, affecting costs and logistics.
For example, if you’re replacing a copper busbar with an aluminum one, the weight drops by nearly two-thirds for the same volume—critical for aerospace or mobile systems. On the other hand, using tungsten for a counterweight dramatically increases mass in a compact space.
Weight and Volume Estimation Workflow
Want to estimate the weight of a part? Here’s a straightforward process:
- Calculate the volume of your part from CAD or drawings (in cm³ or m³).
- Multiply by the density of your chosen metal at the relevant temperature.
- Add allowances for coatings, inserts, or porosity if needed.
- Round to a procurement-friendly precision (e.g., nearest 0.1 kg).
For assemblies, remember that coatings, fasteners, and mixed materials can shift the total mass—always clarify these in your bill of materials.
Use a consistent unit system and a single source table to avoid conversion drift in cross-material comparisons.
It’s crucial to check whether density values in tables represent pure metals, typical alloys, or a range. For traceability in design reviews, always cite your data source. This approach ensures your weight calculations are accurate, and your material choices are defensible—especially when comparing the density of aluminum, density of steel, density of gold, or any other metal for your application.
Next, we’ll explore how to keep density values consistent from design to procurement, so your specifications hold up from drawing board to delivery.

Specification and Procurement for Reliable Density Data
How datasheets report density
When you’re sourcing copper sheet, copper sheet metal, or copper bars for a project, you need more than just a number for the density of copper. Procurement decisions hinge on reliable, consistent data. But what is the density of copper metal in your context? Most datasheets list a nominal value—often 8.92 to 8.96 g/cm³ or 8,920 to 8,960 kg/m³ for pure copper at 20°C—yet the fine print matters. You’ll often find density reported alongside the reference temperature, alloy designation (like UNS C11000), and sometimes the product form (sheet, bar, or plate). These details aren’t just for show: they ensure you get the right weight of copper for your build, with no surprises at delivery or inspection.
Tolerances and measurement conditions to confirm
Sounds straightforward? Not always. Tolerances, test methods, and manufacturing processes can all nudge the actual copper metal density you receive. For example, ASTM B370 for copper sheet in building applications bases thickness calculations on a density of 8.91 g/cm³ (0.322 lb/in³), but actual product may vary slightly due to alloy content, temper, and surface finish. Wrought products are typically closer to theoretical density, while cast or powder-processed forms may show minor reductions due to porosity or inclusions. Always check if the datasheet gives a range or a single value, and whether the measurement reflects the finished form or is theoretical.
| Specification Detail | Why It Matters |
|---|---|
| Density value with units and temperature | Ensures consistency in calculations and shipment weights |
| Alloy designation (e.g., C11000, CW004A) | Confirms chemical composition and expected density |
| Product form (sheet, bar, plate) | Density can shift slightly with form and process |
| Accepted range or reference source | Protects against out-of-spec deliveries |
| Measurement method (if verification is needed) | Clarifies if density is measured or theoretical |
What to ask suppliers before you buy
Imagine you’re preparing a request for quotation (RFQ) or purchase order (PO) for copper sheet metal or copper bars. Here’s a practical checklist to help you avoid costly misunderstandings and ensure your design intent carries through to the delivered product:
- Request the density value, with units and the reference temperature (e.g., 8.94 g/cm³ at 20°C)
- Specify the accepted range or cite the reference source (ASTM, EN, or producer datasheet)
- Clearly state the product form (sheet, bar, plate) and any porosity or surface quality requirements
- Ask for the exact alloy and temper (e.g., CW004A, half-hard, or C11000, annealed)
- Define the measurement method if verification is required (e.g., immersion, pycnometry)
- Include a note on acceptable substitutes—only allow alloys with similar density and performance
This approach helps you lock in the copper density kg m3 you need, minimizing the risk of over- or underweight shipments and ensuring that your calculations for weight of copper per component remain accurate from design through delivery.
Documenting density in inspection and quality plans
Once your copper sheet or bar arrives, inspection teams need a clear reference. In your quality or inspection plan, always:
- Cite the source table or standard (e.g., ASTM B370, EN 1652, or a producer datasheet)
- Define the verification method if density measurement is required
- Record the environmental conditions (temperature, humidity) during testing
- Archive supplier datasheets and attach a metal density chart from a recognized handbook for cross-checking
Density shall conform to the referenced alloy datasheet at stated temperature; if measured, report method and uncertainty.
Why so much detail? Because some copper sheet metal providers publish density ranges, not just single values. When that happens, always choose the conservative (lower) bound for structural or weight-critical designs—this protects both safety and compliance.
By following these steps and keeping your documentation tight, you’ll ensure your copper metal density data stays consistent from the drawing board to the loading dock. Next, we’ll show you where to find the most authoritative sources for copper density data, so your specs and reports can stand up to any audit or review.
Authoritative Sources for Copper Density Data
Standards and Databases to Trust for Copper
When you need to cite the mass density of copper in a report or design, where do you turn? Imagine you’re preparing documentation for a critical application—auditors and engineers will want to see that your numbers come from credible, traceable sources. That’s why it’s essential to rely on recognized standards, national databases, and respected handbooks when sourcing density copper data. Not only does this approach build confidence in your work, but it also ensures consistency across teams and projects, especially when comparing density of various metals.
| Source | What it Provides | Typical Use | Notes |
|---|---|---|---|
| National Standards Organizations (e.g., ASTM, EN, JIS) | Official copper alloy and product specifications, nominal density values | Procurement, engineering design, quality assurance | Reference for alloy grade, product form, and measurement conditions |
| National Metrology Databases (e.g., NIST, CRC Handbook) | Fundamental properties: mass density, atomic properties, temperature dependencies | Research, simulation, critical design validation | Use for pure copper and baseline values; always note temperature |
| Materials Handbooks (e.g., ASM Specialty Handbook, MatWeb) | Comprehensive metal density chart and alloy-specific data | Cross-checking, educational reference, initial selection | Document edition/year for traceability |
| Producer Datasheets | Density ranges by alloy, temper, and product form | Supplier qualification, RFQs, inspection planning | Ideal for as-delivered parts; cite sheet/plate/bar specifics |
Cross Checking Values for Critical Designs
Sounds like a lot of sources? Here’s a practical rule: for any critical application, always verify your density copper value from at least two independent references. For example, check the CRC Handbook or NIST database for the baseline (such as 8,960 kg/m³ for pure copper MIT), then confirm with an ASTM or EN product standard for the specific alloy and form. This two-source approach helps you catch discrepancies and ensures your values match the actual metals and density used in your project.
- Start with a national or international standard for your alloy and product form.
- Cross-check with a reputable database or handbook for the same units and temperature.
- For alloys or special forms, always use producer datasheets for the most precise numbers.
Documenting both sources in your calculation file or report makes your work defensible and ready for audit. For less critical projects, a single trusted reference may suffice, but for safety- or cost-sensitive programs, redundancy is your friend.
Citation Format for Reports and Drawings
Imagine you’re preparing a design review or submitting a report. To avoid confusion and support traceability, always include clear citations for your metal density chart or data tables. Here’s a simple, reproducible format to follow:
Organization, Document or Dataset, Property name, Temperature, Units, Accessed date.
For example: "CRC Handbook of Chemistry and Physics, 2003-2004 Edition, Mass Density of Copper, 20°C, kg/m³, accessed October 2025."
- Specify if the value is for pure copper, a specific alloy, or a product form.
- Record the edition or revision level of the standard or handbook.
- Note the reference temperature and units (g/cm³, kg/m³, etc.).
Why so much detail? Because metals and density values can change with new standards, updated testing methods, or revised alloy compositions. By logging the exact source and revision, you make future audits, updates, and cross-team communication much smoother.
In summary, always anchor your mass density of copper numbers in authoritative references, cross-check for critical work, and document every detail in your reports and drawings. This approach keeps your engineering defensible, your procurement reliable, and your designs ready for the next step—applying density data to real-world manufacturing and design decisions.
Design and Manufacturing Choices Guided by Density
Design Implications of Copper Density
When you’re turning a concept into a real part, one of your first questions is often, “How much does copper weigh in this design?” The answer directly affects everything from thermal performance to vibration resistance and shipping costs. Since the copper density kg/m3 is about 8,960, you can quickly estimate the mass of any part by multiplying its volume by this density. For instance, if your CAD model shows a volume of 50 cm3, the weight of copper per cubic inch or per cubic centimeter becomes a straightforward calculation—crucial for electrical busbars, heat sinks, or precision connectors.
Balancing Conductivity, Thermal Mass, and Weight
Imagine you’re designing a high-performance heat exchanger or a PCB busbar. You want the exceptional conductivity of copper, but you also need to manage the part’s mass for assembly and performance. Here’s where density becomes a balancing act: higher density means more thermal inertia (the part heats and cools more slowly) and more mass for vibration damping, but it also means heavier assemblies and higher shipping costs. If you’re comparing copper to aluminum, you’ll notice copper’s density is more than three times higher—so every design choice impacts the final cu weight and handling.
- Thermal inertia: Dense copper parts store more heat, which is great for temperature stability but can slow response times in some applications.
- Vibration response: Heavier copper components can dampen vibrations, protecting sensitive electronics.
- Assembly and logistics: Knowing the density helps you plan for lifting, mounting, and shipping—no surprises when the crate arrives.
From Material Choice to Manufacturable Parts
So, how do you go from a CAD model to a manufacturable copper part with the right density and weight? Here’s a practical workflow:
| Step | Action |
|---|---|
| 1. Estimate part mass | Calculate volume from CAD and multiply by copper density (kg/m3 or lb/in3 as needed) |
| 2. Select alloy and product form | Choose the copper grade (pure, brass, bronze) and form (sheet, bar, casting) based on performance and weight targets |
| 3. Confirm density at operating temperature | Adjust for temperature if the part will run hot or cold (density drops slightly as temperature rises) |
| 4. Document sources in drawing notes | Record the reference for density values, alloy, and temperature for traceability |
- Review CAD volume and target mass
- Select copper alloy and form for your application
- Use the correct density (e.g., density of copper lb/in3 for US specs)
- Adjust for coatings or inserts if needed
- Document everything in your RFQ or drawing notes
Select alloy and form first, then lock density and temperature to avoid rework late in the build.
Partnering for Prototypes Where Density Matters
Need to turn your design into a physical prototype, and want to ensure you hit your weight targets? That’s where a rapid prototyping partner like XTJ adds value. Their engineers understand the nuances of copper density, alloy selection, and manufacturability—so your prototype matches both your CAD and your performance requirements. Whether you’re working with pure copper or an alloy, XTJ provides complimentary DFM feedback to help you optimize for both function and cu weight. Rapid turnaround and ISO-certified quality mean you get accurate, reliable results every time.
For the best results, include these details in your RFQ:
- CAD model (with volume clearly indicated)
- Target mass or weight per part
- Alloy grade (e.g., C11000, brass, bronze)
- Reference temperature for density data
- Source of density value (datasheet, standard, or handbook)
By sharing this information, you help your manufacturing partner deliver a copper prototype that truly reflects your design intent—no surprises on the scale or in the field.
In summary, understanding and applying the correct copper density kg/m3 is essential for accurate weight estimates, reliable performance, and seamless manufacturing. Whether you’re building a single prototype or scaling up for production, always anchor your calculations in verified density data and clear communication with your suppliers. Ready to move from data to design? Your next step is to put these principles into practice for smarter, lighter, and more effective copper components.
Frequently Asked Questions about the Density of Copper
1. What is the density of copper in kg/m³ and g/cm³?
Copper has a density of approximately 8,960 kg/m³ or 8.96 g/cm³ at 20°C. These values are standard for pure copper and are widely used in engineering calculations and material specifications.
2. Why does the density of copper matter in engineering and manufacturing?
Copper's density affects weight, volume, and performance in applications like electrical wiring, heat exchangers, and plumbing. Accurate density values ensure correct mass estimates, shipping costs, and structural integrity in designs.
3. How does temperature affect the density of copper?
As temperature rises, copper expands, causing its density to decrease. This is especially important in high-temperature environments, where precise density adjustments are needed for accurate simulations and calculations.
4. How do copper alloys like brass and bronze compare in density?
Brass (copper-zinc) and bronze (copper-tin or copper with other elements) typically have lower densities than pure copper due to the addition of lighter metals. The density varies by alloy composition and product form, so always check datasheets for specifics.
5. What should I specify when sourcing copper sheet metal or bars?
When procuring copper products, specify the required density (with units and reference temperature), alloy designation, product form, and measurement method. This ensures you receive materials that meet your design and quality requirements.
-
Posted in
copper alloys, copper sheet, density of copper, engineering materials, metal density comparison


