
How To Clean Copper In 8 Steps: Shine, Protect, And Preserve
Step 1: Identify Your Copper and Its Finish for Safe, Effective Cleaning
How to Identify Solid vs. Plated Copper
Ever wondered why some copper pieces develop a rich brown glow while others show streaks of silver or black underneath? Before diving into how to clean copper, it’s crucial to know what you’re working with. The cleaning method you choose depends on whether your item is solid copper, copper-plated, or finished with a protective coating.
Here’s how to tell the difference:
- Color and Shine: Solid copper has a warm, reddish-brown hue. Over time, it forms a greenish-blue patina, especially if exposed to air and moisture. This is a natural sign of authenticity.
- Weight: Copper is denser than most metals used for plating. If your item feels surprisingly heavy for its size, it’s likely solid copper.
- Edge and Scratch Test: Examine worn edges or gently scratch a hidden spot. Solid copper shows a consistent color throughout, while copper-plated items may reveal a different base metal beneath a thin copper layer.
- Stamps and Labels: Look for markings like “solid copper,” “copper bottom,” or “copper-plated.” These clues help confirm the material.
| Item Type | Typical Finish | Safe Starting Method | Hard No-Go Actions |
|---|---|---|---|
| Solid Copper | Uniform reddish-brown, develops patina over time | Gentle wash, then targeted tarnish removal if needed | None, if uncoated; avoid harsh abrasives on delicate details |
| Copper-Plated | Thin copper layer over base metal; color may wear at edges | Weak, short cleaning cycles; always spot-test first | Extended soaking, aggressive scrubbing, strong acids |
| Lacquered Copper | Glossy, perfectly even sheen; resists tarnish | Mild soap and water only | Acids, abrasives, or solvents until lacquer is removed |
| Copper with Tin/Stainless Lining (Cookware) | Shiny or matte interior, copper exterior | Clean lining according to its material; treat copper exterior separately | Strong acids or abrasives on soft tin lining |
| Copper Jewelry (with stones/plating) | May have plated sections, set stones | Test in hidden area; avoid acids on sensitive stones | Soaking, acid on pearls, opals, turquoise |
Signs a Piece Is Lacquered
Lacquered copper is easy to spot: it has a glass-like, flawless shine with no micro-scratches or color changes. If you’re unsure, gently dab a hidden area with an acetone-soaked cotton swab. If the swab picks up a clear residue, there’s lacquer present. In this case, avoid all acidic or abrasive cleaning methods until the coating is professionally removed.
Patina vs. Tarnish: What to Keep or Remove?
Here’s where personal taste and preservation come into play. Does copper tarnish? Absolutely. Over time, copper reacts with oxygen, forming a layer of brown or black tarnish. Eventually, in the presence of moisture and other chemicals, it can develop a greenish-blue patina—a process known as oxidation (source).
- Patina: Even, brownish or greenish tone. Many collectors and homeowners value this look for its character and authenticity. A natural patina can actually protect copper from further corrosion.
- Tarnish: Dull, dark coating or streaks that obscure the copper’s shine. While some see it as a sign of age, others prefer to remove it for a brighter finish.
- Verdigris: Powdery, green deposits. This is a red flag—verdigris can trap moisture and cause deeper corrosion, so it should be removed.
Red-Flag Conditions: When to Pause Before Cleaning
- Loose rivets or joints
- Cracks or structural damage
- Flaking plating or coatings
- Deep pitting or corrosion
If you spot any of these, hold off on cleaning and consider consulting a professional.
Decision Path:
- If you have solid, uncoated copper with superficial copper tarnish or a mild patina, start with a gentle wash.
- If the item is lacquered, use only non-abrasive soap and water.
- If it’s plated or has a delicate lining, use the weakest and shortest cleaning method—always spot-test in a hidden area for 60 seconds before proceeding.
By taking a few minutes to identify your copper and its finish, you’ll avoid costly mistakes and ensure your cleaning process preserves both beauty and value. Up next: how to set up a safe, effective cleaning space for your copper treasures.
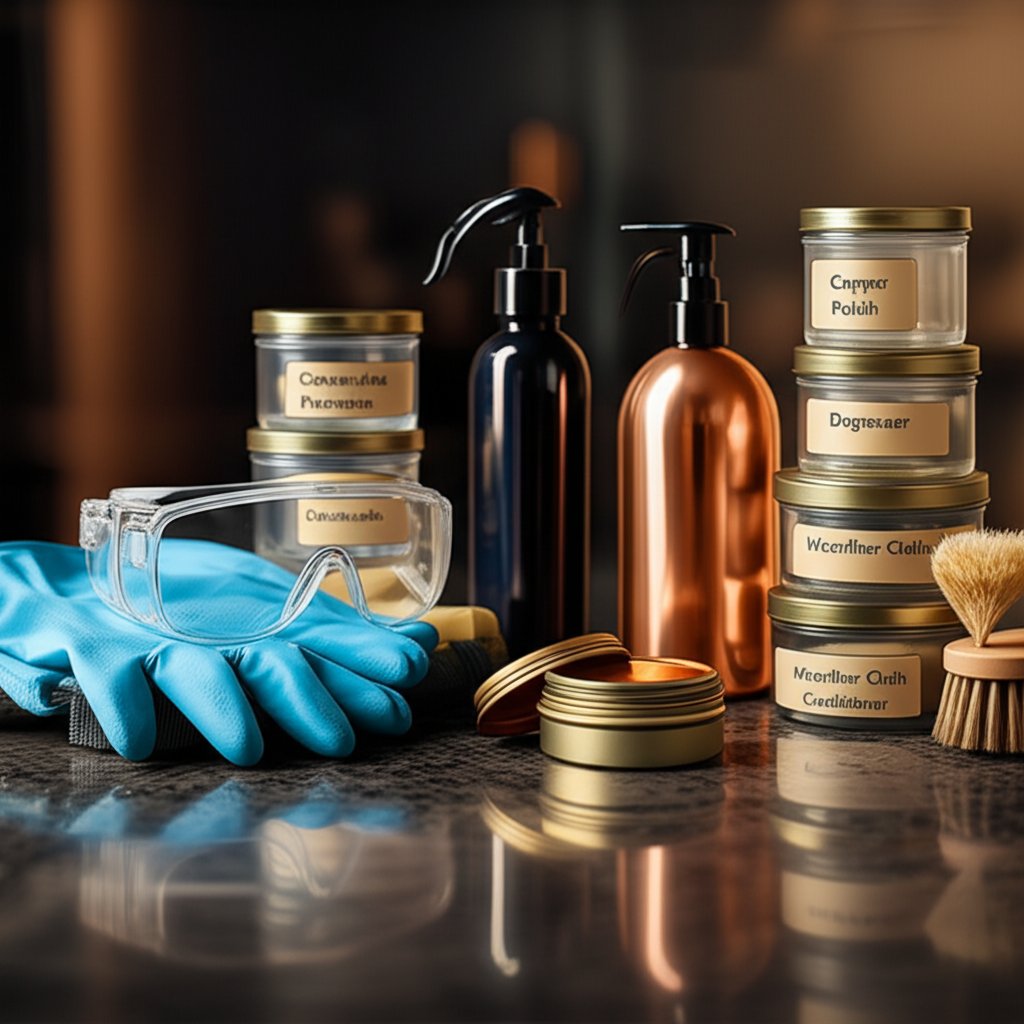
Step 2: Prepare Your Workspace and Safety Essentials for Cleaning Copper
Safety Gear for Cleaning Copper
Before you reach for that vinegar copper cleaner or try a new home remedy for cleaning copper, pause for a moment. Imagine: you’re eager to restore that family heirloom, but a splash of acid or a stray metal brush could do more harm than good. Setting up a safe, organized workspace is the first step to successful—and stress-free—copper cleaning.
-
Personal Protective Equipment (PPE):
- Nitrile or chemical-resistant gloves (keeps hands safe from acids and polishes)
- Safety goggles or glasses to protect your eyes from splashes
- Splash-resistant apron or old clothing
-
Workstation Setup:
- Choose a stable, well-ventilated area away from children and pets
- Lay down a soft towel or mat to cushion and protect delicate copper surfaces
- Keep all cleaning supplies within easy reach, but away from food or drink
-
Tools and Containers:
- Use only plastic or glass bowls for mixing acids (never metal, which can react)
- Have soft microfiber cloths, cotton swabs for tight spots, and nylon (not steel) brushes
- For jewelry, painter’s tape and small zip bags help protect sensitive stones and chains
-
Neutralizing Solution:
- Mix 1 tablespoon baking soda in 2 cups of water—keep this nearby to neutralize any acidic spills or to stop acid reactions on your copper instantly (source)
-
Drying Supplies:
- Lint-free towels for immediate drying—this prevents water spots and flash tarnish
-
Label and Minimize Waste:
- Clearly label all containers and only mix as much solution as you need
Neutralizing and Disposal Basics
After using any acidic solution—whether it’s a vinegar copper cleaner or another home remedy for cleaning copper—always rinse your item thoroughly with clean water. Follow this by wiping with your prepared baking soda solution, rinse again, and dry completely. This stops residual acid from causing flash tarnish or damaging finishes. When you’re done, most small amounts of diluted vinegar or salt solutions are safe to pour down the drain with plenty of running water, but never mix acids with bleach or ammonia, as this can create toxic fumes (reference).
Set a timer before every soak to prevent over-cleaning.
Workstation Setup Checklist
| Essentials | Purpose |
|---|---|
| PPE (gloves, goggles, apron) | Protects you from splashes and skin contact |
| Soft towel or mat | Prevents dents and scratches |
| Plastic/glass containers | Safe for mixing and soaking acidic solutions |
| Microfiber cloths, nylon brushes, cotton swabs | Gentle cleaning without marring copper |
| Baking soda neutralizer | Instantly halts acid reactions and protects surfaces |
| Lint-free drying towels | Stops water spots and flash tarnish |
| Labels for containers | Safety and waste minimization |
Wondering what cleans copper safely and efficiently? Preparation is half the battle. Once your workspace is organized and your safety essentials are ready, you’ll be set to use any cleaning method—whether it’s cleaning copper with vinegar or another trusted solution—confidently and without risk. Next, you’ll learn how to gently wash your copper for everyday maintenance before moving on to deeper cleaning.
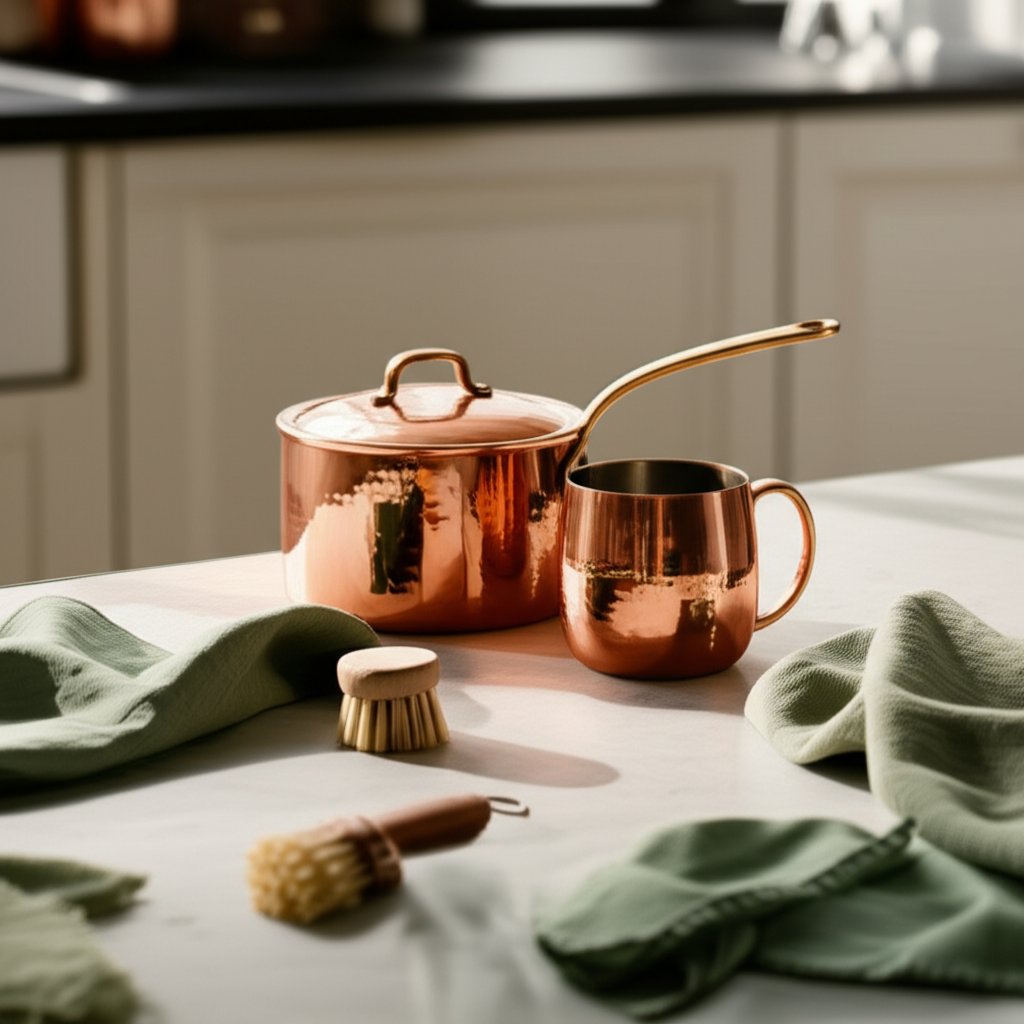
Step 3: Do a Gentle Wash for Routine Cleaning of Copper Mugs, Cups, and Bottles
Gentle Wash for Everyday Soil
Ever wondered why your copper mugs lose their shine or develop spots even after regular cleaning? The secret lies in how you wash and dry them. For everyday maintenance, a gentle wash is all you need to keep your copper items gleaming without damaging their protective patina or finish. This approach works for everything from copper mugs and cups to water bottles and cookware exteriors.
- Prepare your solution: Fill a sink or large bowl with warm water and add a few drops of mild, mild, dye-free dish soap. While most dish soaps are slightly alkaline rather than neutral, products like Dawn are safe enough for everyday cleaning. Avoid anything with harsh chemicals or abrasives.
- Submerge and wipe: Place your copper item (unless it’s lacquered) in the soapy water. Using a soft sponge, gently wipe the surface in straight lines rather than circles—this helps prevent swirl marks. For how to clean copper mugs or cups, focus on the interior and exterior, especially after serving acidic drinks.
- Rinse thoroughly: Run the item under warm water until all soap residue is gone. Don’t leave any suds behind, as they can dull the finish.
- Immediate hand-dry: Use a lint-free microfiber towel to dry the copper completely. Experts recommend drying twice with two different towels to ensure all moisture is removed and to prevent water spots or flash tarnish.
- Air-dry briefly: Let the item air-dry for a few minutes to ensure no hidden moisture remains, especially in crevices or around handles.
Mug and Bottle Care Essentials
When it comes to washing copper mugs or how to clean a copper water bottle, hand-washing is non-negotiable. Can you put copper in the dishwasher? Absolutely not. Dishwashers use harsh detergents and high heat that can cause dents, tarnish, and flaking—so always stick to gentle hand-washing for both lined and unlined copper items.
- Hand-wash after every use, especially after acidic beverages like citrus-based cocktails.
- For lacquered copper, use only this gentle soap-and-water method—never acids, salts, or abrasives.
- If your copper cookware has a stainless or tin lining, wash the inside according to its lining’s care instructions and treat the copper exterior separately.
- If stubborn tarnish remains after a gentle wash, avoid scrubbing harder—instead, move on to targeted acidic cleaning methods in the next step.
Drying Techniques to Prevent Spotting
Proper drying is just as important as washing. Even a drop of water left on the surface can cause spots or accelerate tarnish. For cleaning copper mugs or cups, make it a habit to dry them twice with soft towels and then let them air-dry for a few minutes. This extra step keeps your copper looking bright and extends its life.
-
Do nots:
- No steel wool or abrasive pads
- No chlorine bleach or harsh detergents
- No dishwashers—can you put copper in the dishwasher? Never!
By following these simple steps for how to clean copper cups, mugs, and bottles, you’ll maintain their shine and prevent premature tarnishing. If you notice persistent tarnish or green spots, don’t worry—the next section covers targeted methods for deeper cleaning and restoring your copper’s natural brilliance.
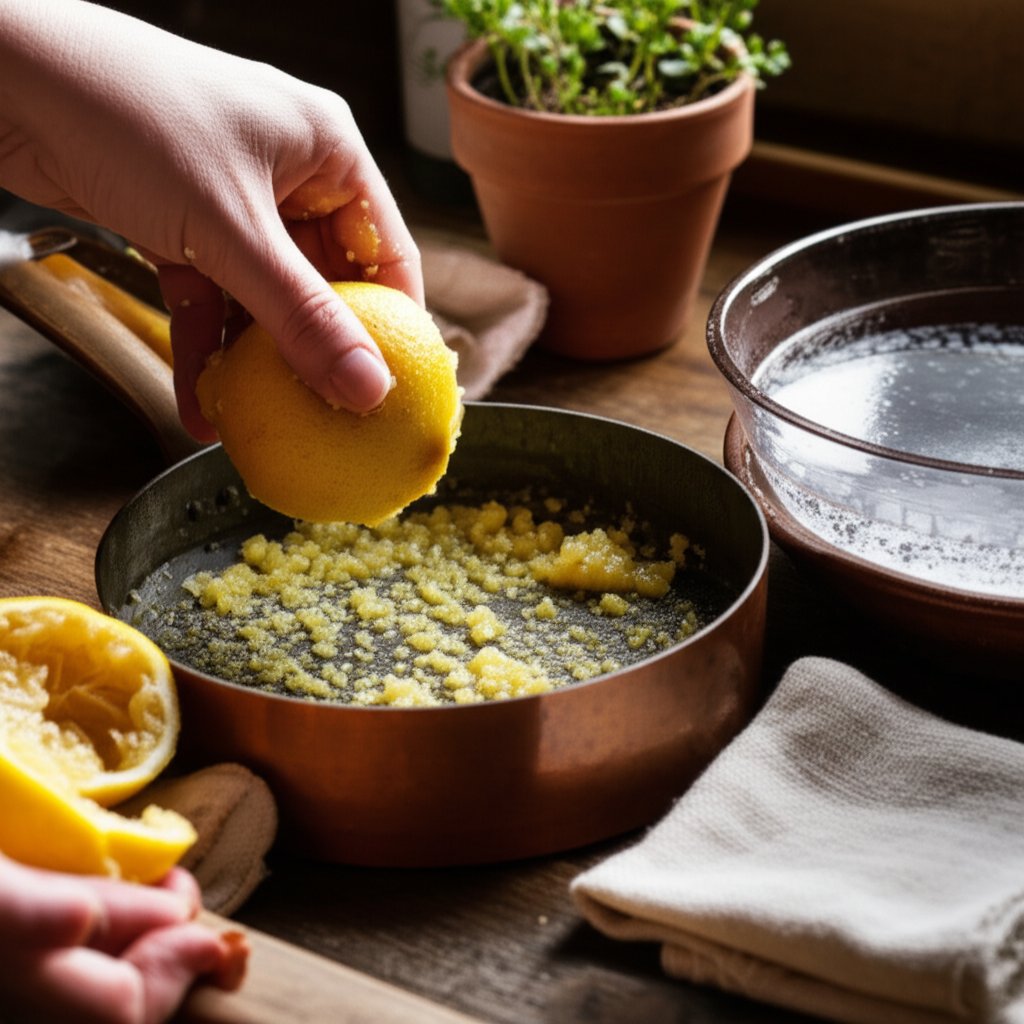
Step 4: Use Precise DIY Acid–Salt Methods for Targeted Copper Cleaning
Vinegar–Salt Solution vs. Lemon–Salt Paste: Which Works Best?
When it comes to how to clean copper with more than just soap and water, two tried-and-true DIY methods consistently deliver results: the vinegar–salt solution and the lemon–salt paste. Both approaches safely remove light to moderate tarnish on uncoated copper, restoring its warm, natural glow. But which method is right for your piece, and how do you use them without risking damage?
| Method | Mix Ratio | Best For | Contact Time | Cautions |
|---|---|---|---|---|
| Vinegar–Salt Solution | 1 cup white vinegar + 1 tbsp table salt | Quick cleaning of copper pans, pots, and flatware | 2–4 minutes | Test on hidden area; avoid on tin linings or sensitive stones |
| Lemon–Salt Paste | 1 tsp salt + enough lemon juice to make a paste | Spot polishing, intricate areas, or stubborn tarnish | Up to 2 minutes | Not for lacquered, plated, or antique items with delicate features |
How Do You Clean Copper with Acid–Salt Methods?
- Spot-Test First: Always test your chosen method on a hidden area for 60 seconds, especially if you’re unsure about plating or mixed materials. This helps prevent accidental dulling or etching.
-
Prepare Your Solution or Paste:
- For vinegar–salt: Mix 1 cup (240 ml) white vinegar with 1 tablespoon (15 g) table salt until fully dissolved.
- For lemon–salt: Sprinkle 1 teaspoon (5 g) salt on the copper surface and squeeze enough fresh lemon juice to create a paste.
-
Apply Gently:
- Vinegar–salt: Submerge the copper item or wipe the solution on using a soft cloth. Agitate gently in straight lines for 2–4 minutes.
- Lemon–salt: Use the cut side of a lemon or a soft cloth to massage the paste into the tarnished areas, working in straight strokes for up to 2 minutes (reference).
- Rinse Thoroughly: Rinse the item with warm water to remove all traces of acid and salt.
- Neutralize: Wipe the surface with a baking soda solution (1 tablespoon baking soda per 2 cups water) to halt any lingering acid reaction.
- Rinse Again and Dry: Give the piece a final rinse, then dry immediately with a lint-free microfiber towel to prevent water spots and flash tarnish.
- Repeat if Needed: If tarnish remains, repeat the process once rather than extending the contact time. Overexposure can dull copper’s finish.
Test and Timing to Protect Finishes
Imagine you’re polishing a treasured pan or a vintage vase. You’ll notice that the best way to clean copper is to work in small sections, keeping a close eye on color changes. If you see a pinkish hue or the shine looks uneven, stop and rinse immediately. For copper with a valued patina, only treat bright green spots (verdigris) with a cotton swab—preserve the rest for character.
Always avoid using these acid–salt methods on cookware with tin linings, on lacquered or plated items, and on jewelry with sensitive stones. If you’re unsure, stick with gentle washing or consult a pro.
Key Takeaway: For how to clean copper pans and how to clean copper pots, a vinegar–salt bath or lemon–salt paste offers a safe, effective solution—just remember to spot-test, limit contact time, and always neutralize and dry thoroughly for the brightest, longest-lasting results.
Once you’ve mastered these targeted cleaning techniques, you’re ready to tackle heavier tarnish or stubborn green spots. In the next section, we’ll explore deeper cleaning strategies for copper with significant oxidation or verdigris.
Step 5: Deep Clean and Remove Verdigris Safely from Heavily Tarnished Copper
Verdigris Removal Without Damaging the Base Metal
When you discover thick green spots or stubborn, dark tarnish on your copper, it’s time to take a more targeted approach. Heavy corrosion—especially the powdery green layer called verdigris—can weaken copper and, if left unchecked, may cause lasting damage. But how do you remove oxidation from copper without scratching, thinning, or harming the underlying metal?
Start with the gentlest method: use a soft nylon brush and distilled water to loosen and remove as much verdigris as possible. For light contamination, a damp microfiber cloth might be enough. Mechanical cleaning is especially recommended for delicate or valuable items, as it minimizes risk of surface damage.
Citric Acid Bath for Uniform Deoxidizing
If the green or black tarnish persists, move to a controlled chemical method. Citric acid is a favorite for those seeking how to clean oxidized copper in an eco-friendly, effective way. Prepare a warm bath with 1–2% food-grade citric acid by weight (about 10–20 grams per liter of water). Submerge the copper item for 5–10 minutes, checking progress every 2 minutes and gently agitating the bath. The acid will dissolve the oxidized layer without harsh abrasion (source). For items with intricate details, use a soft cloth to help the citric acid reach tight spots.
Alternatively, if you don’t have citric acid, you can use a strengthened vinegar-salt solution: mix 1 cup white vinegar with 1 tablespoon salt. Apply the solution with a soft cloth in gentle passes for 3–5 minutes. This method is effective for those wondering how to clean badly tarnished copper or how to clean corroded copper at home.
- Dislodge loose verdigris: Brush gently with a nylon brush and distilled water.
-
Prepare your bath or solution:
- For citric acid: Dissolve 10–20g per liter of warm water.
- For vinegar–salt: Mix 1 cup vinegar with 1 tbsp salt.
-
Apply treatment:
- Submerge in citric acid bath for 5–10 minutes, checking every 2 minutes.
- Or, wipe vinegar–salt solution on for 3–5 minutes, reapplying as needed.
- Rinse thoroughly: Use clean water to remove all residues.
- Neutralize: Wipe with a baking soda solution (1 tbsp per 2 cups water) to halt acid reaction.
- Final rinse and dry: Rinse again and dry immediately with a lint-free towel.
Know When to Stop to Protect Plating and Fine Details
It’s tempting to keep scrubbing until every spot is gone, but overcleaning is a real risk—especially for copper-plated items or those with delicate finishes. For plated copper, always use a cotton swab to apply solutions only to affected spots and limit contact time. If you see pinkish areas, matte patches, or a sudden metallic odor, these are signs you may be removing the copper layer itself.
Stop cues:If any of these occur, stop immediately, rinse, and dry the item.
- Color changes to pink or silvery (indicates exposed base metal)
- Metallic odor intensifies
- Unexpected matte or patchy finish appears
For how to clean the green off of copper with deep pitting, active corrosion under fittings, flaking plating, or if your item has historical or significant value, it’s best to consult a professional conservator. DIY methods can do more harm than good in these cases (reference).
By following these stepwise methods, you’ll know how to clean heavily tarnished copper and how to deoxidize copper safely, restoring its shine without risking permanent damage. Once the surface is clean and dry, you’re ready to polish and refine the finish—covered in the next step.
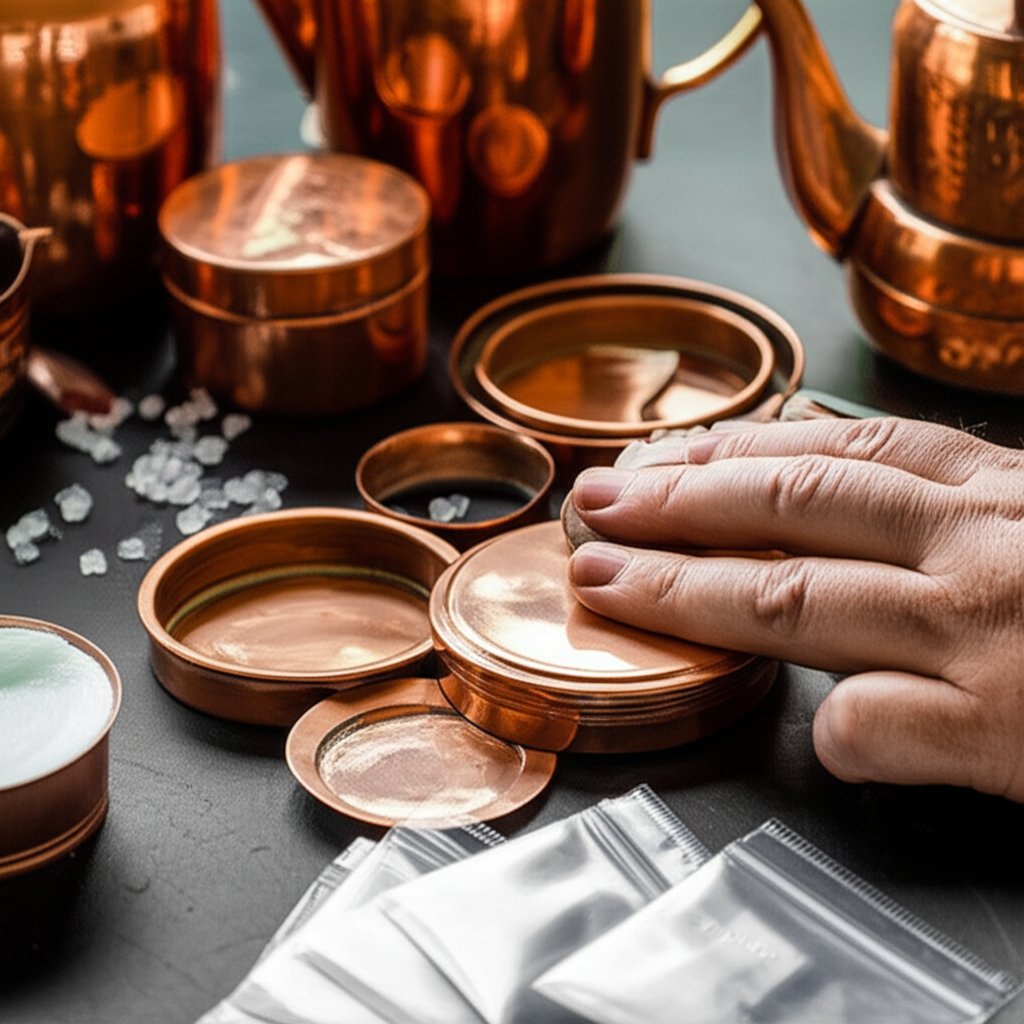
Step 6: Polish and Refine the Finish for Brilliant, Streak-Free Copper Shine
Hand-Polishing for Mirror Shine
When you’ve finished removing tarnish and oxidation, it’s time for the step that truly makes copper dazzle: polishing. But how to polish copper without leaving streaks, swirls, or residue? The answer lies in choosing the right polish, applying it with care, and using the best buffing techniques for each kind of copper item—whether it’s a cherished mug, a piece of jewelry, or your favorite cookware.
Choosing Commercial Copper Polish vs. DIY Paste
Sounds complex? Let’s break it down. You have two main options for polishing copper: a homemade paste or a store-bought, non-abrasive copper polish. Both can deliver a beautiful luster, but each has its strengths and limitations.
| Option | Pros | Cons |
|---|---|---|
| DIY Paste (Flour, Salt, Vinegar) |
|
|
| Commercial Copper Polish |
|
|
How to Polish Copper: Step-by-Step Instructions
- Apply the Polish: For DIY, mix 1 tablespoon flour, 1 tablespoon salt, and enough white vinegar to make a smooth paste. Apply a thin, even coat to the copper with a microfiber cloth. For commercial polish, follow the manufacturer’s instructions and use the provided sponge or a soft cloth.
- Wait and Buff: Let the paste or polish sit for 3–5 minutes. Buff the surface using straight, gentle strokes—never circular motions—to minimize swirl marks and achieve a mirror-like finish. For intricate details or how to polish copper jewelry, use cotton swabs and light pressure.
- Rinse Thoroughly: Wash the item with mild dish soap and warm water to remove all traces of polish or paste.
- Neutralize: Wipe the surface with a baking soda solution (1 tablespoon baking soda in 2 cups water) to stop any lingering acid reaction.
- Dry and Final Buff: Dry immediately with a clean, lint-free towel, then use a separate dry cloth for a final buff to remove haze and bring out maximum shine.
Buffing Patterns That Reduce Swirls
Imagine your favorite copper mug or a detailed pot lid—buffing in straight, overlapping lines (rather than circles) helps avoid visible swirl marks and gives a more professional, streak-free shine. For how to polish copper mugs or cookware, always polish on a cool, dry surface. Avoid working on hot copper, as residue can bake onto the metal and become stubborn to remove (reference).
- For cookware, protect lined interiors by polishing only the copper exterior.
- For jewelry or intricate patterns, use cotton swabs for tight spots and avoid heavy pressure that could round off crisp details.
- Switch to a clean part of your cloth frequently for the best results.
Pro Tip: Polishing copper regularly—every few months for display pieces or as needed for cookware—keeps your collection brilliant and easier to maintain in the long run.
With a refined, streak-free surface, your copper is now ready for the final step: protecting that shine and preventing future tarnish. Let’s look at how to seal in your hard work and keep copper glowing for months to come.
Step 7: Protect Copper and Prevent Tarnish for Long-Lasting Shine
Sealants: Wax vs. Lacquer for Copper Protection
Ever wondered how do you prevent copper from tarnishing after all that careful cleaning and polishing? The secret is in sealing and storing your copper the right way. Even in the best conditions, copper tarnishing is inevitable due to natural reactions with air and moisture. But you can slow the process and keep your copper gleaming much longer by choosing the right protective approach.
| Protection Method | Durability | Ease to Reapply/Remove | Heat Suitability | Best Use Cases |
|---|---|---|---|---|
| Wax (Microcrystalline or Carnauba) | Moderate; lasts a few months, easily renewed | Easy to buff and reapply; removable with mild solvents | Safe for most display pieces; not for direct cooking surfaces | Decor, jewelry, exterior of cookware, sinks |
| Lacquer (Clear Spray or Liquid) | Long-lasting if undamaged; can flake if scratched | Difficult to remove; requires full stripping for repair | Not suitable for cookware or high-heat items | Display pieces, architectural details, jewelry (not for frequent handling) |
| No Coating | Natural patina develops; requires regular cleaning | No removal needed; just routine maintenance | Safe for all uses; patina may affect appearance | Cookware in regular use, items where patina is desired |
For most homeowners, a thin layer of microcrystalline or carnauba wax is the best balance: it slows oxidation, remains reversible, and can be reapplied every few months as needed. Simply buff to a soft sheen after application. For copper you want to keep bright for long periods—like wall art or jewelry you rarely wear—a professional-grade lacquer is an option, but remember: once chipped, it requires full removal and reapplication. Never use lacquer on cookware that will be exposed to heat, as it will degrade and potentially contaminate food (reference).
Storage Strategies for Copper Jewelry and Decor
Does copper jewelry tarnish? Absolutely—especially when exposed to air, sweat, or lotions. To keep copper from tarnishing longer, store jewelry in anti-tarnish bags or wrap in acid-free tissue paper. Add a silica gel packet to absorb moisture. After each wear, gently wipe jewelry with a soft cloth to remove skin oils. For decorative copper, display pieces away from direct sunlight and humidity, and avoid storing in damp environments or near sulfur-rich materials (like some types of rubber bands or certain papers).
- Store copper jewelry in airtight bags with silica gel
- Wrap display pieces in acid-free tissue or soft cloth if kept in storage
- Keep copper dry—never store while damp
- Avoid exposure to chlorine, bleach, and harsh cleaning products
Care Routines to Slow Copper Tarnishing
How to care for copper mugs and cookware? Adopt a light, regular cleaning and drying routine after every use. For frequently used items, skip heavy polishes and focus on gentle washing and immediate drying to prevent water spots and flash tarnish. For rarely handled pieces, a seasonal wax buff is often enough.
- Wipe down with a dry, soft cloth after each use
- Apply a thin wax coat every few months for display items
- For jewelry, remove before swimming, bathing, or exercising
- Check for signs of tarnish or patina and clean promptly
Key Insight: Clean, dry, and air-tight storage is the simplest anti-tarnish strategy.
By following these prevention steps, you’ll spend less time cleaning and more time enjoying the natural beauty of your copper. Next, discover when it’s time to call in a professional to restore or finish your most valuable pieces.
Step 8: Go Professional for Restoration or New Ready-to-Finish Copper Parts
When to Seek Professional Help for Copper Restoration
Ever found yourself staring at a copper piece that’s more pitted, cracked, or flaking than you expected? Sometimes, no matter how much you know about how to restore copper, a DIY approach just won’t cut it. If you spot deep pitting, loose rivets, cracks, flaking plating, or a worn-through tin lining on cookware, these are all signs it’s time to call in a pro. The same goes for items with historical or sentimental value—professional restoration preserves both safety and worth.
- Professional refinishing or repair for architectural copper
- Retinning or relacquering cookware with worn linings
- Conservation services for antiques or heirlooms
- Replacement of damaged panels or hardware to match existing patina
Trying to fix serious damage yourself can result in further harm, especially if you use the wrong copper cleaning products or excessive force. When in doubt, consult a restoration specialist—many offer advice on the best commercial copper cleaner or treatment for your specific situation.
Specifying Finishes on New Parts and Prototypes
What if you’re starting from scratch or upgrading a project? Imagine you’re designing new copper hardware or a custom fixture—wouldn’t it be easier if the part arrived with the right finish, ready to use and easy to maintain? That’s where professional manufacturing services come in. For industrial, architectural, or engineered parts, you can specify finish requirements during production to minimize future cleaning and polishing.
XTJ Rapid Prototyping Services stands out for delivering copper and copper-alloy components with surface finishes tailored to your needs. Their engineers offer complimentary DFM (Design for Manufacturability) feedback, helping you optimize edges, radii, and surface quality for easier cleaning and corrosion resistance. With ISO-certified quality control, you can expect reliable results whether you need a mirror polish, matte finish, or custom texture. Just note: XTJ specializes in new part production and is not a restoration service for antiques or heirlooms.
| Professional Option | Advantages | Limitations | Best Use Cases |
|---|---|---|---|
| XTJ Rapid Prototyping Services | Surface spec control, DFM feedback, ready-to-finish parts, ISO-certified quality | Not for antique restoration or historical conservation | New parts, prototypes, industrial and architectural copper components |
| Restoration Specialists | Expert repair, patina matching, conservation of historical value | Longer turnaround, higher cost, may not offer new part manufacturing | Antiques, heirlooms, valuable cookware, architectural panels |
| Commercial Cleaning Services | Deep cleaning, recoating, use of professional-grade copper cleaning products | May not address structural repairs, finish customization limited | Large-scale installations, commercial kitchens, public art |
Getting Parts Made Ready-to-Finish
Choosing the right partner for your copper project means you’ll spend less time figuring out what do you clean copper with or what do you polish copper with after the fact. By specifying your finish—matte, satin, or mirror-bright—at the production stage, you can ensure that your parts arrive easy to maintain and less prone to tarnish. Services like XTJ allow you to fine-tune these details, so you get the best copper cleaner results with minimal effort.
Key Takeaway: For restoration, preservation, or new builds, professional expertise ensures your copper’s beauty, safety, and longevity—especially when cleaning alone isn’t enough.
With the right approach, you’ll always know when to tackle copper care yourself and when to trust the pros for the best, longest-lasting results.
Frequently Asked Questions About Cleaning Copper
1. What not to use to clean copper?
Avoid harsh abrasives like steel wool, scrubbers, or bleach when cleaning copper. These can scratch or damage the surface, especially on kitchen sinks or vessels. Instead, use non-abrasive cleaners and gentle cloths to maintain copper's finish and prevent unwanted marks or corrosion.
2. Does Dawn clean copper?
Yes, mild dish soaps such as Dawn, Ivory, or Palmolive are safe for cleaning copper. Use them with warm water and a soft cloth or sponge for routine washing. This gentle approach removes dirt without harming the copper's patina or protective coatings.
3. How can you tell if copper is lacquered or plated before cleaning?
Lacquered copper has a glossy, even finish without micro-scratches and resists tarnish. Test with an acetone-soaked swab on a hidden spot—if residue appears, lacquer is present. Copper-plated items may show a different metal at worn edges or if gently scratched. Always identify the finish before choosing a cleaning method.
4. Can you put copper in the dishwasher?
No, copper should never go in the dishwasher. Dishwashers use harsh detergents and high heat, which can cause tarnish, dents, or flaking. Always hand-wash copper mugs, cups, and cookware with mild soap and water, then dry immediately to maintain shine.
5. What is the safest way to remove green spots (verdigris) from copper?
To safely remove verdigris, first use a nylon brush and distilled water to gently dislodge loose deposits. For stubborn spots, try a mild citric acid bath or a vinegar-salt solution, but limit contact time and neutralize with a baking soda solution afterward. For valuable or antique items, consult a professional conservator.


