
Anodized Aluminium QA That Works: Thickness, Seal, Acceptance
Anodized aluminium fundamentals you can trust
When you pick up a sleek smartphone, admire a modern building’s window frames, or use a high-end flashlight, you’re likely holding a piece of anodized aluminum. But what is anodized aluminum, and why is it so widely used across industries? Let’s break down the basics so you can make informed decisions for your next project.
What anodized aluminium means for performance
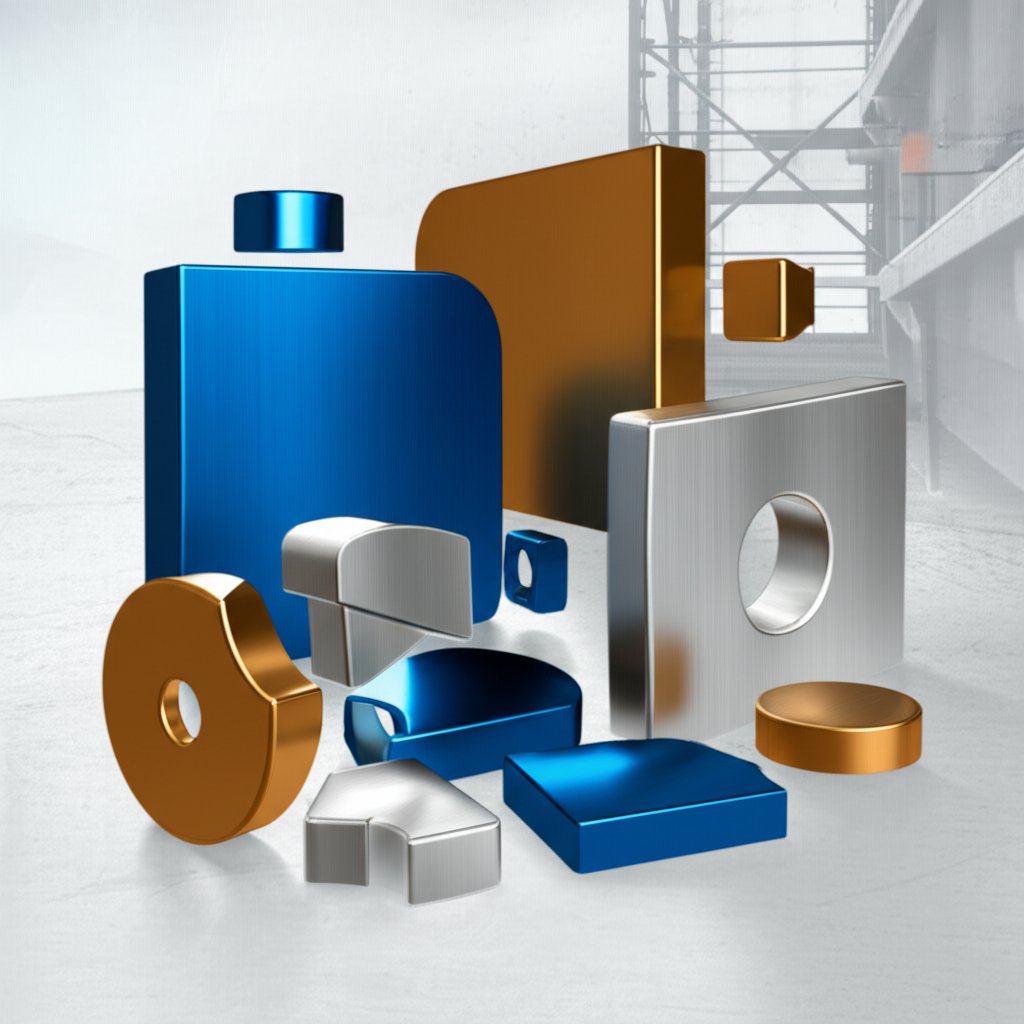
Anodized aluminium is aluminum that’s undergone an electrochemical process called anodizing. This process transforms the metal’s surface into a robust, corrosion-resistant oxide layer. Unlike paint or plating, which add a coating on top, anodizing converts the surface itself—creating a finish that won’t chip or peel. You’ll see this finish in applications ranging from architecture and aerospace to consumer electronics and cookware, where durability, appearance, and longevity matter most.
- Corrosion resistance: Protects against weather, chemicals, and wear
- Wear resistance: Harder surface than bare aluminum, with moderate abrasion resistance
- Color options: Wide variety of hues through dyeing, with good color fastness after sealing
- Electrical insulation: Anodic oxide layer is non-conductive
- Improved adhesion: Porous structure can help paint or adhesives bond better
Key takeaway: Anodizing doesn’t just add a layer—it transforms the aluminum surface, making it tougher, more attractive, and longer-lasting.
How anodizing works: from oxide growth to sealing
So, what is anodizing in practice? The process starts by immersing aluminum in an acid electrolyte bath and applying direct current. The aluminum acts as the anode (hence “anodizing”), releasing oxygen ions that bond with the surface to form a thickened layer of aluminum oxide. This layer is:
- Highly ordered and porous: Nanopores allow dyes or lubricants to be absorbed
- Grown from the base metal: The oxide becomes part of the aluminum, not a separate film
After anodizing, the part can be dyed for color. The final step is sealing—closing the pores to lock in color and maximize corrosion resistance. Sealing is crucial for applications exposed to moisture or chemicals, ensuring the finish stays vibrant and protective over time. This mechanism is what sets anodized aluminum apart from untreated or simply painted surfaces [Anodizing.org].
Anodized aluminum vs painted finishes
If you’re weighing anodized aluminum vs aluminum with a painted finish, consider the differences in both durability and appearance. Paint forms an external film that can chip, flake, or fade, especially in tough environments. In contrast, anodized finishes are integral to the metal’s surface—so they won’t peel, and they offer better resistance to UV, abrasion, and chemicals. While paint offers more flexibility in color and gloss, anodizing excels in longevity and maintenance-free performance, especially for high-traffic or outdoor applications.
It’s worth noting that terminology varies: “anodized aluminum” and “anodized aluminium” mean the same thing, with “aluminum” favored in American English and “aluminium” in British English. The process, benefits, and applications are identical regardless of spelling.
As you read on, keep in mind how anodizing’s unique mechanism shapes not only the look but also the technical performance of your parts. Specifications for thickness, color, and sealing will be key in later sections on standards and quality assurance—so understanding these fundamentals is your first step from concept to procurement.
Processes parameters and practical SOPs for anodizing aluminum
Ever wondered how to anodize aluminum for that durable, sleek finish you see on premium products? The answer lies in choosing the right anodizing process, fine-tuning your parameters, and using the correct anodizing equipment. Whether you’re a hobbyist, a small shop, or running an industrial line, understanding these fundamentals will help you achieve consistent, high-quality results.
Decorative vs hard anodized process choices
Not all anodizing processes are created equal. The choice depends on your application—do you need a decorative finish, extreme wear resistance, or something in between? Here’s a comparative overview of the most common anodizing processes used for aluminum:
| Process Type | Electrolyte Chemistry | Typical Temperature Range | Voltage/Current Density | Coating Thickness | Main Application |
|---|---|---|---|---|---|
| Type I Chromic Acid | Chromic acid | Low to moderate | Low voltage, moderate current | 20–100 microinches (very thin) | Corrosion resistance, aerospace, paint adhesion |
| Type II Sulfuric Acid | 15–20% Sulfuric acid | 15–20°C (59–68°F) | Moderate voltage, 1.5 A/dm² typical | 0.0001"–0.001" (2.5–25 μm) | Decorative, moderate wear, color dyeing |
| Type III Hard Anodize | High-conc. sulfuric acid | Colder baths (often 0–5°C/32–41°F) | Higher current density, higher voltage | Up to several thousandths (thick, dense) | Extreme wear, salvage, industrial, military |
| Coil Anodizing | Sulfuric acid (continuous) | Controlled, continuous | Automated, optimized for speed | Thin to moderate | Architectural, high-volume sheet |
Colder baths generally produce harder, more wear-resistant coatings, while higher current densities and voltages drive faster oxide growth [Anoplate]. Chromic acid anodizing offers excellent corrosion resistance in thin layers, while sulfuric and hardcoat anodizing allow for thicker, more robust finishes.
Process levers: current density, temperature, and time
When setting up your anodizing process, you’ll need to control three main levers:
- Current density: Dictates the rate of oxide growth. Too low, and the layer is thin; too high, and you risk burning.
- Temperature: Lower temperatures yield harder, denser coatings (especially in hard anodizing). Warmer baths are used for decorative finishes.
- Time: Longer processing increases thickness, but there’s a limit—excess time can cause defects or diminishing returns.
Here’s a simple calculation template for setting your process:
Current (A) = Current Density (A/ft² or A/dm²) × Exposed Surface Area
Also consider bath volume and electrolyte concentration—these scale with part size and production volume.
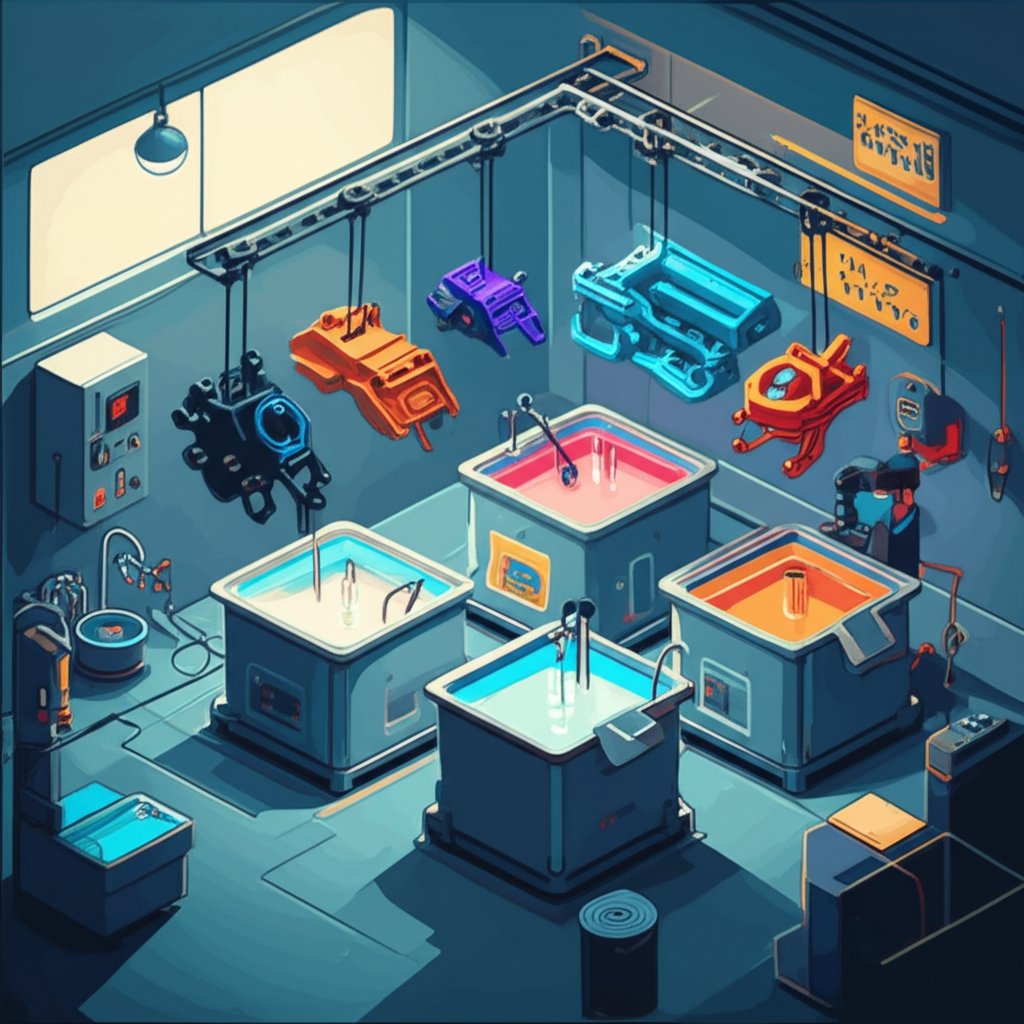
Step-by-step SOPs for every scale
Whether you’re using a basic aluminum anodizing kit or running a full anodizing machine, your workflow will differ. Here’s a breakdown for three typical users:
-
Hobbyist/Home User:
- Wear PPE (gloves, goggles, apron)
- Work in a well-ventilated area
- Use a small anodizing kit with power supply, acid-safe tank, and cathode (aluminum or lead)
- Degrease, rinse, and etch aluminum part
- Immerse in electrolyte, connect anode/cathode, and apply current per kit guidelines
- Rinse, dye (optional), and seal
-
Small-Batch Job Shop:
- Specify rectifier capacity for part area
- Use agitation and chilling to control bath temperature
- Monitor voltage/current density with meters
- Implement in-line rinses and dye tanks
- Log process parameters for repeatability
-
Industrial Line:
- Automated racking and transfer systems
- In-line, multi-stage rinsing and sealing
- Statistical process control (SPC) for QA
- Data logging and recipe management
- Integrated waste treatment and ventilation
Essential anodizing equipment checklist
- Power supply/rectifier (with adjustable current and voltage)
- Acid-resistant tanks (for anodizing, rinsing, dyeing, sealing)
- Cathodes (aluminum or lead bars)
- Agitation system (air or mechanical)
- Cooling system or chillers
- Ventilation and fume extraction
- Personal protective equipment (PPE)
- Test instruments (thickness meters, pH meters, thermometers)
For those starting out, a basic aluminum anodizing kit may include most of these essentials, making it easier to experiment with the anodizing process at home or in a small shop.
Understanding cost drivers
Costs for anodizing aluminum vary by scale and complexity. Major factors include:
- Power supply capacity (rectifier size)
- Bath volume and chemical turnover rates
- Cooling and ventilation requirements
- Quality assurance instrumentation
- Labor and automation level
Smaller anodizing kits are cost-effective for low volumes, while larger anodizing equipment investments pay off with higher throughput and tighter process control. Always factor in ongoing maintenance, chemical replenishment, and waste handling when calculating total cost of ownership.
Mastering these process choices and parameters sets the stage for specifying standards and QA requirements—ensuring your anodized aluminum meets both functional and visual expectations as you move from process setup to procurement.
Standards specifications and purchasing clarity for anodized aluminum finish
When specifying or purchasing anodized aluminum, how do you ensure your parts meet both engineering needs and procurement requirements? Sounds complex, but by understanding key standards and how to reference them, you’ll make the process clear and auditable from start to finish. Let’s break down the essentials so you can confidently call out the right anodized aluminium finish, thickness, and quality controls for your next project.
Choosing the right specification for your part
The most widely recognized standard for anodizing aluminum in critical industries is MIL-A-8625. Originally developed for aerospace and defense, it’s now a benchmark for durability and corrosion resistance in commercial and industrial applications. MIL-A-8625 defines three main types:
- Type I (Chromic Acid): Thin, dimensionally stable, excellent for tight-tolerance parts
- Type II (Sulfuric Acid): Standard decorative and protective finish; can be dyed for color or left as a clear anodize
- Type III (Hard Anodize): Thick, dense coatings for high-wear or extreme environments
Each type is further divided into classes (Class 1: undyed/clear, Class 2: dyed) and specifies minimum thicknesses and sealing requirements for performance. For architectural applications, you’ll also encounter industry standards like AAMA 611 and ASTM B 136, which lay out acceptance criteria for color, gloss, and the aama 611 seal test to verify corrosion resistance.
| Standard | Coverage | Typical Applications | Acceptance Tests |
|---|---|---|---|
| MIL-A-8625 | Types I, II, III; Class 1 (clear), Class 2 (dyed); thickness & sealing | Aerospace, defense, high-end industrial | Thickness (eddy current), color, abrasion, salt spray, sealing |
| AAMA 611 | Architectural anodized aluminium finish; color, gloss, seal | Windows, curtain walls, storefronts | Color uniformity, aama 611 seal test, UV & weathering |
| ASTM B 136 | Sealing quality, dye absorption, colorfastness | Building products, decorative panels | Sealing (dye spot), color rub, corrosion |
Referencing finish, thickness, and color in your order
When you write a purchase order or technical drawing, be specific. Reference:
- Coating type/class: (e.g., Type II, Class 1 for clear anodized finish)
- Thickness target: (e.g., 0.0004–0.0007" for clear architectural finishes)
- Color/dye: Specify "clear anodize" or a color code if dyed
- Sealing method: Required for corrosion resistance
- Allowed touch-up: If repair is permitted, define the method
Always cite the revision of the standard you require (e.g., "MIL-A-8625F, Type II, Class 1, 0.0004–0.0007" thickness, clear anodized finish"). This ensures everyone—engineers, buyers, and anodizers—are aligned on expectations.
Audit-ready documents and certificates
To verify compliance, request the following acceptance documents with your shipment:
- Certificate of Conformance: Confirms the lot meets the specified standard (e.g., mil-a-8625 requirements)
- Test reports: Thickness, color, and sealing test results (like the aama 611 seal test)
- Lot traceability: Batch numbers and process logs for QA tracking
Include sampling plans and rework allowances in your purchase specification to avoid surprises later. For example, define how many parts per lot will be tested for thickness and sealing, and what corrective action is expected if results fall outside spec.
By linking your drawing notes, QA plans, and procurement documents to the right standards, you’ll streamline communication and ensure the anodized aluminium finish you receive is exactly what you intended. Next, we’ll explore how color control and sealing impact both appearance and durability, so you can specify finishes that not only meet standards but also look great in the real world.
Color dyeing and sealing for consistent finishes on anodized aluminum
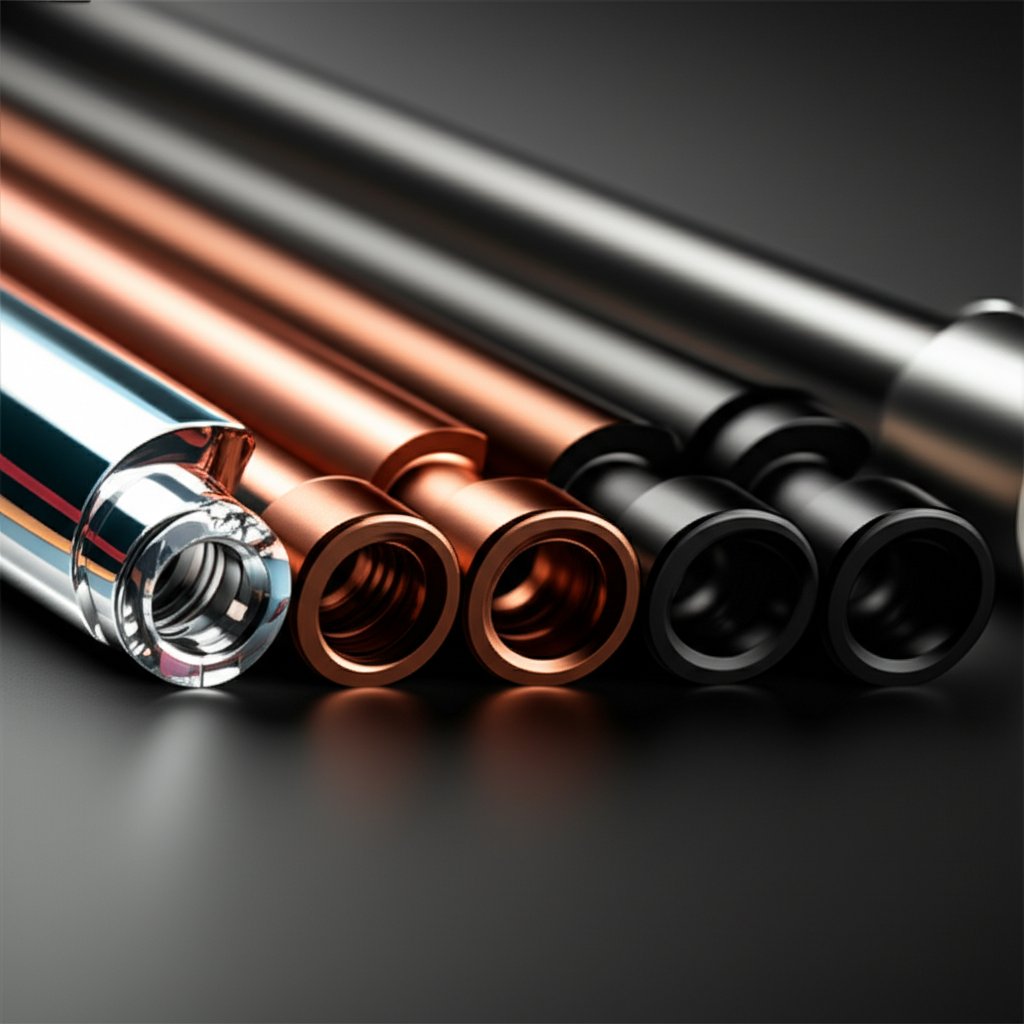
Ever wondered why some anodized aluminum parts have a bright silver sheen while others sport a rich dark bronze anodized color or even bold blues and reds? The answer lies in the science of color creation, dyeing, and sealing—steps that make the difference between a clear anodized finish and a vibrant, lasting hue. Let’s break down how color anodized aluminum is made and what it takes to keep those colors sharp and durable.
Clear anodized versus dyed finishes
When you see clear anodized aluminum, you’re looking at a part that’s been anodized but not dyed. This process leaves the natural metallic look, sometimes called “satin silver,” and is popular for architectural and industrial uses where a sleek, modern appearance is desired. In contrast, dyed finishes use the porous structure of the anodic oxide layer to absorb colorants—either organic dyes or inorganic metal salts—before sealing locks the color in place.
Here’s how the process typically flows:
- Clean: Remove oils and contaminants from the aluminum surface.
- Etch/Desmut: Uniformly texture and remove surface impurities.
- Anodize: Grow a porous oxide layer via electrochemical reaction.
- Dye: Immerse in dye bath (for colored finishes); dye molecules or metal salts fill the pores.
- Seal: Hydrate and close the pores to lock in color and improve corrosion resistance.
Controlling shade and repeatability
Sounds simple? In reality, achieving consistent anodized aluminum colors across batches is a technical challenge. Why? Because several variables influence the final shade and depth of color. According to industry experts, factors that impact color include:
- Alloy composition and temper: Different alloys absorb dyes differently, affecting the final hue.
- Pre-anodize surface prep: Polished, brushed, or matte surfaces reflect light and color in unique ways.
- Bath temperature and time: Higher temperatures or longer dye times deepen color, but too much can cause unevenness.
- Dye concentration and chemistry: Stronger dye solutions yield richer colors but can reduce UV stability for some organics.
- Oxide layer thickness: Thicker layers absorb more dye, but may shift the shade or reduce clarity in clear anodized finishes.
For example, a dark bronze anodized color is achieved by carefully balancing alloy, oxide thickness, and dye chemistry. Electrolytic two-step coloring (using metal salts and electric current) is often used for these deep bronze and black hues, offering superior UV and weather resistance compared to organic dyes.
To help visualize, here’s a sample anodizing color chart from a leading finisher:
- Clear Satin Anodized (no dye)
- Champagne
- Light, Medium, Dark Bronze
- Black
- Gold, Nickel, Blue, Red, Green (special orders)
Notably, dark bronze anodized aluminum is a favorite for window frames and architectural trims, thanks to its ability to mimic the look of traditional metals with modern durability and minimal maintenance.
Sealing and colorfastness
So, how do you ensure your color anodized aluminum stays vibrant for years? The answer is sealing. After dyeing, the part is sealed—most commonly by boiling in deionized water—which hydrates the oxide and closes the pores. This crucial step:
- Prevents dye leaching and fading
- Improves resistance to weather, UV, and chemicals
- Enhances overall corrosion protection
Key takeaway: The chemistry and duration of the sealing step are critical—get them right, and you’ll maximize both color fastness and corrosion resistance. Skipping or rushing sealing can lead to premature fading, chalking, or color bleed, especially in outdoor applications [Finishing and Coating].
There are several sealing methods, including hot water, mid-temperature, and nickel-based cold sealing. While hot water sealing is most common, newer methods are being developed for better energy efficiency and environmental impact. For high-performance finishes, always verify that your vendor uses a sealing process appropriate for your application’s durability needs.
Checklist for consistent color lots
| Step | Control Point |
|---|---|
| Alloy/Temper | Match for all parts in a lot |
| Surface Finish | Uniform prep (polished, brushed, matte) |
| Dye Bath | Maintain logs for concentration, pH, temperature |
| Sealing | Verify time, temperature, chemistry |
| QA Testing | Color tolerance checks, rub tests, sealing verification |
For specialty shades or architectural projects, always communicate color match expectations up front. Ask for samples or swatches, and request your vendor’s process control ranges and color tolerance targets to avoid surprises.
In summary, mastering color and sealing in anodized aluminium isn’t just about picking a shade from an anodizing color chart. It’s a careful balance of chemistry, process control, and quality checks—ensuring your clear anodized, bronze, or custom color finish looks great and lasts. Up next, we’ll dive into how to measure, test, and verify these finishes so your parts meet both aesthetic and technical requirements every time.
Measurement QA and acceptance testing for anodized finishes
When you receive a batch of anodized aluminium parts, how do you know they truly meet your specs? Imagine a scenario where a beautiful clear anodized aluminum finish looks perfect—until it fails in the field due to thin coating or poor sealing. That’s why robust quality assurance (QA) is essential. Let’s walk through practical, proven methods to measure, test, and document the quality of your anodized finish, so you can confidently answer the question: How to tell if aluminum is anodized—and if it’s done right?
Measuring coating thickness correctly
Thickness is the backbone of any anodized coating. Too thin, and you risk corrosion and wear; too thick, and you may face fit or cost issues. The industry standard for non-destructive measurement is the eddy current method. Instruments like the PosiTector 6000 NAS probe are designed specifically for accurate thickness checks on aluminum, with top precision for coatings under 100 μm (4 mils)—the range most anodized finishes fall into.
- Eddy current gauges: Fast, non-destructive, ideal for production QA and hard-to-reach areas
- Cross-section microscopy: Destructive but highly accurate; best for process validation or troubleshooting
- Gravimetric (weight gain) methods: Useful for research and process control, but less common in routine QA
Seal quality and porosity checks
Even a thick anodized coating can fail if it’s not properly sealed. Sealing closes the oxide pores, locking in color and maximizing corrosion resistance. Here’s how to check seal quality and porosity:
- Dye spot test (ASTM B136): Expose the surface to a dye solution, then rinse and inspect for color retention—unsealed pores will absorb and retain dye
- Admittance (electrical impedance) test: Measures how well the coating resists fluid penetration; higher admittance may indicate poor sealing
- Microscopy: Visualizes pore structure and seal uniformity
Corrosion, wear, and colorfastness testing
For critical applications, you’ll want to validate more than just thickness and seal:
- Neutral salt spray (ASTM B117): Simulates harsh environments to assess corrosion resistance
- Abrasion (rub/wear tests): Checks durability of the anodized finish, especially for high-traffic or mechanical parts
- Color/optical checks: Compare color uniformity and match against standards or control samples—especially important for clear anodized aluminum finish and dyed parts
| Method | What It Measures | Sample Prep Needed? | Interpretation Guidance |
|---|---|---|---|
| Eddy Current | Coating thickness (μm/mils) | No (non-destructive) | Compare to spec (e.g., 10–25 μm for architectural, per standard) |
| Cross-section Microscopy | Coating thickness, structure | Yes (cut/polish sample) | Reference spec for min/max, check for uniformity |
| Dye Spot Test | Seal quality, porosity | No (surface only) | Pass = minimal stain; Fail = persistent color |
| Admittance | Seal quality | No (probe contact) | Lower admittance = better seal |
| Salt Spray | Corrosion resistance | No (whole part) | Time to failure vs. spec (hours to pitting/corrosion) |
| Wear Test | Abrasion resistance | No (surface only) | Rub-off, weight loss, or visual scoring |
Sampling plans, records, and process feedback
How do you build a QA plan that catches issues without slowing production? Start by tying your sampling plan to drawing notes and lot sizes. For example, specify that one part per batch (or more for critical lots) is tested for thickness, seal, and color. Keep calibration records for all meters and instruments—traceable to standards—and log all results in a simple spreadsheet or template for traceability.
- Set acceptance criteria based on referenced standards (e.g., MIL-A-8625, ASTM B244)
- Document all test results, including date, operator, and equipment used
- Retain test samples or digital records for future audits
If a test fails, use the results to adjust your process: low thickness? Try increasing anodizing time or current density. Poor seal? Review sealing bath chemistry or dwell time. This feedback loop keeps your anodized finish consistent and reliable for every order.
By mastering these QA tools and documenting every step, you’ll ensure your clear anodized aluminum finish or custom color anodized coating meets both customer expectations and industry standards. Next, let’s look at troubleshooting common defects, so you can resolve issues before they impact quality or delivery.

Troubleshooting guide for anodizing defects
Ever unboxed a shipment of anodized aluminium parts, only to spot streaks, chalky surfaces, or uneven color? Anodizing defects are frustrating—but with the right troubleshooting approach, you can diagnose root causes and fix them before they impact your product’s reputation or performance. Let’s walk through the most common issues, what causes them, and how to resolve them quickly and confidently.
Rapid diagnosis by symptom: what to look for
Imagine you’re inspecting a batch of black anodised aluminium and notice some parts have a milky haze, others show patchy color, and a few have visible marks where the racks held them. These symptoms each point to specific problems in the anodizing process. Here’s a practical matrix to help you connect what you see to likely causes and solutions:
| Defect | Probable Causes | Inspection Checks | Corrective Actions |
|---|---|---|---|
| Nonuniform color shade / streaks | Poor electrical contact, alloy inconsistency, uneven racking, gas trapping | Visual check under consistent light, thickness mapping, review racking | Improve rack contact, standardize alloy batches, adjust loading angles, ensure agitation |
| Chalky or powdery finish | Improper sealing (low temp/pH), over-etching, excessive dwell in electrolyte | Rub test for powder, inspect seal tank records, check pH/temp logs | Raise sealing temp/pH, shorten electrolyte immersion, optimize seal chemistry |
| Smut after etch (meaning of smut: dark/gray residue) | High silicon/iron in alloy, incomplete desmutting, improper rinsing | Microscopy, visual under light, check desmut/rinse logs | Adjust desmut bath, improve rinsing, use alloys with controlled Si/Fe |
| Burnt edges / white spots | High current density, poor agitation, excessive voltage | Inspect edge zones, monitor current/voltage readings | Lower current, increase agitation, check power supply calibration |
| Poor dye uptake / light or faded black anodizing aluminum | Thin oxide layer, low dye concentration, acid residues, improper sealing | Color rub test, cross-section microscopy, dye bath logs | Increase anodizing time/thickness, refresh dye bath, improve rinsing before dye |
| Rack marks / streaks | Contact points during anodize or dye, movement during process | Visual inspection at contact locations | Minimize rack contact area, use insulated racks, secure parts firmly |
| Black anodized aluminum inconsistencies | Alloy mismatch, dye contamination, uneven oxide thickness | Color uniformity checks, alloy batch review, thickness mapping | Standardize alloy, filter dye bath, control anodizing time/current |
Root causes linked to process stages
Most anodizing defects trace back to a handful of process variables: material quality, surface prep, racking, bath chemistry, electrical parameters, and sealing. For example, the meaning of smut is often misunderstood—while some smut comes from poor sealing, much is actually due to high silicon or iron content in the alloy or incomplete desmutting [STERC]. Black anodized finishes are especially sensitive to dye bath purity and oxide thickness, so extra care is needed when you how to anodize aluminum black for deep, uniform color.
Corrective actions that stick: prevention and documentation
- Use clean, well-maintained racking for reliable electrical contact
- Maintain consistent bath agitation and temperature control
- Keep detailed bath maintenance and process parameter logs
- Rinse with deionized water after each stage to prevent contamination
- Standardize alloy selection and surface prep for critical color applications
Always document any parameter changes in a run log—this helps you correlate process tweaks with QA outcomes over time. If you need to define anodized quality in your shop, it’s not just about the final look, but about controlling every step from material selection through sealing.
By building a troubleshooting matrix and focusing on root cause analysis, you’ll turn frustrating failures into actionable improvements—ensuring your next batch of black anodized aluminum or architectural finishes meets both spec and customer expectations. In the next section, we’ll explore how to prep anodized surfaces for painting, adhesives, or specialty coatings, so your parts are ready for any demanding application.
Post processing paints adhesives and coatings for anodized aluminium
Imagine you’ve got a batch of beautifully anodized aluminium parts—but now your customer wants a custom color, or you need to bond, paint, or add a specialty aluminum coating for advanced performance. Sounds complex? Let’s break down your options and the best practices for each, so you can confidently choose the right post-processing path for your application.
When to paint over anodized surfaces
Can you paint anodized aluminum? Yes—but success depends on understanding the unique properties of the anodized layer. Sealed anodized surfaces are non-porous and highly corrosion resistant, but this also means paint adhesion is naturally lower than on bare metal. Painting anodized aluminum is most effective when the existing finish is worn, or when a specific color or effect is needed that’s not achievable through anodizing alone. Before you grab your alu paint or anodized aluminium paint, consider the trade-offs:
-
Pros of painting over anodized aluminium
- Expands color and gloss options beyond what anodizing dyes can achieve
- Can resurface worn or cosmetically damaged anodized finishes
- Allows for specialty coatings, such as anti-graffiti or chemical-resistant layers
-
Cons of painting over anodized aluminium
- Requires thorough surface prep for reliable adhesion
- May reduce the inherent longevity and low-maintenance benefits of anodizing
- Potential for paint peeling if prep or primer selection is inadequate
Adhesion and surface prep for bonding
For paint or adhesive to bond well, the anodized surface must be properly prepared. Here’s a step-by-step approach, based on industry best practices and reference data:
- Clean thoroughly: Remove oils, dirt, and oxidation using a mild detergent or specialized aluminum cleaner. Rinse and dry completely.
- Light abrasion: Sand gently with 180–220 grit sandpaper to roughen the anodized layer. This increases surface area for primer or glue to grip.
- De-anodize or etch (if needed): For maximum adhesion, especially in critical bonding or painting, consider partially removing or etching the anodic layer.
- Primer selection: Use a self-etching primer or one specifically formulated for aluminum coating. This helps form a chemical bond between the anodized layer and the paint or adhesive.
- Controlled curing: Apply paint or alu epoxy in thin, even coats, allowing each to dry fully before the next. Follow manufacturer’s recommendations for drying and curing times.
Remember: Sealing the anodized layer reduces porosity, which boosts corrosion resistance but can lower adhesion. Surface activation (light sanding or etching) is often necessary for successful painting or bonding. For adhesives, choose products rated for metal-to-metal or metal-to-composite bonding, and always test for compatibility.
Specialty coatings and alternative treatments
Sometimes, you need more than just color—you might require electrical conductivity, enhanced chemical resistance, or a specific finish. Here’s how to decide:
- Maintain sealed anodize: Best for marine or outdoor use, where corrosion protection is the top priority. Use this approach if you don’t need additional coatings or bonding.
- Partial de-seal or micro-etch: If you need to paint or bond, lightly abrade or etch the surface to improve adhesion, but retain some corrosion resistance. This is the most common approach for repainting or applying alu epoxy.
- Alternative chemical conversion: For electrical conductivity or as a primer for further painting, consider conversion coatings like Alodine. When comparing alodine vs anodize, note that Alodine provides good paint base and conductivity, but less corrosion resistance than a sealed anodized finish.
Here’s a quick comparison of your options:
| Path | Best For | Key Steps | Limitations |
|---|---|---|---|
| Keep sealed anodize | Corrosion, aesthetics | Minimal prep, no paint | Low paint adhesion |
| Paint over sealed anodize | Custom color, repair | Clean, sand, prime, paint | May reduce durability |
| Dye then paint accents | Design flexibility | Anodize, dye, mask, paint | Complex process |
| Alternative conversion (Alodine) | Conductivity, paint base | Apply Alodine pre-paint | Less corrosion resistance |
In summary, the right approach for post-processing anodized aluminium depends on your end-use priorities—whether that’s maximizing corrosion resistance, achieving a unique color, or preparing for strong bonding. By following proven surface prep and primer strategies, you’ll get the most out of your aluminum coating or anodized aluminium paint, and be ready for even the toughest applications. Next, we’ll cover safety and environmental best practices to ensure your processes are as responsible as they are effective.
Safety, Environmental, and Waste Handling Essentials for Anodizing Plants
When you walk into an anodizing plant or set up your own anodizing line, safety and environmental stewardship should be top priorities. From handling potent anodising solutions to managing waste streams, every step requires careful planning—because a safe, compliant operation is the foundation for quality and sustainability in anodizing industries. Let’s break down what you need to know to protect your team, your community, and the environment.
Chemical safety and PPE essentials
Handling acids, caustics, and dyes used in aluminum anodizing is serious business. Imagine a scenario where a spill or splash occurs—are you prepared? Before starting any batch, make sure your setup passes these checks:
- Safety Data Sheets (SDS) for all chemicals are accessible in the work area
- Secondary containment (trays or berms) is in place under tanks and drums
- Eyewash stations and safety showers have been tested and are unobstructed
- Fume extraction and ventilation systems are running and verified
- Rectifier interlocks and emergency stops are functional
- All equipment is properly grounded
Personal protective equipment (PPE) is non-negotiable. Here’s a quick checklist:
- Acid-resistant gloves
- Chemical goggles or face shield
- Acid-resistant apron or suit
- Sturdy, chemical-resistant footwear
These basics apply whether you’re running a large anodizing plant or a small shop offering aluminum anodizing near me. Consistent training and clear signage reinforce a culture of safety across all anodizing industries.
Ventilation, rinsing, and spill response
Proper ventilation is essential to control fumes from anodize solutions and maintain air quality. Exhaust hoods should be positioned over process tanks and checked regularly for airflow. For rinsing, a cascade (counter-flow) rinse system is best practice: water flows from the cleanest to the dirtiest tank, reducing water use and improving rinse quality. This design not only conserves resources but also limits the volume of wastewater needing treatment.
Should a spill occur, act fast: isolate the area, neutralize acids or caustics with appropriate agents, and collect residues for proper disposal. Always have spill kits and clear procedures in place.
Waste treatment and documentation
Anodizing generates several waste streams—spent anodise solutions, etch liquors, dye baths, and sealing overflows. Each must be managed to prevent environmental harm. Here’s how to approach waste handling responsibly:
- Label all waste streams clearly (e.g., "Etch Waste," "Anodize Waste," "Dye Rinse")
- Keep detailed logs of waste generation, storage, and disposal (manifests)
- Consult local regulations and engage certified waste handlers for off-site treatment
- For in-house treatment, use pH adjustment tanks, clarifiers, and filter presses to neutralize and separate hazardous materials from water [Met-Chem]
- Never discharge untreated or partially treated waste to public sewers or the environment
Neutralization is a key concept: by adjusting pH, metals and acids in waste become insoluble and can be filtered out. For larger operations, continuous flow systems are common; smaller shops may use batch treatment or evaporation. Always verify that your process meets or exceeds regulatory thresholds for discharge and emissions.
Document every step—regulators may audit your records, and good documentation protects your business and the environment. If you’re unsure about compliance, consult a qualified environmental engineer or waste management expert.
Environmental and worker safety plans must be established before any anodizing work begins—not after. Responsible management of anodize solutions and waste is not just good practice; it’s essential for legal compliance and long-term success.
By following these safety and environmental fundamentals, you’ll ensure your anodizing plant or shop is a responsible member of the community. Next, we’ll guide you through the final steps to move from design to production with anodized aluminium, including how to select the right partners and processes for your project.
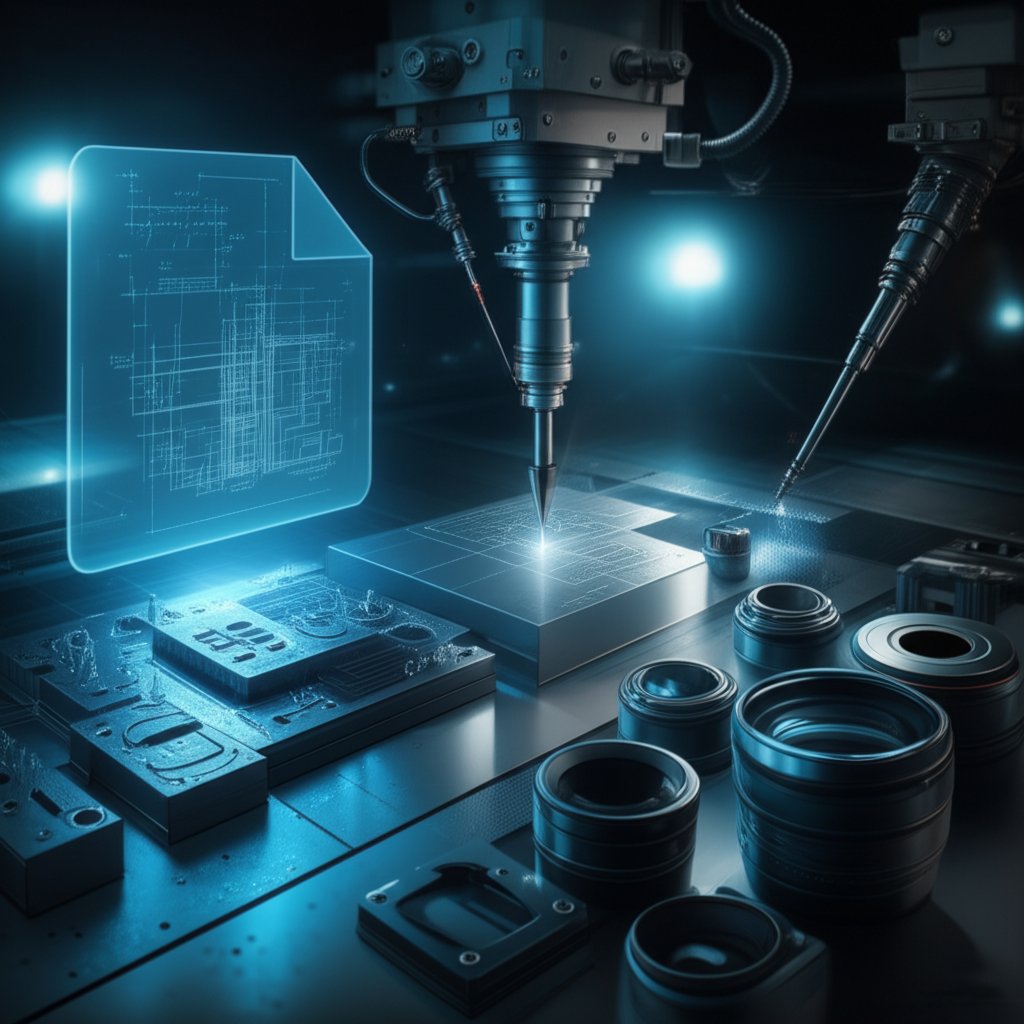
From prototype to anodized aluminium in production
Ready to turn your design into a real anodized aluminium part? Whether you’re an engineer, designer, or procurement lead, navigating the journey from CAD file to finished product can feel overwhelming. Let’s simplify the process, so you can move confidently from concept to production—while ensuring quality, consistency, and value every step of the way.
From CAD to anodized prototype: What matters most
Imagine you’ve finalized your 3D model and are eager to see it as a physical part. Before you upload your file to a manufacturer or search for anodizers near me, it’s crucial to set your project up for success. Here’s a streamlined action checklist for designers and engineers:
- Confirm the aluminum alloy and temper (e.g., 6061-T6 or 7075-T6) for both machining and anodizing compatibility.
- Specify the desired finish type/class (e.g., Type II, Class 1 for clear anodize or Class 2 for color).
- Define target coating thickness and color requirements.
- Choose sealing method and note any performance needs (e.g., outdoor corrosion, wear).
- Include QA tests: thickness, color, sealing, and corrosion resistance.
- Prepare your CAD file in a supported format (such as STEP, DWG, or DXF).
These steps help avoid costly redesigns and ensure your anodized aluminum sheets, extrusions, or custom parts meet both technical and visual standards.
Specifying materials and finishes: Why details matter
Not all aluminum is created equal when it comes to anodizing. Alloys like 6061 and 7075 are popular for their strength and anodizing response, but each will yield slightly different finishes. For example, 7075 may appear duller after anodizing due to its higher zinc content. Always align your alloy choice with your performance and appearance goals—especially for applications demanding consistent color across multiple anodized aluminum sheets or profiles.
When specifying finishes, reference industry standards and communicate details clearly on your drawings or RFQs. This includes:
- Coating type/class (e.g., Type II, Class 2, black anodize)
- Target thickness (e.g., 0.0004–0.001" per side)
- Color and sealing requirements
- QA and acceptance criteria
Clear specifications help both you and your chosen anodizer deliver parts that match expectations the first time.
Selecting a reliable anodizing partner: Comparison table
Choosing the right manufacturing and anodizing path is key to meeting deadlines and quality targets. Here’s a comparison of common prototyping and production options, with a focus on getting anodized aluminum near you or through integrated partners:
| Provider | Capabilities | Material Options | QA & Support | Best For |
|---|---|---|---|---|
| XTJ Rapid Prototyping Services | CNC machining, injection molding, die casting, anodizing-ready finishing | 50+ materials, including 6061/7075 aluminum | Complimentary DFM feedback, ISO 9001:2015 QC, fast turnaround | High-precision parts, fast prototyping, seamless transition to anodizing |
| In-house Prototyping | Manual/CNC machining, basic finishing | Limited by shop inventory | Direct control, but limited QA | Early-stage mockups, one-offs |
| Local Job Shop or Anodizers Near Me | Machining, forming, anodizing, custom finishing | Common alloys and sheet sizes | Personal service, may offer sample runs | Small batches, specialty finishes, local support |
| Online Parts Platforms | Sheet/plate cutting, anodized aluminum sheet supply | Standard alloys, limited custom options | Automated quoting, variable QA | Quick-turn standard parts, cost-sensitive jobs |
You’ll notice integrated rapid prototyping services like XTJ stand out for their full-range support—from material selection and CNC precision to DFM (Design for Manufacturability) advice that directly impacts anodizing quality. Their ISO-certified QA and fast delivery help you move from prototype to finished product without delays or surprises.
From idea to anodized aluminum near me
To ensure a smooth transition from concept to anodized production, follow this practical action plan:
- Finalize your design and select the right aluminum alloy for anodizing.
- Prepare a clear specification for finish, thickness, color, and QA.
- Choose a provider that matches your needs—considering turnaround, QA, and support.
- Upload your CAD file and review manufacturability feedback or guidelines.
- Request samples or small runs to validate finish and fit.
- Scale up to production with confidence, knowing your anodized aluminum extrusions or sheets will meet both technical and visual requirements.
By following these steps and choosing the right partners, you’ll bridge the gap between design and production, ensuring every anodized aluminium part is ready for its application—whether it’s a one-off prototype or a full production run sourced from anodized aluminum near me.
Anodized Aluminium: Frequently Asked Questions
1. Is hard anodized aluminum better than regular aluminum?
Hard anodized aluminum offers improved durability and corrosion resistance compared to untreated aluminum. The anodizing process creates a tough oxide layer that protects the metal from wear, making it ideal for demanding applications like cookware, aerospace, and architectural components.
2. What are the main benefits of anodized aluminium?
Anodized aluminium provides superior corrosion and wear resistance, a wide range of color options, and a non-conductive surface. Its finish is integral to the metal, so it resists chipping and peeling, making it suitable for outdoor, high-traffic, or decorative uses.
3. How is anodized aluminium different from painted aluminum?
While painted aluminum has a surface coating that can chip or fade, anodized aluminium undergoes an electrochemical process that transforms its surface, resulting in a durable, long-lasting finish that resists UV, chemicals, and abrasion. Anodizing also allows for vibrant, fade-resistant coloring.
4. Can anodized aluminium be painted or coated after anodizing?
Yes, anodized aluminium can be painted or coated, but proper surface preparation is crucial. Light abrasion or etching improves paint adhesion, and using compatible primers ensures a durable bond. This approach is useful for custom colors or specialty coatings beyond standard anodized finishes.
5. What should I consider when specifying anodized aluminium for my project?
Specify the alloy, anodizing type, thickness, color, and sealing method. Reference relevant standards like MIL-A-8625 or AAMA 611, and detail QA requirements such as thickness and sealing tests. Clear communication with your anodizer or manufacturer helps achieve consistent results.
-
Posted in
aluminum finishes, anodized aluminium, anodizing process, color anodizing, corrosion resistance


