
Copper Melting Point: What Is It, And Why Do Values Differ?

Understanding copper melting point basics
When you search for the copper melting point, you’re usually looking for a clear number, a comparison with other metals, or practical guidance for processing copper. But what does this number really mean for science, manufacturing, and everyday design decisions? Let’s break it down so you can make smarter choices—whether you’re an engineer, fabricator, or just curious about materials.
What the copper melting point really means
Simply put, the melting point is the temperature at which copper changes from solid to liquid. For pure copper, this is a sharply defined temperature—at this exact point, both solid and liquid phases exist in equilibrium. If you add more heat at the melting point, the temperature doesn’t increase until all the solid has melted. This is why the copper melting temperature is so critical in thermal processing and material selection.
- Definition: The melting point is the precise temperature where a solid becomes a liquid under standard atmospheric pressure.
- Pure copper: This value is fixed for pure, uncontaminated copper, but can shift with impurities or alloying.
- Melting range: Alloys (like brass or bronze) melt over a temperature range, not a single point.
- Units: Melting points are typically listed in degrees Celsius (°C), Fahrenheit (°F), and Kelvin (K).
Key temperature: The melting point of pure copper is 1084.62°C (1984.32°F, 1357.95 K) (NIST Chemistry WebBook). Always check trusted sources like NIST, ASM Handbooks, or CRC Handbook for the most up-to-date values and conversions.
Why melting point matters for design and manufacturing
Imagine you’re designing an electrical connector or planning a casting process. Knowing what is the melting point of copper is crucial for several reasons:
- Material selection: You need copper to stay solid at service temperatures, especially in electrical and thermal applications.
- Process planning: The melting point dictates furnace type, energy use, and safety measures.
- Failure prevention: Exposing copper to temperatures near its melting point can cause structural changes or part failure.
But here’s where it gets interesting: Real-world melting points can shift. Factors like impurities, alloying elements, atmospheric conditions, and even grain size can lower the observed melting point. For example, adding zinc to copper (making brass) drops the melting temperature and creates a melting range instead of a single number. The same is true for other metals—compare this with the aluminum melting point (660°C) or the much higher melting point of steel (typically 1370–1510°C) and melting point of iron (1538°C).
How melting behavior differs from softening and annealing
It’s easy to confuse melting with other temperature-driven changes in copper. Here’s a quick rundown:
- Melting: Solid turns to liquid at a fixed temperature (for pure copper).
- Softening: Copper becomes more ductile at lower temperatures, but remains solid.
- Annealing: Heating copper below its melting point to relieve stresses and improve ductility—no liquid forms.
This distinction matters, especially when processing or joining copper. You might need to anneal copper at 400–600°C for flexibility, but actual melting only happens above 1084°C. If you’re working with alloys, always check their specific melting ranges.
| Metal | Melting Point (°C) | Melting Point (°F) |
|---|---|---|
| Copper | 1084.62 | 1984.32 |
| Aluminum | 660 | 1220 |
| Steel (varies) | 1370–1510 | 2500–2750 |
| Iron | 1538 | 2800 |
In summary, understanding the copper melting point is about more than just a number. It’s a gateway to making informed decisions in design, manufacturing, and material selection. For the most reliable figures, always consult trusted sources such as NIST, ASM, or CRC Handbooks. In the next section, we’ll explore why reported melting points can differ and how labs measure these values in practice.
How melting point is measured and standardized
Sounds complex? When you browse material data sheets or engineering handbooks, you’ll notice that the melting temp of copper sometimes varies slightly between sources. Why? The answer lies in how melting point is measured, the conditions used, and the standards followed. Let’s break down the definition of melting temperature and the practical reasons why reported values can differ—even for pure metals like copper.
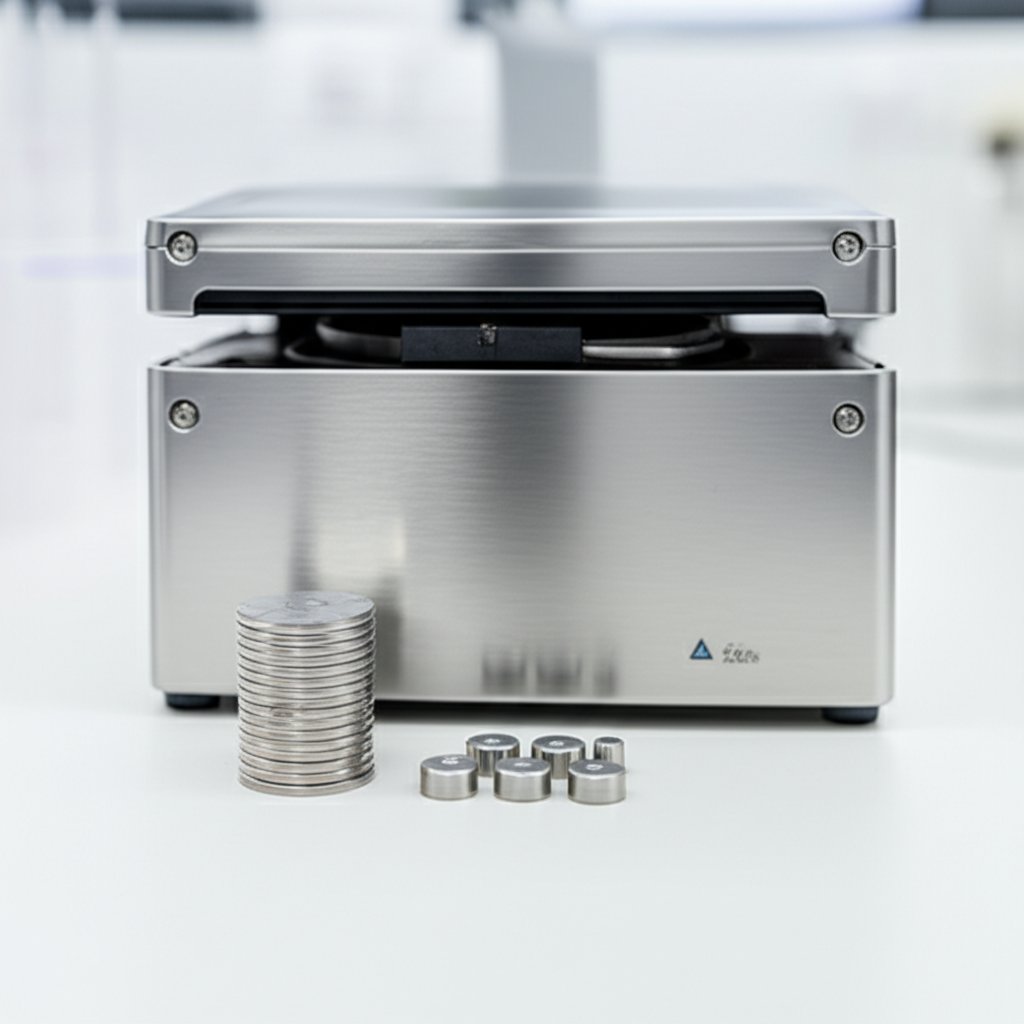
How labs measure melting temperature
Modern labs typically rely on two main thermal analysis techniques to determine the melting temperature of metals: Differential Scanning Calorimetry (DSC) and Differential Thermal Analysis (DTA). Both methods involve heating a sample alongside a reference and tracking their thermal behavior as temperature rises.
| Method | Key Principle | Typical Accuracy | Sample Size | Atmosphere | Common Pitfalls |
|---|---|---|---|---|---|
| DSC (Differential Scanning Calorimetry) | Measures heat flow difference between sample and reference as temperature increases | High (can resolve small transitions, sensitive to calibration) | Small (1–15 mg) | Inert (often argon or nitrogen) | Thermal lag, sample placement, heating rate effects |
| DTA (Differential Thermal Analysis) | Measures temperature difference between sample and reference | Moderate (good for detecting transitions, less precise than DSC for enthalpy) | Small to moderate | Inert or oxidizing | Lower sensitivity, overlapping transitions can be hard to resolve |
| Visual/Capillary | Direct observation of sample melting in a capillary tube or on a hot stage | Low to moderate (subjective, operator-dependent) | Variable | Air or inert | Subjectivity, oxidation, not suitable for all metals |
For both DSC and DTA, the sample is typically heated at a controlled rate (for example, 5–20°C/min). As the sample melts, the instrument records a thermal event—an endothermic peak for melting. The define melting temperature in this context is the point where this peak occurs (the solidus), while the define melting range refers to the temperature interval between the start and end of melting, especially relevant for alloys.
Why heating rate and atmosphere change results
Imagine heating a small copper sample slowly versus rapidly. If you increase the heating rate, you’ll introduce a lag between the true sample temperature and what the instrument’s thermocouple reads. This can shift the observed melting range, especially the liquidus (end of melting) temperature. Larger sample sizes can also cause thermal gradients—meaning the core heats slower than the surface—leading to less accurate readings.
Atmosphere matters too. An inert gas (like argon) prevents oxidation, which could otherwise lower the apparent melting temperature or introduce errors. For metals like copper, using an oxidizing atmosphere can result in surface oxidation before actual melting, affecting the measurement. These factors help explain why metal melting points may not always match across different labs or databases.
Using standards and references to verify data
To ensure consistency, labs follow recognized standards such as ASTM E794, which specifies how to use DSC and DTA for measuring melting and crystallization temperatures. This includes guidelines for sample mass, heating rates, encapsulation, and calibration procedures. Calibration against pure reference metals (with well-known melting points) is essential for trustworthy results.
- Use calibration metals (like pure gold or indium) to check instrument accuracy
- Maintain consistent sample mass and encapsulation for repeatability
- Apply baseline correction to account for instrument drift
- Control heating ramp rates (e.g., 5–10°C/min for metals)
- Record atmosphere conditions (inert vs. air)
- Cross-check results with authoritative sources (NIST, ASM, CRC, MatWeb)
By following these practices, labs can minimize variability and provide reliable values for the melting temp of copper and other melting temperature of metals. Still, it’s good practice to always cite the method and source when reporting or comparing data.
Next, we’ll see how copper alloys introduce further complexity, with melting ranges replacing single values—and why this matters for casting, brazing, and material selection.
Copper alloys and melting ranges made clear
When you think of the copper melting point, it’s tempting to picture a single, precise temperature. But as soon as you move from pure copper to copper alloys, things get more interesting—and more practical for real-world manufacturing. Why do alloys like brass and bronze melt over a range instead of a single point? Let’s explore what this means for casting, joining, and choosing the right material for your needs.
Solidus and liquidus explained for copper alloys
Ever wondered why your alloy doesn’t melt all at once? The answer is the difference between solidus and liquidus temperatures. The solidus is the highest temperature at which an alloy is still completely solid. The liquidus is the lowest temperature at which it’s fully liquid. Between these two points, the alloy exists as a mixture of solid and liquid—sometimes called the “mushy zone.”
Pure copper melts sharply at 1085°C (1984°F), but most copper alloys don’t. For example, the brass melting point and bronze melting point are always given as ranges—never a single number. This is because alloying elements disrupt the uniform atomic structure, causing different parts of the material to melt at different temperatures.
How alloying elements change melting behavior
What happens when you add zinc, tin, nickel, or phosphorus to copper? Each element shifts the melting behavior and the processing window. Here’s how some of the most common copper alloys behave:
| Alloy | Typical Composition | Solidus (°C) | Liquidus (°C) | Notes |
|---|---|---|---|---|
| Brass | Cu + 5–40% Zn | ~900 | 930–940 | "Brass metal melting point" varies with Zn; good for casting, hot forming |
| Bronze (Tin Bronze) | Cu + 5–20% Sn | ~830–950 | ~1000–1050 | Higher Sn lowers melting point; excellent wear resistance |
| Cupronickel | Cu + 10–30% Ni | 1170 | 1240 | High corrosion resistance; used in marine applications |
| Phosphor Bronze | Cu + 0.5–1% P + 5–10% Sn | ~890–960 | ~1000–1050 | Phosphorus improves strength and deoxidation |
Notice how the melting point of brass is lower than pure copper, and the melting temperature of brass can shift depending on the zinc content. The same goes for bronze and cupronickel—each alloying element changes not just the melting range, but also properties like fluidity, hot-shortness (tendency to crack when hot), and suitability for brazing or casting.
Reading copper alloy phase diagrams for process decisions
Imagine you’re planning to cast a part or select a filler metal for brazing. How do you know which alloy will perform best? This is where phase diagrams—graphs showing temperature vs. composition—become your roadmap. The solidus and liquidus lines on these diagrams tell you the exact temperatures where melting starts and finishes for any given composition.
For example, when joining two copper parts with a brazing filler, you must choose a filler whose liquidus is below the solidus of the base metals to avoid melting the workpiece. Alloys with a narrow melting range are ideal for tight-fitting joints, while those with a wider range offer more flexibility for parts with larger gaps.
Why does a melting range matter? In casting and joining, the width of the melting range determines flow, fill, and the risk of defects. Alloys with a wide melting range can be more forgiving for casting but may be prone to segregation (liquation) during slow heating, while narrow-range alloys are better for precise, clean joints.
In summary, the transition from pure copper to copper alloys introduces a melting range defined by solidus and liquidus temperatures. The "brass metal melting point" and similar values for other alloys are always a range—shaped by composition and processing needs. Understanding these ranges, and how to read phase diagrams, is key for engineers and fabricators who need to predict casting behavior, optimize brazing, or select the right material for the job. Next, we’ll look at how these melting behaviors translate into practical melting and casting workflows for pure copper and its alloys.
Practical melting and casting workflows for copper and its alloys
When you’re ready to turn raw copper or its alloys into usable parts, knowing the right melting and casting workflow is essential. Whether you’re tackling a small jewelry project at home or managing an industrial foundry, understanding what temperature does copper melt and how to control the process ensures safety, quality, and efficiency. Let’s break down the steps, decision points, and best practices for melting pure copper and common copper alloys like brass and bronze.
Step-by-step guide to melting pure copper
- Prepare your workspace and safety gear. Always wear heat-resistant gloves, goggles, a face shield, and a protective apron. Work in a well-ventilated area and keep a fire extinguisher nearby.
- Choose your furnace and crucible. For small-scale or home melting, a charcoal or propane furnace with a clay-graphite crucible works well. For industrial or high-volume work, induction or gas-fired furnaces paired with silicon carbide (SiC) or high-density graphite crucibles are more efficient (Morgan MMS).
- Charge preparation. Clean copper scrap or wire thoroughly—remove insulation, rust, or paint. Cut larger pieces for faster, even melting.
- Load the crucible. Place the copper into the crucible, leaving room for expansion and stirring. Do not overfill.
- Heat to melting temperature. The copper melting temp is about 1084°C (1984°F). Set your furnace to reach and slightly exceed this temperature for a full, even melt.
- Control oxidation. Cover the melt with a suitable flux (such as borax) or use an inert gas (argon or nitrogen) if your equipment allows. This prevents copper oxide formation and improves metal quality.
- Remove impurities. As copper melts, skim off any dross or impurities that float to the top using a metal spoon or skimmer.
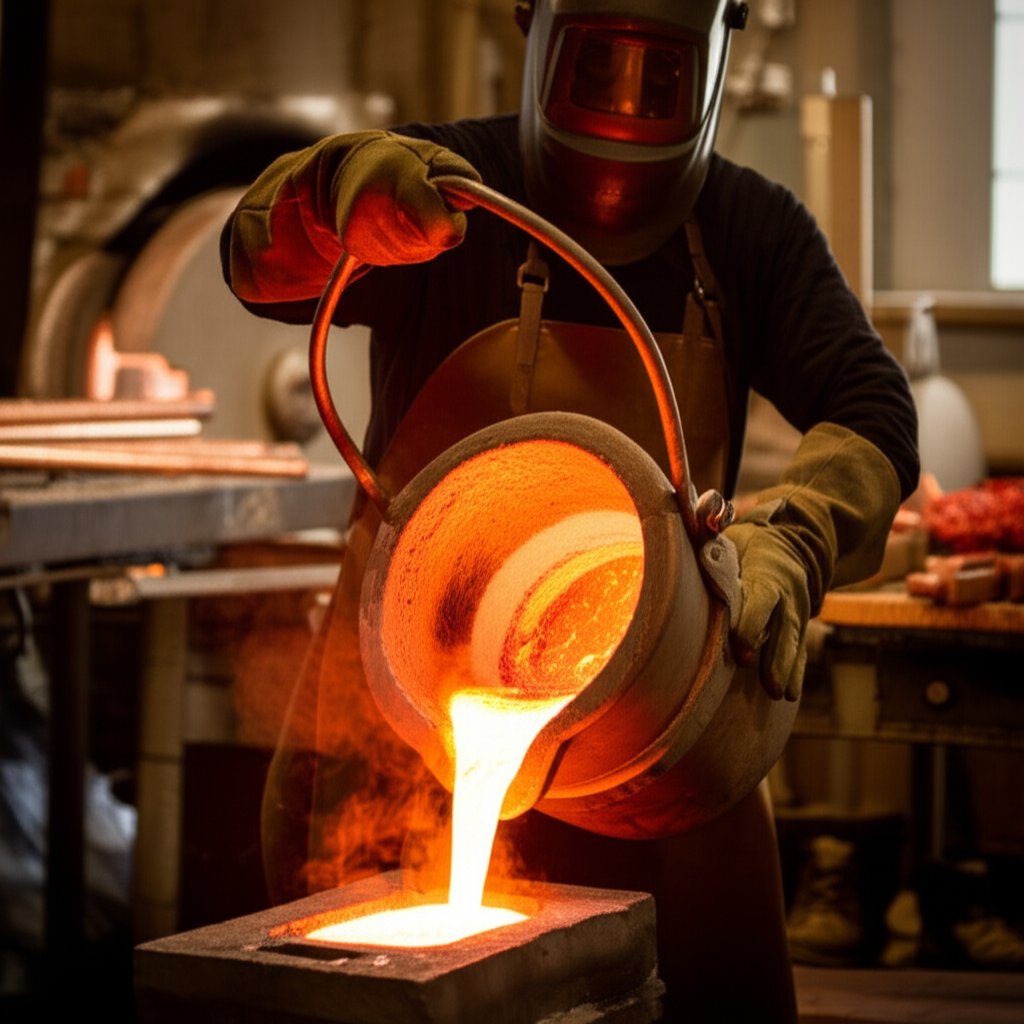
- Pouring. Carefully lift the crucible with tongs and pour the molten copper into preheated molds. Move slowly to avoid splashing and ensure even fill.
- Cooling and demolding. Allow the casting to cool completely before handling. Remove from the mold and inspect for defects.
Adjustments for brass, bronze, and cupronickel
When melting copper alloys, you’ll notice that the brass melting temp (typically 900–940°C) and bronze melt point (830–913°C for tin bronze) are lower than pure copper. Here’s how you adapt your process:
- Lower furnace settings: Adjust your furnace temperature to match the alloy’s solidus and liquidus range. Overheating can increase oxidation and zinc loss in brass.
- Atmosphere control: For brass, use a flux cover or inert gas to minimize zinc vaporization and reduce fume hazards.
- Crucible compatibility: SiC and clay-graphite crucibles are suitable for most copper alloys, but always check for chemical compatibility with your specific alloy.
- Pouring technique: Alloys with a wide melting range (like some brasses) may require slower, more controlled pouring to avoid segregation.
Crucibles, fluxes, and furnaces that work best
-
Batch size & purpose:
- Small batches or home use: Propane/charcoal furnace + clay-graphite crucible
- Medium/large batches: Induction or gas-fired furnace + SiC or high-density graphite crucible
-
Alloy type:
- Pure copper: Best with inert cover or flux to limit oxidation
- Brass (zinc-bearing): Use flux and control temperature to limit zinc loss
- Bronze: Similar to copper, but monitor tin loss at high temps
-
Atmosphere needs:
- Air: Acceptable for basic melting, but increases oxidation
- Inert gas: Recommended for high-quality or critical castings
Superheat and mold temperature guidance
| Material | Melting Temp (°C) | Pouring Temp (°C) | Mold Preheat (°C) |
|---|---|---|---|
| Pure Copper | 1084 | 1150–1200 | 200–400 |
| Brass | 900–940 | 1000–1050 | 150–300 |
| Bronze | 830–913 | 950–1050 | 150–300 |
Note: Always confirm these ranges with your alloy supplier or reference handbook for your specific composition and casting method.
Safety, preheat, and post-pour notes
- Preheat all tools and molds to avoid thermal shock and moisture-related explosions.
- Never add wet metal to molten copper—steam can cause dangerous eruptions.
- Ventilate your workspace, especially when melting brass, to avoid exposure to zinc fumes.
- After pouring, allow castings to cool in place before handling to prevent burns and warping.
By following these structured workflows and making informed decisions about furnaces, crucibles, and process controls, you’ll achieve better results—whether your goal is a flawless jewelry piece or a robust industrial casting. Next, we’ll examine the thermophysical data that influence pouring, mold design, and final part quality, helping you connect process steps to performance outcomes.
Thermophysical data that drives processing decisions
When you’re pouring copper or its alloys, success hinges on more than just hitting the right cu melting point. The real game-changers are the thermophysical properties that come into play as copper transitions from solid to liquid. Wondering why some castings fill perfectly while others misrun or crack? Let’s explore the key properties—like latent heat, viscosity, surface tension, specific heat, and thermal conductivity—and see how they affect every step from mold design to final part quality.
Key thermophysical properties near melting
Imagine you’re designing a mold or setting up a pour. You’ll want to know not just the melting point of cu, but also how copper behaves as it melts and flows. Here are the most influential properties near the copper metal melting point (around 1084°C):
| Property | Typical Value | Units | Temperature Dependence |
|---|---|---|---|
| Density of copper | 8.93 | g/cm³ (at 20°C) | Decreases with temperature; ~7.94 g/cm³ near melting |
| Latent heat of fusion | 204.8 | J/g | Value at melting point |
| Specific heat capacity | 0.385 | J/g·°C | Rises slightly with temperature |
| Thermal conductivity | 385–401 | W/m·K | Decreases with temperature |
| Resistivity of copper | 1.7 × 10⁻⁸ | ohm·m | Increases with temperature |
- Viscosity: Copper’s low viscosity (not listed numerically in the primary sources) means it flows easily, aiding in mold filling.
- Surface tension: High surface tension can affect how copper wets and fills small features, impacting gating and riser design.
Processing implications for pouring and mold design
Sounds complex? Here’s how these numbers shape your casting results:
- Density of copper: Knowing the copper density helps you calculate charge weights and predict shrinkage. As copper heats up, its density drops, so you’ll need to account for expansion and contraction in your mold design.
- Latent heat of fusion: This is the energy needed to melt solid copper. It determines how much heat your furnace must deliver and how quickly the metal will solidify—crucial for gating and riser sizing.
- Thermal conductivity: Copper’s exceptional thermal conductivity means it loses heat rapidly to the mold. If you don’t preheat your mold or pour fast enough, the metal can freeze before filling every detail, causing misruns or cold shuts. This is especially different from metals like aluminum or steel, which cool more slowly.
- Resistivity of copper: While mainly important for electrical applications, resistivity rises with temperature, so it’s relevant if you’re casting conductors or components where electrical performance matters.
- Specific heat capacity: This impacts how much energy is needed to raise copper to the melting point and how much heat is retained during pouring.
Design takeaway: Always preheat your molds and tools when working with copper. Its high thermal conductivity can cause the metal to solidify too quickly, leading to incomplete fills. Preheating helps reduce this risk and improves casting quality.
What to do when data varies by source
You might notice that sources sometimes list slightly different values for the same property—why is that? Measurement conditions, purity, and temperature all affect reported values. For the most accurate data, always:
- Check the temperature at which the property was measured (room temperature vs. near melting point)
- Verify material purity (pure copper vs. alloyed or work-hardened states)
- Consult multiple reputable references, such as MatWeb and AZoM
- Document your sources and note any temperature dependence
By understanding and applying these thermophysical properties, you’ll make smarter decisions about fill, gating, riser sizing, and mold preheat—leading to higher quality copper castings and fewer surprises on the shop floor. Up next, we’ll tackle how to spot and fix common casting defects, linking symptoms to root causes and practical fixes for copper and its alloys.
Troubleshooting melting and casting defects
Ever poured a batch of copper or copper alloy and found bubbles, cracks, or odd inclusions in your casting? You’re not alone. Even with careful control of what temp does copper melt and precise handling, defects can sneak in—costing time, materials, and quality. Let’s break down the most common copper casting defects, how to spot them, and practical steps to fix or prevent them for both pure copper and copper alloy castings.
Common copper casting defects and how to spot them
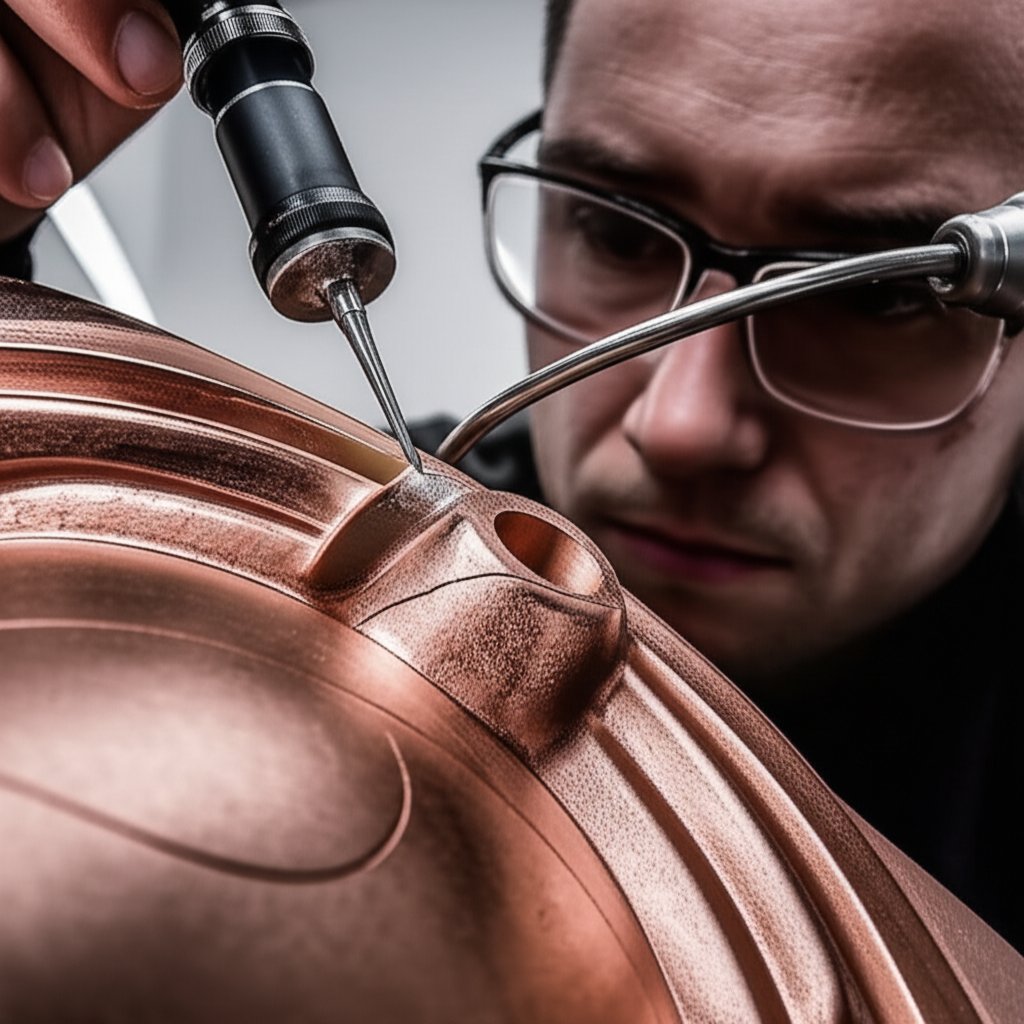
When troubleshooting a copper or copper alloy casting, start with a visual inspection. Here are the defects you’ll most likely encounter:
| Defect | Likely Causes | Corrective Actions | Prevention |
|---|---|---|---|
| Porosity / Gas Holes | Gas absorption, high moisture in mold, poor degassing, improper melting temperature | Degas at right time, control moisture, adjust melting temp, use oxidizing flux | Dry mold, use clean charge, optimize venting and pouring temperature |
| Shrinkage Porosity | Uneven cooling, small risers, poor gating/riser design | Increase riser size, improve gating, adjust pouring speed and temperature | Design for shrinkage, use chills, ensure adequate liquid supply |
| Oxidation / Surface Defects | High temperature, poor atmosphere control, exposure to air | Use flux cover, melt in inert or weakly oxidizing atmosphere, control temperature | Cover melt, preheat tools, minimize exposure to air |
| Dross / Slag Inclusions | Unclean charge, poor slag removal, turbulent pour | Refine with flux, skim dross, improve pouring system | Use clean charge, filter melt, avoid turbulence |
| Hot Tearing / Cracking | Low pouring temp, slow cooling, uneven stirring | Stir thoroughly, lower pouring temp, increase cooling rate | Use proper mold material, control cooling, optimize alloy composition |
| Contamination | Impurities in charge, wrong charging sequence | Reduce impurities, refine with flux, control charging sequence | Strict charge control, limit returns, select refining agents |
| Dimensional Inaccuracy | Poor mold design, uneven cooling, improper process control | Use precise molds, control cooling, implement quality checks | Regular inspection, adjust mold as needed, monitor process parameters |
Root causes and corrective actions that work
Sounds complex? Start by asking: Was the charge clean? Did you control the melting and pouring temperature? Was the mold fully dry? For example, porosity in a copper alloy often traces back to gas absorption from a wet mold or poor degassing. Surface oxidation and dross are usually signs of overheating or too much air exposure. Shrinkage and hot tearing can reveal issues with riser size, cooling rate, or even the melting temp of brass or bronze used.
Here’s a quick checklist to help you catch problems before they start:
- Ensure charge materials are clean and dry
- Preheat all molds and tools thoroughly
- Use proper fluxes for your alloy (especially for brass or bronze)
- Control furnace atmosphere (inert or weak oxidizing for most copper alloys)
- Set and monitor correct pouring temperature for your specific alloy
- Design gating and riser systems for effective feeding and venting
- Skim off dross and inclusions before pouring
By following these steps, you’ll drastically reduce the risk of common casting issues and improve yield—whether you’re working with pure copper or a specialty copper alloy.
When to recycle, re-melt, or scrap
Not every casting can be saved, but most copper and copper alloy defects can be addressed by re-melting or refining the metal. If you spot minor porosity, surface oxidation, or inclusions, consider recycling the casting by melting it again—after cleaning off any contaminants. Severe contamination or structural cracks, however, may require scrapping the part entirely to avoid compromising downstream quality (Ever Power).
Pro tip: Always document defects and their suspected causes. This helps you adjust process parameters and avoid repeat issues, especially when switching between different copper alloy types or changing the melting point copper process window.
By understanding the root causes and applying targeted corrective actions, you’ll spend less time troubleshooting and more time producing high-quality copper and copper alloy castings. Next, we’ll focus on safety and environmental best practices—essential knowledge for anyone handling molten copper or its alloys.
Safety and environmental best practices for copper melting and casting
When you’re working with molten copper or its alloys, safety isn’t just a box to check—it’s the foundation for every successful pour. You might be asking: What is copper’s melting point, and how does it affect safety protocols? At temperatures above 1084°C (1984°F), every step, from PPE choice to environmental practices, becomes critical. Let’s break down the essentials for staying safe and responsible, whether you’re in an industrial foundry or a small workshop.
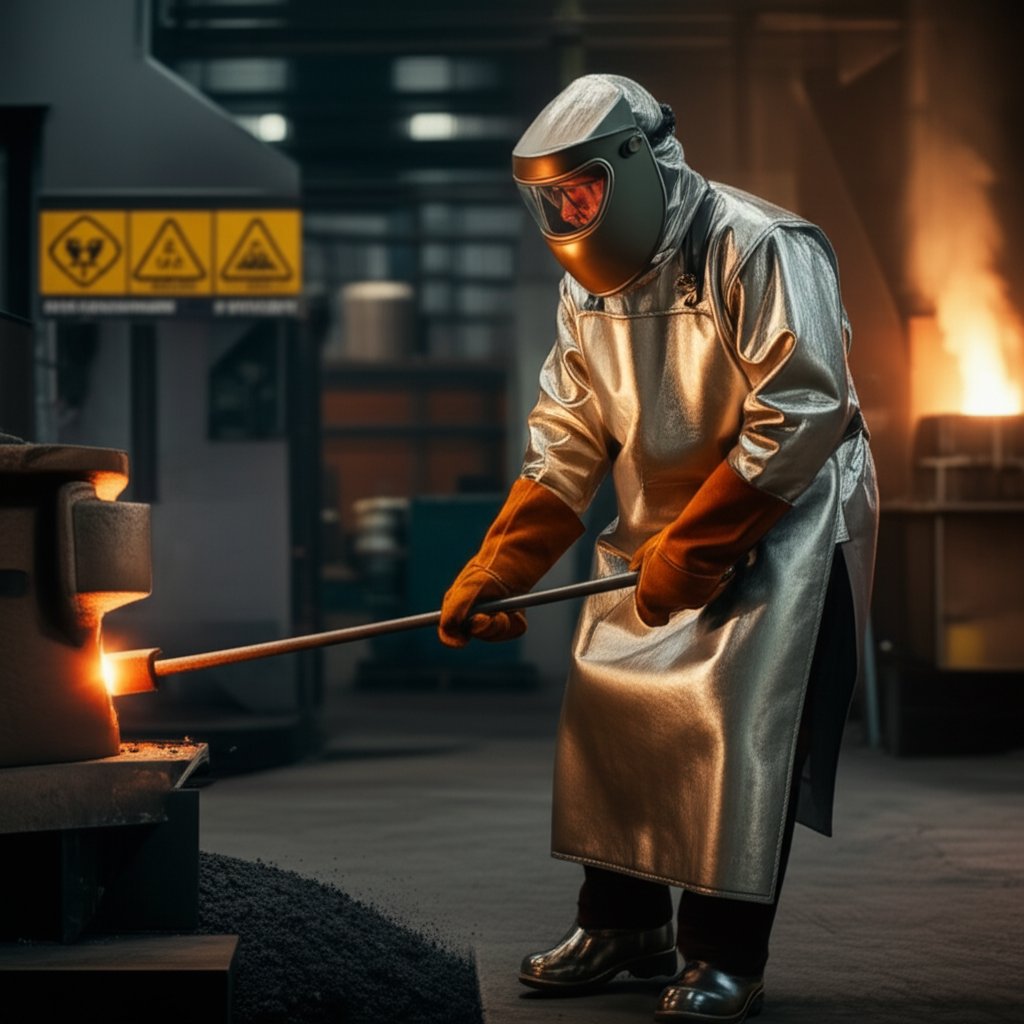
Personal protective equipment for molten operations
- Face shield: Protects against splashes of molten metal and flying debris.
- Heat-resistant gloves: Essential for handling tools and molds near the furnace.
- Aluminized flame-resistant clothing: Shields the body from radiant heat and potential fire hazards.
- Steel-toed boots: Guard feet against falling objects and accidental spills.
- Safety goggles: Prevent eye injuries from sparks and chemical splashes.
Imagine handling a ladle of copper at its melting temperature—one slip, and the right PPE could mean the difference between a minor scare and a serious injury. Always inspect gear before each use, and never skip any item, even for a quick job.
Ventilation, fume control, and zinc exposure
Melting copper alloys, particularly brasses, can release hazardous fumes—think zinc vapor, sulfur dioxide, and trace heavy metals. Good ventilation isn’t optional; it’s essential for protecting your lungs and those of everyone nearby. Here’s how to keep the air safe:
- Install exhaust hoods above furnaces and pouring stations to capture fumes at the source.
- Use air filtration systems to remove harmful particles before air is released outside.
- Monitor for signs of poor air quality—if you notice a metallic taste, irritation, or smoke, stop and improve ventilation immediately.
For zinc-bearing brasses, keep temperatures as low as practical within the alloy’s melting range and use flux covers to reduce zinc loss and fume generation.
Moisture control and safe handling of fluxes and dross
Picture this: a single drop of water in a hot mold can cause a violent steam explosion. Always preheat molds and tools thoroughly before introducing molten metal. Here’s a quick incident response protocol if a spill or splash occurs:
- Evacuate the immediate area and alert all personnel.
- Shut down the furnace if safe to do so.
- Use fire extinguishers for small fires—never use water on molten metal spills.
- Seek medical attention for burns or injuries immediately.
- Document the incident and review procedures to prevent recurrence.
Always preheat all tools and molds. Even a trace of moisture can cause dangerous eruptions when in contact with molten copper or its alloys.
Safe scrap handling and environmental stewardship
Handling scrap and managing waste responsibly is a cornerstone of both safety and sustainability. Store copper scrap in dry, secure bins to prevent oxidation and contamination. Separate copper from other metals to ensure the highest value during copper recycling.
- Keep the work area clean—remove any flammable or explosive materials before melting.
- Dispose of slag and dross at designated facilities to avoid soil and water contamination.
- Participate in copper recycling programs to reduce waste and conserve resources. Nearly 80% of all copper ever mined is still in use today thanks to effective recycling practices.
Proper copper recycling not only benefits the environment but also offers economic returns and supports a sustainable industry. Always follow local regulations for hazardous waste disposal and recycling procedures.
By following these safety and environmental best practices, you’ll protect yourself, your team, and the planet—while ensuring each casting run is as efficient and trouble-free as possible. Up next, we’ll share essential tools and references to help you turn material data into real-world copper parts, safely and sustainably.
Tools, References, and a Path to Working Copper Parts
When you’re ready to turn melting temperature data into real-world copper parts, having the right tools and resources makes all the difference. Whether you’re an engineer looking for a quick superheat calculation or a designer seeking a trusted rapid prototyping partner, this section gathers the essentials to help you move from theory to finished product—without missing a step. Let’s explore the calculators, reference links, and practical services that streamline your journey from copper melting point data to manufacturable parts.
Essential references and calculators
Sounds complex? It doesn’t have to be. Imagine you need to compare the melting temperature of copper with other metals, convert units, or estimate superheat for your next casting run. Here are some must-have resources:
- American Elements Melting Point Table: Quickly compare the metal melting point of copper, aluminum, steel, and more. Find reliable values for pure metals and common alloys in both Celsius and Fahrenheit.
- NIST Chemistry WebBook: Authoritative source for melting points, thermophysical data, and property tables for copper and other elements.
- MatWeb Copper Datasheet: Material property sheets for copper alloys, including melting range, density, and thermal conductivity.
- Engineering Toolbox Unit Converter: Instantly convert between °C, °F, and K, or compare the melting temp of metals side by side.
- Superheat Calculator: Estimate required superheat for copper and alloy casting to ensure complete fill and minimize defects.
- Electris Copper & Aluminum Prototyping: Insights on the prototyping process, including CNC machining, design validation, and process selection for copper parts.
From data to parts with rapid prototyping
When you need to move quickly from material selection to a functional copper prototype, partnering with an experienced prototyping service can save time and reduce costly mistakes. Here’s how top services compare for copper and alloy parts:
| Service | Capabilities | Material Range | DFM Support | Turnaround |
|---|---|---|---|---|
| XTJ Rapid Prototyping | CNC machining, injection molding, die casting | 50+ metals & plastics (copper, aluminum, steel, etc.) | Complimentary DFM feedback, ISO 9001:2015 QC | Rapid (project-specific, often days to weeks) |
| Electris | CNC, laser cutting, waterjet, finishing | Copper, aluminum, specialty alloys | Design engineering, PPAP, custom tooling | Fast (typically project-based) |
- XTJ Rapid Prototyping specializes in both metal and plastic parts, leveraging advanced CNC machining, injection molding, and die casting. With over 50 material options—including copper and popular aluminum alloys like 6061 and 7075—they support industries from aerospace to medical. Their experienced engineers offer complimentary DFM (Design for Manufacturability) feedback to help you avoid thermal-processing pitfalls, especially when working with metals that have high or low melting points. Rapid turnaround and ISO-certified quality control ensure your prototype moves smoothly from concept to reality.
- Electris provides precision copper and aluminum prototypes using CNC, laser, and waterjet processes. Their engineering team supports every step, from design validation to custom tooling, and can deliver both single units and small series for functional testing and pre-series production.
When to involve manufacturing experts early
Imagine you’re designing a copper busbar or a heat sink and want to avoid costly rework. When is the right time to bring in manufacturing expertise?
- When the melting temperature of copper will affect joining, forming, or surface finish
- If your design requires tight tolerance or specific electrical/thermal performance
- When comparing melting temp of metals to select the right alloy for your application
- If you’re unsure how your design will behave during casting, machining, or thermal treatment
- When you need to know what metal has the highest melting point for extreme environments or temperature-sensitive parts
Early collaboration with prototyping and manufacturing partners saves time, reduces risk, and helps you optimize for the real-world challenges of copper and alloy processing. For example, knowing that tungsten holds the answer to what metal has the highest melting point (3422°C) can guide material selection for furnace components or high-temperature tooling (American Elements).
By leveraging these tools, references, and expert partners, you’ll move confidently from copper melting point data to manufacturable, high-performance parts—no matter how demanding your application. Ready to get started? Explore the resources above and connect with a prototyping partner when your next project demands precision and speed.
Frequently Asked Questions About Copper Melting Point
1. Can you smelt copper at home?
Melting copper at home is challenging because its melting point is around 1084°C (1984°F), much higher than most household appliances can reach. Specialized equipment like a propane or induction furnace and proper safety gear are required. Always ensure good ventilation and follow strict safety protocols due to the high temperatures involved.
2. Why is copper so hard to melt?
Copper is difficult to melt because of its high melting point and significant heat of fusion, meaning it requires more energy to transition from solid to liquid compared to metals like aluminum. Its high thermal conductivity also causes it to lose heat quickly, making temperature control crucial during melting.
3. Which melts faster, copper or aluminum?
Aluminum melts at a lower temperature (about 660°C or 1220°F) compared to copper (1084°C or 1984°F), so aluminum melts faster under the same conditions. This difference impacts furnace selection and process planning for casting or joining these metals.
4. How do impurities and alloying affect copper's melting point?
Impurities and alloying elements like zinc, tin, or nickel lower copper's melting point and create a melting range instead of a single temperature. This is why alloys such as brass and bronze have different and broader melting ranges, affecting their casting and joining properties.
5. What safety precautions are essential when melting copper?
When melting copper, always use full personal protective equipment, including heat-resistant gloves, face shields, and flame-resistant clothing. Ensure proper ventilation to control fumes, especially when working with copper alloys containing zinc. Preheat all tools and molds to avoid moisture-related explosions, and follow best practices for copper recycling and waste disposal.
-
Posted in
casting safety, copper alloys, copper melting point, copper processing, metal melting points


