
MMA Welding Aluminium Without Porosity: 9 Essential Points
Step 1 Decide if MMA suits your aluminum weld
When MMA Welding Aluminium Beats Other Processes
Ever wondered if you can tackle that aluminum repair with your trusty stick welder? The short answer: yes, you can stick weld aluminum, but it’s not always the best tool for every job. MMA (Manual Metal Arc, or stick welding) has its place—especially when portability, speed, or outdoor conditions matter more than appearance or precision. Let’s break down where MMA welding aluminium works best, and where MIG or TIG might be the smarter choice.
| Process | Portability | Cost | Access to Tight Spaces | Tolerance Demands | Learning Curve | Post-Weld Finishing |
|---|---|---|---|---|---|---|
| MMA (Stick) | Excellent (No gas, simple setup) |
Low (Minimal equipment, low consumable cost) |
Very Good | Low to Moderate (Rougher finish, less precise) |
Moderate (Short arc, quick travel required) |
High (Slag removal, rough bead) |
| MIG | Moderate (Needs shielding gas, spool gun for aluminum) |
Moderate to High (More gear, consumables) |
Good | Moderate (Good for most fabrication) |
Easy (Simple trigger operation) |
Low (Cleaner bead, less spatter) |
| TIG | Low (Bulky gear, gas required) |
High (Precision equipment) |
Fair | High (Tightest tolerances, best for thin/cosmetic) |
Steep (Coordination, settings) |
Very Low (Minimal cleanup) |
Limitations That Sabotage Aluminum Stick Welds
Aluminum brings unique challenges to arc welding. Its high thermal conductivity draws heat away fast, so you’ll need more amperage to keep the puddle molten—yet too much, and you risk burn-through. The metal’s oxide layer melts at a much higher temperature than the base aluminum, making thorough cleaning and sometimes preheating essential. Hydrogen sensitivity means contamination or moisture in your consumables can cause porosity—tiny bubbles that weaken your weld.
Stick welding aluminum is also less forgiving than with steel. The technique window is narrow: you need to maintain a short arc, travel quickly, and select the right rod for your base alloy. Welds are typically rougher, with more spatter and slag, and require more post-weld finishing. If you’re aiming for a flawless finish or thin material, stick welding aluminum may not deliver the results you want.
Risk Assessment Before You Strike an Arc
-
Best suited for MMA stick welding aluminum:
- On-site or outdoor repairs (no gas required)
- Thick aluminum sections (frames, castings, brackets)
- Contaminated, weathered, or less-than-pristine surfaces
- Jobs where appearance is secondary to function
-
Better suited for TIG/MIG:
- Thin-gauge aluminum or sheet metal
- Cosmetic welds (visible joints, artwork, automotive panels)
- Critical, leak-tight, or high-strength joints
- Precision fabrication or production work
Choose MMA for rugged aluminum repairs and access; choose TIG/MIG for precision, cosmetics, and thin sections.
So, can you stick weld aluminium? Absolutely—but success depends on matching the process to the job, understanding aluminum’s quirks, and preparing thoroughly. If you’re set on welding aluminum with a stick welder, you’ll need to pay special attention to oxide removal, joint fit-up, and consumable selection. In the next steps, we’ll walk you through how to prep your gear, pick the best rods, and dial in your technique to keep porosity at bay and your welds strong.
Step 2 Prepare safety gear and a stable setup
Essential PPE For Aluminum Stick Welding
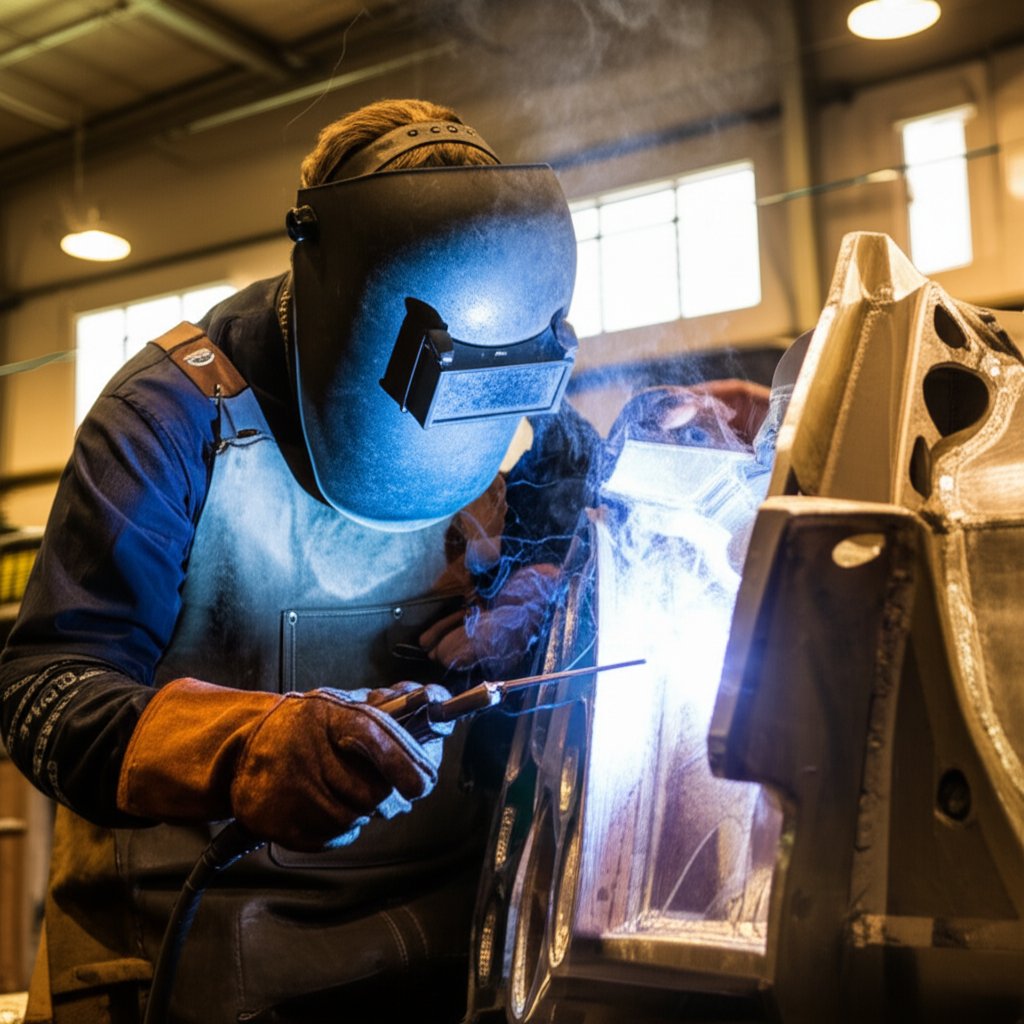
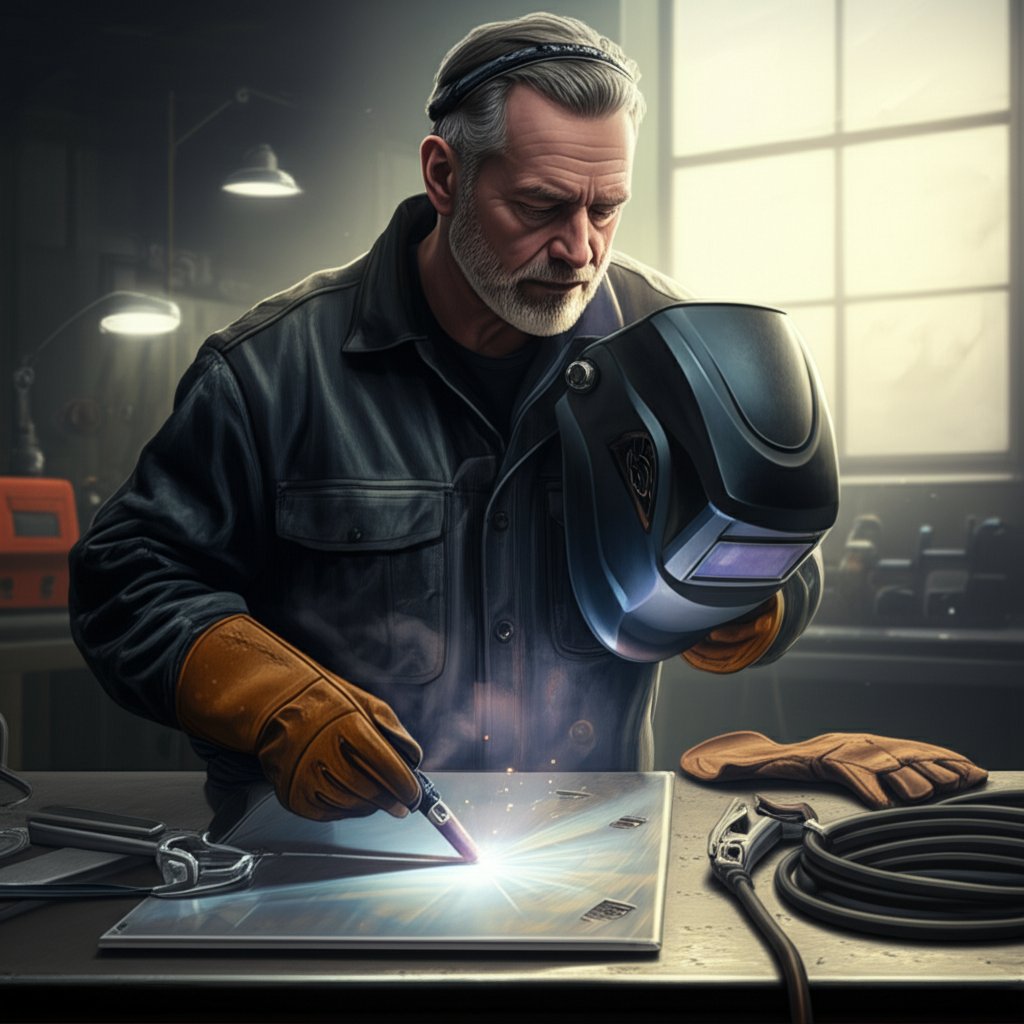
When you’re getting ready for welding aluminum with a stick welder, safety should always come first. Sounds obvious? Maybe, but aluminum’s unique hazards—intense UV light, hot spatter, and metal fumes—mean you need to be especially thorough. Start by suiting up with a full-coverage welding helmet (auto-darkening preferred), a flame-resistant jacket that covers your neck and arms, and heavy-duty gloves rated for high heat. Because aluminum reflects radiant energy, exposed skin is at risk even if you’re not right over the weld. Don’t forget a respirator or welder’s mask approved for aluminum fumes, especially if you’re working in a tight or poorly ventilated space. It’s a smart move to check manufacturer guidance for your PPE and update it as needed for your specific aluminium welding machine setup.
Grounding And Leads That Prevent Arc Dropouts
Ever had your arc sputter or die mid-bead? That’s often a sign of poor grounding or worn leads. For successful welding aluminum with an arc welder, electrical integrity is critical. Here’s what you’ll notice makes the difference:
- Clamp Placement: Attach the earth clamp to bright, oxide-free aluminum as close to the weld joint as possible. This minimizes resistance and voltage drop, ensuring stable arc performance.
- Cable Quality: Inspect all cables for cuts, burns, or loose connections. Shorter, heavier-gauge leads are best for portable jobs—they reduce voltage drop and help your aluminum stick welder deliver consistent heat input.
- Lead Routing: Keep cables off hot surfaces and away from sharp edges. Aluminum’s high reflectivity can soften insulation if cables aren’t managed properly.
Proper grounding not only stabilizes your arc but also limits the chance of electrical shock. According to Lincoln Electric, always maintain insulation on weld cables and check extension cords for ground continuity before starting any arc welding project.
Pre-Weld Checklist To Avoid Porosity
Imagine prepping your gear only to end up with porous, weak welds. To set yourself up for success, follow this pre-weld checklist:
- Verify all cables are dry, intact, and securely connected.
- Position the clamp on freshly cleaned aluminum, as close as possible to the joint.
- Remove all flammable materials from the workspace.
- Ensure adequate ventilation or local exhaust to disperse fumes.
- Double-check polarity settings per your electrode’s datasheet—incorrect polarity can destabilize the arc.
- Inspect amperage leads and confirm your machine’s duty cycle matches the job.
- Test your arc on a scrap piece of aluminum before welding the actual part.
Short, clean ground paths reduce spatter and porosity on aluminum.
- Use a dedicated stainless steel wire brush for aluminum only—never share it with steel.
- Keep grinding dust from steel separate to avoid cross-contamination.
- Stage workpieces in a warm, low-humidity area to limit moisture pickup.
Workspace and Setup Tips
- Shield hoses and clear walkways—aluminum’s radiant heat can damage insulation.
- Plan lead routing to keep cables out of puddles or off hot surfaces.
- Always check that your aluminium welding machine is on a stable, dry surface.
Common Setup Mistakes and How to Avoid Them
- Loose ground clamp: Always tighten securely on clean metal.
- Long, undersized cables: Use the shortest, thickest cables you can manage for your setup.
- Skipping PPE: Never weld aluminum without full skin and respiratory protection.
- Ignoring ventilation: Fumes build up fast—use fans or exhaust if indoors.
- Cluttered workspace: Remove trip hazards and keep your area organized.
By taking these steps, you’ll give yourself the best shot at a clean, strong weld—free from arc instability and porosity. Next, you’ll learn how to select the right aluminum electrodes for your specific project and setup, building on this safe, reliable foundation.
Step 3 Choose the correct aluminum electrodes
Electrode Chemistries: Al-Si vs Al-Mg
When you’re welding aluminum with stick rods, the right electrode choice can make or break your results. Sounds complex? It’s easier when you focus on chemistry. Aluminum stick welding rods are typically categorized by their alloying elements—mainly silicon (Al-Si) or magnesium (Al-Mg)—and each has strengths for specific applications. For example, Al-Si rods like E4043 are general-purpose, offering great fluidity and arc stability, while Al-Mg rods such as E5356 provide higher strength and improved crack resistance for structural work.
| Electrode Type | Common AWS Designation | Typical Alloy Compatibility | Best For | Recommended Current | Flux Behavior & Cleanup |
|---|---|---|---|---|---|
| Pure Aluminum | E1100 | 1xxx, 1100, 3003 | Joining pure aluminum, ductile repairs | DC Electrode Positive (DCEP) | Minimal slag, easy cleanup; low strength |
| Al-Si (Silicon bearing) | E4043 | 6xxx, 5xxx (Mg <2.5%), castings | General repairs, cast aluminum, 6xxx frames | DC Electrode Positive (DCEP) | Good fluidity, moderate slag; thorough post-weld cleaning required |
| Al-Mg (Magnesium bearing) | E5356 | 5xxx, marine/structural | High strength, corrosion-resistant joints | DC Electrode Positive (DCEP) | More slag, excellent crack resistance; clean thoroughly after welding |
| Al-Mn (Manganese bearing) | E3003 | 1xxx, 3xxx | Joining pure and 3xxx series | DC Electrode Positive (DCEP) | Minimal slag, good ductility |
Matching Rods to 3xxx, 5xxx, and 6xxx Aluminum
Imagine you’re repairing a cast aluminum bracket or fabricating a 6061 frame. Which rod do you reach for? Here’s a quick guide:
- For castings or 6xxx series (like 6061): Use Al-Si rods (E4043). Their silicon content helps prevent cracking and provides smoother welds.
- For 5xxx series (marine or structural): Choose Al-Mg rods (E5356) if the magnesium content in the base metal is above 2.5%. They deliver higher strength and corrosion resistance, ideal for tough environments.
- For pure aluminum or 3xxx series: E1100 or E3003 rods are suitable, offering good ductility and conductivity for repairs or joining similar alloys.
Always check the manufacturer’s recommendations for your specific aluminum welding rods. The wrong match can lead to cracking or weak welds, especially with dissimilar alloys.
Flux Functions and Cleanup Strategy
Ever wondered why aluminum stick rods have such a thick, powdery coating? The flux is your secret weapon against aluminum’s stubborn oxide layer and hydrogen porosity. It works by:
- Generating a shielding gas to block contamination
- Dissolving and removing the aluminum oxide layer
- Scavenging hydrogen to reduce porosity
- Stabilizing the arc for smoother operation
But there’s a catch: too much rod manipulation can churn flux into the puddle, trapping slag and causing lack of fusion. After welding, you must chip and wire-brush all flux residue, as it can be corrosive if left on the aluminum. Plan for both mechanical and chemical cleaning before putting the part into service.
- Keep a range of electrode diameters (2.5mm, 3.2mm, 4.0mm, etc.) on hand to match joint size and heat-sink needs.
- Always store aluminum stick rods in a dry, sealed container to prevent moisture pickup.
- Confirm the welding rod for aluminum matches both your base alloy and desired mechanical properties.
In summary, aluminum sticks for welding are not one-size-fits-all. Choosing the right aluminum arc welding rods and understanding their flux roles is crucial for strong, low-porosity welds. Next, you’ll see how joint prep and fixturing can further boost your success with aluminium stick welding rods—setting the stage for clean, consistent results every time.
Step 4 Prepare joints and precision fixturing
Joint Designs That Favor MMA On Aluminum
When you’re setting up for welding cast aluminum or any aluminum component with a stick welder, joint design is your first line of defense against porosity and distortion. Why does it matter? Because aluminum’s high thermal conductivity and tendency to warp mean that sloppy fit-ups or poor edge prep can quickly sabotage your results. For MMA (SMAW) welding aluminium with stick, you want joints that allow for easy access, strong tie-ins, and room for slag removal. Butt, fillet, and lap joints are common, but each needs a thoughtful approach to edge prep and backing.
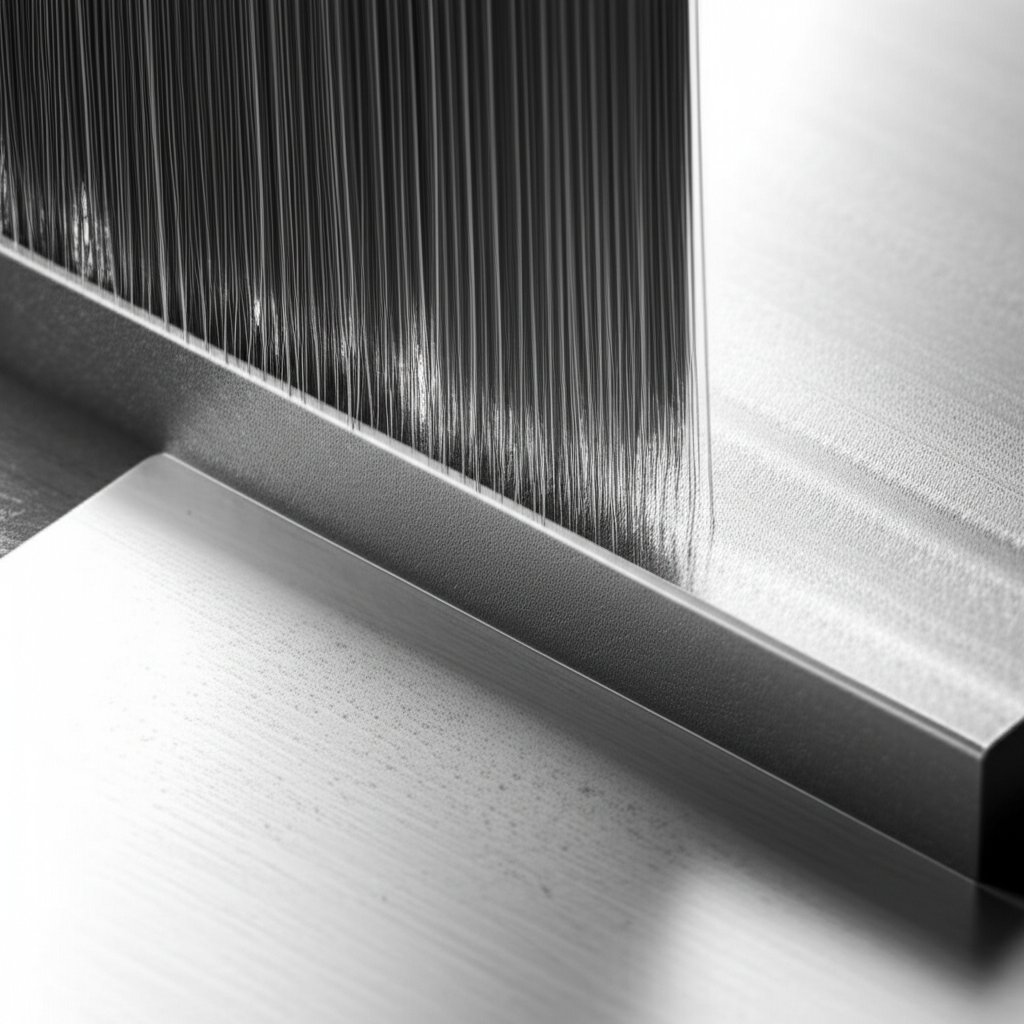
Oxide Removal and Edge Conditioning
Ever noticed how quickly aluminum forms a dull, chalky layer? That’s the oxide, and it melts at a much higher temperature than the base metal—if you don’t remove it, you’ll struggle with fusion and risk inclusions. Here’s a practical prep sequence to maximize your success with an aluminium welding set:
- Degrease: Wipe down all surfaces with a dedicated aluminum cleaner or solvent to remove oils and dirt.
- Oxide Removal: Use a dedicated stainless steel wire brush (never used on steel) to scrub the joint area just before welding.
- Edge Prep: Bevel thick sections for better penetration and ensure all edges are bright and free from contamination. For butt joints, a small root gap can aid penetration—just don’t go overboard, as excessive gaps make it harder to stick weld aluminium cleanly.
- Fit-Up: Align parts with tight, consistent gaps. Loose fit-ups cause burn-through and make slag removal harder.
- Preheat (if needed): For thicker or highly conductive sections, preheat to 300–400°F (150–200°C) to slow cooling and reduce cracking risk.
Heat Sinks and Backing Bars for Control
Aluminum’s tendency to absorb and dissipate heat rapidly can leave you chasing a runaway puddle or battling distortion. The solution? Use heat sinks and backing bars to stabilize the joint and control the weld zone. Here’s how different joints benefit from these supports:
| Joint Type | Edge Prep/Gap | Backing/Heat Sink Strategy |
|---|---|---|
| Butt Joint | Bevel edges for thick sections; maintain a narrow, consistent root gap | Use copper or aluminum backing bars for heat extraction and to support the puddle; CNC-machined bars ensure tight fit and repeatability |
| Fillet Joint | Clean, square edges; avoid excessive gaps | Clamp heat sinks behind or beneath the joint to absorb excess heat and minimize distortion |
| Lap Joint | Bright, oxide-free overlap; ensure no trapped contaminants | Back up with a conductive bar to draw heat away and prevent burn-through |
Note: For numeric bevel angles or root gaps, always follow electrode or code recommendations. When in doubt, a slight bevel and a gap just wide enough for the arc to access the root are safe starting points.
Precision Fixturing for Consistency
Imagine you’re welding aluminium with stick welder on a part that demands tight tolerances or flatness—maybe a bracket or a structural frame. Even with the best welding rods for aluminium stick welding, manual clamping or makeshift supports can introduce movement, misalignment, or uneven heat flow. This is where precision-made fixtures and backing bars shine. Custom CNC-machined fixtures provide stable, repeatable support, maintain alignment, and offer superior heat management compared to improvised setups. For complex or high-spec jobs, consider partnering with a provider like XTJ CNC Machining Services for custom heat sinks, backing bars, or jigs tailored to your project. These solutions are engineered for ultra-tight tolerances, helping you reduce distortion and achieve better bead consistency—especially critical for smaw aluminum welds on demanding parts.
Clean edges and conductive backing tame aluminum’s heat and reduce porosity.
By investing the time in joint prep and fixturing, you’ll notice fewer defects, less warping, and stronger, more reliable welds—whether you’re tackling a simple repair or welding cast aluminum for a critical application. Next, you’ll discover how to handle and condition your consumables to keep moisture and contamination from undoing your hard work at the bench.
Step 5 Condition and handle consumables correctly
Moisture Control For Aluminum Stick Rods
Ever pulled out a fresh aluminum stick welding rod only to end up with a bead riddled with pinholes? That’s usually moisture at work. Even a tiny trace of water—absorbed by the flux or clinging to the rod—can flood your weld with hydrogen, leading to porosity and weak joints. For MMA welding aluminium, diligent rod storage and handling are non-negotiable if you want clean, strong welds.
- Store aluminum arc rods and aluminium arc rods in sealed, low-humidity containers—ideally in a heated, climate-controlled room.
- Keep rods in their original, unopened packaging until you need them. If you must open a pack, remove only as many as you’ll use that day.
- Allow rods to acclimate to the welding area’s temperature for at least 24 hours before use if they’ve been stored in a cooler environment.
- Never touch the flux coating with sweaty or oily gloves—skin oils can introduce contaminants that affect arc stability.
- Segregate rods from steel dust and other contaminants; use a dedicated storage area for aluminum welding electrodes.
- If your rod manufacturer provides reconditioning instructions, follow them exactly. In general, avoid excessive heat that could degrade the flux.
Dry rods in, dry welds out—moisture feeds porosity.
Flux Activation And Slag Management
When you strike an arc with an aluminum stick welding rod, the flux coating activates—shielding the puddle, breaking down oxides, and scavenging hydrogen. But here’s the catch: excessive manipulation, like heavy weaving or long pauses, can churn flux into the molten pool and trap slag. This leads to lack of fusion and hard-to-remove inclusions.
- Favor short, controlled stringer beads over wide weaves.
- Chip and wire-brush all slag thoroughly between passes. Don’t let residue linger—aluminum’s oxide reforms quickly, especially if the part cools.
- Re-clean the joint with a dedicated brush if there’s any delay between passes.
Handling Practices That Protect Quality
- Open only a fresh tube of aluminum rods for stick welding when you’re ready to work.
- Stage just the day’s quantity in a clean, warm, and dry area near your workbench.
- Handle each aluminum stick welding rod gently—avoid dropping or scraping rods, which can crack the flux and expose the core to moisture.
- After each weld pass, chip and brush slag before laying the next bead. If the part cools, re-brush to remove any new oxide.
Imagine you’re mid-project and your rods have been sitting out overnight. Before continuing, check for any signs of moisture or damaged flux. If in doubt, set questionable rods aside—using compromised consumables is a surefire way to invite porosity and defects into your weld.
Remember, rod welding aluminum is all about controlling what goes into your puddle. When you treat every welding aluminum rod as a precision tool—kept dry, clean, and handled with care—you’ll see fewer defects and more reliable results. In the next step, you’ll learn how to fine-tune your machine settings and create a repeatable setup for every new job, locking in those quality gains you’ve worked so hard to achieve.
Step 6 Dial in machine settings with a template
Polarity and Amperage Tuning Framework
Ever wondered why your stick weld aluminum results swing from too cold to a molten mess? Aluminum’s high thermal conductivity means it pulls heat away from the puddle fast—so dialing in your welding aluminum stick welder is more than just picking a number and hoping for the best. If you’re unsure how to weld aluminium with a stick welder, start with the basics: most aluminum electrodes require direct current electrode positive (DCEP), but always double-check your rod’s datasheet for confirmation. The right amperage depends on electrode diameter and base thickness. For example, a 3/32" (2.4 mm) E4043 rod typically starts at 50–80 amps, a 1/8" (3.2 mm) at 80–130 amps, and a 5/32" (4.0 mm) at 100–160 amps (WeldGuru). Start at the low end, then fine-tune for smooth wetting without excessive fluidity or undercut.
Preheat and Interpass Control
Sounds complex? Here’s the trick: thick aluminum sections (over 1/4") often benefit from a gentle preheat—think 300–400°F (150–200°C)—to slow heat loss and help the puddle form. But don’t overdo it: for heat-treatable alloys or those with high magnesium, keep interpass and preheat below 250°F (121°C) to avoid degrading mechanical properties. Record whether you preheated and at what temperature, so you can repeat what works—or troubleshoot when things go wrong.
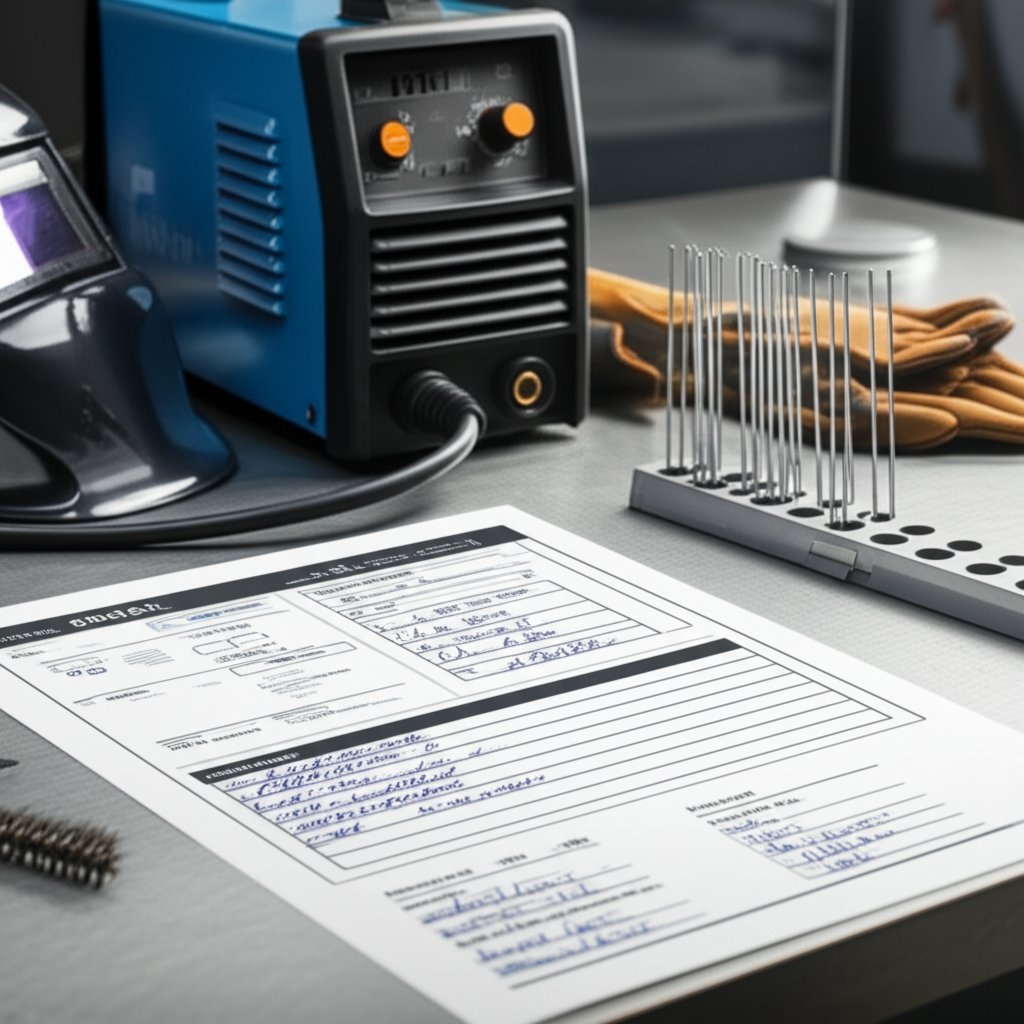
Parameter Template You Can Print
Imagine having a fill-in-the-blank cheat sheet for every job. Here’s a printable table to help you track and repeat your best results. For exact values, always use the electrode manufacturer’s published recommendations.
| Parameter | Example Entry |
|---|---|
| Base Alloy | 6061-T6 |
| Thickness | 1/4" (6.4 mm) |
| Joint Type | Butt, beveled |
| Electrode Type/Diameter | E4043, 1/8" (3.2 mm) |
| Recommended Polarity | DCEP (per datasheet) |
| Starting Amperage Range | 80–130 A (per datasheet) |
| Arc Length Target | Short—keep tip close enough to feel flux drag |
| Travel Speed Notes | Fast, straight stringers; avoid weaving except on very thick sections |
| Preheat/Interpass | Preheated to 350°F; interpass < 250°F |
| Slag Removal Between Passes | Chip and wire-brush after every pass |
| Special Observations | Arc stability, puddle behavior, any porosity |
Step-by-Step: How to Stick Weld Aluminum Without Guesswork
- Verify polarity per your electrode’s data sheet—DCEP is standard for most rods.
- Strike an arc on scrap aluminum to check arc stability and wetting.
- Adjust amperage for a puddle that wets smoothly but isn’t overly fluid—raise amps if the bead is cold or lacks fusion, lower if you see undercut or burn-through.
- Maintain a tight arc length—close enough to feel the flux drag, but not so close you stick the rod.
- Test, break, and inspect a tack to ensure full fusion before committing to the whole joint.
- Keep notes on your settings and observations for each joint. This is how you’ll develop repeatable, high-quality results and answer for yourself how do you weld aluminum with a stick welder under different conditions.
Remember, aluminum’s heat-sink effect means you may need to start slightly hot, then back off the amps as the part warms up. On thick sections, preheat and faster travel help stabilize the puddle, while on thin stock, lower amps and a feather-light touch keep you from burning through. If you ever find yourself wondering how to weld aluminum with a stick welder on a new part, refer to your notes and this template before you strike an arc.
Next, you’ll learn how to master bead technique—stringer vs. weave, arc angles, and interpass cleaning—so your controlled setup translates into consistently sound welds with minimal porosity.
Step 7 Run controlled stringers and manage slag
Strike Tacks and Puddle Control
Ever wondered why your aluminum stick weld looks solid at the start but falls apart by the end? The answer often lies in how you start and manage your weld bead. For successful aluminum stick welding, begin by placing short, well-fused tacks at key points along the joint. These tacks hold alignment and let you test-break one to ensure proper fusion and wetting before committing to a full pass. Remember, aluminum doesn’t give you color cues—so rely on the shine and flow of the puddle. You’ll notice the puddle forms quickly and stays fluid for only a short window, so move with purpose and control.
- Place short tacks at the joint ends and midpoints. Test-break one to check for fusion and penetration.
- Hold a tight, consistent arc length. Keep the tip close enough to feel the flux dragging, but not so close that you stick the rod. This minimizes flux entrapment and helps stabilize the arc, a must for quality welding aluminum with stick rods [reference].
Stringer Beads Beat Wide Weaves
When it comes to smaw aluminum welding, less is more. Wide weaves can churn flux into the puddle, trapping slag and leading to lack of fusion or porosity. Instead, favor small, straight stringer beads with a slight forward travel angle—just enough to keep the flux coating trailing behind the molten pool. Minimal oscillation is key. If you’re new to stick aluminum welding, practice running stringers on scrap of similar thickness until you can produce uniform beads without undercut or excessive slag. On thicker sections, you might need a slight weave, but keep it controlled and only as wide as the electrode core.
- Minimal oscillation—let the rod do the work, don’t over-manipulate.
- Maintain a travel angle that keeps the flux behind the puddle for optimal shielding.
- Pause briefly at bead toes to ensure tie-in, but avoid lingering, which can cause porosity or burn-through.
Consistent stringer beads are the backbone of a reliable aluminum stick weld—each pass should overlap slightly, with no cold laps or unfilled craters.
Interpass Cleaning and Restart Strategy
Aluminum’s oxide layer reforms quickly, and any trapped slag or moisture can undo your hard work. After each pass, chip and wire-brush the slag thoroughly. If there’s any delay before the next bead, re-brush the joint to remove fresh oxide. Before restarting, re-warm the joint if it’s cooled significantly—this helps maintain puddle control and reduce the risk of porosity. For every restart, fill the crater to prevent end-cracking, a common pitfall in aluminum stick welds. Consistency in cleaning and restarts sets apart strong, clean aluminum stick weld from those riddled with defects.
Short, clean stringers with disciplined arc length deliver the soundest aluminum stick welds.
Before tackling a critical job, practice welding with aluminum stick rods on scrap to dial in your speed, arc length, and cleaning routine. With these techniques, you’ll build repeatable habits that translate to robust, lower-porosity welds every time. Next, you’ll learn how to spot and fix defects fast, ensuring your hard work stands the test of time.
Step 8 Troubleshoot defects with a quick map
Find And Fix Porosity Fast
Ever laid down a bead, only to see pinholes or hear that telltale hiss as you chip the slag? Porosity is the #1 enemy when you can you weld aluminum with a stick welder. Aluminum’s tendency to trap hydrogen means even a small mistake—like a moist rod or dirty joint—can fill your weld with tiny voids. So, how do you spot the cause and fix it before it ruins your project?
| Defect | Likely Causes | Checks To Confirm | Corrective Actions |
|---|---|---|---|
| Porosity | Moist rods, contaminated base, long arc length, oxide not removed | Pinholes in bead, hissing during slag removal, bubbles in cross-section |
|
| Lack of Fusion | Low heat input, fast travel, oxide not removed, improper rod angle | Dull, cold bead; incomplete tie-in at toes; bead peels off base |
|
| Slag Entrapment | Wide weave, excessive manipulation, poor interpass cleaning | Slag islands in bead, rough surface, hard-to-remove inclusions |
|
| Burn-Through | Excess heat, thin base, gap too wide, slow travel | Holes in bead, excessive undercut, distorted workpiece |
|
| Cracking at Crater | No crater fill, wrong filler chemistry, rapid cooling | Cracks at ends of bead, especially after cooling |
|
Diagnose Lack Of Fusion And Undercut
Imagine running a bead that looks fine—until you try to bend it, and it snaps right off. Lack of fusion is a hidden defect that can sneak up on you, especially if you can you weld aluminium with a stick welder on thick or dirty material. To catch it early, inspect bead edges for smooth tie-in and break-test a sample if possible. If you’re seeing undercut (grooves along the bead’s edge), you might be running too hot or moving too slow. Adjust your amperage, travel speed, and arc angle, and always re-clean the joint between passes to avoid oxide-related fusion problems.
Cracking And Burn-Through Controls
Aluminum’s high thermal expansion makes it prone to cracking—especially at craters or where the weld cools too quickly. If you’re asking, "can i stick weld aluminum without cracks?" the answer is yes, but only if you fill each crater, match rod chemistry to your base, and avoid rapid cooling. Preheat thick sections and use a slower, steady hand to prevent stress buildup. Burn-through is the opposite problem, often striking when you try to weld thin aluminum with a stick welder. Lower your amps, use a smaller rod, and keep your arc moving to avoid melting right through the base.
Quick Post-Weld Inspection Checklist
- Bead is clean, shiny, and free from pinholes (no visible porosity)
- Uniform bead profile—no undercut or excessive buildup
- Good tie-in at toes; edges blend smoothly with base metal
- Slag chips off cleanly, no inclusions left behind
- Optional: break or etch test a sample to check for internal voids
Most aluminum stick porosity traces back to moisture or oxide—clean and dry before you adjust amps.
Whether you’re troubleshooting after your first attempt or refining your results, documenting what you change (in your parameter template from Step 6) is key. This way, the next time someone asks, "can aluminum be welded with a stick welder?" or "can i weld aluminium with a stick welder?" you’ll have a proven roadmap to share. Up next, you’ll learn how to inspect, finish, and decide when it’s time to switch processes or call in a pro for critical jobs.
Step 9 Inspect finish and choose the best path
Post-Weld Cleaning And Corrosion Control
Imagine stepping back after a hard-won MMA weld on aluminum—only to see dull residue, rough edges, or even hidden defects. How do you make sure your work stands up to the elements and looks as good as it performs? The answer starts with thorough post-weld cleaning and smart finishing choices. Aluminum is notorious for its oxide layer and for trapping contaminants, so cleaning isn’t just about looks—it’s about longevity and corrosion resistance.
- De-slag and brush: Remove all slag using a chipping hammer and a dedicated stainless steel wire brush.
- Solvent rinse: Wipe the weld and surrounding area with a safe, non-flammable solvent or specialized aluminum cleaning wipe to remove oils and fine particles.
- Neutralize residual flux: If the electrode manufacturer recommends, use a neutralizing solution to counteract any corrosive flux residue left behind.
- Light sanding: Smooth out the bead and any rough transitions to improve both appearance and resistance to moisture traps.
- Protective coating: If the part will see harsh environments, apply a suitable coating or paint to shield the weld from further oxidation and corrosion.
Mechanical cleaning is often the first step, but for critical jobs or where appearance matters, consider chemical or electrolytic methods that remove oxide and contaminants more effectively. Each method has trade-offs—mechanical abrasion is fast but less thorough, while chemical options like pickling require careful handling [reference].
When To Choose TIG, MIG, or CNC Machined Solutions
Not every project calls for the same finishing—or even the same joining process. When you’re deciding between sticking with MMA, switching to TIG or MIG, or outsourcing to CNC machining, weigh your priorities: precision, appearance, speed, and complexity. The table below compares your main options, including CNC machining for ultra-precise parts or fixtures. CNC can complement or even replace welding for some high-tolerance jobs—think custom heat sinks, intricate brackets, or when repeatability is mission-critical.
| Process | Precision/Tolerance | Cosmetic Quality | Speed (Thin/Thick) | Access/Portability | Finishing Required |
|---|---|---|---|---|---|
| CNC Machined Solution/Fixturing | Ultra-high (±0.005mm) | Excellent—machined finish | Fast for complex shapes; no heat distortion | Shop-based; best for small to medium parts | Minimal (deburr, cleaning) |
| TIG (Tungsten Inert Gas) | High—best for thin and intricate work | Excellent ("stacked dimes" look) | Slower, especially on thick material | Requires gas, less portable | Minimal (light brush, degrease) |
| MIG (Metal Inert Gas) | Moderate to high | Good, but more spatter than TIG | Fast, especially on thick sections | Moderate portability; needs gas/spool gun | Remove spatter, light sanding |
| MMA (Manual Metal Arc / Stick) | Moderate—best on thick, rugged parts | Fair; rougher bead, more cleanup | Fast on thick; not suitable for thin | Excellent—most portable, no gas needed | Extensive (slag removal, sanding, cleaning) |
For jobs demanding tig welding aluminum or mig welded aluminum with flawless appearance or tight tolerances, TIG and CNC machining often lead the way. MIG welding aluminum with a mig welder is your go-to for speed and productivity on thicker parts, though you’ll spend more time cleaning spatter. MMA delivers when ruggedness and access matter most, but expect more post-weld finishing and a less refined look.
Finishing Steps That Improve Service Life
After cleaning, inspect your welds closely—look for uniform bead shape, no pinholes, and smooth tie-ins. If you spot defects, address them before putting the part into service. For critical applications, consider non-destructive testing or even outsourcing to a CNC shop for parts or fixtures that require ultra-high repeatability or complex geometry. This is especially important when MMA’s limitations—like rougher finish or less control over distortion—could compromise your results.
- Chip and brush all slag and oxide before further finishing.
- Rinse with solvent and dry thoroughly.
- Neutralize any residual flux as needed—especially for outdoor or marine use.
- Sand or polish to the desired smoothness.
- Apply a corrosion-resistant coating or paint for added protection.
When appearance or corrosion resistance is paramount, aluminum tig welding or a CNC-machined finish is often worth the investment. For general-duty repairs, MMA gets the job done, but don’t skip thorough cleaning and inspection.
Use MMA where access and robustness rule; switch to TIG/MIG or CNC when precision and cosmetics define success.
Frequently Asked Questions about MMA Welding Aluminium
1. Can MMA weld aluminum?
Yes, MMA (Manual Metal Arc) welding can be used for aluminum, especially for on-site repairs and thick sections. However, it requires careful preparation, the right electrodes, and attention to moisture and oxide removal to avoid porosity and weak welds. It’s best suited for rugged, functional repairs where appearance is less critical.
2. Can I stick weld aluminum?
You can stick weld aluminum using specialized electrodes designed for aluminum. The process is more challenging than stick welding steel due to aluminum's high thermal conductivity and oxide layer. Success depends on proper joint prep, electrode selection, and controlling moisture to prevent defects.
3. Is MMA welding stronger than MIG for aluminum?
MMA welding can produce strong welds on thick, rugged aluminum parts, but MIG welding is generally easier for beginners and offers a cleaner finish with less post-weld cleanup. MIG is preferred for production, thin sections, or when appearance is important, while MMA excels in portability and tough conditions.
4. What are the main challenges when stick welding aluminum?
The main challenges include managing aluminum’s oxide layer, preventing hydrogen-induced porosity, maintaining proper heat input, and selecting the correct electrode chemistry. Moisture and contamination can quickly cause defects, so thorough cleaning and dry storage of rods are crucial.
5. When should I choose TIG, MIG, or CNC machining instead of MMA for aluminum?
Choose TIG for precise, cosmetic welds on thin or intricate aluminum parts, MIG for fast production on medium to thick sections, and CNC machining for ultra-tight tolerances or complex parts where welding may not achieve the required accuracy or finish. MMA is ideal when portability and access are more important than appearance.
-
Posted in
aluminum stick welding, aluminum welding tips, arc welding aluminum, mma welding aluminium, welding aluminum electrodes

