
Copper Wire Ampacity And Voltage Drop—Get It Right Fast
Copper Wire Fundamentals and Core Properties
What Makes Copper Wire a Top Conductor?
Ever wondered why copper wire is the backbone of power distribution and electronics? The answer lies in its unique blend of electrical, mechanical, and chemical properties. As a metallic conductor, copper wire is prized for its high electrical conductivity, durability, and reliable performance in terminations and connections. But what does that really mean for your next project or installation?
How Copper’s Electrons Enable Low-Resistance Paths
Let’s break down the science. Copper’s atomic structure features 29 electrons, with a single, loosely bound valence electron. This setup allows electrons to move freely through the lattice when an electric field is applied, resulting in exceptionally low electrical resistivity. In practical terms, this means copper conductors carry current with minimal energy loss as heat—vital for safe, efficient wiring in everything from homes to industrial systems. The conductivity of copper is about 5.96 × 10⁷ S/m, making it the industry standard for electrical wiring.
- Outstanding conductivity: Copper’s conductivity is second only to silver, but at a much lower cost, making it the default for most copper electrical applications.
- Low resistivity: The resistivity of copper is low, allowing for efficient current flow and less voltage drop across distances.
- Ductility and formability: Pure copper wire can be drawn into fine strands or formed into complex shapes without breaking, supporting both solid and stranded copper conductor designs.
- Mechanical strength: Copper retains stable strength and flexibility, providing resilience during installation and over years of use.
- Oxidation resistance: Unlike iron, copper forms a protective patina rather than rust, ensuring long service life even in challenging environments.
Where Copper Wire Excels in Real-World Use
From power generation to electronics, copper wire’s combination of high conductivity and mechanical stability makes it the go-to choice for low- and medium-voltage applications. The vast majority of copper used worldwide—almost 70%—goes into electrical wiring and related uses, reflecting its unmatched suitability for carrying current efficiently.
But not all copper is created equal. The purity and processing of copper matter. For most electrical uses, pure copper wire forms the standard, with grades like electrolytic tough pitch (ETP) and oxygen-free (OF) copper offering high purity and excellent conductivity. Even small amounts of impurities or alloying elements can increase resistivity, so manufacturers tightly control composition and processing methods [Copper Development Association].
- Conductivity vs. resistivity: Conductivity measures how easily electricity flows; resistivity measures how much a material resists flow. For copper, high conductivity and low resistivity are two sides of the same coin.
- Purity vs. alloying: Pure copper wire is used for most copper electrical work, while minor alloying (like silver-bearing copper) is reserved for specialized, high-temperature applications.
- Grain structure and processing: Annealing and controlled rolling optimize grain size and uniformity, improving both flexibility and conductivity.
Key takeaway: Copper wire’s unique balance of high conductivity, mechanical strength, and corrosion resistance makes it the preferred choice for most low- and medium-voltage copper electrical applications, outpacing alternatives on reliability and efficiency.
How Does Copper Compare to Aluminum and Silver?
| Property | Copper | Aluminum | Silver |
|---|---|---|---|
| Conductivity | Excellent (5.96 × 10⁷ S/m) | Good (3.5 × 10⁷ S/m) | Best (6.30 × 10⁷ S/m) |
| Cost | Moderate | Low | Very High |
| Handling | Flexible, strong, easy to terminate | Lightweight, less flexible, more oxidation concerns | Soft, tarnishes, rarely used outside specialty cases |
While silver outperforms copper in raw conductivity, its cost and tarnishing limit its use. Aluminum is lighter and cheaper but requires larger cross-sections to match copper’s performance and is more prone to oxidation. Copper strikes the best balance for most practical wiring needs.
Safety and Code Preview: Choosing the right copper conductor is also about safety and code compliance. National and international standards specify minimum sizes, installation methods, and performance criteria—topics we’ll cover in detail in later sections on sizing and ampacity/voltage drop.
Types and Treatments of Copper Wire Made Simple
Solid Versus Stranded Copper Wire Explained
Choosing between solid copper wire and stranded copper wire can feel overwhelming, but the right pick comes down to how and where you’ll use it. Imagine wiring a home’s fixed outlets versus routing audio cables in a car or robot—very different needs, right? Let’s break down the basics so you can match the wire to your project.
| Type | Construction | Flexibility | Typical Terminations | Corrosion Resistance | Common Use-Cases |
|---|---|---|---|---|---|
| Solid Copper Wire | Single, continuous copper core | Low | Screw terminals, push-in connectors | Moderate (if bare copper) | Fixed building wiring, outdoor installations, high-current circuits |
| Stranded Copper Wire | Multiple thin copper strands twisted together | High | Crimped terminals, soldered lugs | Moderate (if bare; higher if coated) | Automotive wiring, robotics, speaker cables, flexible cords |
Solid wire, with its single copper core, is best for permanent, low-movement installations—think wiring inside walls or outdoor runs where vibration is minimal. It’s rugged, less expensive, and resists environmental stress well. Stranded wire, on the other hand, is all about bendability and vibration resistance, making it ideal for applications where the wire must flex or twist repeatedly.
Pros/Cons: Solid Copper Wire
- Pros: Lower cost, simple to terminate, durable in fixed positions, less prone to corrosion if left as wire bare copper.
- Cons: Stiff—can break if bent repeatedly, harder to route through tight spaces, not ideal for vibration-prone environments.
Pros/Cons: Stranded Copper Wire
- Pros: Highly flexible, resists fatigue from movement and vibration, easier to install in complex geometries.
- Cons: Slightly higher cost, more complex termination, may require special connectors to ensure all strands are captured.
Quick tip: For long, straight runs or fixed installations, solid copper wire is often the go-to. For high-flex or portable applications, stranded copper wire is usually the better choice.
Annealed and Hard-Drawn Treatments
Ever see the terms annealed copper wire or hard-drawn copper and wonder what they mean? It’s all about how the copper is processed after drawing:
- Annealed copper wire is heat-treated after drawing, making it softer, more flexible, and more conductive. This is the standard for most commercial, retail, and residential wiring—especially where bends and tight spaces are involved.
- Hard-drawn copper is not heat-treated after drawing, so it’s stiffer and stronger but less conductive and much less flexible. It’s used in overhead transmission, straight bus installations, or anywhere high tensile strength is a must.
When flexibility, malleability, and conductivity are needed, annealed wins. If strength and rigidity matter more, hard-drawn is your answer.
Bare Copper Wire and Coated Options
Now, let’s talk surface finish. Bare copper wire—sometimes called wire bare copper—has no protective coating. It’s highly conductive and easy to terminate, making it popular for indoor electrical work, grounding, and bonding. However, in humid or corrosive environments, bare copper can oxidize over time.
That’s where copper coated wire comes in. The most common coatings are tin, nickel, or silver, which shield the copper from corrosion and make soldering easier. Tinned copper, for example, is a favorite in marine and outdoor work because it stands up to moisture and air pollution. If you’re wiring in a boat, near the ocean, or in a chemical plant, coated copper wire is often the smart move.
| Finish | Corrosion Resistance | Best Use-Case |
|---|---|---|
| Bare Copper | Good indoors, moderate outdoors | General wiring, grounding, bonding |
| Tinned/Coated Copper | Excellent in humid, marine, or polluted environments | Marine, outdoor, industrial, soldered connections |
Pros/Cons: Bare Copper vs. Coated Copper
- Bare copper: High conductivity, easy to work with, but may oxidize in harsh environments.
- Copper coated wire: Slightly higher cost, but offers extended life and easier soldering in tough conditions.
Labeling tip: Wire is usually labeled by AWG (American Wire Gauge) plus strand count (e.g., 12 AWG 7-strand), and finish (bare, tinned, etc.). Always check the label to match your needs.
Remember: Bend radius matters—stranded and annealed wires can tolerate tighter bends, while solid or hard-drawn wires need a gentler curve to avoid breakage. Bookmark this section for a quick reference on wire types and treatments, and keep reading for a hands-on guide to sizing and catalog specs in the next chapter.
Sizing Conversions and Catalog Spec Interpretation
AWG to mm² Conversion Quick Reference
Ever stood in front of a wire rack, puzzled by the difference between AWG and mm²? You’re not alone. Whether you’re matching a grounding wire size chart or just need to know if that “18 guage wire” is right for your project, understanding size conversions is key to safe, code-compliant installations.
| AWG Size | mm² (Cross-Section) | Typical Diameter (mm) |
|---|---|---|
| 22 | 0.5 | 0.65 |
| 18 | 1 | 1.02 |
| 12 | 3.31 | 2.05 |
| 8 | 8.37 | 3.26 |
| 4 | 25 | 5.19 |
| 3/0 | 95 | 11.68 |
| 4/0 | 120 | 13.12 |
*AWG to mm² and diameter values are typical; always check the manufacturer’s datasheet for precise measurements.
Conductor Diameter and Cross-Section Essentials
Why does size matter? The cross-sectional area of a cable copper wire directly impacts its current-carrying ability and resistance. For example, the diameter of 3 0 copper wire (3/0 AWG) is around 11.68 mm—substantial enough for heavy-duty power feeds. Meanwhile, a 12 ga solid copper wire is sized for branch circuits and lighting.
| AWG | Typical Stranding (bare) | Approx. OD (mm, uninsulated) | Common Use |
|---|---|---|---|
| 18 | 7/26 | 1.02 | Low-power, control wiring |
| 12 | 7/20 | 2.05 | Lighting, branch circuits |
| 8 | 7/0.0486 | 3.26 | 8 awg copper ground wire, subpanels |
| 4/0 | 19/0.1055 | 13.12 | Service entrance, large feeders |
*Stranding and OD values are representative for stranded bare copper conductor; insulation adds further thickness. For exact OD, consult the cable datasheet.
How to Read Wire Catalog Specs
Wire catalogs can be dense, but once you know what to look for, you’ll breeze through. Imagine you’re comparing cable copper wire options for a new panel. Here’s a quick checklist to help you interpret specs and avoid costly mistakes:
- Material & Temper: Is it pure copper, annealed, or hard-drawn? (See ASTM B3 for annealed copper wire standards.)
- Stranding Class: Is it solid or stranded? How many strands?
- Insulation/Polymer Type: PVC, XLPE, PTFE, or other?
- Temperature Rating: 60°C, 75°C, 90°C, or higher?
- Voltage Rating: What’s the maximum safe voltage?
- Outer Diameter (OD): Critical for conduit fill and connector fit. OD varies with insulation type—always check the datasheet, especially for large wires like 4/0 bare copper wire.
- Compliance Marks: UL, IEC 60228, or other standards?
Remember, the actual OD and construction can vary between manufacturers—even for the same AWG—due to insulation thickness and stranding choices. For panel layout, conduit sizing, and connector selection, always use the datasheet as your source of truth.
Pro tip: Don’t rely on generic tables alone. For critical runs—like a stranded bare copper conductor in a crowded panel—always confirm the exact OD, insulation type, and compliance with the latest code edition. This attention to detail prevents headaches with conduit fill and ensures a smooth inspection process.
Ready to apply these sizing skills? Next, we’ll cover how ampacity, voltage drop, and installation methods all play into safe, code-approved wiring choices.
Ampacity Derating and Voltage Drop Essentials
Ampacity Basics and When to Check the Code
Ever wondered why the same copper ground wire can carry more current in one installation than another? The answer comes down to ampacity—the maximum continuous current a conductor can handle without exceeding its temperature rating. Sounds complex? Let’s break it down with real-world context.
- Conductor size: Larger wires (lower AWG numbers) can carry more current due to their greater cross-sectional area.
- Insulation temperature rating: The higher the insulation’s temperature rating, the greater the ampacity. For example, a 90°C-rated wire can safely handle more amps than a 60°C-rated one of the same size.
- Ambient conditions: Wires installed in hot environments or crowded conduits must be derated because higher temperatures reduce safe ampacity.
- Installation method: Whether the wire is in open air, conduit, underground, or bundled with others affects heat dissipation.
To ensure safety and code compliance, always consult the latest National Electrical Code (NEC) or your local code. Start with NEC Article 310 (especially Table 310.16/310.15(B)(16)), which lists allowable ampacities for copper conductors based on insulation and installation. For equipment terminations, NEC 110.14(C) covers temperature limits. Internationally, IEC 60364 and IEC 60228 provide similar guidance for copper grounding wire and other conductors.
| AWG/kcmil | 60°C | 75°C | 90°C |
|---|---|---|---|
| 12 | 20A | 25A | 30A |
| 8 | 40A | 50A | 55A |
| 4 | 70A | 85A | 95A |
| 4/0 | 195A | 230A | 260A |
*Always verify with the current code edition and manufacturer datasheets. Schneider Electric—NEC Table 310.15(B)(16)
Voltage Drop and Run Length Considerations
Imagine you’re wiring a long barn or remote shed. Even with the right copper wire size, you’ll notice the lights might dim or motors run hot if you ignore voltage drop. Voltage drop is the reduction in voltage as current travels through the wire—too much, and equipment performance suffers or even fails.
The main factors affecting voltage drop are:
- Current (I): Higher current increases voltage drop.
- Run length (L): Longer wires mean more resistance and greater voltage drop.
- Wire resistance (R): Thinner wires have higher resistance; stranded ground wire and solid conductors of the same size have similar resistance, but always check datasheets.
- Power factor (for AC): Affects the total impedance in AC circuits.
The general formula for voltage drop in a single-phase system is:
Vd = I × (R × L)
For three-phase systems and power factor corrections, the formulas become a bit more complex, as shown in this voltage drop reference. Most codes recommend a maximum voltage drop (often 3–5%) from source to load. Always check project specifications or local code for exact limits.
Temperature and Bundling Derating
Wires don’t exist in a vacuum—literally. If your copper grounding wire is installed in a hot attic, or if you’re running multiple wires together in a tight conduit, you’ll need to derate (reduce) the ampacity. Why? Both heat and lack of ventilation make it harder for wires to dissipate heat, risking insulation breakdown or fire.
- Ambient temperature derating: If the environment exceeds 30°C (86°F), use correction factors from NEC Table 310.15(B)(1) to reduce ampacity. For example, at 40°C (104°F), ampacity might drop to 91% of the base value.
- Bundling derating: More than three current-carrying wires in a raceway or cable? Apply adjustment factors from NEC Table 310.15(C)(1)—for 4–6 wires, multiply ampacity by 80%; for 7–9, by 70%, and so on.
Note: Ground wires (like bare ground wire or ground wire bare copper) are typically not counted as current-carrying for derating purposes, but always confirm per NEC 310.15(F).
Always verify conductor temperature ratings, installation methods, and code correction factors using official sources—not just rules of thumb. Local code editions and manufacturer datasheets are your best reference for safe, compliant wiring.
Choosing a Larger Gauge for Long Runs
Let’s say you’re running a subpanel to a detached garage. You calculate that a certain size copper ground wire is code-legal for the ampacity, but your run is over 100 feet. What now? If voltage drop calculations show you’ll exceed the recommended limit, you should size up—choose the next larger wire gauge. This reduces resistance and keeps voltage drop within safe limits, preventing equipment damage and nuisance tripping.
- Start with code-legal ampacity for your load and insulation type.
- Calculate voltage drop for your run length, current, and wire size.
- If voltage drop is too high, select a larger wire size and recalculate.
Practical example: If you’re running 6/3 wire for a long distance, you might need to check what size conduit for 6 3 wire is required, and whether upsizing to a larger copper conductor is necessary for voltage drop control.
By understanding ampacity, voltage drop, and derating, you’ll ensure every copper ground installation—from stranded ground wire in a control panel to bare ground wire for outdoor bonding—meets code, functions reliably, and stays safe for years. Next, we’ll dive into installation and termination best practices to help you make solid, long-lasting connections.
Installation and Termination Best Practices
Crimping Steps That Deliver Gas-Tight Connections
Ever had a connection fail—even when you followed the manual? The difference often comes down to technique and tool choice. Whether you’re working with insulated copper wire 24 gauge or heavy copper hard drawn conductors, proper crimping ensures a gas-tight, vibration-resistant joint. Here’s a field-proven workflow:
- Choose the right crimp tool: Match the tool and die to your connector and wire size. Some connectors require specific die codes—always check the datasheet.
- Prepare the conductor: Use a quality wire stripper (thermal or mechanical) to remove just enough insulation for the terminal barrel. Avoid nicking or cutting strands, especially on fine-stranded or insulated cu wire types.
- Insert the wire fully: Ensure all strands are inside the barrel, with no copper exposed outside the crimp zone.
- Select the correct crimp profile: Some terminals call for hex, indent, or oval crimps. Follow manufacturer specs for the right profile and location.
- Execute the crimp: Squeeze the tool handles smoothly and fully. A proper crimp forms a cold weld, locking the wire and terminal together.
- Verify with a pull test: Gently tug the wire; it should not pull free. For critical jobs, use a calibrated pull tester to confirm strength.
- Apply strain relief: Use boots, backshells, or clamps to prevent flexing at the crimped joint.
Visual cues: A good crimp shows no exposed copper, no cracked insulation, and a firm, uniform impression. A bad crimp may be loose, uneven, or show broken strands—these are failure points waiting to happen.
Soldering and Heat-Shrink Techniques That Last
Wondering how do you solder two wires together for a connection that stands the test of time? Soldering is a classic method for copper wire electrical work, especially in electronics or when a crimp tool isn’t available. But success hinges on the details:
- Pick the right tip and solder: Use a tip sized for your wire solid or stranded. Lead-free, RoHS-compliant solder is now standard in most applications.
- Prepare and tin the wires: Strip insulation without damaging strands, then pre-tin both wires by applying a small amount of solder.
- Join and heat: Hold wires together, apply the iron until solder flows smoothly through the joint, and avoid overheating (which can damage insulation or cause cold joints).
- Check the joint: A good solder joint is shiny and smooth, not dull or lumpy. Cold or cracked joints can cause intermittent failures.
- Protect with heat-shrink: Slide heat-shrink tubing over the joint before soldering, then shrink it after cooling for mechanical support and insulation.
Tip: For insulated copper wires, ensure the insulation does not melt or recede excessively during soldering. Quick, controlled heat minimizes this risk.
Ferrules, Lugs, and Connector Compatibility
Ever noticed screw-clamp terminals loosening or fine strands fraying? Ferrules are your answer. These tin-plated copper sleeves reinforce stranded wire ends, making insertions easier and more reliable—especially for wire solid or highly flexible conductors [Wiring Harness News]:
- Cut wire flush and strip precisely: The strip length should match the ferrule barrel—too short leaves strands exposed; too long reduces holding power.
- Insert fully into the ferrule: All strands must fill the barrel; none should protrude more than 0.5 mm.
- Use the matched crimp tool: Only use crimpers approved for your ferrule brand and size for UL-compliant results.
- Test for pull-out strength: After crimping, gently pull to check security.
Ferrules are especially useful for insulated copper wire 24 gauge and other fine-stranded types in control panels, reducing the risk of loose or damaged connections during rework.
Pros/Cons: Crimp vs Solder vs Crimp+Heat-Shrink
| Method | Pros | Cons |
|---|---|---|
| Crimp |
|
|
| Solder |
|
|
| Crimp + Heat-Shrink |
|
|
Checklist for Reliable Terminations
- Always check connector datasheets for compatible strand classes and required strip lengths.
- Confirm torque specs or crimp die codes—if in doubt, verify with vendor documentation.
- Inspect every joint: Look for clean, tight terminations with no stray strands or melted insulation.
- Use backshells, boots, or clamps to relieve strain on sensitive joints.
"The best connection is only as strong as its weakest link. Taking time for careful preparation and tool selection prevents costly rework and ensures your copper wire electrical projects last for years."
Ready to apply these techniques? Next, we’ll explore how to match wire characteristics to real-world applications—from power distribution and grounding to electronics and crafts.
Practical Applications Across Industries
Power Distribution and Grounding: Safety Starts with the Right Wire
When you flip a light switch, charge your phone, or power up heavy equipment, you’re relying on copper wire to keep energy flowing safely and efficiently. But did you know the type of copper wire you choose can make all the difference in performance and longevity?
- Power distribution (residential, commercial, industrial): Use solid or stranded copper with robust insulation for high current loads. Bare copper ground wire is the industry standard for grounding and bonding because of its unmatched conductivity and corrosion resistance.
- Grounding and bonding: For safety-critical applications, bare or tinned copper ensures reliable earth connections. Stranded copper is preferred where flexibility is needed, such as in substation grids or equipment with vibration.
- Renewable energy (solar, wind): Look for copper wire rated for high temperatures and UV exposure, often with XLPE or PV-rated insulation.
Electronics, Signal, and Low-Noise Builds: Precision Matters
Ever wonder why your audio sounds clear or data transfers without glitches? It’s not just the device—it’s the wire. In sensitive electronics, copper’s high conductivity and flexibility help prevent signal loss and minimize electromagnetic interference (EMI).
- Consumer electronics: Fine-strand stranded copper is ideal for internal wiring in computers, phones, and appliances. Its flexibility allows for tight bends and intricate routing.
- Signal and low-noise circuits: Use shielded or twisted-pair copper wire to combat EMI. Oxygen-free copper is often chosen for high-end audio or medical equipment.
- Data and telecom: While fiber optics are on the rise, copper still plays a key role in last-mile connectivity and hybrid networks.
Artisanal, Craft, and Jewelry Uses: Form Meets Function
Imagine handcrafting a wire sculpture or a custom ring. Here, copper wire isn’t just a conductor—it’s a medium for creativity. The right choice depends on flexibility, finish, and how the piece will be worn or displayed.
- Jewelry making copper wire: Choose dead-soft or half-hard copper for easy shaping and intricate designs. Copper jewelry wire is often available in a range of gauges and finishes, including bare, tinned, or even colored coatings for visual appeal.
- Copper wire for crafts: For sculptures, mobiles, or mixed-media art, stranded or solid bare copper is favored for its malleability and rich patina.
- Copper jewelry supplies: Look for wire that resists tarnish or is lacquer-coated for long-lasting shine, especially for pieces worn against the skin.
| Environment | Preferred Insulation/Finish | Corrosion Considerations | Common Applications |
|---|---|---|---|
| Indoor (dry, controlled) | PVC, bare copper | Low risk; patina forms slowly | Building wiring, electronics, crafts |
| Outdoor (exposed) | XLPE, tinned copper | Moderate risk; tinned or coated wire recommended | Grounding, solar, outdoor lighting |
| Marine/high humidity | Tinned or silver-plated copper | High risk; tin/silver plating resists corrosion | Boats, docks, coastal installations |
| High temp/industrial | Silicone, PTFE, mica insulation | Heat accelerates oxidation; specialty insulation needed | Motors, ovens, heavy equipment |
Storage and Handling Tips for Long-Lasting Performance
- Avoid tight bends: Sharp bends can weaken or break strands, especially in stranded copper. Follow recommended bend radii for each gauge.
- Prevent kinks and knots: Always coil wire loosely—tight loops can create stress points that degrade performance over time.
- Control storage environment: Store copper wire in dry, temperature-stable areas to prevent oxidation and insulation degradation.
- Inspect before use: Look for signs of corrosion, fraying, or insulation cracks, especially if the wire has been stored for a long period.
"Matching copper wire to your application—whether it’s for grounding, electronics, or jewelry—ensures safety, reliability, and creative freedom. The right wire choice supports both technical performance and personal expression."
Curious how to select copper wire for your next project or business need? In the next section, we’ll walk through a step-by-step decision framework to help you make the right choice every time, whether you’re wiring a new home, building a solar array, or sourcing copper wire for crafts.
How to Choose Copper Wire with Confidence
Decision Flow for Picking the Right Copper Wire
When you’re planning a project—whether it’s wiring a new home, upgrading a solar array, or searching for copper wire for sale—it’s easy to get overwhelmed by options. But what if you had a reliable process to follow every time? Here’s a practical, repeatable framework to help you avoid costly mistakes and get the most value for your investment.
- Define your application and standards context: Are you wiring for power, grounding, electronics, or crafts? Identify if industry standards (like NEC, IEC, or NEMA) apply. For example, a residential installation will have different requirements than a jewelry project or a solar farm.
- Determine current and allowable voltage drop: Estimate the maximum current your wire will carry and how much voltage drop is acceptable for your application. This will guide your minimum wire size.
- Set insulation rating by environment and temperature: Will the wire be indoors, outdoors, underground, or in high-heat areas? Choose insulation with appropriate thermal and environmental resistance (see table below).
- Select conductor size and stranding class: Match the wire gauge and stranding to your ampacity and flexibility needs. For example, stranded wire is best for vibration-prone or flexible installations.
- Verify connector compatibility: Confirm that your chosen wire fits your terminals, lugs, or ferrules—check the outer diameter (OD) and stranding type.
- Confirm code compliance: Ensure your selection meets national or local codes for safety and installation, especially for building or industrial projects.
- Finalize by checking availability and lead times: Before placing an order, check if your preferred wire is in stock and how quickly it can be delivered. This helps avoid last-minute project delays.
Insulation and Environment Checklist
Your choice of insulation is just as important as conductor size. Imagine installing the wrong insulation underground or outdoors—failure could be costly or dangerous. Here’s a quick comparison of common insulation types for copper wire:
| Insulation Type | Temperature Tolerance | Flexibility | Chemical/UV Resistance | Typical Use |
|---|---|---|---|---|
| PVC (Polyvinyl Chloride) | Up to 90°C | Good | Moderate | Indoor wiring, general purpose |
| XLPE (Cross-linked Polyethylene) | Up to 90–105°C | Moderate | High | Outdoor, underground, solar |
| PTFE (Polytetrafluoroethylene) | Up to 200°C | Excellent | Excellent | High-temp, industrial, harsh environments |
Avoiding Common Buying Mistakes
Ever bought too little wire and had to scramble for more—only to find the cost of copper wire per foot had jumped? Or ordered extra, only to have it sit unused? Avoid these pitfalls with a few simple habits:
- Request datasheets before you buy copper wire: Always review the technical specs for insulation, OD, and compliance. This helps you avoid mismatches and failed inspections.
- Confirm OD for connector fit: Even small differences in insulation thickness can affect whether your wire fits in lugs or terminals. Measure twice, order once.
- Track price movements: Copper prices fluctuate daily. For large projects, monitor the market and plan purchases accordingly to get the best value. Wondering how much is copper wire worth? Check with suppliers for up-to-date pricing, especially if you’re looking for where to buy copper wire in bulk.
- Order the right amount: Use take-offs to estimate total length needed. It’s better to have a little extra than to fall short mid-job—but avoid large overruns that tie up cash unnecessarily.
"The best way to avoid project delays and budget surprises is to plan ahead, request full specs, and work with trusted suppliers who can advise you on availability and lead times."
Where Can I Buy Copper Wire? Practical Sourcing Tips
Still wondering where to find copper wire or where to get copper wire for your next job? Start with reputable electrical supply houses, wire specialists, or online distributors with transparent specs and responsive customer service. For unique gauges or specialized insulation, reach out early—lead times can vary, especially in busy seasons.
By following this framework, you’ll make informed decisions that save time, money, and frustration—whether you’re buying for a single project or sourcing copper wire for sale in bulk. Ready to take your build from wire selection to custom assemblies? In the next section, we’ll explore prototyping and manufacturing resources for advanced copper wire applications.
Prototyping and Manufacturing Resources for Copper Builds
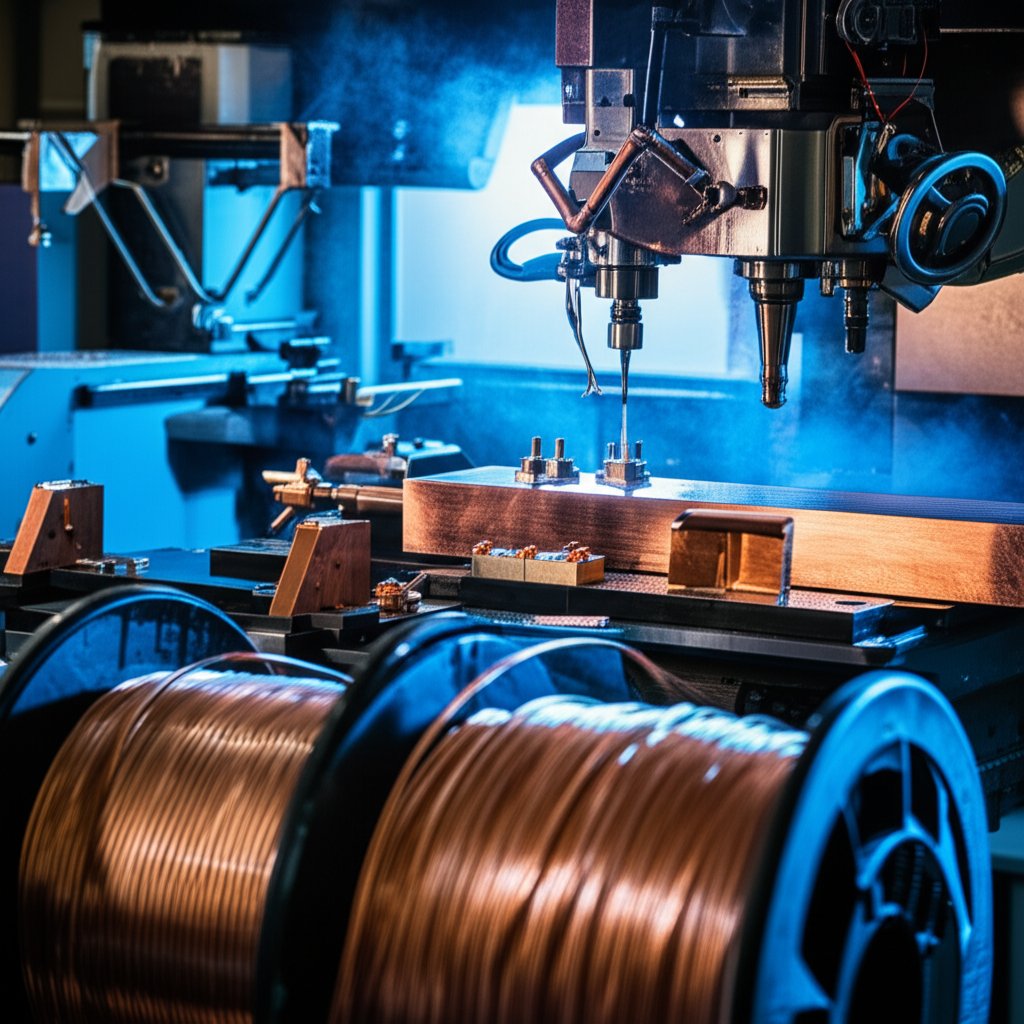
When Machined Copper Parts Complement Wiring
Ever find yourself needing more than just wire—like a custom bus bar, a precision terminal, or a unique enclosure to bring your copper wire project to life? Imagine building a control panel where the copper leads must connect to a custom-machined busbar, or designing a thermal spreader that fits perfectly with your bare copper cable. That’s where advanced manufacturing steps in to bridge the gap between off-the-shelf wire and fully tailored assemblies.
- Custom bus bars and power distribution blocks—for handling high currents with robust, low-resistance copper bare wire connections.
- Thermal spreaders and heat sinks—leveraging copper’s superior thermal conductivity for electronics or power modules.
- Precision contact lugs and terminals—ensuring a perfect fit with spools of copper wire, especially when standard sizes don’t match your application.
- Machined housings and fixtures—providing mechanical support, EMI shielding, or unique mounting solutions for copper strip wire and assemblies.
- Custom cable assemblies—where bare stranded copper cable must be terminated with exacting tolerances for high-reliability installations.
Prototype to Production Without Losing Tolerances
Sounds complex? With today’s CNC technology, moving from prototype to production—without sacrificing precision—is more accessible than ever. CNC machining allows you to specify tight tolerances, smooth finishes, and complex geometries in copper rod stock or sheet. This is especially crucial for electrical and thermal components, where even small dimensional errors can affect performance or fit.
| Provider/Method | Capabilities | Batch Size | Material Range | Typical Use Cases |
|---|---|---|---|---|
| XTJ CNC Machining Services | 4/5-axis CNC, +/- 0.005mm tolerance, fast lead times, engineering support | Prototype to high-volume | 30+ materials incl. copper bare, alloys, plastics | Bus bars, terminals, housings, custom fixtures |
| Manual Machining | Basic shapes, slower, operator-dependent | One-off, small batch | Common metals | Simple brackets, non-critical fixtures |
| Sheet Metal Fabrication | Laser/waterjet cut, bent, moderate tolerances | Low to mid-volume | Sheet copper, aluminum | Enclosures, mounting plates |
For projects demanding tight fit with copper bare or bare stranded copper cable, CNC machining excels at delivering repeatable precision—whether you’re ordering one piece or a hundred. Always compare vendor datasheets and your project’s tolerance requirements before committing to a process.
Engineering Support That Speeds Up Builds
Stuck on a design challenge or unsure how to optimize your copper part for manufacturability? This is where dedicated engineering support makes a difference. At key moments—such as specifying the interface between a copper bare wire and a machined terminal—consulting with manufacturing engineers can save time, reduce rework, and ensure compliance with industry standards.
When your project calls for custom copper components, CNC machining services from specialists like XTJ offer a practical path to high-quality results. Their ability to handle everything from small prototype runs to large-scale production, combined with material expertise in copper bare and alloys, helps ensure your assemblies perform as intended.
Key takeaway: For advanced copper wire projects, partnering with experienced CNC shops provides the agility, precision, and support needed to move confidently from prototype to production—especially when off-the-shelf solutions fall short.
Ready to take your copper builds to the next level? Explore DFM (design for manufacturability) support and tap into resources that help your copper leads, bus bars, and assemblies deliver reliable performance—every time.
Copper Wire: Frequently Asked Questions
1. Where can I get copper wire for free?
Copper wire can often be salvaged from old home appliances and electronics. Power cords from large appliances like refrigerators or washers are a good source. Always ensure safe removal and proper recycling practices when sourcing copper wire this way.
2. How much is 1 lb of copper wire worth?
The value of 1 lb of copper wire changes with market rates, but it is typically priced by scrap yards based on copper content and condition. Clean, bare copper wire fetches the highest price. For up-to-date rates, check with local recyclers or suppliers before selling or buying.
3. What does copper wire do for your body?
While copper wire itself is not intended for bodily use, copper as a mineral is essential for health. It helps produce red blood cells, supports brain function, and strengthens bones. However, copper wire should not be ingested or used as a supplement.
4. What are the key differences between solid and stranded copper wire?
Solid copper wire consists of a single core, offering rigidity and is ideal for fixed installations. Stranded copper wire is made from multiple thin strands, providing flexibility for environments with movement or vibration. Each type suits different applications based on durability and flexibility needs.
5. How do I choose the right copper wire for my project?
Select copper wire by assessing your application, required current, environment, insulation type, and code compliance. Use sizing charts for correct gauge, consider ampacity and voltage drop, and verify compatibility with connectors. For custom needs, CNC machining services can provide precise copper parts.
-
Posted in
ampacity, copper conductor, copper wire, electrical installation, wire sizing


