
Copper Pipe Types, Sizing, And Joints: Stop Leaks Before They Start
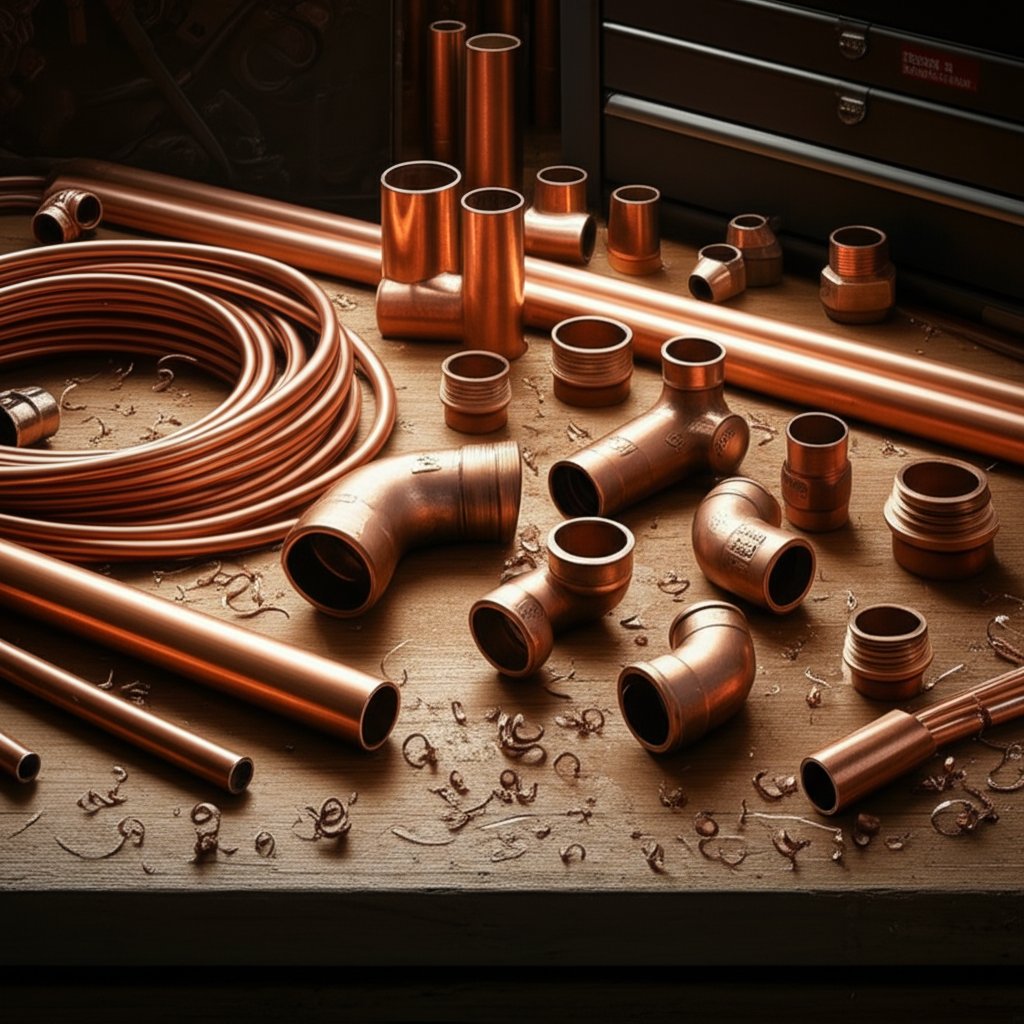

Copper Pipe Basics and Why It Still Matters
What copper pipe is and how it differs from copper tubing
When you’re planning a plumbing project, you’ll quickly encounter both copper pipe and copper tube—terms that sound similar but aren’t interchangeable. So, what’s the real difference? In simple terms, copper pipe is specified by its nominal size (which loosely relates to the inside diameter), while copper tube is sized by its precise outside diameter and wall thickness. This means when you’re looking at copper pipework sizes, the numbers don’t always match what you’d measure with a tape or caliper. For example, a “1/2-inch” copper pipe actually has a larger outside diameter than you might expect, while copper tube gives you the exact OD you see on the label.
Where copper piping shines in residential and commercial systems
Imagine the plumbing in your home or a high-rise building. You’ll notice copper piping is often the backbone for both supply and distribution lines, thanks to its proven performance in handling hot and cold water, heating, and even some gas applications. Rigid copper pipe is ideal for straight runs and precise angles, while flexible copper tube (or copper line) is perfect for navigating around obstacles or making gentle curves without extra fittings (This Old House).
Key benefits and tradeoffs of copper plumbing
Why does copper plumbing remain the gold standard, even as alternatives emerge? Here’s what sets it apart:
- Heat resistance: Handles high temperatures without warping or releasing toxins.
- Biostatic properties: Naturally resists bacterial growth inside the pipe.
- Fire performance: Non-combustible and doesn’t emit dangerous fumes.
- Recyclability: Nearly 100% recyclable without loss of quality.
- Long lifespan: Decades of reliable service with proper installation and water chemistry.
But there are tradeoffs to consider:
- Higher initial cost compared to some plastics.
- Requires skilled soldering or joining methods.
- Potential for pinhole corrosion if water chemistry is aggressive.
All copper used in water supply must meet strict standards such as ASTM B88 for water tube and NSF/ANSI 61 for drinking water safety, ensuring your system is code-compliant and safe for household use.
Key insight: Matching the right copper pipe type and joining method to your application is essential for leak-free, long-lasting results.
Common mistakes to avoid with copper pipe
- Misidentifying nominal size versus actual measurement—always check a copper pipework sizes chart.
- Overheating joints during soldering, which can weaken connections.
- Mixing copper with dissimilar metals (like steel) without a dielectric union, risking galvanic corrosion.
By understanding the basics of copper pipe, copper tube, and copper plumbing, you’ll be better equipped to select the right materials and avoid the pitfalls that can lead to leaks or costly repairs. Whether you’re running a new copper line or updating a system, starting with this knowledge sets the foundation for a reliable installation.
Understanding Copper Types for Code Compliant Choices
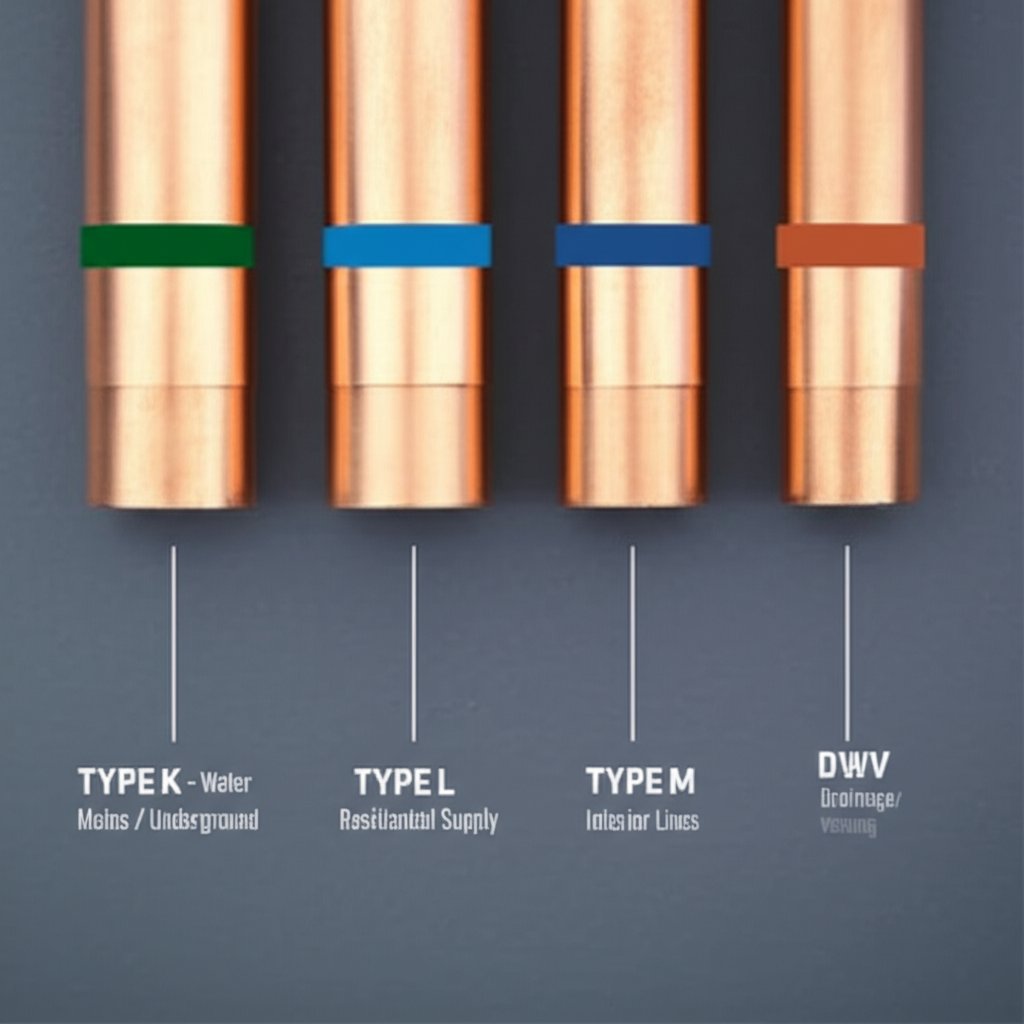
Type M vs Type L Copper for Domestic Water
When you’re choosing copper for water supply, you’ll quickly encounter the difference between type M and type L copper pipe. Sounds complex? Let’s break it down. Type M copper has the thinnest wall and is commonly used for interior branch lines in residential plumbing—where local code allows. Type L copper is slightly thicker, offering extra durability and is often the default for professional plumbers in interior water supply lines, exposed piping, or where higher pressure or mechanical protection is needed.
| Copper Type | Typical Applications | Relative Wall Thickness | Code/Standard Reference | Notes |
|---|---|---|---|---|
| Type K | Main water lines, underground, HVAC, fire protection | Thickest | ASTM B88 | Best for high pressure & underground; green marking |
| Type L | Interior branch supply, exposed outdoor, repairs | Medium | ASTM B88 | Most common for residential; blue marking |
| Type M | Interior branch supply (where code allows) | Thinnest | ASTM B88 | Lowest cost; red marking; not always code-approved |
| DWV | Drain, waste, vent (above ground only) | Very thin | Check local code | Yellow marking; not for pressure systems |
When Type K Copper Earns Its Keep
Type K copper pipe is the heavyweight champion for strength and pressure. You’ll see it specified for main water lines—especially those that run underground—or in commercial and industrial settings where maximum durability is required. Its thick wall stands up to backfill pressure and mechanical abuse. Type K is also used in HVAC, fire protection, and some fuel systems, but its cost means it’s reserved for situations where its properties are truly needed.
DWV Copper and Where It Fits
What about drain, waste, and vent? DWV copper is the thinnest of all and is only suitable for non-pressurized drainage systems above ground. It’s rarely used in new construction today, as PVC and ABS have largely replaced it, but you might still find it in vintage homes or commercial renovations. DWV is never suitable for water supply due to its low-pressure rating (The Spruce).
How to Choose: Key Decision Factors
- Operating Pressure: Higher pressure or underground? Choose Type K. Standard interior supply? Type L or M (if code allows).
- Exposure to Impact: Exposed lines need thicker walls (Type L or K) for protection.
- Local Code Acceptance: Always check if Type M is permitted for potable water; some jurisdictions require Type L or K.
- Installer Skill: Thicker types are harder to bend and cut—plan for the right tools and methods.
Pros and Cons by Copper Type
-
Type K
- Pros: Maximum strength, best for underground or high-pressure use
- Cons: Most expensive, harder to work with
-
Type L
- Pros: Versatile, widely code-approved, good balance of cost and durability
- Cons: Slightly higher cost than Type M, less robust than K for burial
-
Type M
- Pros: Lowest cost, easy to cut and fit
- Cons: Not always code-approved, not for high-pressure or exposed runs
-
DWV
- Pros: Lightweight, easy to install for drainage
- Cons: Only for non-pressurized, above-ground drainage
When in doubt, check local code and the engineer of record before selecting Type M for concealed potable runs.
Common Missteps to Avoid
- Mixing types (e.g., Type M and Type L) in a single run without documenting transitions or using proper adapters
- Choosing too-thin wall (like Type M) where mechanical abuse is possible
- Assuming all copper types are interchangeable—always verify with the ASTM B88 standard and your local plumbing code
Understanding the difference between type l and m copper pipe and where type l copper vs type k matters can help you avoid costly mistakes and ensure your installation is safe, efficient, and code-compliant. Next, we’ll demystify sizing so you can match your copper choice to the right diameter for any job.
Sizing Copper Correctly Without Guesswork
How to Measure Copper Pipe Size Accurately
Ever wondered why your “half-inch” copper pipe doesn’t actually measure half an inch? You’re not alone! Copper pipe sizing can seem confusing, but with a few simple tools and a reliable copper pipe dimensions chart, you can get it right every time. Here’s how:
- Use a caliper: Place the jaws around the outside of the pipe and read the outside diameter (OD) to the nearest hundredth of an inch.
- Tape and string method: Wrap a string around the pipe, mark the circumference, then measure and divide by 3.14 (π) to estimate the OD.
- Check manufacturer or ASTM B88 charts: Once you know the OD, match it to the nominal size using a copper pipe size chart—remember, nominal size is not the actual OD!
Nominal vs Actual Diameter Explained
Sounds complex? Let’s break it down. The nominal size is a standardized name (like 1/2" or 3/4") used in plumbing codes and supply stores, but it doesn’t directly correspond to a physical measurement. The actual outside diameter (OD) and inside diameter (ID) depend on the type (K, L, M, or DWV) and wall thickness. For example, a 3/4" copper pipe has an OD of 0.875", but the ID varies from 0.745" to 0.811" depending on the wall thickness (Engineers Edge).
| Nominal Size (inches) | Outside Diameter (OD, inches) | Type K ID (inches) | Type L ID (inches) | Type M ID (inches) | DWV ID (inches) | Wall Thickness Range (inches) |
|---|---|---|---|---|---|---|
| 1/2 | 0.625 | 0.527 | 0.545 | 0.569 | - | K: 0.049, L: 0.040, M: 0.028 |
| 3/4 | 0.875 | 0.745 | 0.785 | 0.811 | - | K: 0.065, L: 0.045, M: 0.032 |
| 1 | 1.125 | 0.995 | 1.025 | 1.055 | - | K: 0.065, L: 0.050, M: 0.035 |
| 1 1/2 | 1.625 | 1.481 | 1.505 | 1.527 | 1.541 | K: 0.072, L: 0.060, M: 0.049, DWV: 0.042 |
| 2 | 2.125 | 1.959 | 1.985 | 2.009 | 2.041 | K: 0.083, L: 0.070, M: 0.058, DWV: 0.042 |
For a full breakdown, check the authoritative copper pipe diameter chart and copper tube diameter chart for every size and type.
Choosing Sizes by Flow and Fixture Load
How do you know which size to pick for your project? It’s not just about matching the old pipe—it’s about balancing flow, pressure, and noise for your system. Here’s a quick workflow to guide you:
- Identify the system type: Is it hot water, cold water, or a recirculation line?
- Count fixture units: Use local plumbing code tables to sum up the demand (sinks, showers, appliances).
- Pick the size: Refer to a copper pipe size chart to choose a diameter that keeps velocity below recommended limits (usually around 8 feet/sec for cold, 5 feet/sec for hot water).
- Check local code: Always confirm your selection meets both national and local requirements.
For example, the 3 4 copper pipe outer diameter (0.875") is commonly used for main supply lines in residential settings, providing a good balance of flow and pressure for typical fixture counts.
Watch-Outs and Common Sizing Mistakes
- Mixing up tubing and pipe sizes—tubing is sized by actual OD, pipe by nominal size.
- Assuming all 3/4" pipes are the same—wall thickness changes the ID and flow capacity.
- Using a compression fitting on a pipe sized for soldering—prep lengths and fit may differ.
- Relying on guesswork—always consult a copper pipe dimensions chart or manufacturer’s data.
Key takeaway: Accurate sizing is critical—use the right charts and measurement methods to ensure your copper tubing sizes match the needs of your system.
With a clear understanding of how to measure copper pipe size and interpret the charts, you’re ready to select the right diameter for any job. Next, we’ll explore trusted joining methods to ensure every connection is leak-free and built to last.

Joining Methods You Can Trust for Leak-Free Results
Soldering Copper Like a Pro
Ever wondered why some copper pipe joints last for decades while others spring leaks? It often comes down to the joining method. Soldering—sometimes called "sweating copper tubing"—remains a staple for permanent, watertight connections in copper plumbing. Here’s a step-by-step look at how to get it right:
- Surface Preparation: Clean the outside of the pipe and the inside of the fitting with an abrasive cloth or brush until shiny. Any residue can cause leaks!
- Flux Application: Apply a thin, even layer of plumbing flux to both surfaces. This helps the solder flow and prevents oxidation.
- Assembly: Insert the pipe into the fitting fully—this is key for a strong copper pipe coupling.
- Heating: Use a propane torch to heat the joint evenly. Move the flame around to avoid overheating one spot.
- Soldering: Touch solder to the joint; it should melt and wick into the seam by capillary action. Don’t add solder directly to the flame!
- Cooling and Cleaning: Let the joint cool naturally, then wipe off any excess flux to prevent corrosion.
Well-executed soldering creates long-lasting copper pipe connectors for both supply and distribution lines (Copper Tube Handbook).
Brazing When Higher Temperatures Are Required
When you’re working with systems exposed to high temperatures or pressures—think HVAC or refrigeration—brazing is the go-to method. The process is similar to soldering but uses a higher-temperature filler metal, resulting in a stronger joint that holds up to service temperatures as high as 350°F.
- Prep: Clean and dry the pipe and fitting as for soldering.
- Flux (if required): Use a flux suitable for brazing, or choose a flux-coated filler rod.
- Assembly: Fit the parts together snugly.
- Heating: Use an oxy-acetylene torch to heat the joint to brazing temperature (typically above 1100°F).
- Brazing: Apply the brazing rod to the joint; it should flow into the seam and form a robust bond.
- Cooling and Cleaning: Allow to cool, then clean off any residual flux.
Brazed joints are preferred and often required for HVAC and refrigeration, especially when high strength or temperature resistance is needed.
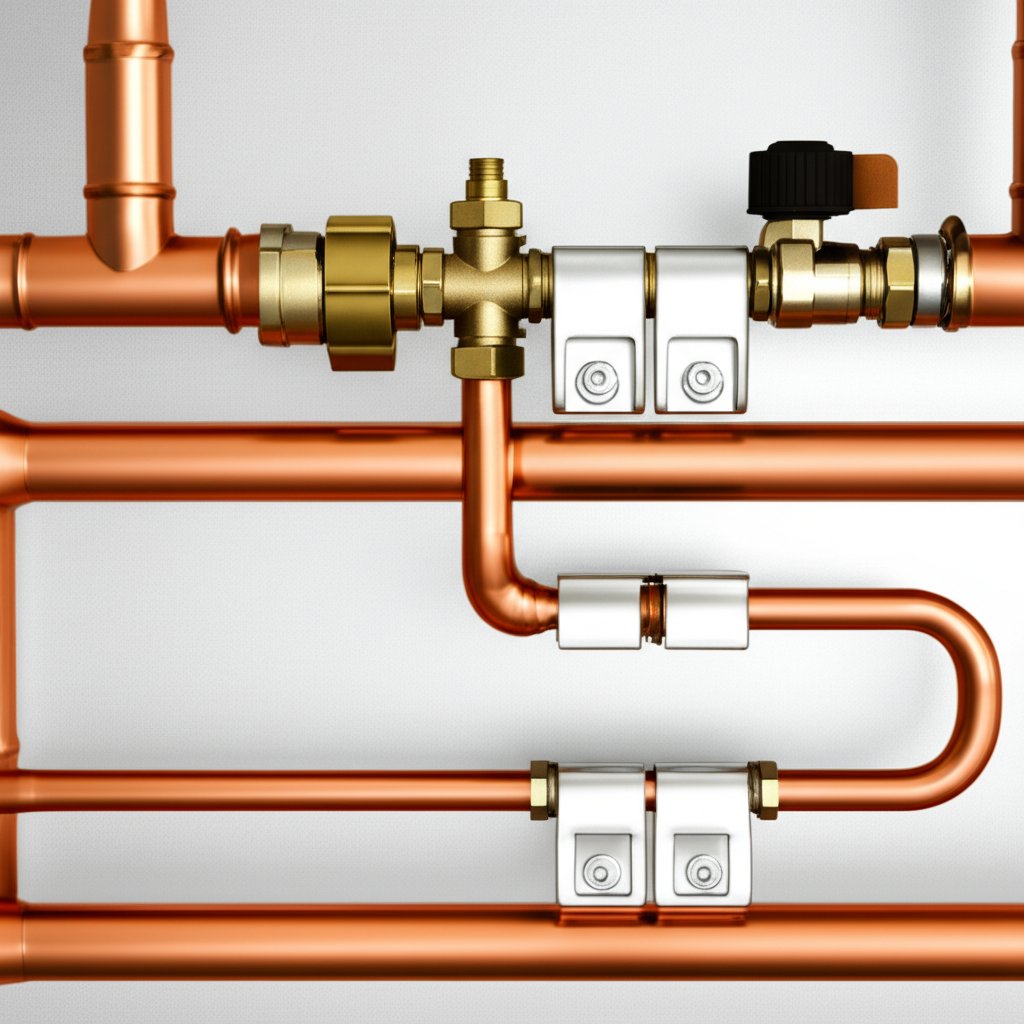
Compression, Flare, and Press Fittings Compared
Not comfortable with flames or working in a tight spot? Mechanical joining methods like copper compression fittings, flare fittings, and press-connect systems offer reliable alternatives. Here’s how compression fittings work:
- Cut and Deburr: Cut the copper pipe square and remove any burrs.
- Slide on Nut and Ferrule: Place the compression nut and ring (ferrule) onto the pipe.
- Insert Pipe: Push the pipe into the body of the fitting.
- Tighten: Use two wrenches—one to hold the fitting body, one to tighten the nut. This compresses the ferrule and creates a tight seal.
These compression fittings for copper pipe are ideal for quick fixes, repairs, or when soldering isn’t practical. They’re also popular for connecting appliances, valves, and in situations where disassembly may be needed later. While generally less permanent than soldered joints, a well-installed compression fitting copper connection can last for years.
Press-Connect and Push-Connect Fittings
Press and push-connect fittings use special tools to mechanically seal the joint, eliminating open flames entirely. Always use manufacturer-approved tools and fittings, and verify local code acceptance before use.
| Joining Method | Learning Curve | Tools Needed | Flame Required | Typical Applications |
|---|---|---|---|---|
| Soldering | Moderate | Torch, flux, solder, cleaning tools | Yes | Permanent water lines, visible plumbing |
| Brazing | Advanced | Oxy-acetylene torch, brazing rod, flux | Yes (higher temp) | HVAC, refrigeration, high-pressure |
| Compression | Easy | Wrenches, cutter, deburring tool | No | Repairs, appliance hookups, tight spaces |
| Press/Push-Connect | Easy-Moderate | Special press tool, compatible fittings | No | Fast installs, retrofits, flame-restricted areas |
Common Mistakes and Safety Basics
- Overheating joints (burning flux or pipe)
- Insufficient cleaning—leads to weak joints
- Moving the joint before it cools, causing leaks
- Not purging water from the pipe before applying heat
- Neglecting nitrogen purge during brazing in HVAC systems (prevents internal oxidation)
- Failing to use two wrenches with copper tubing compression fittings—can twist or deform the pipe
And always remember these safety basics:
- Work in a well-ventilated area
- Use flame barriers and keep a fire extinguisher nearby
- Wear appropriate PPE (gloves, goggles)
- Double-check for water or pressure in the line before applying heat
Key insight: The best joining method depends on your application, skill level, and safety requirements. Whether you’re sweating copper tubing or using a copper pipe coupling, careful prep and attention to detail are essential for a leak-free result.
Now that you know how to create secure, code-compliant copper pipe connectors, you’re ready to tackle system maintenance and repairs with confidence. Next, we’ll explore how to keep your copper plumbing leak-free for the long haul.
Longevity, Corrosion Control, and Practical Repairs
What Affects Copper Longevity?
Ever wondered how long do copper pipes last? Most homeowners expect decades of service—but what really determines lifespan? Typically, copper water pipes last 50 to 70 years, thanks to copper’s natural corrosion resistance and ability to withstand high pressures and temperatures (Flotechs Plumbing). Still, several factors can shorten or extend their useful life:
- Water Chemistry: Acidic or highly alkaline water can erode the protective film inside copper plumbing pipe, leading to corrosion and leaks.
- Water Pressure: Excessive pressure stresses joints and walls, increasing the risk of rupture or pinhole leaks.
- Installation Quality: Poor soldering, improper sizing, or inadequate support can cause premature failure.
- Climate: Freezing or extreme heat causes expansion and contraction, sometimes resulting in cracks or bursts.
- Maintenance: Regular inspection and prompt repairs help maximize how long copper plumbing lasts.
Diagnosing Pinhole Leaks and Corrosion
Spotting trouble early can save you from bigger headaches down the road. Here’s a checklist of warning signs, likely causes, and what you should do next:
| Symptom | Likely Cause | Immediate Action |
|---|---|---|
| Blue-green stains on fixtures or pipe | Corrosion from acidic water | Test water pH; consider water treatment |
| Weeping joints or tiny leaks (pinhole) | Breakdown of protective film, high velocity, or stray currents | Shut off water; inspect for further damage |
| Discolored water (brown, green, reddish) | Internal pipe corrosion | Flush system; schedule professional inspection |
| Low water pressure | Scaling or partial blockages | Check for visible obstructions; consult plumber |
- Staining and deposits are early warnings—don’t ignore them.
- Multiple pinhole leaks may signal systemic failure, especially in older copper pipes for water.
- Visible corrosion on the outside of the pipe suggests internal issues as well.
Repair Versus Replace: Making the Right Call
When a leak appears, should you patch it or plan for a full replacement? Here’s a simple sequence to help you decide:
- Temporary Fixes: Use an emergency compression coupling or repair clamp for accessible leaks. These can buy time but are not long-term solutions.
- Permanent Repairs: For isolated issues, replace the damaged section with new copper using code-approved methods (solder, compression, or press fittings). Always follow the NSF/ANSI 61 standard for potable water safety.
- Full Replacement: If you notice frequent leaks, widespread corrosion, or pipes over 50 years old, consult a licensed plumber for a full repipe. This is especially important for aging copper drain pipe or if water quality is compromised.
Major repairs or replacements should always comply with the International Plumbing Code and local regulations. If you’re unsure, a professional assessment is the safest route.
Key insight: Stable water chemistry and proper velocity control are central to long-term performance—protecting your investment and reducing future repairs.
By staying proactive with maintenance and understanding the signs of trouble, you can extend the lifespan of your copper plumbing pipe and avoid costly surprises. Next, we’ll help you compare repair options and alternatives so you can make informed decisions for your home or business.
Cost-Conscious Selection and Alternatives Comparison
Picking Between Type M and Type L
When you’re deciding which copper piping to use, you’re really weighing cost, code, and performance. Type M and Type L are the most common choices for residential water lines, but which is right for you? Imagine you’re renovating a bathroom and want a long-lasting, code-compliant result—should you pay more for thicker walls, or is the thinner, less expensive pipe good enough?
Type L copper costs more per foot than Type M, but it offers greater durability, especially in exposed or high-traffic areas. If your local code allows Type M for concealed, low-pressure runs, it can save you money without compromising basic performance. But in areas prone to mechanical damage or where higher water pressure is expected, Type L is the safer bet. Always check your city or county’s plumbing code before you buy copper pipe, as some jurisdictions only permit Type L or K for potable water.
Copper Versus PEX, CPVC, and Galvanized: What’s the Real Cost?
Wondering how much is copper pipe compared to alternatives? Let’s make it simple. Copper pipe price per linear foot typically ranges from $2.50 to $5.00, with fittings adding $1.00 to $3.00 each. For a 100-foot project, expect a total installed cost of $800 to $1,500. PEX, on the other hand, offers a total installed cost of $300 to $500 for the same length, largely because it’s easier and faster to install. CPVC falls somewhere in between, while galvanized steel is rarely used in modern homes due to corrosion risk and labor-intensive installation.
| Material/Type | Typical Applications | Material Cost | Tool Complexity | Flame Needed? | Expected Longevity | Corrosion Resistance | Repairability |
|---|---|---|---|---|---|---|---|
| Type K Copper | Main supply, underground, high-pressure | $$$$ | High (cutting, bending, soldering) | Yes | 50+ years | Excellent | Moderate |
| Type L Copper | Interior/exposed supply, repairs | $$$ | Moderate-High | Yes | 50+ years | Excellent | Moderate |
| Type M Copper | Concealed interior supply | $$ | Moderate | Yes | 40-50 years | Good | Moderate |
| DWV Copper | Drain, waste, vent (non-pressure) | $$ | Moderate | Yes | 40-50 years | Good | Easy |
| PEX | All supply, especially remodels | $ | Low (crimp/cinch tool) | No | 30-50 years* | Excellent (except UV exposure) | Easy |
| CPVC | Supply lines, remodels | $ | Low (plastic cutters, solvent cement) | No | 30-50 years | Very Good | Easy |
| Galvanized Steel | Legacy supply, rare new installs | $$ | High (threading, heavy tools) | No | 30-40 years | Poor (prone to internal rust) | Difficult |
*PEX longevity is still being evaluated, but current estimates are promising.
Budget, Timeline, and Skill Tradeoffs
Choosing the right material isn’t just about the copper pipe cost—it’s also about installation speed, available skills, and long-term maintenance. Copper is time-tested and delivers a professional look, but installation takes longer and often requires skilled soldering. PEX is much faster and easier to run in tight spaces, making it a favorite for remodels and new builds alike. CPVC can be a DIY-friendly alternative, while galvanized is best left for replacement projects only.
- If you want a proven, long-lasting solution and are prepared for higher upfront costs, copper is a solid choice—just be sure to confirm how much is copper pipe and factor in labor.
- If you’re on a tight budget or need a quick install, PEX is hard to beat in both cost and convenience.
- If you’re replacing old galvanized, consider the long-term benefits of switching to copper or PEX rather than matching outdated materials.
- If you’re in an area with hard water, PEX may offer better resistance to scale and corrosion than copper (A&E Plumbing, Heating and Air).
If-Then Guide for Material Selection
- If concealed potable lines with moderate pressure and code permits, consider Type L.
- If highest pressure or underground installation, choose Type K.
- If you’re on a budget and code allows, Type M can save money for interior runs.
- If you want the lowest copper pipe price and fastest install, consider PEX—especially for remodels or hard-to-reach spaces.
- If you see copper for sale or copper pipe for sale at a discount, make sure it’s the right type and size for your project and meets code standards.
Key takeaway: The best material for your project balances code, cost, performance, and skill. Always verify local amendments and code requirements before making your final selection.
By understanding your options and how copper pipe cost compares to alternatives, you can make a confident, code-compliant choice for your next project. Up next, we’ll outline practical templates to help you plan and execute your copper installation without guesswork.
Templates for Materials and Scope to Plan Your Job
Materials List You Can Adapt
Starting a plumbing copper project can feel overwhelming, especially if you’re unsure what you’ll need. Imagine opening your toolbox and finding everything ready—no last-minute hardware runs. Here’s a baseline materials checklist to help you plan and execute any small to mid-sized copper pipe plumbing job with confidence:
- Copper pipe (Type K, L, or M as required by code, in appropriate diameters)
- Copper plumbing fittings (elbows, tees, couplings, reducers, adapters, threaded copper pipe connectors)
- Shutoff valves and unions
- Pipe hangers and supports (to maintain code-compliant spacing—see manufacturer or Copper Tube Handbook for specifics)
- Flux and lead-free solder (for soldered joints) or approved press/compression fittings
- Pipe cleaning tools (abrasive cloth, fitting brush, deburring tool)
- Measuring tape, marker, and pipe cutter
- Personal protective equipment (PPE): gloves, goggles, flame barrier
- Insulation sleeves (for hot water lines or pipes in unconditioned spaces)
- Pressure test plugs or gauges
Tailor this list based on your project’s scope and always verify that all copper plumbing connections and fittings meet local code and NSF/ANSI 61 standards for potable water.
Scope of Work Outline
When you’re planning a copper pipe plumbing project—whether it’s a kitchen remodel or a new bathroom branch—clarity and sequence are essential. Here’s a simple scope-of-work template you can adapt:
Project Scope Template:
- Isolate and drain the affected plumbing copper system
- Verify no pressure or water remains in lines
- Layout new pipe runs and mark locations for all fittings and supports
- Cut copper pipe to length, deburr and clean all ends
- Dry-fit all copper plumbing fittings and mark insertion depths
- Join sections (solder, compression, or press as appropriate)
- Pressure test the system for leaks
- Insulate exposed hot water lines
- Document changes and attach manufacturer submittals/code references for permit records
Attaching manufacturer submittals and relevant code excerpts is especially important when seeking permits or passing inspections.
Sequenced Installation Steps (Soldered Joint Example)
- Measure and cut the copper pipe to required lengths using a pipe cutter.
- Ream and deburr the inside and outside of all pipe ends to prevent turbulence and ensure smooth flow.
- Clean the outside of the pipe and inside of the fitting using an abrasive cloth or brush until shiny.
- Apply a thin, even layer of flux to both surfaces.
- Fully insert the pipe into the fitting; twist slightly for even coverage and mark the insertion depth.
- Heat the joint evenly with a propane torch until the flux sizzles and solder melts on contact.
- Apply solder to the joint, allowing it to wick into the seam by capillary action.
- Let the joint cool naturally, then wipe excess flux to prevent corrosion.
- Repeat for all joints. Once complete, pressure test the system before concealing or insulating.
Variants for Other Methods:
- Compression: Slide nut and ferrule onto pipe, insert pipe into fitting, and tighten with two wrenches until secure.
- Press-connect: Prepare pipe as above, insert into press fitting, and use manufacturer’s press tool to secure the joint.
Common Mistakes to Avoid
- Skipping deburring after cutting pipe—can cause leaks and premature wear
- Dry-fitting without marking insertion depth—leads to incomplete joints
- Inadequate support spacing—results in sagging or noisy pipes (always check code or manufacturer tables)
- Not flushing out flux residue after soldering—risk of internal corrosion
- Using the wrong type of copper plumbing fittings for the application (e.g., using DWV for pressure lines)
- Overheating or underheating joints, especially with threaded copper pipe adapters
Before you start, review the Copper Tube Handbook or manufacturer’s charts for support spacing, fitting selection, and installation best practices. Careful planning and adherence to these templates will help ensure your plumbing copper project is leak-free, code-compliant, and built to last.
Next, we’ll explore how custom machining can further enhance your copper installation with precision fittings and adapters for those unique challenges.
Custom Fittings and Manifolds with Precision Machining
When Off-the-Shelf Fittings Are Not Enough
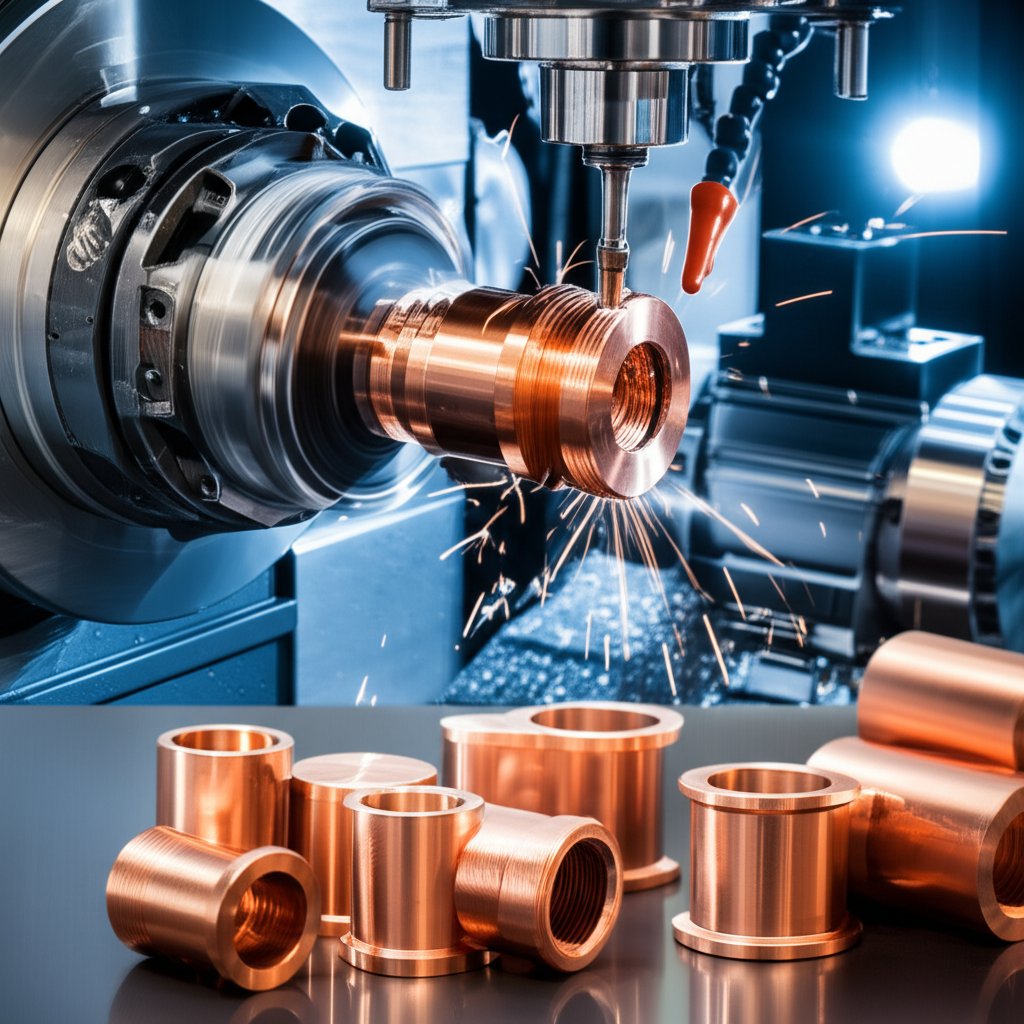
Ever run into a situation where standard copper pipework fittings just don’t cut it? Maybe you’re retrofitting an old system, connecting to specialty equipment, or squeezing a manifold into a tight mechanical room. In these cases, precision matters—and that’s where custom CNC machining steps in to bridge the gap.
- Transitioning unusual sizes: Need to adapt from one copper pipe size to another, or join copper to PVC? Custom copper to copper fittings and copper to pvc adapters can be machined for a perfect, leak-free fit.
- Integrating sensor ports: Modern building management often requires sensor or gauge ports in copper pipe and fittings. Custom machining allows precise placement and thread compatibility.
- Creating compact manifolds: When space is at a premium, a custom manifold can combine multiple copper connectors or outlets into a single, streamlined block.
- Machining compatible alloys: Sometimes, you need a bracket, flange, or adapter in brass or bronze that’s fully compatible with copper pipe pressure fittings and resists corrosion.
Custom Copper Adapters and Manifolds
Imagine you’re upgrading a hot water recirculation system and the available copper pipe compression connectors just won’t fit the unusual geometry of your mechanical room. Or, perhaps your project calls for a specialized copper manifold integrating both threaded and soldered outlets. In these scenarios, custom CNC machining enables you to:
- Match exact pipe dimensions and thread profiles for seamless copper pipe and fittings integration
- Ensure precise alignment and sealing faces to minimize leak risk
- Optimize flow by reducing unnecessary restrictions or dead legs in your copper pipework fittings
One standout provider in this space is XTJ CNC Machining Services, which offers high-precision, rapid-turnaround parts in copper and compatible alloys. Their advanced 4- and 5-axis machining centers deliver tolerances as tight as +/- 0.005mm, supporting both prototypes and full-scale production. With ISO 9001:2015 and IATF16949 certifications, you can trust their quality for mission-critical copper pipe compression connectors and custom manifolds. Always ensure your drawings are validated against ASTM and local plumbing codes before fabrication, no matter the vendor.
Quality and Tolerances for Leak-Tight Assemblies
Why does precision matter so much for copper pipe pressure fittings? Even a small misalignment or rough sealing surface can lead to persistent leaks, especially in high-pressure or temperature-sensitive systems. CNC machining delivers:
- Repeatable, consistent tolerances for every batch of copper connectors
- Smooth, burr-free sealing faces for reliable gasket or soldered joints
- Custom geometry to suit unique project needs or legacy system upgrades
Here’s how custom fabrication options compare for copper pipe and fittings:
| Provider | Lead Time | Tolerances | Material Options | Certifications | Engineering Support |
|---|---|---|---|---|---|
| XTJ CNC Machining Services | As fast as 3 days | Up to +/- 0.005mm | 30+ metals & plastics (incl. copper, brass, bronze) | ISO 9001:2015, IATF16949 | Dedicated engineering team |
| Local Job Shop | 1–3 weeks | Varies (typically +/- 0.05–0.1mm) | Common metals, some plastics | May offer ISO or none | Limited or none |
| In-House Fabrication | Variable (depends on shop load) | Depends on tools/skill | Shop inventory only | Rarely certified | Internal resources only |
Key insight: When standard fittings fall short, custom CNC machining ensures your copper pipework fittings meet the highest standards for safety, fit, and reliability.
Whether you’re upgrading a legacy system, tackling a challenging retrofit, or simply want leak-tight copper to copper fittings that outlast the competition, precision machining can make all the difference. Next, we’ll explore advanced copper pipe applications in HVAC and gas systems, where specialized standards and techniques become critical.
Advanced Applications in HVAC and Gas Systems
Refrigeration and ACR Copper Basics
When you step into the world of HVAC and refrigeration, you’ll notice that not all copper pipe is created equal. Imagine a walk-in cooler or an air conditioner—these systems rely on specialized copper, known as ACR (Air Conditioning and Refrigeration) tubing, which is engineered for higher pressures, precision, and cleanliness. Unlike standard plumbing pipe, ACR copper is manufactured to ASTM B280 standards, ensuring it’s seamless, thoroughly dehydrated, and often sealed with caps to prevent moisture or contaminants from entering before installation.
ACR tubing is designated by its actual outside diameter—so if you’re working with 1 4 copper tubing (0.250" OD), you’re dealing with a size commonly used for refrigerant lines or control circuits. For larger systems, sizes like 7 8 copper tubing are typical for suction lines. These tubes are available in both rigid (drawn) and soft copper tubing (annealed coils), allowing for easy bends around equipment or obstacles. ACR copper is also pressurized with nitrogen during packaging to prevent internal oxidation, which is crucial for system cleanliness and efficient heat transfer.
When joining ACR copper, especially for HVAC applications, brazing is the preferred method. Always purge with nitrogen during brazing to avoid forming harmful oxides inside the pipe—these can clog expansion valves or compressors and reduce system performance. The allowable working pressure of ACR copper tubing varies significantly depending on the tubing diameter, condition (hard or annealed), and operating temperature. When designing a refrigeration system, consult the latest ASTM B280 standard or the manufacturer's engineering data sheets to obtain the maximum allowable working pressure (MAWP) at the specific application temperature. Using the pressure value without correcting for temperature is dangerous.
Gas Line Considerations and Code Checks
Thinking of using copper for a natural gas or propane line? It’s essential to check your local codes first—not all jurisdictions permit copper gas line installations, and compatibility with fuel gases (especially those containing sulfur compounds) must be verified. Where allowed, copper tube must be installed following strict guidelines to prevent corrosion and mechanical damage.
- Never use a copper gas line as an electrical ground.
- Protect copper from contact with dissimilar metals (like steel) by using dielectric sleeves or approved tape to avoid galvanic corrosion.
- Support copper tube with clips or hangers spaced no more than 6 feet apart for horizontal runs.
- Where copper passes through walls or floors, use steel sleeves and wrap the pipe to prevent abrasion.
- Underground piping must be buried with at least 12–18 inches of cover, or installed in conduit where required by code.
- Never lay copper tube in contact with cinders or soils containing cinders to prevent corrosion.
Always consult the National Fuel Gas Code and your local building department for the latest requirements. For medical gas or other specialty systems, even stricter standards apply—these lines must be cleaned, capped, and installed by certified professionals.
Flexible Tubing Where Movement Matters
Not every installation is straight and rigid. When you need to navigate tight spaces or accommodate vibration—think compressors, pumps, or equipment racks—flexible copper tubing is your go-to. Soft copper tubing, available in long coils, can be gently bent by hand or with a tubing bender, minimizing the need for joints and reducing leak risk. This flexibility is especially valuable in pipe for hvac applications, where movement and vibration are common.
- Use the largest bend radius possible to avoid kinking or work hardening the tube.
- Support tubing near vibrating equipment to prevent fatigue failures.
- Seal all connections carefully—use only approved flare or brazed joints for gas and refrigerant lines.
- Keep lines clean and dry; even a small amount of moisture or debris can cause major issues in refrigeration or medical gas systems.
For example, type k copper tubing is often chosen for underground or high-pressure gas lines, thanks to its thick wall and durability. Type l copper tubing is common in above-ground HVAC and refrigeration work, balancing strength with ease of bending.
Specialty copper pipe applications demand strict adherence to standards and manufacturer instructions—cutting corners is never worth the risk.
As you plan your next project, remember: using the right copper, following best practices, and respecting code requirements are non-negotiable for safety and long-term performance. Up next, we’ll wrap up with actionable checklists and pro recommendations to ensure your copper systems are built to last.
Actionable Next Steps and Pro Recommendations
Your Copper Selection Checklist
Ready to put your knowledge into practice? Whether you’re a DIYer or managing a commercial install, having a clear, step-by-step plan ensures your copper pipe system is safe, efficient, and code-compliant. Here’s a checklist to guide your next project—no guesswork, just proven results.
- Confirm application and code: Identify the end-use (potable water, HVAC, drain, gas) and check local building codes for approved types of copper pipe (Type K, L, M, or DWV).
- Select pipe type: For most residential water supply lines, copper type l is a safe, versatile bet. If you’re weighing type l or type m copper pipe, remember to factor in pressure, exposure, and code requirements.
- Size by flow and charts: Use fixture counts and a manufacturer or ASTM B88 chart to choose the right diameter—don’t rely on guesswork or visual inspection alone.
- Choose the joining method: Decide between soldering, brazing, or mechanical fittings based on your environment, skill level, and local fire safety rules.
- Plan for testing and documentation: Pressure test every system before concealing pipes, and document your work for future maintenance or code inspections.
Installation Verification and Documentation
Imagine closing up the walls, only to discover a hidden leak months later. Avoid costly callbacks by taking these extra steps:
- Inspect every joint for proper alignment, clean surfaces, and solid bonds (especially critical for copper tubing types with varying wall thickness).
- Pressure test the system gradually and monitor for drops—no visible leaks doesn’t always mean you’re in the clear.
- Keep a record of pipe types, sizes, and joining methods used, along with any code or manufacturer documentation.
- Attach reference charts (such as ASTM B88, ASTM B280, IPC, and NSF/ANSI 61) to your project file for easy future reference.
Key insight: Choosing the correct type, size, and joining method for your copper installation prevents most failures before they start.
Where to Get Engineered Custom Parts
Sometimes, standard fittings just won’t do—especially when your design calls for custom manifolds, adapters, or mounting hardware. For these leak-critical components, precision machining is essential. Consider working with a provider like XTJ CNC Machining Services when you need drawing-validated, high-tolerance copper or brass parts. Their ISO 9001:2015 and IATF16949 certifications, plus support for over 30 materials, offer peace of mind for demanding jobs. Of course, always verify your design against ASTM and local codes before ordering any custom solution.
| Decision Step | Pro Tip |
|---|---|
| Pipe Type Selection | When in doubt, choose copper type l for versatility and compliance. |
| Type Comparison | Weigh type l copper vs type m based on code, pressure, and exposure—not just cost. |
| Custom Parts | Use certified machining for leak-critical or specialty components. |
| Verification | Always document sizes, types, and pressure test results before sign-off. |
Still searching for “copper pipe near me” or unsure which copper tubing types fit your needs? Use this checklist and linked standards to guide your buying decisions and installation process. With a systematic approach and the right resources, you’ll deliver copper systems that stand the test of time—leak-free and code-compliant from day one.
Frequently Asked Questions About Copper Pipe
1. Is it safe to drink water through copper pipes?
Yes, copper pipes are widely used for drinking water due to their resistance to corrosion and natural antimicrobial properties. All copper pipe for potable water must meet strict standards like NSF/ANSI 61 to ensure safety and water quality. Regular maintenance and monitoring water chemistry help maximize safety and lifespan.
2. Why are there different types of copper pipe (K, L, M, DWV), and how do I choose?
Copper pipe types differ mainly in wall thickness and intended use. Type K has the thickest walls for high-pressure or underground lines, Type L is versatile for most residential supply, Type M is thinner and typically used where local code allows, and DWV is for non-pressurized drain, waste, or vent lines. Your choice should be based on pressure requirements, exposure, and local code acceptance.
3. How do I accurately measure copper pipe size for replacement or repair?
To measure copper pipe size, use a caliper to determine the outside diameter (OD), then consult a copper pipe dimensions chart to match this to the nominal size and wall type (K, L, M, or DWV). Remember, copper pipe is sized by nominal diameter, not actual OD, so always verify using manufacturer or ASTM B88 charts.
4. What are the main causes of leaks or corrosion in copper pipes?
Copper pipe leaks or corrosion typically result from aggressive water chemistry (like low pH), excessive water velocity, poor installation practices, or electrical grounding issues. Regular inspections, maintaining proper water chemistry, and using the correct type and joining method can prevent most problems.
5. Can I use copper pipe for gas or HVAC applications?
Yes, but only specific types of copper tubing—such as ACR tubing for HVAC—are suitable, and installation must follow strict codes. For gas lines, always confirm local regulations, as not all areas permit copper for fuel gases. Use the correct type (often Type K or L), and follow manufacturer and code standards for safety.
-
Posted in
copper pipe, copper pipe types, pipe joining methods, pipe sizing, plumbing


