
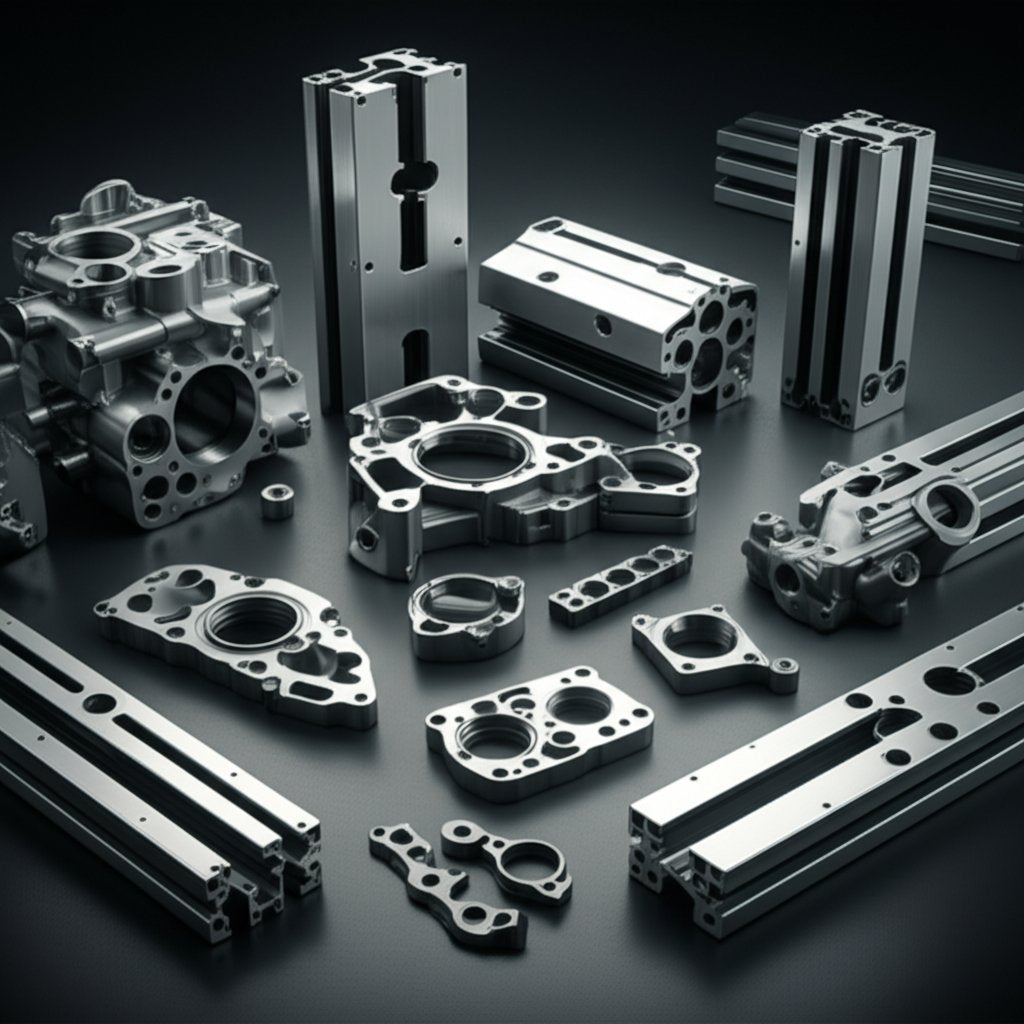
Aluminium Alloy Types, Tempers, And Finishes For Engineers
Aluminium Alloy Fundamentals That Matter
Ever wondered why some aluminum parts feel feather-light and bend easily, while others are sturdy enough for aircraft wings or bike frames? The answer lies in the difference between pure aluminum and aluminium alloy. Understanding this distinction is essential for engineers and designers who need to match material properties to real-world performance needs.
What aluminium alloy means
At its core, an aluminium alloy is simply aluminum that has been intentionally mixed with other elements—such as magnesium, silicon, copper, zinc, or manganese—to enhance specific properties. These additions, even in small amounts, can dramatically change how the metal behaves. For example, pure aluminum is prized for its high electrical and thermal conductivity and natural corrosion resistance, but it is soft and lacks the strength needed for demanding structural applications. Alloying transforms it into a versatile engineering material, suitable for everything from automotive engine blocks to aerospace components and architectural frameworks [source].
Aluminum versus aluminium naming clarity
You might see both "aluminum" and "aluminium" used in technical documents or product specs. They're the same element: "aluminum" is the preferred spelling in the United States, while "aluminium" is used internationally. Regardless of spelling, the science of alloying and its impact on properties is universal.
Elements in aluminium and how alloying works
So, how does alloying actually work? When elements like magnesium (Mg), silicon (Si), copper (Cu), or zinc (Zn) are added to pure aluminum, they disrupt the regular arrangement of atoms in the metal. This disruption increases strength and hardness, and can also influence other traits such as corrosion resistance or machinability. The result is a family of materials—each with its own balance of mechanical and physical properties—tailored for specific tasks.
- Strength – Increased dramatically by alloying, allowing use in load-bearing parts
- Ductility – Can be tuned for deep drawing or forming operations
- Corrosion resistance – Enhanced or reduced depending on alloying elements
- Machinability – Some alloys cut easily, others require special tooling
- Conductivity – Typically highest in pure aluminum, but still significant in many alloys
Small additions of elements like Mg, Si, Cu, or Zn can transform aluminum from a soft, pliable metal into a high-strength engineering alloy.
When to pick pure aluminum vs an alloy
Sounds complex? Here’s a practical way to decide: If your project demands maximum electrical or thermal conductivity and corrosion resistance, pure aluminum (often 99% or higher) is the go-to. Think electrical bus bars or chemical handling tanks. But if your application requires strength, durability, or specific forming and welding characteristics—like bicycle frames, automotive panels, or aerospace brackets—an aluminum alloy is almost always the better fit.
To help you navigate the options, aluminum alloys are grouped into series (1000–7000), each defined by its main alloying element. This series system makes it easier to match an alloy to your design’s needs—whether you prioritize formability, weldability, corrosion resistance, or maximum strength.
Imagine the difference between a soda can (soft, easily shaped, made from nearly pure aluminum) and a structural bracket on a vehicle (rigid, strong, made from a carefully engineered alloy). Both are aluminum, but their performance comes down to the science of alloying. Choosing the right type is about matching material properties to the demands of your application—not simply picking the "strongest" or "most advanced" option.
Alloy Families and Popular Grades Overview
When you’re faced with a wall of numbers—1000, 2000, 5000, 6061—how do you make sense of which aluminium alloy is right for your project? The answer lies in understanding the major alloy families. Each series brings its own strengths, weaknesses, and best-fit applications. Let’s break down the differences so you can quickly match the right alloy to your engineering needs.
Understanding the 1000 to 7000 Series
| Series | Main Alloying Element | Key Traits | Typical Forms | Common Applications |
|---|---|---|---|---|
| 1000 | None (Pure Al, ≥99%) | Excellent conductivity, high formability, superb corrosion resistance, low strength | Sheet, foil, wire, plate | Electrical bus bars, chemical tanks, food packaging |
| 2000 | Copper (Cu) | High strength (can rival steel), good machinability, lower corrosion resistance (often clad or coated) | Sheet, plate, extrusions | Aerospace structures, military vehicles, high-stress brackets |
| 3000 | Manganese (Mn) | Moderate strength, good formability, corrosion resistance, easy to weld | Sheet, coil, tube | Cooking utensils, signage, roofing, storage tanks |
| 4000 | Silicon (Si) | Lower melting point, good ductility, smooth welds, good thermal conductivity | Welding wire, brazing rod, automotive parts | Welding filler, engine blocks, heat exchangers |
| 5000 | Magnesium (Mg) | Exceptional corrosion resistance, excellent weldability, moderate strength, good formability | Sheet, plate, marine extrusions | Boat hulls, pressure vessels, cryogenic tanks |
| 6000 | Magnesium & Silicon (Mg-Si) | Versatile, heat-treatable, strong, good machinability, extrudable | Extrusions, plate, bar, sheet | Frames, structural panels, automotive parts |
| 7000 | Zinc (Zn) & Magnesium (Mg) | Highest strength, good fatigue resistance, lower corrosion resistance, costly | Plate, extrusions, forgings | Aerospace, high-performance sports, military hardware |
Why 6061 Is Widely Specified
If you’ve worked with aluminum, chances are you’ve encountered 6061 aluminium alloy. What makes it such a workhorse? The combination of magnesium and silicon as its main alloying elements gives 6061 a rare blend of strength, weldability, and corrosion resistance. It’s heat-treatable, so you can boost its strength through processing, and it’s readily available in extrusions, plate, and sheet. This makes 6061 a go-to for structural frames, automotive components, and general-purpose brackets.
Marine-Ready 5000 Series Overview
Need something for a saltwater or chemical environment? The 5000 series aluminum alloys, especially those like 5052, are your best friends. With magnesium as the main ingredient, these alloys offer exceptional corrosion resistance and are easy to weld and form. That’s why you’ll find them in boat hulls, storage tanks, and pressure vessels. Just keep in mind that while they’re tough against the elements, their strength is moderate compared to 6000 or 7000 series alloys.
Aerospace-Focused 2000 and 7000 Series
When only maximum strength will do—think aircraft wings, landing gear, or military vehicles—engineers turn to 2000 series aluminum (copper-based) and 7000 series aluminum (zinc-based). 2024 is famous for its high strength-to-weight ratio, though it sacrifices some corrosion resistance. 7075, on the other hand, boasts the highest tensile strength among common aluminum alloys, making it ideal for performance-critical and lightweight structures. Both are often protected with coatings or cladding to counteract their lower natural corrosion resistance.
As you navigate the world of aluminium alloy choices, remember to pair each family with the expected environment and fabrication process. For example, 6000 series excels in extruded shapes for frames, while 5000 series shines in marine sheet or plate. By matching the series to your project’s demands, you’ll avoid common pitfalls and ensure reliable, long-lasting performance.
Tempers and Heat Treatment Made Practical
Ever wondered why two parts made from the same aluminium alloy can perform so differently? The secret is in their temper—the specific combination of mechanical and thermal treatments each piece receives. Understanding temper designations and heat treatment is essential for engineers who want to get the most out of every alloy, whether you’re forming, machining, or welding.
What Temper Codes Like O, H, T4, and T6 Mean
When you see a product labeled as 6061-T6 or 5052-H32, those extra letters and numbers after the alloy tell you how it’s been processed. These temper codes are not just technical jargon—they signal how the metal will behave during fabrication and in service. Here’s a quick guide:
- O (Annealed): The softest state, maximizes ductility and formability. Ideal for deep drawing, bending, or applications needing maximum workability.
- H (Strain-Hardened): Used for non-heat-treatable alloys (like most 5000 series), this temper increases strength through cold working. The higher the number (e.g., H32 vs H12), the greater the strength—at the cost of some ductility.
- T (Heat-Treated): Indicates a heat-treatable alloy (such as 6061 or 7075) that’s been solution heat-treated and then aged to boost strength. Numbers after the T (e.g., T4, T6) show the specific sequence of treatments.
- W (Solution Heat-Treated, Unaged): Temporary temper, used when the alloy is in a freshly quenched state before final aging.
- F (As Fabricated): No special control over thermal or strain-hardening treatments. Properties are as-processed.
For example, aluminum alloy 6061 in the T6 temper has been solution heat-treated, quenched, and artificially aged for maximum strength. In contrast, the O temper of the same alloy is soft and easy to form.
Trade-Offs Between Strength and Formability
Choosing the right temper is all about balancing strength, ductility, and ease of fabrication. Here’s what you’ll notice:
- Annealed (O) tempers are easiest to shape but weakest in strength.
- Strain-hardened (H) tempers boost strength for non-heat-treatable alloys but reduce formability.
- Heat-treated (T) tempers can deliver high strength, but may become less workable and more prone to cracking if bent sharply.
For instance, if you need to bend or deep-draw a part, an O or H1x temper is often best. If you require high yield strength of Al for a load-bearing frame, a T6 or similar temper is preferred. The key is to match the temper to your forming, machining, or joining process—and to the part’s end use.
Why 6061-T6 Behaves Differently Than 6061-T4
Imagine two brackets made from the same 6061 aluminum composition. One is marked T4, the other T6. What’s the difference? Both share the same chemistry, but their mechanical properties diverge due to processing:
| Property | 6061-T4 | 6061-T6 |
|---|---|---|
| Ultimate Tensile Strength (MPa) | 230 | 310 |
| Yield Strength (MPa) | 130 | 270 |
| Elongation at Break (%) | 18 | 10 |
| 6061-T6 Elastic Modulus (GPa) | 69 | 69 |
Notice that the 6061-t6 elastic modulus—a measure of stiffness—remains unchanged despite the temper. This means that while strength (yield and ultimate) increases dramatically with T6, the alloy’s resistance to elastic deformation stays the same [reference]. In short, T6 is much stronger, but not stiffer than T4. This is a common theme across many aluminum alloy types—heat treatment can boost strength without making the material “springier.”
Keep in mind: Machining, forming, or welding can locally change the temper, potentially softening or hardening the area and affecting final properties.
Practical Tips for Selecting Tempers and Heat Treatment
- For non-heat-treatable alloys (like the 5xxx series), choose H tempers for higher strength and O tempers for easier forming.
- For heat-treatable alloys (2xxx, 6xxx, and 7xxx), T tempers (like T6) are ideal when high strength is needed, but consider T4 or O tempers if significant forming is required before final heat treatment.
- If welding is involved, remember that heat-treatable alloys may lose strength in the heat-affected zone. Plan for possible post-weld heat treatment to restore properties.
- Always check the types of aluminium alloys and their available tempers in your supplier’s datasheets and relevant standards to ensure compatibility with your manufacturing route.
Understanding how tempers and heat treatment interact with alloy chemistry means you can confidently specify the right state for your application—whether you’re seeking the highest strength, the best formability, or a balance of both. Next, let’s see how to use these insights to choose the perfect alloy for your project’s specific demands.
Decision Matrix for Selecting Common Alloys
When you’re choosing between common aluminum alloys, it’s easy to get lost in a sea of grades, properties, and trade-offs. How do you decide which is best for your project—especially when every application seems to demand a different combination of strength, corrosion resistance, cost, and workability?
How to Prioritize Properties by Application
Start by asking: What matters most for your part’s success? For marine environments, corrosion resistance and weldability top the list. In aerospace, strength-to-weight ratio and fatigue resistance are critical. For consumer products, you might prioritize formability and surface finish. Here’s a quick guide to attribute weighting:
- Marine/Outdoor: Corrosion resistance (5xxx series), weldability, moderate strength
- Aerospace/Performance: Highest strength (2xxx/7xxx series), fatigue resistance, machinability
- General Structural: Balanced strength, weldability, cost-effectiveness (6xxx series like 6061)
- Consumer Devices: Formability, surface finish, moderate strength (3xxx, 5xxx, 6xxx series)
Comparing the Most Common Aluminum Alloy Grades
| Alloy | Strength | Corrosion Resistance | Weldability | Machinability | Cost | Availability | Typical Forms | Cautions |
|---|---|---|---|---|---|---|---|---|
| 2024 | High | Low | Poor | Good | High | Limited | Sheet, plate | Needs coating for corrosion; not for welding |
| 6061 | Medium | Good | Excellent | Good | Moderate | Excellent | Extrusions, plate, sheet | Heat-affected zone softens after welding; post-weld treatment may be needed |
| 6082 | Medium-High | Good | Good | Good | Moderate | Good | Extrusions, plate | Similar to 6061, but not as widely available in all regions |
| 5052 | Moderate | Excellent | Excellent | Good | Low | Excellent | Sheet, plate | Not heat-treatable; moderate strength only |
| 5083 | Medium | Excellent | Good | Fair | Moderate | Good | Plate, sheet | Not for high-temp use; some loss of strength after welding |
| 7075 | Very High | Low | Poor | Fair | High | Limited | Plate, extrusions | Prone to stress corrosion; difficult to weld |
When 6061 Beats 7075 and Vice Versa
Imagine you’re designing a structural frame. Should you choose the strongest aluminum alloy available, or is there a smarter option? 7075 offers top-end strength and is a classic aircraft aluminum, but it’s expensive, less corrosion-resistant, and tough to weld. 6061, on the other hand, is the most common aluminum alloy for general structures—easy to weld, widely available, and more forgiving in fabrication. Unless you truly need the maximum strength (and can manage the extra cost and fabrication limits), 6061 is often the better all-around pick.
Marine, Aerospace, and Consumer Device Selection Tips
- Marine/Outdoor: Choose 5052 or 5083 for their outstanding corrosion resistance and weldability. These grades are mainstays in boat hulls and chemical tanks.
- Aerospace/High-Performance: 2024 and 7075 are preferred for critical, lightweight structures—just remember to specify protective coatings and avoid welding where possible.
- General Structural/Consumer: 6061 and 6082 offer a strong balance of properties, easy machining, and broad supply chain support, making them ideal for frames, brackets, and housings.
There’s no single “best” grade—your ideal alloy depends on the demands of your project and the trade-offs you’re willing to make between cost, strength, corrosion resistance, and manufacturability.
Quick Checklist: Narrowing Down the Best Alloy for Your Needs
- Define design loads and required strength—use an aluminum grades chart to compare options.
- Assess the service environment (marine, outdoor, high-temperature, etc.).
- Determine joining method (welding, bolting, adhesive) and check weldability/machinability ratings.
- Balance cost and availability—workhorse grades like 6061 minimize lead time risk.
- Check temper availability and consider any required post-processing.
Once you’ve considered these factors, you’ll have a shortlist of common aluminum alloys tailored to your application. Up next, we’ll connect your alloy choice to hands-on fabrication and joining strategies for real-world success.
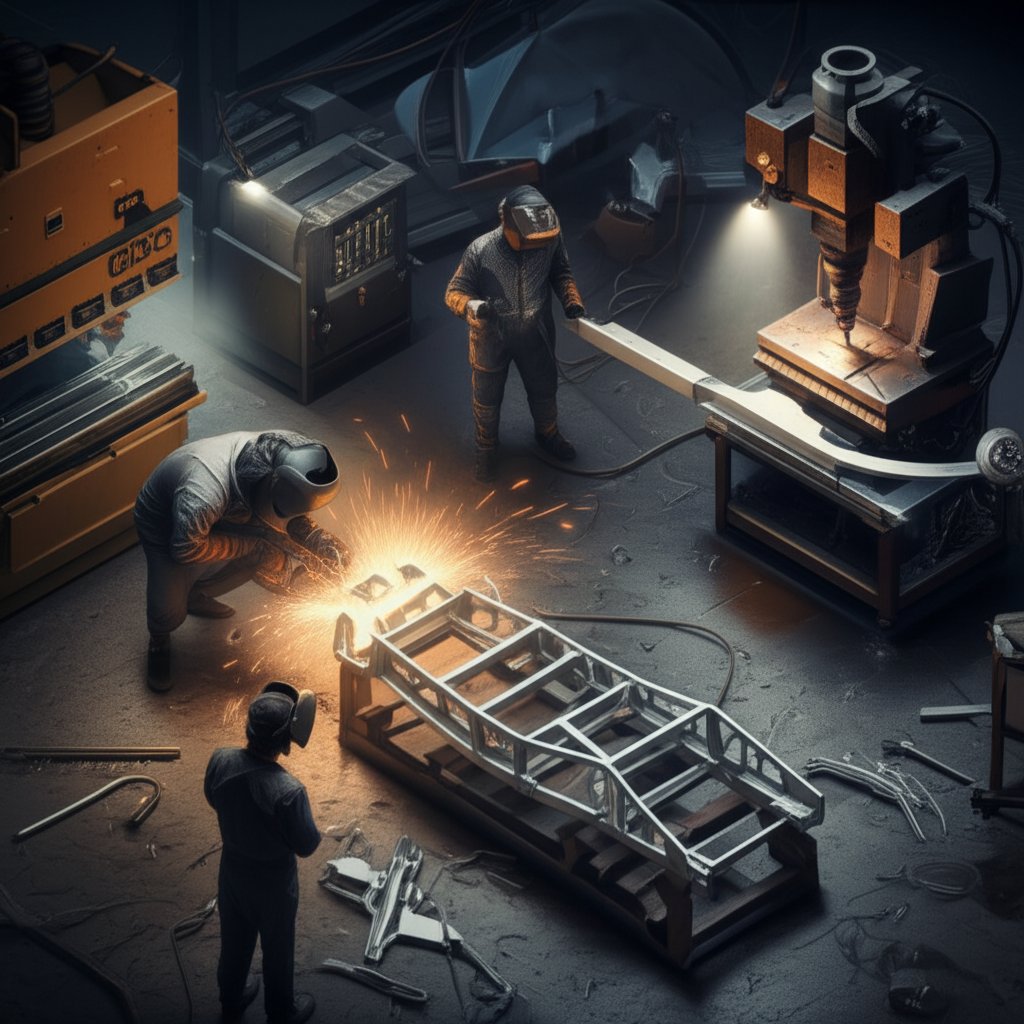
Fabrication and Joining Best Practices for Aluminium Alloy Material
When it’s time to turn a design into a finished part, the real-world properties of your chosen aluminum alloy material come to the forefront. Whether you’re welding, machining, bending, or heat treating, the right approach can mean the difference between a flawless component and costly rework. Let’s break down the essential shop-floor best practices—so your next project with aluminium alloys goes smoothly, whether you’re working with 6061 t6 aluminum tubing, marine-grade sheets, or castings.
Welding Aluminum Alloys Without Cracks
Welding aluminum is notoriously different from steel. Have you ever seen a weld crack or warp unexpectedly? That’s often due to the unique thermal and chemical behavior of aluminum vs alloy steels. Aluminum’s high thermal conductivity means heat dissipates rapidly, raising the risk of shallow penetration, warping, or distortion—especially in thin sheets or tubing. Plus, every piece forms a tough oxide layer that melts at a much higher temperature than the underlying metal, which can disrupt fusion if not properly removed.
- Choose the right process: Use GTAW (TIG) for precision and thin sections; GMAW (MIG) for productivity and thicker parts. Both suit most types of aluminium materials but require different skill levels and equipment.
- Remove oxides just before welding: Use a dedicated stainless steel brush or chemical cleaner. This step is critical for avoiding inclusions and weak welds.
- Use the correct shielding gas: 100% argon is standard; argon-helium blends can help with thicker sections.
- Select a compatible welding rod for aluminum: Match filler metal to the base alloy (e.g., ER4043 or ER5356 for 6061 alloys). This reduces hot cracking and ensures joint strength.
- Control heat input: Use short welds, backstep techniques, or thicker material to minimize distortion. For cast aluminum welding, preheat may help reduce cracking risks.
- Inspect welds: Check for porosity, cracks, and undercut. For critical parts, consider dye penetrant or radiographic testing.
-
Common pitfalls:
- Welding over dirty or oxidized surfaces
- Improper filler selection
- Excessive heat input causing warping or burn-through
- Insufficient shielding gas coverage
- Contamination from steel tools or hands
Thorough pre-cleaning—removing oxides and contaminants just before welding—is the single best way to avoid porosity and weak joints in aluminum fabrication.
Machinability Tips for Clean Finishes
Aluminum alloys are generally easier to machine than steels, but their softness and tendency to form built-up edges on cutting tools can challenge even experienced machinists. Want to achieve a mirror finish on your next batch of 6061 t6 aluminum tubing? Try these proven strategies:
- Use sharp carbide tools designed for non-ferrous metals.
- Apply proper cutting fluids to reduce heat and prevent chip welding.
- Ensure generous chip evacuation—aluminum’s stringy chips can clog flutes and damage surfaces.
- Secure stable fixturing to minimize vibration and chatter.
- For thin-walled parts, like tubing, support the interior to prevent collapse or distortion.
-
Common machining pitfalls:
- Using dull tools, leading to poor surface finish
- Overlooking coolant needs, causing thermal expansion or built-up edge
- Setting excessive feed/speed, which may cause chatter or tool breakage
- Neglecting to deburr edges, resulting in assembly issues
Forming and Bending Do’s and Don’ts
Aluminum’s ductility makes it a favorite for forming and bending—but not all alloys or tempers behave the same. When comparing alloy vs aluminum (pure), alloys typically offer higher strength but may be less forgiving during tight bends. Here’s how to keep your parts crack-free:
- Select O or H-temper sheets for deep forming—these are softer and less likely to crack.
- For stronger tempers (like T6), use larger bend radii to avoid fracture.
- Consider incremental forming or hydroforming for complex shapes.
- Always align bends with the grain direction for maximum ductility.
-
Forming pitfalls:
- Specifying radii too tight for the chosen alloy/temper
- Designing features too close to bends, risking deformation
- Ignoring grain direction, which can lead to unexpected cracking
Heat Treatment and Its Role in Fabrication
Heat treatment unlocks the full potential of many aluminum alloys, especially 6xxx and 7xxx series. The process usually involves:
- Solution heat treating to dissolve alloying elements
- Rapid quenching to retain elements in solution
- Aging (natural or artificial) to develop final strength
For heat-treatable alloys, a controlled quench is crucial to minimize distortion—especially for precision parts. Remember, welding or forming can locally alter the temper, so plan for post-fabrication heat treatment if consistent properties are needed throughout the part.
Designing for Fabrication Success
Imagine you’re designing a bracket: Will it be welded, bent, or machined? Each process affects tolerances, surface finish, and even the choice between aluminum vs aluminum alloy. By understanding the real-world behavior of your selected alloy, you can avoid costly mistakes and ensure shop-floor success.
In summary, successful fabrication of aluminium alloy material hinges on matching the process to the alloy’s properties, prepping surfaces meticulously, and respecting the limitations of each technique. By following these best practices, you’ll bridge the gap between design intent and reliable, high-quality finished parts—no matter which types of aluminium materials you choose. Next, we’ll explore how to protect those parts with the right surface finishes and corrosion control strategies.
Corrosion Protection and Surface Finishes for Aluminium Alloy Parts
When you picture a shiny bicycle frame, a rugged marine bracket, or a sleek consumer device, you’re seeing more than just the base metal—surface treatments play a huge role in how aluminium alloy parts look, last, and perform. So, how do you pick the right finish for your application? Let’s break down the most effective options, from anodizing to conversion coatings and paint systems, so you can confidently protect and enhance your aluminum sheet, decorative sheet metal, or even aluminium casting projects.
Choosing Anodizing Types for Function and Look
Ever wondered why some aluminum parts keep their luster outdoors or resist scratches so well? That’s often thanks to anodizing—a controlled electrochemical process that thickens and strengthens the natural oxide layer on the metal’s surface. Anodizing not only boosts corrosion and wear resistance but also allows for a wide range of color options, making it ideal for both functional and decorative applications.
There are several types of anodizing, each with its own strengths:
| Treatment | Benefits | Typical Thickness | Color Options | Common Uses |
|---|---|---|---|---|
| Type II (Sulfuric Acid) Decorative Anodize | Good corrosion/wear resistance, easily dyed, cost-effective | 5–30 μm (0.0002–0.0012 in) | Wide variety; not always perfectly matched | Consumer electronics, outdoor furniture, painting aluminum wheels, decorative sheet metal |
| Type III (Hard Anodize) | Exceptional wear resistance, high hardness, thicker protection | 12–50 μm (0.0005–0.002 in) | Darker shades, limited dye acceptance | Industrial parts, marine fasteners, high-wear machine components |
| Conversion Coatings (e.g., Alodine, Cr-free alternatives) | Baseline corrosion protection, excellent paint adhesion, minimal thickness | Very thin (often invisible) | Usually colorless or iridescent | Aircraft aluminum, electronics housings, pre-paint treatment |
| Paint & Powder Coating | UV stability, color/branding, extra protection | Variable (often 50–100 μm for powder) | Any color (RAL, Pantone) | Architectural panels, automotive trim, aluminum sheet facades |
Type II anodizing is the go-to for most decorative and general-purpose needs, while Type III hard anodize is best for abrasion-heavy or industrial settings. Both start with a thorough cleaning and etching process, often using an anodizing machine to control current, time, and temperature for consistent results. After anodizing, parts can be dyed for aesthetics and then sealed to lock in color and block contaminants.
Keep in mind: Anodizing adds a small but measurable thickness to all surfaces—including threads and tight fits—so always account for dimensional growth in your design. Masking is recommended for critical areas.
Conversion Coatings and Paint Systems
Looking for a foundation that boosts paint adhesion or provides baseline corrosion resistance for aluminium alloy parts? Conversion coatings—like traditional chromate (Alodine 1200) or modern Cr(VI)-free alternatives—chemically modify the surface to create a thin, protective layer. These treatments are especially valuable for aerospace and electronics, where even a thin layer can make a big difference in durability and electrical performance.
Recent studies show that some non-chrome conversion coatings (such as zirconium-based PreCoat A32) can match or even exceed the corrosion resistance of older chromate systems, especially on high-strength alloys like 2024-T3 and 2024-T81. Both types passed strict salt spray resistance tests, with only a few small pits after 168 hours, meeting aerospace standards for corrosion protection [reference]. These coatings are thin, nearly invisible, and ideal as a primer for subsequent painting or powder coating.
When aesthetics or branding matter, powder coating and wet paint systems offer unlimited color choices and extra UV protection. Just be sure to properly pretreat the surface—conversion coatings or anodizing—before painting aluminum wheels or panels to ensure adhesion and prevent underfilm corrosion.
Designing for Durability in Marine and Industrial Atmospheres
In harsh environments—like marine, coastal, or industrial settings—surface finish is more than just a style choice. It’s a critical line of defense. Here’s how to get the most from your surface treatment:
- Use hard anodize or advanced coatings (like plasma electrolytic oxidation) for high-wear or submerged parts.
- Apply conversion coatings before painting or powder coating for the best corrosion resistance.
- Always insulate dissimilar metals to avoid galvanic corrosion—use gaskets or isolators when fastening aluminium alloy to steel or copper.
- Design drainage paths to prevent standing water in crevices or joints, especially for aluminium casting or complex aluminum sheet assemblies.
- Specify surface finish (matte, satin, polished) before treatment for a consistent appearance across all parts.
For maximum durability, choose a surface treatment that matches both the environment and the part’s function—marine parts need robust corrosion barriers, while decorative sheet metal benefits from color-stable, easy-to-clean finishes.
- Marine/coastal: Hard anodize or high-performance conversion coatings, plus sealing
- Industrial/chemical: Powder coat over conversion coating for maximum chemical and abrasion resistance
- Consumer/outdoor: Type II anodizing for color and weatherability; specify UV-stable dyes
By understanding the capabilities and limitations of each surface treatment, you can extend the life, improve the look, and boost the value of your aluminium alloy components—whatever the application. Next, we’ll explore how these finishing choices play into additive manufacturing and advanced fabrication strategies.

Additive Manufacturing with Aluminium Alloys
Ever wondered how engineers create intricate, lightweight parts that seem impossible to machine or cast? Additive manufacturing (AM)—often called 3D printing—has opened new frontiers for aluminium alloys, enabling the production of highly complex, high-performance components in aerospace, automotive, and beyond. But not all aluminium alloys are equally suited for AM, and the process comes with its own unique challenges and solutions. Let’s break down what you need to know to leverage AM for your next project.
Which Aluminium Alloys Work Well in AM?
When you scan the aluminum alloys list used in additive manufacturing, you’ll notice a pattern: alloys rich in silicon, such as AlSi10Mg and AlSi12, dominate the field—especially in laser powder bed fusion (LPBF). Why? Silicon lowers the melting point and improves fluidity, helping to avoid hot cracking and ensuring a dense, crack-resistant part. These types of aluminum alloys are favored for their balance of strength, lightweight properties, and printability, making them a staple for intricate brackets, heat exchangers, and housings in demanding industries.
For applications demanding even higher performance, such as aerospace or advanced automotive, research is rapidly expanding into new systems like aluminum lithium alloy and custom chemistries designed for AM. These next-generation alloys promise improved strength-to-weight ratios and enhanced fatigue life, though they may require specialized process controls or grain refiners to prevent cracking and ensure uniform microstructure [reference].
Porosity, Hot Cracking, and Parameter Control
While AM offers unmatched design freedom, it also introduces new technical hurdles. The most common defects in typical aluminum alloys printed by AM include:
- Porosity – Small voids caused by trapped gas or incomplete fusion, which can weaken the part
- Hot cracking – Cracks that form during rapid solidification, especially in high-strength alloys
- Rough surfaces and partially unfused areas – Resulting from uneven heat distribution or suboptimal scan strategies
How do engineers tackle these challenges? It starts with careful parameter development:
- Powder quality – Consistent particle size and dryness are critical; pre-drying powder can help prevent porosity
- Laser power and scan speed – Fine-tuning these settings reduces both porosity and hot cracking
- Scan strategy – Optimized patterns and double scanning can improve fusion and microstructure
- Grain refiners – Adding refiners to the alloy can enhance crack resistance and mechanical properties
Some advanced systems also use in-situ monitoring to detect defects as they form, enabling real-time adjustments and higher repeatability. As you move up the list of aluminum alloys for AM, remember that every printer and alloy combination may require unique tuning for best results.
Consistent scan strategy and high-quality powder are the foundation of repeatable, high-strength aluminum AM parts.
Post-Processing for Properties and Precision
Once your part is printed, the journey isn’t over—post-processing is essential to achieve final properties and tolerances. Here’s a typical AM workflow for aluminium alloys:
- Design for AM – Optimize geometry for printability, support removal, and minimal post-processing
- Parameter development – Tune laser power, scan speed, and powder characteristics
- Build – Execute the print, using in-situ monitoring if available
- Stress relief – Heat treat the part to reduce residual stresses from rapid cooling
- Hot Isostatic Pressing (HIP) (if specified) – Apply high pressure and temperature to close internal pores and boost density
- Precision machining – Refine critical features, threads, or interfaces to tight tolerances
- Surface finishing – Options include polishing, tumbling, anodizing, or painting for aesthetics and corrosion resistance
- Verification – Inspect dimensions and properties to ensure they meet design requirements
For many typical aluminum alloys used in AM, HIP can significantly reduce porosity, enhancing both mechanical properties and fatigue life. Final machining ensures that tight tolerances and surface finishes are achieved, especially on critical interfaces. Anodizing or painting may be applied for additional protection, just as with conventionally manufactured parts.
Design Tips for AM Success
- Maintain consistent wall thickness to avoid uneven cooling and warping
- Plan for adequate support structures—especially in overhangs or thin features
- Leave machining stock on critical surfaces for post-print refinement
- Consider the end-use environment when selecting alloys and surface treatments
By mastering the interplay between alloy selection, process control, and post-processing, you can unlock the full potential of aluminium alloys in additive manufacturing—delivering parts that are lighter, stronger, and more complex than ever before. In the next section, we’ll see how standards and specifications help ensure consistency and quality across the entire aluminum supply chain.
Standards and Specification Cross-Reference
Ever tried to specify an aluminium alloy, only to get lost in a maze of numbers, codes, and regional naming conventions? When you’re engineering with different grades of aluminium, understanding how to read and cross-reference alloy standards is a must. Let’s make sense of the most common systems, so you can confidently select, specify, and verify the right material for your next project.
How to Read Alloy and Temper Designations
When you see an alloy like 6061-T6, what does it really mean? The four-digit number (e.g., 6061) is the alloy designation, indicating the aluminium group number and main alloying elements. The temper code (such as T6) tells you about the heat treatment or mechanical processing the material has undergone. But there’s more: the same alloy can be supplied in different forms—sheet, plate, extrusion, or forging—and each form may be governed by a different standard. That’s why it’s crucial to specify both alloy and temper, plus the relevant product standard, to avoid confusion or mismatched expectations.
ASTM, EN, and UNS Cross-References
Imagine needing 6061 extrusion for a structural frame. You’ll likely encounter ASTM B221 for extrusions, ASTM B209 for sheet/plate, and similar but not identical EN AW or UNS designations if sourcing internationally. Here’s a practical cross-reference for several common aluminium grades, showing how alloy standards map across regions and product forms:
| Common Alloy Name | ASTM Product Standard | EN AW Designation | UNS Number | Typical Product Forms | Where to Verify |
|---|---|---|---|---|---|
| 6061 | ASTM B221 (Extrusion), ASTM B209 (Sheet/Plate) | EN AW-6061 | A96061 | Extrusions, sheet, plate, bar | ASTM, EN, NIST |
| 2024 | ASTM B209 (Sheet/Plate) | EN AW-2024 | A92024 | Sheet, plate, bar | ASTM, EN |
| 7075 | ASTM B209 (Sheet/Plate), ASTM B221 (Extrusion) | EN AW-7075 | A97075 | Extrusions, plate, bar | ASTM, EN |
| 5052 | ASTM B209 (Sheet/Plate) | EN AW-5052 | A95052 | Sheet, plate, coil | ASTM, EN |
| 1100 | ASTM B209 (Sheet/Plate) | EN AW-1100 | A91100 | Sheet, plate, foil | ASTM, EN |
| 3003 | ASTM B209 (Sheet/Plate) | EN AW-3003 | A93003 | Sheet, plate, coil | ASTM, EN |
Not every alloy has a direct one-to-one mapping across all standards, and product forms matter. For example, ASTM B221 specifically governs extruded bars, rods, wire, profiles, and tubes, while ASTM B209 covers sheet and plate. Always check the latest aluminum specifications for your region and application.
Where to Find Official Specifications
Ready to dig deeper into a particular aluminium specification? Here’s where to look:
- ASTM International – The go-to source for North American alloy standards; check product-specific standards like ASTM B209 (sheet/plate) or ASTM B221 (extrusions).
- EN (European Norm) – For European projects, use EN AW designations and consult the relevant EN standards for wrought or cast alloys.
- UNS (Unified Numbering System) – A cross-industry system, often used in global supply chains to clarify types of aluminium grades.
- Manufacturer Data Sheets – For detailed mechanical properties, tolerances, and heat-treatment notes, always verify with the supplier’s datasheet and cross-check against official standards.
Before releasing a drawing or purchase order, confirm that you’ve specified the alloy, temper, and product form, plus the relevant standard and edition. This level of detail helps prevent costly errors and ensures you get exactly the aluminium grades you expect.
Always call out the standard edition and acceptance criteria in your project specifications—this avoids disputes and keeps everyone on the same page.
- Check both the alloy and temper code when reviewing different grades of aluminium.
- Use the aluminium group number (1xxx–7xxx) to quickly compare types of aluminium grades for your application.
- Consult official sources (ASTM, EN, NIST, ASM) for the latest updates and clarifications.
With a clear understanding of how alloy standards and specifications work, you’ll be ready to move forward with confidence—whether you’re sourcing material, qualifying suppliers, or preparing for production. Next, we’ll troubleshoot common fabrication problems and show how standards play a role in quality assurance and problem-solving.
Troubleshooting Aluminum Fabrication Problems
When you’ve invested time and resources into an aluminium alloy project, the last thing you want is a weld that cracks, a part that warps, or corrosion that creeps in unexpectedly. Sounds familiar? You’re not alone—these issues are common, but they’re also preventable with the right approach. Let’s walk through the most frequent aluminum fabrication problems and how to fix them, step by step, so you can deliver strong, reliable results every time.
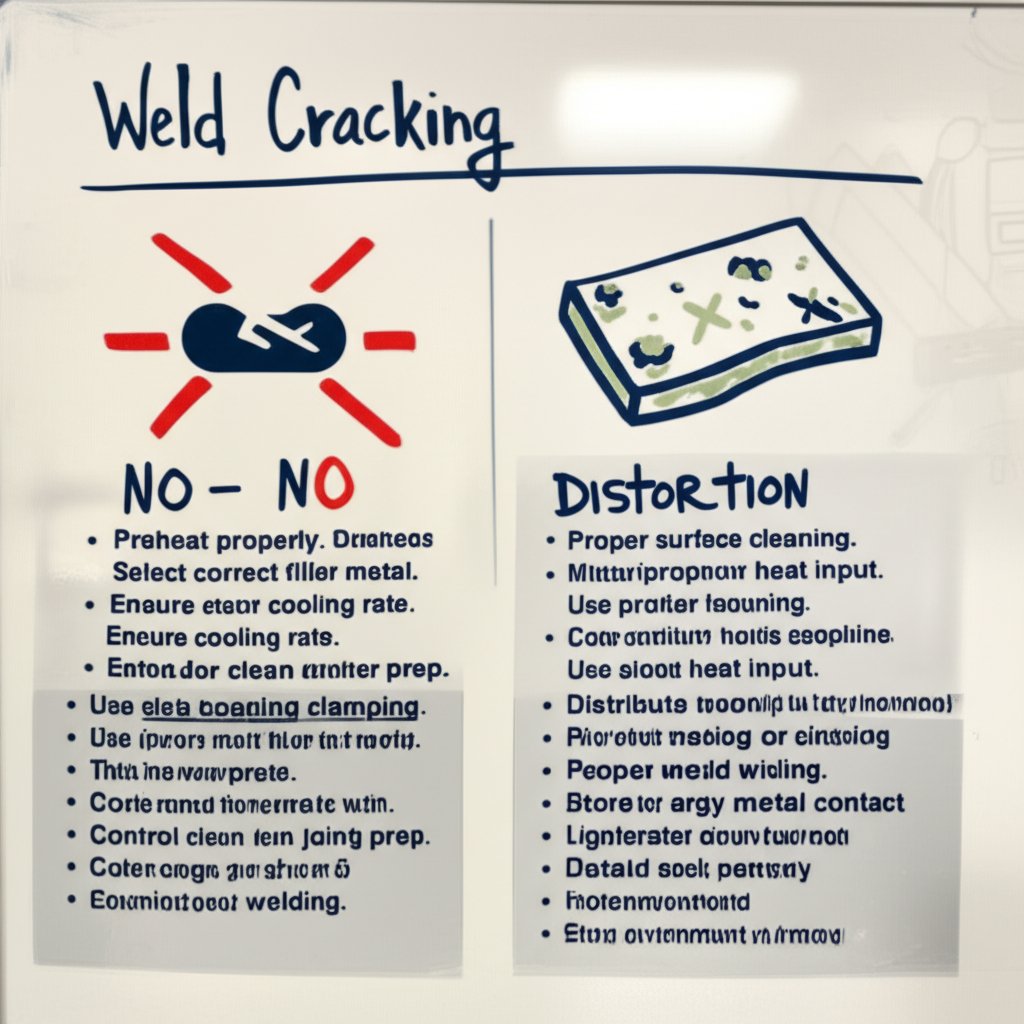
Why Welds Crack and How to Prevent It
- Diagnose: Are you seeing cracks at the start or end of welds, or along the bead? Hot cracking and stress cracking are two main culprits in aluminum. Hot cracking often relates to alloy chemistry and filler selection, while stress cracking is tied to mechanical stresses as the weld cools.
- Contain: Stop the process and inspect the joint design and fit-up. Are you using a restrictive joint that limits filler addition? Is the weld bead concave, or is the travel speed too slow?
- Correct: Select a filler metal with low crack sensitivity—consult a reputable filler guide for your specific aluminium alloy. For hot-crack-prone alloys (like 6000 series), a beveled groove joint allows more filler and reduces risk. For stress cracks, consider using silicon-containing filler and employ a crater fill technique at weld ends. Increase travel speed to narrow the heat-affected zone, and preheat if allowed to reduce residual stresses.
- Prevent: Always pre-clean oxides, use the correct filler, and optimize joint design. Monitor heat input—too much can lower the strength of aluminum and increase cracking risk.
Reducing Distortion and Residual Stress
- Diagnose: Notice parts warping, twisting, or not fitting together after welding? Distortion is a result of aluminum’s high thermal conductivity and expansion coefficient, causing non-uniform heating and cooling.
- Contain: Pause welding, check for over-sized welds, and assess fixturing. Are you applying more heat than necessary, or welding out of sequence?
- Correct: Use the smallest weld size that meets structural needs. Balance welds around the neutral axis and alternate sides to distribute shrinkage. Employ skip or backstep welding techniques, and use jigs or clamps to hold parts in alignment. For thick sections, double-sided welding can help.
- Prevent: Design with minimal welding in mind—use extrusions or formed shapes when possible. Pre-set components to compensate for expected movement, and use computer-aided distortion prediction for complex assemblies.
Controlling Porosity and Surface Defects
- Diagnose: Are there bubbles, pinholes, or a rough, sooty weld surface? Porosity is usually caused by hydrogen entering the weld pool—often from moisture or contaminants.
- Contain: Stop welding and inspect for oil, grease, or condensation on the base or filler metal. Is your shielding gas flow steady and adequate?
- Correct: Thoroughly clean all surfaces with solvent and a dedicated stainless steel brush. Use only dry, fresh filler wire, and store it properly. Allow cold aluminum to acclimate to shop temperature to prevent condensation. For thicker sections, consider baking out moisture if specifications allow. Adjust gas flow and use a larger nozzle if needed.
- Prevent: Always clean just before welding, use low dew point gases, and follow recommended purging cycles. Store materials in dry, temperature-stable environments to avoid hydrated oxides.
Managing Galvanic Corrosion Risks
- Diagnose: Are you seeing unexplained corrosion where aluminum contacts another metal (like stainless steel)? This is likely galvanic corrosion, especially in the presence of moisture or saltwater.
- Contain: Inspect joints for direct metal-to-metal contact and check for missing or degraded coatings or gaskets.
- Correct: Separate dissimilar metals with insulating washers, gaskets, or coatings. Apply a corrosion-resistant primer or paint to both surfaces before assembly. In critical locations, use compatible fasteners or design for drainage to prevent water accumulation.
- Prevent: Specify non-absorbent isolators (like rubber or plastic), ensure regular maintenance, and avoid designs that trap moisture. For marine or harsh environments, use extra layers of protection and schedule periodic inspections.
Safety first: Always clean aluminum thoroughly before welding or assembly, and ensure proper fume extraction—contaminants and poor ventilation can compromise both part quality and worker health.
Checklist: Process Controls for Consistent Quality
- Document cleaning steps (solvent wipe, brushing, drying)
- Record filler wire batch and storage conditions
- Monitor gas type, flow rate, and nozzle cleanliness
- Note preheat and post-weld heat treatment as required
- Log inspection points (visual, NDT, fit-up checks)
By following these step-by-step troubleshooting methods, you’ll not only solve problems as they arise, but also build a robust process that consistently delivers the strength of aluminum and the durability you expect. Wondering about other aluminum metal properties—like "is aluminum strong" or "is aluminum flammable"? While aluminum is non-flammable and boasts an impressive strength-to-weight ratio, its real-world performance depends on careful fabrication and proactive quality control. In the next section, we’ll show you how to move from successful troubleshooting to confident production, ensuring your aluminium alloy designs are ready for manufacturing at scale.
From Alloy Selection to Production with Confidence
After troubleshooting and refining your aluminium alloy design, the next step is turning that concept into a reliable, manufacturable product. How do you bridge the gap from material shortlist to real-world production—especially when tight tolerances, surface finishes, and complex features are non-negotiable? Let’s walk through a practical, engineer-friendly roadmap that helps you move from specification to shop floor with clarity and confidence.
From Material Shortlist to Manufacturable Design
Imagine you’ve narrowed down your choices to a few common aluminum grades—maybe 6061 for its balance of strength and machinability, or 7075 for maximum load-bearing. What’s next? Follow this concise action plan to ensure your design is both robust and ready for efficient production:
- Confirm alloy and temper based on the operating environment and mechanical requirements. For example, select 5052 for marine corrosion resistance, or 6061-T6 for structural frames.
-
Choose the best process route:
- Machining from plate or extrusion for precision parts with tight tolerances
- Casting plus machining for complex, high-volume shapes
- Additive manufacturing (AM) for intricate geometries or rapid prototyping
- Define critical-to-quality features—such as hole positions, flatness, or surface finish—that must be tightly controlled.
- Lock in surface finish and coating specs early. Specify anodizing, powder coating, or conversion coating to match the environment and function; this is especially important for aluminum materials exposed to the elements.
- Schedule a Design for Manufacturability (DFM) review with your manufacturing partner. This helps ensure your design aligns with real-world process capabilities, whether you’re machining from an extrusion or casting a complex preform.
- Pilot-build and validate—manufacture a small batch to check tolerances, fit, and finish before ramping up to full production.
- Ramp up to production once your prototype meets all functional and aesthetic requirements.
Always specify alloy, temper, surface finish, and inspection criteria clearly on your drawings to avoid ambiguity and ensure consistent quality.
When to Choose Precision CNC Machining
Some parts—like thin-walled housings, intricate brackets, or assemblies with tight geometric dimensioning and tolerancing (GD&T)—demand more than basic fabrication. That’s where precision CNC machining shines. Multi-axis CNC (4- and 5-axis) can deliver ultra-tight tolerances, complex contours, and consistent surface finishes on a wide range of aluminum and aluminum alloys. This is especially valuable for prototypes, aerospace components, or high-end consumer devices where every micron counts.
If your project requires advanced fixturing, simultaneous machining, or multi-operation setups, CNC is often the best path to avoid tolerance stack-up and maintain critical alignments. For example, a laptop chassis made from 6061-T6 can achieve thin, rigid walls and precise cutouts using CNC, while a 7075 bracket benefits from both strength and fine detail machining.
For engineers seeking external manufacturing support, specialized partners like XTJ CNC Machining Services offer 4- and 5-axis capability, ultra-tight tolerances (as fine as ±0.005mm), and certified quality systems. This level of precision helps reduce rework, accelerate validation, and deliver parts that meet even the most demanding requirements—whether you need a single prototype or full-scale production.
Prototype to Production Without Rework
How do you ensure your aluminium alloy part moves smoothly from prototype to production, minimizing costly changes? The answer lies in early collaboration and clear documentation. Here’s a step-by-step checklist to help you stay on track:
- Share complete 3D CAD models and detailed 2D drawings with all critical tolerances and GD&T clearly defined.
- Specify aluminum composition, alloy, temper, and all surface treatments up front.
- Align your coating and finishing specs with the selected manufacturing route—anodized parts may require special masking or post-machining steps.
- Engage your supplier in DFM discussions to identify any process limitations (such as minimum wall thickness for casting or burr control for CNC).
- Conduct pilot builds to validate fit, function, and appearance before scaling up.
- Document inspection and acceptance criteria on every drawing and traveler card.
By following these steps, you’ll avoid the most common pitfalls in aluminum industrial uses—such as unexpected distortion, mismatched finishes, or tolerance issues—while ensuring your product meets both functional and aesthetic goals.
What Is Aluminium Used For? Real-World Examples
Wondering what aluminum is used for in practice? The answer is almost everywhere: aircraft structures, automotive frames, marine vessels, consumer electronics, and even architectural facades. Each application leverages a different set of aluminum grades and fabrication routes to balance weight, strength, durability, and cost. For instance, 5052 is a staple for marine tanks and hulls, while 6061 and 7075 dominate in high-strength, lightweight assemblies where precision is paramount.
In summary, moving from alloy selection to successful production isn’t just about picking the right material—it’s about integrating design, process, and quality controls from day one. By collaborating closely with manufacturing partners, specifying every detail, and leveraging advanced CNC or casting techniques as needed, you’ll deliver aluminium alloy parts that perform exactly as intended—every time.
Frequently Asked Questions About Aluminium Alloy
1. Is aluminum alloy a good metal?
Aluminum alloys offer an outstanding strength-to-weight ratio and excellent corrosion resistance, making them ideal for marine, industrial, and structural applications. By combining pure aluminum with elements like magnesium, silicon, or copper, these alloys become much stronger than pure aluminum alone, while still being lightweight and easy to form or machine.
2. What is the most common aluminum alloy?
6061 is one of the most widely used aluminum alloys due to its balance of strength, weldability, and corrosion resistance. For general-purpose applications, 3003 is also very popular for its moderate strength and excellent formability, especially in sheet and plate products.
3. What are the main differences between pure aluminum and aluminum alloy?
Pure aluminum is highly conductive and naturally corrosion-resistant, but it is relatively soft and not suitable for high-strength applications. Aluminum alloys, on the other hand, are engineered by adding elements like magnesium, silicon, or zinc to boost strength, tailor ductility, and improve performance for specific uses such as aerospace, marine, or automotive parts.
4. How do I choose the right aluminum alloy for my project?
Start by prioritizing your application needs—consider strength, corrosion resistance, weldability, machinability, and cost. For marine environments, 5000 series alloys are preferred; for high-strength and aerospace needs, 2000 or 7000 series are common; for general structures, 6061 is often the best balance. Reviewing an aluminum grades chart and consulting with manufacturers or CNC machining experts can help ensure the best fit.
5. What surface finishes and treatments are available for aluminum alloys?
Aluminum alloys can be finished with anodizing (for enhanced corrosion and wear resistance), conversion coatings (for improved paint adhesion), and powder or wet paints (for color and UV stability). The right finish depends on the environment and the required durability, with options like decorative anodizing for consumer products and hard anodizing for industrial components.
-
Posted in
aluminium alloy types, aluminum grades, cnc machining, corrosion protection, metal fabrication


