
Aluminium Welding With TIG: 8 Steps From Alloy To Clean Beads
Step 1: Identify the Alloy and Plan the Joint for Reliable TIG Aluminum Welds
Ever wonder why some aluminum TIG welds look flawless while others are brittle or riddled with pores? The answer often lies in the prep—specifically, knowing exactly what you’re welding and how you’re going to join it. Before you even power up your TIG torch, nailing down the alloy type, filler metal, and joint design sets the foundation for strong, clean beads. Let’s break down how to eliminate the guesswork from aluminium welding with TIG.
Alloy Identification Workflow That Saves Rework
Sounds complex? It doesn’t have to be. The first step in any TIG welding of aluminium project is to identify your base alloy. This is crucial because different alloys respond differently to heat, filler, and even joint design. Here’s how you can do it:
- Check mill markings on the part, if available.
- Review part drawings or supplier paperwork for alloy designations (e.g., 6061, 5083).
- Look for physical clues: Extrusions often have fine lines along their length, while castings may show rougher surfaces or complex shapes.
- When in doubt: Consult supplier documentation or, for critical jobs, use non-destructive tests such as spark-free hardness/density checks (The Fabricator).
For instance, if you’re tig welding cast aluminum, you’re likely dealing with an AlSiMg alloy, which will impact your filler choice and joint prep.
Filler Selection Map for Everyday Jobs
Choosing the right filler rod is just as important as knowing your base alloy. The wrong choice can lead to hot cracking, poor strength, or mismatched color after anodizing. Here’s a quick guide to help you match common alloys to the best TIG filler rods:
| Alloy Family | Weldability | Typical Applications | Common Failure Modes | Recommended Filler(s) |
|---|---|---|---|---|
| 1xxx (Pure Al) | Good | Electrical, chemical tanks | Porosity, lack of fusion | 1100, 4043 |
| 3xxx (Al-Mn) | Good | Heat exchangers, cookware | Porosity | 4043, 4943 |
| 5xxx (Al-Mg) | Excellent (watch Mg content) | Marine, pressure vessels, trailers | Hot cracking (high Mg), porosity | 5356 (if Mg > 2.5%), 5554, 5183 |
| 6xxx (Al-Mg-Si) | Good | Structural, automotive, extrusions | Hot cracking, loss of strength | 4043, 4943, 5356 (for color match) |
| 7xxx (Al-Zn) | Limited (caution: many are unweldable) | Aerospace, sports equipment | Hot cracking, stress corrosion | 5356 (for 7005), mechanical fastening often preferred |
For tig welding aluminum rod selection, always verify the alloy compatibility and consider your service environment—especially if post-weld anodizing or high strength is needed.
Joint Design Choices to Control Distortion
Now, imagine you’ve picked the right alloy and filler. The last piece is joint design. The way you prepare and fit your joint can make or break your weld—literally. Here’s a practical checklist before you start gtaw welding aluminum:
- Confirm base alloy family (1xxx–7xxx)
- Know the intended service temperature
- Choose joint type (butt, lap, tee) and check fit-up tolerance
- List filler metal candidate(s) (e.g., 4043 vs 5356)
- Decide if preheat is needed (thicker castings or high Mg alloys)
- Set an interpass temperature plan (keep below 250°F for most alloys)
For example, when tig aluminium welding on marine-grade 5083, a fillet joint with 5356 filler and careful preheat control can help prevent distortion and cracking.
Key Insight: Matching your filler rod to the base alloy is the #1 way to avoid hot cracking in TIG aluminum welds. When in doubt, use a filler that shifts the weld chemistry away from crack-sensitive peaks—never weld autogenously on alloys prone to cracking.
By following this workflow, you’ll sidestep the common traps that lead to weak, brittle, or porous TIG beads. Whether you’re tackling tig welding cast aluminum repairs or setting up a new production run, this foundation ensures every weld starts strong.
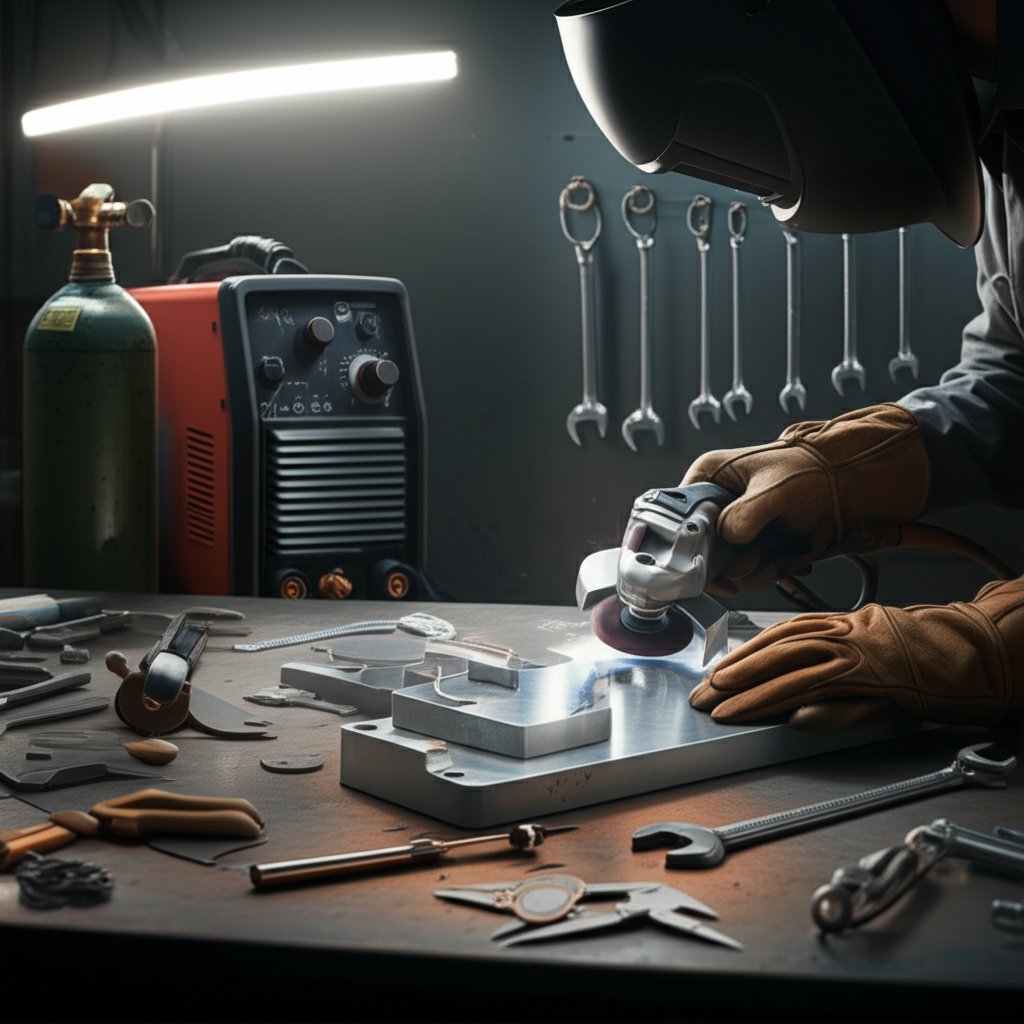
Step 2: Gather Tools and Set Up the TIG Equipment for Aluminum Welding
Imagine setting up for your first clean, crack-free aluminum TIG weld—only to realize your gear is missing a key feature or your torch overheats halfway through the job. Sounds frustrating? That’s why getting your TIG setup right is the backbone of quality aluminium welding with TIG. Let’s walk through the essentials, so your next weld is as smooth as your prep.
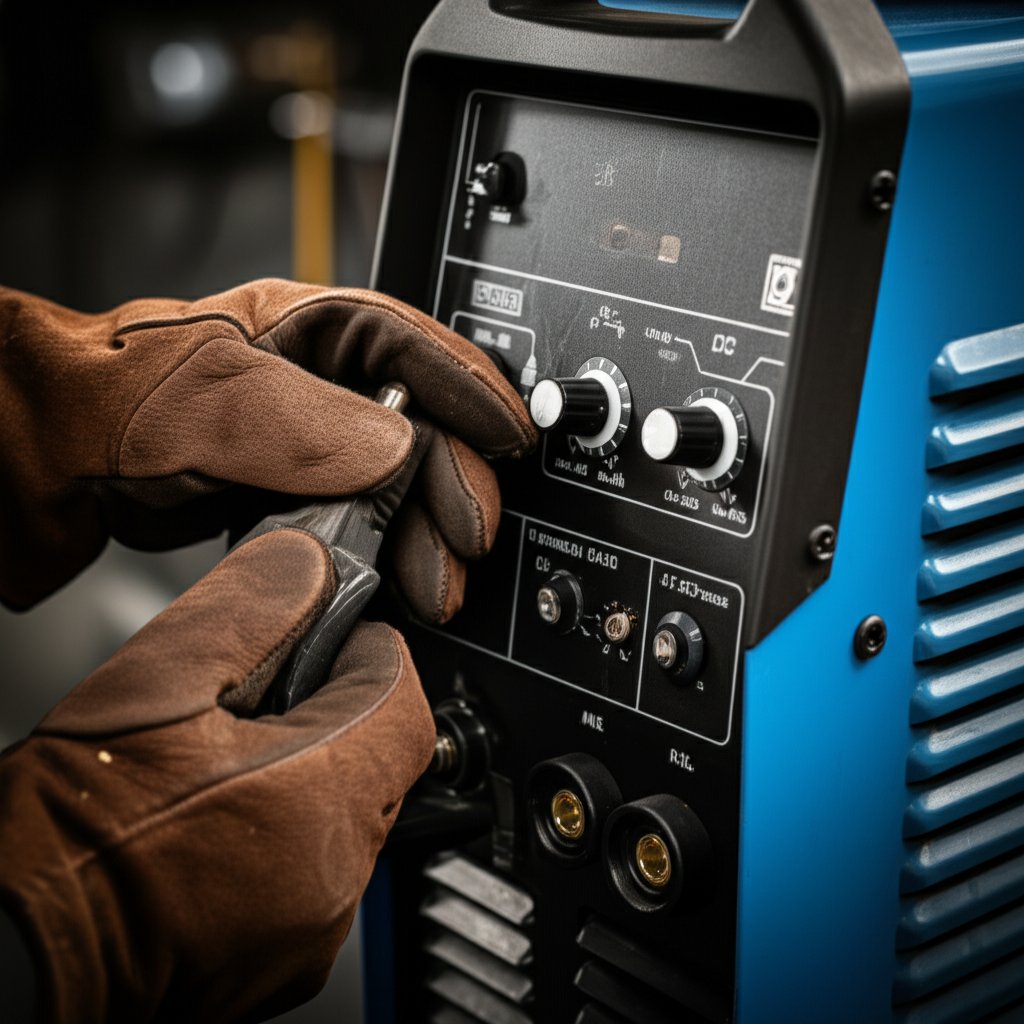
AC-Capable TIG Features That Matter Most
Not all TIG welders are built for aluminum. For reliable results, you’ll want an aluminum TIG welder with these features:
- AC (Alternating Current) capability: Only AC can break through aluminum’s stubborn oxide layer, enabling proper fusion.
- High-frequency start: Ensures a contamination-free arc, especially on thin or sensitive workpieces.
- Adjustable AC balance and frequency: Lets you fine-tune cleaning action versus penetration and shape the arc for tight joints.
- Stable low-end amperage control: Critical for thin-gauge aluminum and precision work.
If you’re shopping for a tig aluminium welder or comparing tig welders for aluminium, these features are non-negotiable for consistent, professional results.
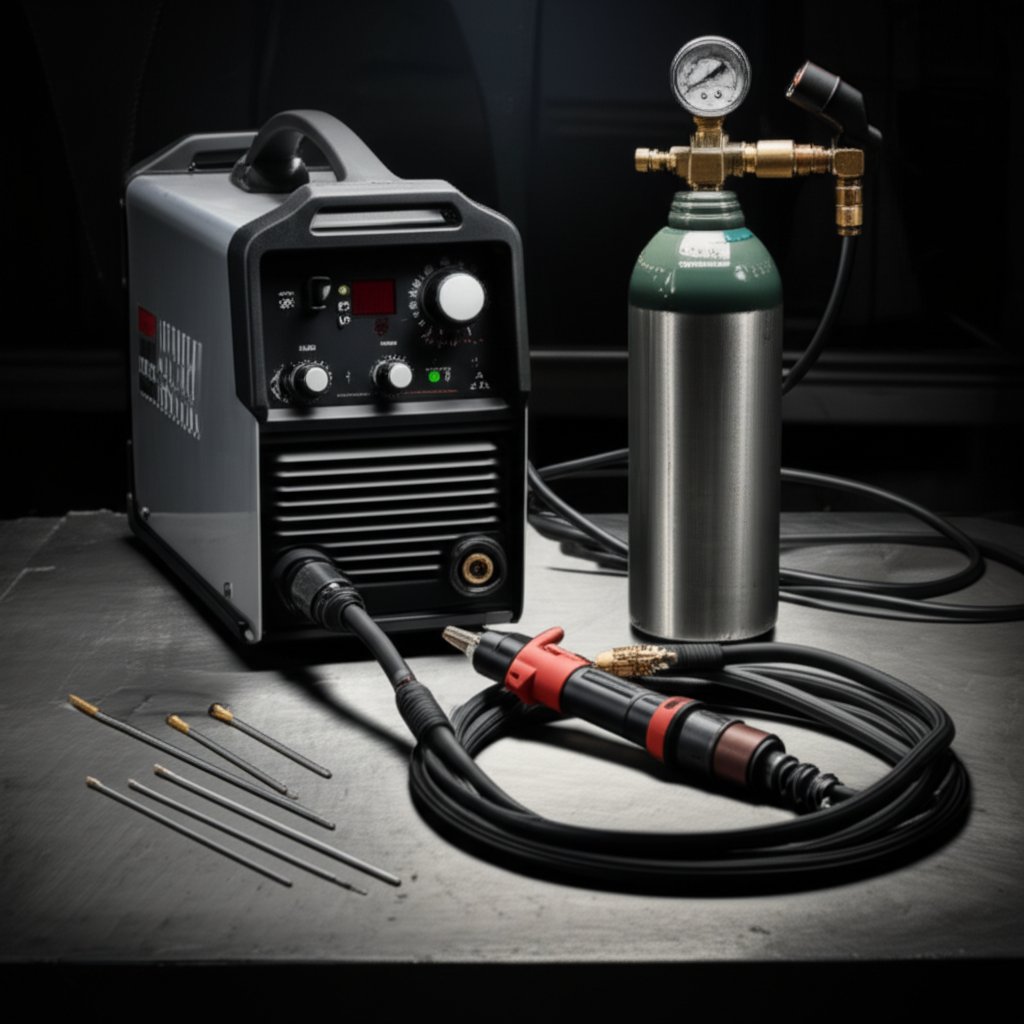
Essential Equipment and Consumables Checklist
- AC-capable TIG power source (with foot pedal or fingertip amperage control)
- Pure argon shielding gas (see “Gas lens and argon for cleaner puddles” below)
- Air- or water-cooled TIG torch matched to your job size
- Gas lens cups for improved shielding coverage
- 2% lanthanated or ceriated tungsten electrodes (ball or truncated tip for AC)
- Matched aluminum TIG filler rods (4043, 5356, etc.)
- Stainless-only wire brush and solvent wipes for prep
- Personal protective equipment (PPE): gloves, flame-resistant clothing, auto-darkening helmet, and safety glasses
Gas Lens and Argon for Cleaner Puddles
What’s the best gas for TIG welding aluminum? For 90% of jobs, you’ll use 100% argon. It delivers a stable arc, excellent cleaning action, and minimal spatter—especially important when welding thin aluminum or chasing that perfect bead (WeldGuru). For thick sections, a helium-argon mix can boost heat input, but stick with pure argon unless you have a specific need.
Gas lens cups are a game-changer, providing a laminar flow that shields the weld zone more evenly and reduces turbulence. This means fewer inclusions and a shinier, defect-free bead.
- Secure your argon cylinder upright and away from traffic.
- Attach the regulator and check for leaks at all fittings.
- Set the flow rate—typically 10–35 cubic feet per hour for aluminum TIG.
- Attach the gas lens cup and verify coverage over your joint area.
Remember, dialing in the right gas flow is just as important as torch angle or filler selection for aluminum TIG welding.
Tungsten and Filler Pairings You’ll Actually Use
Choosing the correct tig tungsten for aluminum is essential. For AC welding, 2% lanthanated (blue) or ceriated (gray) tungsten electrodes provide stable arcs and longer life than pure tungsten. Prepare a slightly balled or truncated tip for the best results on aluminum—this improves arc stability and reduces the risk of tungsten inclusions.
For filler, match rod type and diameter to your base alloy and joint thickness. 4043 is a go-to for general fabrication and castings, while 5356 is preferred for marine or high-strength applications. Both are widely available in standard diameters.
Cable Management and Safety Setup
- Route torch and ground cables to avoid trip hazards and snags.
- Ensure the work clamp is on clean, bare metal—no paint or oxidation.
- Double-check PPE: gloves, FR clothing, helmet, and safety glasses.
Tip: A dry run before striking an arc helps you spot cable issues or awkward torch angles before they become a problem.
| Torch Size | Cooling Method | Amperage Rating | Typical Aluminum Thickness | Duty Cycle Guidance |
|---|---|---|---|---|
| WP9 | Air-cooled | 125A | Thin sheet, up to 1/8" | Short runs, light fabrication |
| WP17 | Air- or water-cooled | 150A | Up to 3/16" | General purpose, moderate duty |
| WP20 | Water-cooled | 250A | 1/4" and thicker | Long runs, heavy-duty work |
| WP26 | Air-cooled | 200A | Heavy fabrication | Shorter cycles, industrial use |
With your TIG equipment dialed in, you’re ready to move on to prepping and fitting your aluminum workpiece—a step that’s just as critical for weld quality as machine setup. Next, we’ll cover cleaning, fit-up, and tacking for flawless aluminum beads.
Step 3: Prepare and Fit Up the Workpiece for Porosity-Free Aluminum TIG Welds
Cleaning That Actually Removes Oxides
Ever wonder why even the best TIG setup can’t save a weld from porosity or weak fusion? The answer is often in the prep. Before welding aluminum with TIG, you need to tackle two stubborn enemies: oil and oxide. Aluminum’s oxide layer melts at a much higher temperature than the base metal and traps contaminants—so skipping proper cleaning is a recipe for trouble.
- Degrease first: Wipe all joint areas with a lint-free rag soaked in an approved solvent such as acetone or mineral spirits. This step removes oils and grease that a brush cannot touch. Never use alcohol; it’s ineffective for degreasing aluminum (The Fabricator).
- Let it dry: Wait for the solvent to fully evaporate before moving on—striking an arc on solvent-wet metal is dangerous and can cause porosity.
- Disrupt the oxide: Use a dedicated stainless steel wire brush (never used on steel) or a fresh abrasive pad. Brush lightly and in one direction, just before welding, to minimize re-oxidation. Avoid aggressive brushing, which can embed contaminants.
These aluminum welding tips aren’t just for show—cleaning is the single most important step for strong, clean beads, whether you’re prepping for tig welding on aluminum sheet or heavy plate.
Fit-Up Rules That Prevent Burn-Through
Now that your metal is spotless, fit-up is next. Consistent joint gaps and flushness are critical for controlling heat input and avoiding burn-through or lack of fusion. Imagine trying to weld aluminum with TIG when the edges are misaligned or the gap is too wide—chances are, you’ll fight with erratic puddles and ugly beads.
- Verify edge prep: Ensure all mating edges are smooth, burr-free, and properly beveled if required.
- Square and clamp: Use clamps or fixtures to hold parts square and flush. Even a small misalignment can cause heat to concentrate and lead to burn-through.
- Check gap size: For most aluminum TIG welding jobs, a tight, uniform gap (about the thickness of the filler rod) is ideal for butt joints. Lap and tee joints may need slightly more clearance to ensure full fusion.
- Plan tacks: Place tacks at regular intervals (every 2–4 inches for thin material, wider for thick) to lock in geometry and minimize distortion.
- Use heat sinks: For thin sections, backing bars or copper heat sinks help absorb excess heat and prevent warping.
Following these aluminium welding tips ensures your fit-up supports—not sabotages—your weld quality.
Smart Tack Strategy for Distortion Control
Ever had your joint shift or distort halfway through a weld? Tacking isn’t just about holding parts together; it’s about controlling distortion from heat expansion. Here’s a quick reference for common joint types and fit-up best practices:
| Joint Type | Preferred Edge Prep | Tack Spacing |
|---|---|---|
| Butt Joint | Square for thin, beveled for thick | Tight gap, tacks every 2–4" |
| Lap Joint | Clean overlap, slight edge break | Moderate gap, tacks every 3–6" |
| Tee Joint | Square or slight bevel at base | Wider spacing, tacks every 4–8" |
Always double-check that tacks are free from porosity and fully fused—they’ll be the anchor points for your final pass.
Preheat and Interpass Control: When and Why
Is preheating always necessary? Not for every job, but it can be a game-changer for thicker sections or when working in cold environments. Mild preheat (just enough to warm the part) helps reduce the risk of cold starts, moisture, and uneven heat distribution—especially for heavy castings or dissimilar thicknesses. But beware: excessive preheat can soften the metal and reduce joint strength.
Remember: Moisture is the enemy—always keep your parts and filler rods dry before and during welding.
Control the interpass temperature (the part’s temperature between weld passes) to avoid overheating and excessive softening. For most aluminum alloys, keeping the interpass temperature below 250°F (120°C) is a safe rule of thumb.
By mastering cleaning, fit-up, and tacking, you’ll set yourself up for consistent, defect-free aluminum TIG welding—and you’ll notice your welds look and perform better, even before you start dialing in machine settings. Next, we’ll explore how to fine-tune AC waveforms and settings to make your puddle behave just the way you want.
Step 4: Dial in AC TIG Settings and Waveforms for Clean, Controlled Aluminum Welds
Dialing AC Balance for Oxide Control
Ever started a bead and wondered why the puddle looks cloudy or the arc feels unstable? That’s where understanding AC TIG welding aluminum settings pays off. Aluminum forms a stubborn oxide layer that melts at a much higher temperature than the base metal. The trick is using AC (alternating current) to both break up that oxide and achieve solid penetration. But how do you balance these competing needs?
Modern AC TIG welders let you adjust the AC balance—the ratio of cleaning (electrode positive, EP) to penetration (electrode negative, EN). More EP means more cleaning action, which is great for dirty or heavily oxidized material, but it also heats your tungsten and can erode the tip. More EN means deeper penetration and less stress on your tungsten, but too much can leave oxides behind, causing porosity or a dull, etched bead.
- For clean, new aluminum, start with 75–80% EN (penetration) and 20–25% EP (cleaning) (Miller Welds).
- If you see black flecks or an oxide “skin” in the puddle, increase EP slightly for more cleaning.
- For older, dirty, or marine-exposed parts, you may need to drop EN as low as 65% to boost cleaning, but watch your tungsten for signs of balling or erosion.
Remember, AC balance doesn’t replace proper part cleaning—it’s your last line of defense against stubborn oxides.
Frequency for Bead Focus and Penetration
Next up is AC frequency, a powerful but often overlooked setting in ac TIG welding aluminum. Frequency controls how many times per second the polarity switches. On older machines, this was fixed at 60 Hz, but modern inverters let you dial it from 60 up to 250 Hz or more.
- Higher frequency (120–250 Hz) tightens the arc, giving you a narrower, more focused bead—ideal for thin sheet, tight corners, or when you want crisp weld toes.
- Lower frequency (80–120 Hz) produces a wider, softer arc, which is helpful for thick fillets or outside corner joints where you want a broader bead profile.
Imagine you’re welding a thin edge and the arc keeps wandering—bumping the frequency up can help you “draw” with precision and avoid melting away the edge.
Polarity Pitfalls to Avoid: Tungsten Prep and Arc Control
So, what polarity for TIG welding aluminum? Always use AC—never DC—for aluminum, because only AC provides the cleaning action you need. This is the core of aluminum TIG welding polarity. The EN cycle (current from electrode to work) does the welding, while the EP cycle (current from work to electrode) cleans the oxide.
Your tungsten prep matters, too. For AC TIG, use a 2% lanthanated or ceriated tungsten with a slightly balled or truncated tip—this stabilizes the arc and resists erosion. Too much EP (over-cleaning) will ball the tip excessively, leading to a wide, unstable arc and possible tungsten inclusions in your weld.
Over-cleaning with excessive EP can erode your tungsten, destabilize the arc, and wash out bead toes. Find the lowest EP setting that keeps the puddle shiny and oxide-free.
Quick Reference: AC TIG Settings for Common Aluminum Welds
| Scenario | AC Balance (EN/EP) | AC Frequency | Torch Travel Style |
|---|---|---|---|
| Thin sheet edges (≤1/8") | 80% EN / 20% EP | 150–250 Hz | Steady, short arc, moderate speed |
| Thick fillet welds (≥1/4") | 70% EN / 30% EP | 80–120 Hz | Slower, wider torch weave |
| Corner joints | 75% EN / 25% EP | 90–120 Hz | Steady, slight push angle |
Use these as starting points—always test on scrap and adjust for your specific material and joint.
Common Mistakes When Adjusting TIG Aluminum Settings
- Too much cleaning (EP): Causes tungsten balling, arc instability, and bead washout. Reduce EP if your tungsten erodes quickly.
- Too low frequency on thin edges: Leads to a wide, wandering arc and poor bead definition. Bump frequency up for sharper control.
- Inconsistent arc length: Increases heat input and can cause a runaway puddle or lack of fusion. Keep a short, steady arc for best results.
Mastering these settings means you’ll spend less time fighting the puddle and more time laying down smooth, strong beads. Ready to put your AC TIG skills to the test? Next, we’ll walk through a step-by-step welding technique to turn your setup into flawless aluminum welds.
Step 5: Execute the Weld with a Proven TIG Aluminum Procedure
Foolproof TIG Start Without Contamination
Wondering how to go from a perfectly prepped joint to a strong, clean bead? The secret is a repeatable TIG technique—one that you can trust every time you strike an arc. If you’ve set up your machine and prepared your workpiece, now it’s time to weld aluminum with TIG like a pro. Here’s a step-by-step guide that takes the guesswork out of how to tig weld aluminum and ensures every pass is consistent and defect-free.
- Staggered tacks to lock geometry: Before running your weld, place tacks at regular intervals along the joint. This holds parts in alignment and minimizes distortion as you work.
- High-frequency start with minimal arc length: Use your TIG welder’s high-frequency start to initiate the arc without touching the tungsten to the aluminum. Keep the arc length short—about 1/8 inch—for better control and less contamination.
- Establish a small, shiny puddle before adding filler: Pause briefly to let the base metal form a glossy, reflective puddle. This is your cue that the oxide layer is broken and the metal is ready for filler.
- Dip filler on the leading edge, withdraw to avoid freezing: Feed the filler rod into the front of the puddle, then pull it back quickly. This technique avoids freezing the rod in the weld and traps fewer contaminants.
- Maintain a steady torch angle: Hold the torch nearly perpendicular to the work, with a slight push angle (about 10–15°). This keeps the arc stable and the shielding gas covering the puddle.
- Control travel speed for bead consistency: Move at a steady pace—think about 7 inches per minute as a baseline for manual TIG on aluminum. Too slow and you risk overheating; too fast and you’ll see lack of fusion or underfill.
- Pause to add filler at tie-ins: When you reach the end of a bead or need to restart, pause and add a little extra filler. This ensures a smooth transition and prevents undercut at the overlap.
- Taper current at the end and backfill the crater: As you finish, slowly reduce amperage while adding filler. This fills the crater at the end of the weld, reducing the risk of crater cracking—a common failure point in aluminum welds.
Filler Feeding Rhythm for Consistent Beads
Ever notice those perfect, stacked-dime beads on professional TIG welds? That’s the result of a smooth, consistent filler feeding rhythm. The trick is to match your filler dips to your travel speed—aim for a quick, light dip once per second for even spacing. On thicker material, a slight side-to-side torch oscillation can help tie in the edges and improve fusion.
- Puddle sheen: The puddle should stay shiny and reflective. A dull or cloudy puddle means you’re losing shielding or moving too slowly.
- Bead width tolerance: Keep the bead width consistent—too wide indicates excess heat, too narrow suggests not enough fusion.
- Color of the heat-affected zone: A light, straw-colored zone next to the bead is normal. Dark, sooty edges can signal overheating or poor gas coverage.
The crater at the end of your weld is always the weakest point if left unfilled. Always backfill with filler and taper off your current to prevent cracks.
Crater Fill Techniques That Stop Cracks
Not sure how to weld aluminum with a TIG and avoid those annoying end cracks? The answer is in your finish. As you approach the end of your weld, start easing off the pedal (or dial) to reduce current while feeding in a bit more filler rod. This gradual taper fills the crater and prevents the rapid cooling that causes hot cracking—a notorious issue in aluminum TIG welding.
| Material Thickness | Recommended Interpass Temp | Cool-Down Cue |
|---|---|---|
| Thin (< 1/8") | Below 250°F (120°C) | Can touch for a second without discomfort |
| Medium (1/8" – 1/4") | Below 250°F (120°C) | Warm to the touch, but not hot |
| Thick (> 1/4") | Below 300°F (150°C) | Needs a brief pause between passes |
Staying within these temperature ranges helps you avoid excessive softening and keeps your welds strong and clean.
How Do You TIG Weld Aluminum Like a Pro?
Practice makes perfect, but following this standardized TIG procedure removes most of the mystery from how to weld aluminum with TIG. Focus on clean starts, steady travel, and mindful crater fill. Your beads will come out smoother, stronger, and more reliable—whether you’re tackling thin sheet, structural parts, or intricate assemblies.
Next, we’ll explore how pulse TIG can help you control heat even further, especially on thin or heat-sensitive aluminum sections.
Step 6: Control Heat with Smart AC Pulse TIG Strategy
Peak and Base Current Made Simple
Ever struggled to weld thin aluminum without burning through or warping the metal? That’s where pulse TIG shines. By switching rapidly between a high (peak) and low (base) current, pulse TIG lets you control heat input with surgical precision—especially important in tig aluminum welding or when tackling heat-sensitive assemblies.
- Peak current: Delivers the punch needed for fusion and penetration. Think of this as the “workhorse” part of the cycle.
- Base current: Drops the heat, allowing the weld puddle to cool and stabilize, reducing the risk of overheating or distortion. This is your “rest” phase.
- Pulse rate (Hz): Controls how many times per second the current switches from base to peak. Lower rates (1–2 Hz) create distinct ripples, while higher rates (20+ Hz) smooth out the bead for a more uniform appearance.
- Duty cycle: The percentage of time spent at peak current in each cycle. Higher duty cycles mean more heat, lower ones help keep things cool.
Imagine welding a thin edge on a 6061 sheet: with the right aluminum tig settings, you can float the puddle along the joint without melting the edge, thanks to a carefully chosen pulse pattern.
Pulse Rate and Duty Cycle for Bead Control
When does pulsing really help? Picture yourself joining thin aluminum sheet, welding dissimilar thicknesses, or working on a heat-sensitive part where distortion is a real risk. Pulse TIG isn’t just about avoiding burn-through—it’s also about controlling bead profile and appearance, especially for that signature “fish-scale” look in aluminium welding tig.
| Scenario | Suggested Pulse Rate | Duty Cycle | Bead Texture/Effect |
|---|---|---|---|
| Thin sheet edges (<1/8") | 1–2 Hz | ~30–50% | Distinct ripples, max edge control |
| Dissimilar thickness joints | 2–10 Hz | 40–60% | Balanced heat, even fusion |
| Heat-sensitive assemblies | 10–30 Hz | 20–40% | Smoother bead, less distortion |
| Cosmetic welds (fish-scale look) | 1–2 Hz | 30–50% | Pronounced, even ripples |
| General fabrication | 10–30 Hz | 40–60% | Smooth, controlled bead |
For most aluminum welding tig jobs, start with a pulse rate around 1–2 Hz for visible ripples or 20–30 Hz for a smooth finish. Adjust the duty cycle to manage heat: higher for thick parts, lower for thin or delicate work. Always test your settings for tig welding aluminum on scrap first to dial in the best results.
AC Pulse for Cleaner Aluminum Beads
Wondering how pulsing interacts with AC TIG on aluminum? Here’s the secret: pulsing on AC not only manages heat but also helps maintain oxide cleaning during the cooling phase. This means you get a shinier, cleaner bead and less risk of black inclusions or cloudy puddles. It’s a smart way to optimize your tig settings for aluminum without sacrificing weld quality.
- Sync your filler dips with the pulse peak—add filler when the arc is hottest for best fusion.
- Keep arc length steady during the base current; this stabilizes the puddle and reduces spatter.
- Avoid setting the base current too high—if the puddle never cools, you lose the benefits of pulsing.
- Use a foot pedal for real-time control, especially on variable thickness joints.
Pulse TIG is a powerful heat management tool—but it won’t fix poor fit-up or bad prep. Use it to fine-tune your weld, not as a substitute for proper technique.
Mastering pulse TIG takes practice, but it’s one of the most effective tig welding aluminum tips for challenging jobs. Whether you’re after edge control, reduced distortion, or a show-quality bead, pulse settings give you the flexibility to tailor the weld to your project’s needs. Next, we’ll look at quick-reference tables and troubleshooting tips to keep your TIG process running smoothly.
Step 7: Quick-Reference TIG Settings and Troubleshooting Matrix for Aluminum Welds
At-a-Glance TIG Settings for Aluminum
Ever reached for your torch and wondered, “What settings should I use for this thickness?” Or maybe you’re juggling filler rods and tungsten sizes, trying to remember which combo works best. Instead of guessing, use these quick-reference tables—designed to help you dial in the right aluminum welding settings every time.
| Material Thickness | Tungsten Diameter | Filler Rod Type/ Diameter |
Amperage Range | AC Balance / Frequency | Shielding Gas Flow |
|---|---|---|---|---|---|
| 1/16" (1.6 mm) | 1/16" (1.6 mm) | 4043 or 5356 1/16" (1.6 mm) |
45–70 A | 75–80% EN / 20–25% EP 120–200 Hz |
10–15 CFH |
| 1/8" (3.2 mm) | 3/32" (2.4 mm) | 4043 or 5356 3/32" (2.4 mm) |
90–130 A | 75% EN / 25% EP 100–150 Hz |
15–20 CFH |
| 1/4" (6.4 mm) | 1/8" (3.2 mm) | 5356 1/8" (3.2 mm) |
150–210 A | 70–75% EN / 25–30% EP 80–120 Hz |
18–25 CFH |
| 3/8" (9.5 mm) and up | 1/8" (3.2 mm) | 5356 1/8" (3.2 mm) or larger |
200–300 A | 70% EN / 30% EP 60–100 Hz |
20–30 CFH |
Use this aluminum tig welding settings chart as a starting point. Always consult your welder’s manual or published manufacturer charts for precise numbers and adjust for your project.
| Joint Type | Travel Speed | Torch Cup Size |
|---|---|---|
| Butt Joint | Moderate to Fast (steady pass) | #6–#8 (9–13 mm) |
| Lap Joint | Moderate (watch for undercut) | #7–#10 (11–16 mm) |
| Tee Joint | Slower (ensure fusion at root) | #8–#10 (13–16 mm) |
These tendencies help you select the right torch cup and pace for your joint. For best results, test on scrap and fine-tune your aluminum tig weld process as needed.
Symptom-Based Fixes That Actually Work
Even with the right welding parameters for tig welding, issues can pop up. Here’s a troubleshooting matrix to help you spot, diagnose, and fix the most common problems in aluminum TIG welding:
| Symptom | Likely Cause | Corrective Action |
|---|---|---|
| Porosity (holes, bubbles) | Contaminated base/filler, moisture, poor gas coverage | Clean thoroughly, dry filler rods, check gas flow and coverage |
| Lack of Fusion | Low amperage, fast travel, poor fit-up, long arc | Increase amperage, slow travel, improve fit-up, shorten arc |
| Excessive Soot | Insufficient gas, torch angle, draft, contaminated tungsten | Increase gas flow, correct torch angle, shield from wind, regrind tungsten |
| Burn-Through | High amperage, slow travel, thin base, poor fit-up | Reduce amperage, increase speed, use backing, improve fit |
| Undercut | High travel speed, torch angle, excessive heat | Slow down, adjust torch, reduce amperage |
| Crater Cracking | Rapid cooling, no crater fill, wrong filler | Taper current at end, add filler, use correct rod |
Tip: Persistent porosity? Dry your filler rods and increase your cleaning action—moisture is the #1 enemy of clean aluminum TIG welds.
- Redo test coupons to confirm settings before production runs.
- Inspect weld etch for full fusion—look for a uniform, shiny cross-section.
- Verify gas coverage by checking bead appearance—dull or sooty beads mean poor shielding.
Tables You Can Tape to the Welding Booth
Print these tables and keep them at your welding station. With these aluminum tig tips at your fingertips, you’ll spend less time troubleshooting and more time producing clean, strong welds. By using a systematic approach, you can turn even challenging jobs into repeatable successes—no more guesswork, just solid results every time you tackle aluminum tig welding settings.
Ready to put your knowledge to work? In the next step, we’ll explore when it makes sense to outsource complex or high-volume TIG-welded aluminum projects to a certified fabrication partner for even greater efficiency and quality.
Step 8: Should You Outsource TIG Aluminum Welding?
When Outsourcing TIG Aluminum Welding Makes Sense
Ever faced a situation where your team is swamped, deadlines are tight, or the complexity of a TIG-welded aluminum assembly is beyond your shop’s comfort zone? You’re not alone. Deciding whether to invest in more aluminum welding equipment, hire specialized staff, or outsource can be tough. Let’s break down when partnering with a certified fabrication shop is the smartest move for your business.
- Tight delivery timelines: You need finished parts in days, not weeks.
- Large production runs: Scaling up quickly would require more aluminum welding machines and floor space than you have.
- Complex assemblies: Multi-process builds needing laser cutting, precision bending, and TIG welding in one seamless workflow.
- Advanced finishing: Projects that must be anodized or powder coated for durability or aesthetics.
- Prototype to production: You want to move from a single prototype to a full run without retooling your entire shop.
Imagine you’re bidding on a contract that requires rapid turnaround and tight tolerances. Instead of overextending your crew or investing in another aluminum welder machine, outsourcing can help you deliver on time and budget—while maintaining quality.
In-House TIG vs. Outsourcing: A Side-by-Side Comparison
| Criteria | Aluminum Sheet Metal Fabrication (Certified Partner) | Your In-House TIG Welding |
|---|---|---|
| Lead Time | As fast as 3 days (prototype or production) Integrated workflow speeds delivery |
Dependent on staff, machine capacity, and scheduling; often longer for complex jobs |
| Capacity for Complex Assemblies | Laser cutting, bending, TIG welding, and finishing under one roof; scalable to large volumes | Limited by available aluminum welding equipment, floor space, and skilled labor |
| Finishing Options | Anodizing, powder coating, and other custom finishes available in-house | Often requires sending parts to third-party finishers, adding time and cost |
| Quality Assurance | ISO 9001 certified QA ensures every part meets specs; less rework, more consistency | QA depends on internal processes; may lack formal certification or traceability |
| Cost Efficiency | No need to invest in new aluminum welding machines or hire extra staff; pay per project | Requires ongoing investment in aluminum welder machines, training, and maintenance |
| Inventory/Logistics | Can store finished goods for rush orders; manages shipping and packaging | Requires dedicated warehouse space and inventory management |
Choosing a partner like XTJ's cnc machining services gives you access to high-precision TIG-welded parts, whether you’re working on a one-off prototype or a full-scale production run. Their advanced aluminum welding equipment and ISO 9001 quality assurance streamline every step—from laser cutting to final finish—so you can focus on your core business instead of troubleshooting weld defects or machine downtime.
What to Look for in a Certified TIG Fabrication Partner
- Proven experience with TIG welding aluminum and complex assemblies
- Modern, well-maintained aluminum welding equipment
- Integrated finishing options (anodizing, powder coating, etc.)
- ISO 9001 or equivalent quality certification
- Transparent quoting and clear communication throughout the project
According to industry experts, outsourcing to a partner with in-house engineering, finishing, and inventory management can reduce total project costs and minimize scheduling headaches, especially for high-volume or custom-fit jobs.
ISO 9001-certified partners reduce rework costs and deliver consistent quality—especially important when deadlines or end-use reliability are critical.
Balancing Trade-Offs: Is Outsourcing Always the Answer?
Of course, outsourcing isn’t always the best fit. If you have a steady volume of similar parts, a good TIG welder for aluminum, and the right crew, in-house production can be cost-effective. But as projects scale, complexity rises, or finishing needs expand, working with a certified partner helps you stay agile and competitive—without the overhead of constant equipment upgrades or training.
So, next time you’re weighing whether to add another aluminum welder machine or outsource, consider the full picture: lead time, quality, finishing, and your team’s bandwidth. The right decision frees up your resources and ensures every TIG-welded aluminum part meets the highest standards, from the first bead to the last shipment.
Frequently Asked Questions About Aluminium Welding With TIG
1. What are the best settings for TIG welding aluminum?
For most aluminum TIG welding, use AC polarity with 100% argon shielding gas. Start with 75–80% EN balance for penetration, 120–200 Hz frequency for arc focus, and adjust amperage based on material thickness. Always consult your welder's manual or a trusted settings chart for precise numbers.
2. Why is AC used for TIG welding aluminum instead of DC?
AC is essential for TIG welding aluminum because it alternates current direction, providing both oxide cleaning (EP) and penetration (EN). DC lacks this cleaning action, leading to poor weld quality and oxide contamination.
3. How do I choose the right filler rod for TIG welding aluminum?
Match the filler rod to your base alloy and application. For general use, 4043 or 5356 rods are common. Check alloy compatibility, desired strength, and post-weld finishing needs like anodizing to select the best option.
4. What equipment is needed for TIG welding aluminum?
You'll need an AC-capable TIG welder, pure argon gas, a suitable torch (air- or water-cooled), a gas lens, 2% lanthanated or ceriated tungsten, and compatible aluminum filler rods. Proper PPE, such as gloves and an auto-darkening helmet, is also essential.
5. When should I consider outsourcing aluminum TIG welding?
Outsource when you need rapid turnaround, complex assemblies, integrated finishing, or ISO 9001-certified quality. Certified partners with advanced aluminum welding equipment can handle large runs or prototypes, freeing your team for core work and ensuring consistent results.
-
Posted in
aluminum filler rods, aluminum TIG setup, sheet metal fabrication, TIG welding aluminum, welding troubleshooting


