
Essential Techniques for CNC Milling Acrylic Parts
TL;DR
CNC milling is a highly effective method for creating precise and visually appealing acrylic parts. Success in CNC milling acrylic parts hinges on using the correct tools, particularly single-flute or 'O-flute' bits designed for plastics, and maintaining optimal machine settings. High spindle speeds combined with appropriate feed rates are crucial to prevent the material from melting or cracking, ensuring a clean, smooth finish.
Why Acrylic is an Ideal Material for CNC Machining
Acrylic, also known as Polymethyl Methacrylate (PMMA), is a thermoplastic polymer that has become a popular choice in manufacturing for its unique combination of properties. Often used as a lightweight and more durable alternative to glass, its characteristics make it exceptionally well-suited for the precision of CNC machining. This process allows for the creation of intricate components with high accuracy, making it a preferred method for both prototyping and full-scale production runs.
The advantages of using acrylic are clear and compelling, especially when precision and aesthetics are paramount. Its inherent machinability means it can be cut and shaped efficiently, often resulting in lower tool wear and reduced production costs compared to harder materials. This balance of performance and workability makes it a go-to material across numerous industries, from automotive to medical devices.
Key benefits that make acrylic a superior choice for CNC milling include:
- Optical Clarity: Acrylic is renowned for its high transparency, allowing up to 92% of light to pass through it, which is even greater than glass. This makes it perfect for applications like display cases, lenses, and light fixtures where visual appeal is critical.
- Durability and Weather Resistance: It is highly resistant to impact, abrasion, UV light, and general weathering. Unlike many other plastics, acrylic parts maintain their strength and clarity when exposed to outdoor elements, making them suitable for everything from signage to architectural facades.
- Lightweight: Acrylic is approximately 50% lighter than glass, which simplifies handling, reduces shipping costs, and lowers the structural support requirements for finished assemblies.
- Ease of Machining: The material is relatively soft and becomes malleable with heat, which allows for high-speed routing. When machined correctly, it produces smooth edges that often require minimal post-processing or polishing.
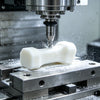
Essential Tools and Setup for Milling Acrylic
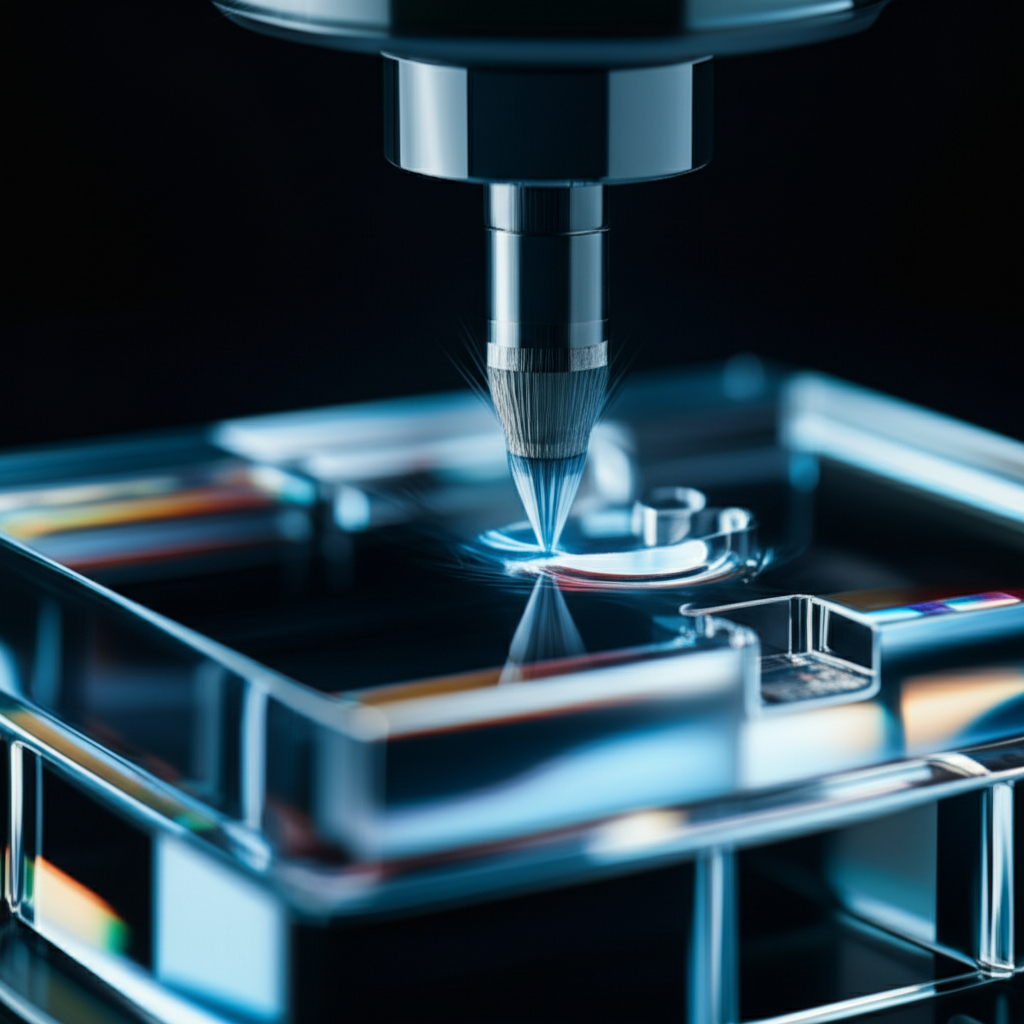
Achieving a professional-quality finish when CNC milling acrylic requires a specific setup and the right choice of tools. Because acrylic is prone to melting, chipping, or stress cracking, careful preparation is key to success. From the cutting bit to how the material is held in place, each element plays a crucial role in the final outcome.
Choosing the Right CNC Bit
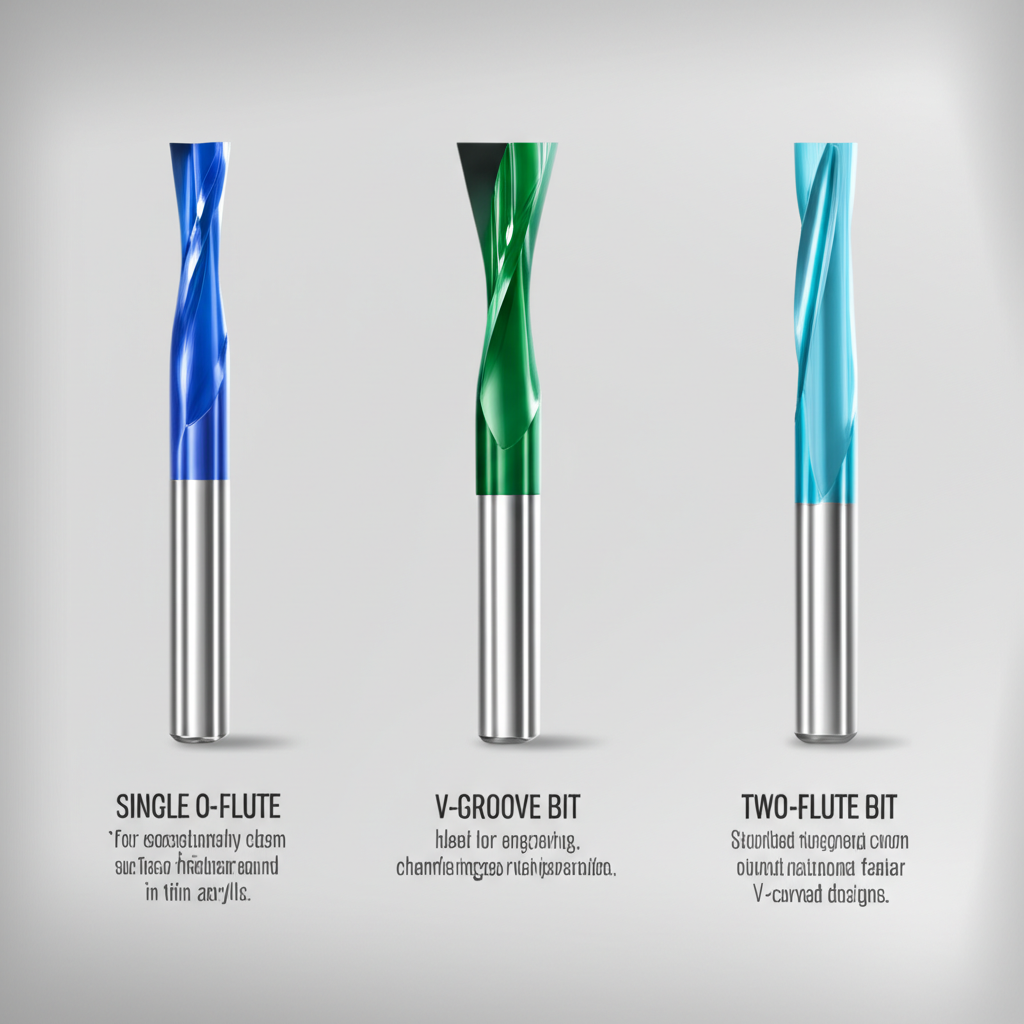
The single most important tool is the cutter itself. Using a bit designed specifically for plastics is non-negotiable. Cutters previously used on metal should be avoided, as even minor nicks on the cutting edge can cause a poor surface finish. For acrylic, carbide bits are a popular choice.
The most highly recommended bits are single-flute or 'O-flute' end mills. These bits feature a unique geometry that excels at clearing chips away from the cutting path. This rapid chip evacuation is vital to prevent plastic from melting and welding itself back onto the part or the tool. For engraving, a 60° V-carving bit is often the perfect choice for creating sharp, clean lines.
Workholding Techniques
Properly securing the acrylic sheet or block is critical to prevent vibration, which can lead to inaccuracies and a poor finish. If the workpiece moves even slightly during machining, the entire part can be ruined. Several methods are effective for holding acrylic:
- Vacuum Tables: For larger sheets, a vacuum table provides the most consistent and secure hold across the entire surface.
- Double-Sided Tape: A high-quality, strong double-sided tape is a surprisingly effective method for smaller parts, ensuring they remain flat and fixed.
- Clamps: Mechanical clamps can be used, but care must be taken not to overtighten them, as this can introduce stress into the material and cause it to crack or bow.
Coolant and Chip Evacuation
Heat is the primary enemy when machining acrylic. As the cutter spins, it generates friction and heat, which can easily melt the material. To combat this, effective chip evacuation and sometimes cooling are necessary. For most applications, a steady blast of compressed air directed at the cutting tool is sufficient. This clears away hot chips and provides some cooling. While liquid coolants can be used, it's essential to ensure they are compatible with acrylic, as some chemicals can cause crazing or cracking.
Optimal Speeds and Feeds for a Flawless Finish
Dialing in the correct speeds and feeds is arguably the most challenging aspect of CNC milling acrylic parts, yet it is essential for achieving a clean, polished finish. This involves balancing three key variables: spindle speed (RPM), feed rate (how fast the machine moves), and depth of cut. An incorrect setting in any of these areas can lead to melting, chipping, or a rough surface. The goal is to cut a chip that carries heat away from the workpiece, rather than letting the tool rub and generate excessive friction.
A general rule of thumb is to use a high spindle speed paired with a relatively fast feed rate. According to some sources, a spindle speed of at least 18,000 RPM is recommended as a starting point. If you use a higher RPM, you must also increase the feed rate to prevent melting. However, a feed rate that is too fast can put excessive pressure on the material and the tool, potentially causing the part to break or be dislodged from its workholding. It is always best to perform test cuts on a piece of scrap material to fine-tune your settings before beginning the final part.
For those undertaking critical projects or requiring high-volume production with guaranteed precision, navigating these complexities can be time-consuming. In such cases, partnering with a specialized service can be a strategic advantage. For instance, professional CNC machining services from a provider like XTJ can deliver high-precision custom parts with tight tolerances, leveraging advanced equipment and expertise to bypass the steep learning curve of optimizing machine parameters.
Here is a table with suggested starting parameters. Always consult your tool manufacturer's recommendations and adjust based on your specific machine and material.
| Bit Diameter | Spindle Speed (RPM) | Feed Rate (in/min) | Depth of Cut (per pass) |
|---|---|---|---|
| 1/8" (3.175mm) | 18,000 - 20,000 | 60 - 90 | 0.0625" (1.5mm) |
| 1/4" (6.35mm) | 18,000 - 22,000 | 80 - 120 | 0.125" (3mm) |
| 1/2" (12.7mm) | 16,000 - 20,000 | 100 - 150 | 0.25" (6mm) |
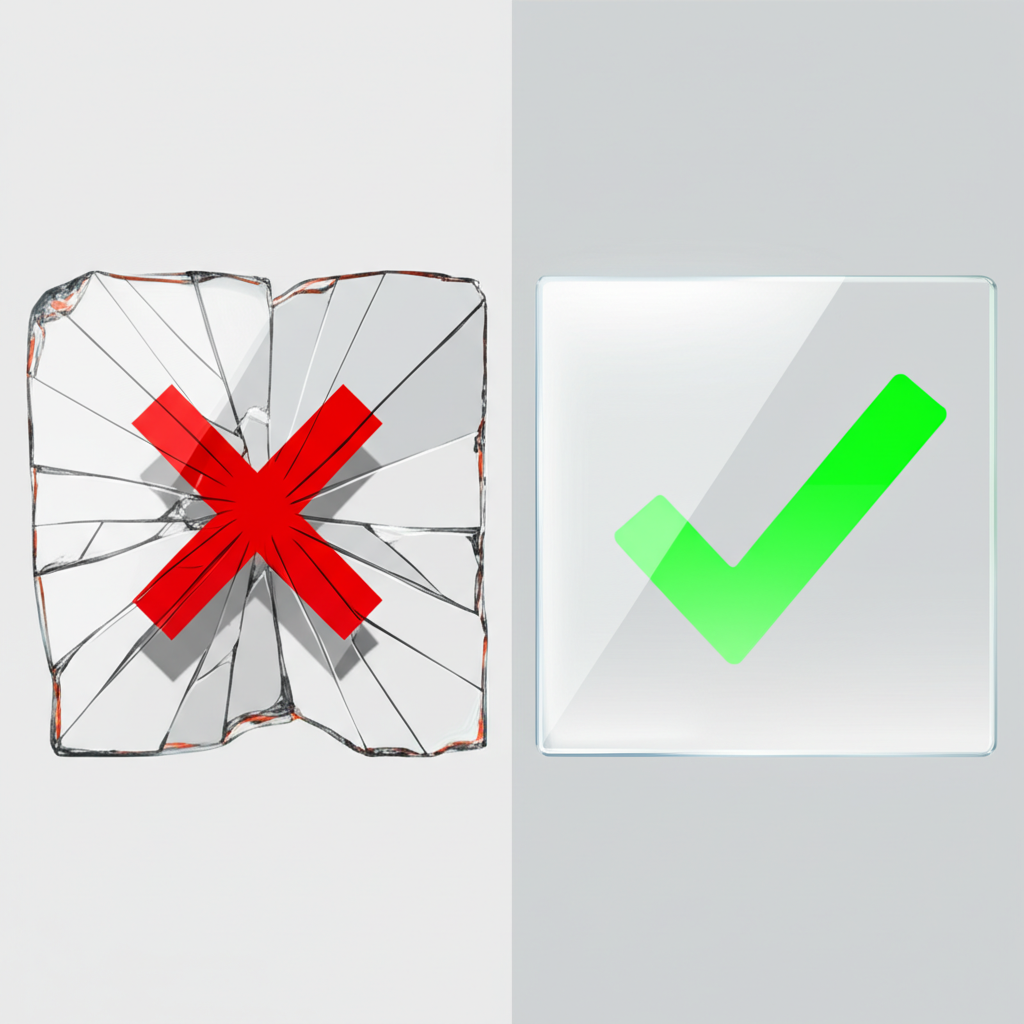
Common Challenges and Troubleshooting Solutions
Even with careful preparation, milling acrylic can present challenges. Understanding the cause of common problems is the first step toward solving them and achieving consistent, high-quality results. Most issues relate to heat management, tool choice, or machine settings.
Problem: Melting the Acrylic
This is the most frequent issue, occurring when the chips don't clear away fast enough and the tool's friction overheats the material. The plastic becomes gummy and can weld itself back into the cut or clog the tool.
- Solution: Increase the feed rate. Moving the tool faster through the material creates a larger chip that carries more heat away.
- Solution: Use an O-flute bit designed for plastics to maximize chip evacuation.
- Solution: Reduce the spindle speed (RPM) slightly if increasing the feed rate isn't possible, but be careful not to go too slow, which can cause chipping.
- Solution: Implement an air blast to actively clear chips and cool the tool.
Problem: Chipping and Cracking
Acrylic is a brittle material, and applying too much force or using the wrong tool can easily cause it to chip at the edges or develop stress cracks.
- Solution: Use a very sharp bit. A dull tool will push and tear the material rather than shearing it cleanly.
- Solution: Reduce the feed rate or the depth of cut to lessen the cutting pressure.
- Solution: Ensure the workpiece is securely fastened and does not vibrate during cutting.
- Solution: Use a toolpath that ramps into the material smoothly instead of plunging straight down.
Problem: Poor Surface Finish
A rough or cloudy surface finish can be caused by tool marks, vibration, or slight melting. The goal is a smooth, transparent edge right off the machine.
- Solution: Verify the cutter is sharp and free of nicks. A dedicated bit for acrylic is best.
- Solution: Optimize your speeds and feeds. A finish pass with a shallower depth of cut and a moderate feed rate can often clean up the edge.
- Solution: For the highest level of clarity, post-processing techniques like flame polishing or buffing can be used to achieve a glass-like finish.
Frequently Asked Questions
1. Can you CNC mill acrylic?
Yes, absolutely. Acrylic is one of the most popular plastic materials for CNC machining due to its excellent machinability, durability, and optical clarity. It can be cut into complex and precise shapes, making it an ideal choice for a wide range of industrial and commercial applications as a superior alternative to materials like glass.
2. What RPM is needed for CNC acrylic?
A high spindle speed is generally recommended for cutting acrylic to help prevent melting. A good starting point is at least 18,000 RPM. This high speed should be paired with an appropriately fast feed rate to ensure the tool is cutting chips effectively rather than rubbing and generating excess heat.
3. What materials cannot be CNC machined?
While CNC machining is incredibly versatile, it is not suitable for all materials. Generally, materials that are very soft, flexible, or gummy, like rubber and silicone, are difficult to machine. Other challenging materials include carbon fiber composites (which are highly abrasive), ceramics, and hardened glass, which can shatter or cause extreme tool wear.
4. What CNC bit for acrylic?
The best choice for cutting acrylic is a solid carbide, single-flute bit, often called an 'O-flute' bit. Its design is specifically engineered to pull chips up and away from the cut, which is essential for preventing melting. For engraving purposes, a 60° V-carving bit is an excellent option for creating detailed and clean lines.
-
Posted in
acrylic parts, cnc machining, CNC milling, plastic fabrication, PMMA
