
Proven Strategies to Reduce CNC Machining Costs

TL;DR
To effectively reduce CNC machining costs, focus on Design for Manufacturability (DFM). This involves simplifying your part's geometry, adding radii to internal corners, using standard tool sizes, and loosening tolerances where possible. Strategic material selection that balances cost with machinability, minimizing the number of machine setups, and increasing order volume to leverage economies ofscale are also critical for significant savings.
Design for Manufacturability (DFM): The Primary Cost-Saving Lever
The most significant factor influencing CNC machining costs is your part's design. Design for Manufacturability (DFM) is the practice of designing parts in a way that makes them as easy and economical to manufacture as possible. Every decision, from the shape of a corner to the thickness of a wall, directly impacts the time, tooling, and complexity required for machining, which all translate to cost. By optimizing your design upfront, you can eliminate unnecessary expenses before a single chip of metal is cut.
A core principle of DFM is simplifying geometry. Complex shapes often require multi-axis machines and multiple setups, where the part must be manually repositioned. Each setup adds labor costs and introduces potential for error. As Fictiv explains, designing a part that can be machined from the fewest sides possible, ideally in a single setup, is a highly effective cost-reduction strategy. This might involve splitting a complex component into simpler parts that can be assembled later.
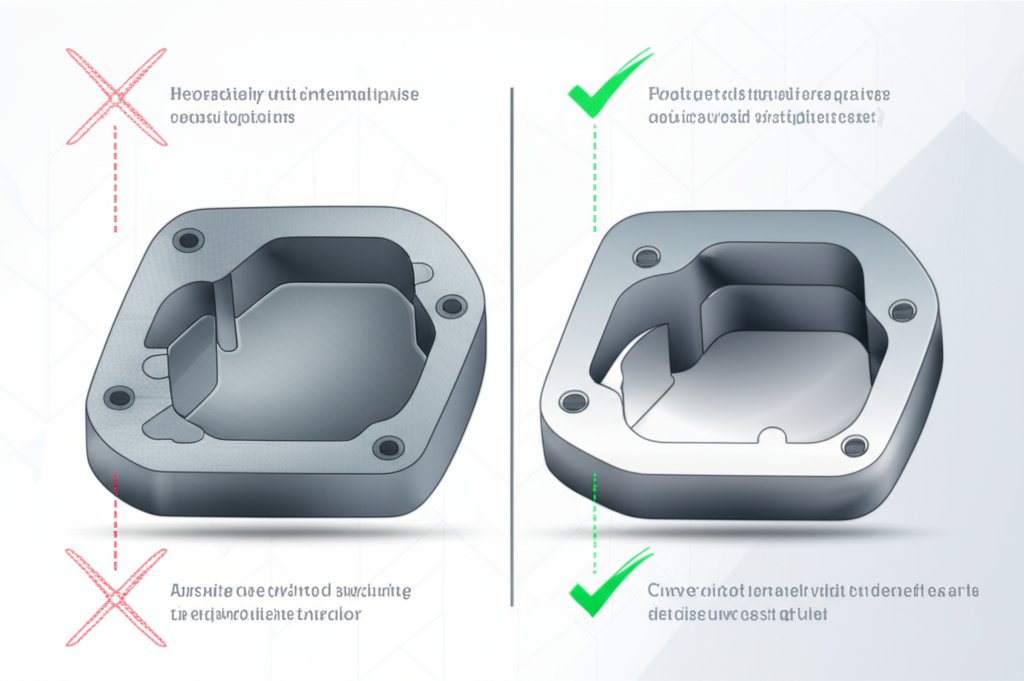
Another critical aspect is the design of internal corners. CNC milling tools are round, so they naturally leave a radius in any internal corner. Creating a sharp, 90-degree internal corner is impossible with a standard end mill and requires a much slower and more expensive process like EDM. To avoid this, always add a radius to internal corners. A good rule of thumb from Protolabs Network (formerly Hubs) is to make the radius at least one-third of the cavity's depth. A larger radius allows for a larger, more robust tool to be used, which can remove material faster and reduce machine time.
Wall thickness and feature depth also play a major role. Thin walls (under 0.8mm for metal or 1.5mm for plastic) are prone to vibration and warping, requiring the machinist to take many slow, careful passes, which dramatically increases time and cost. Similarly, deep pockets with a depth-to-width ratio greater than 4:1 are difficult and time-consuming to machine. Keeping walls thick and pockets shallow where possible will lead to a more stable and cost-effective machining process. For businesses looking to optimize their designs, services that provide DFM feedback are invaluable. For instance, you can accelerate your product development with XTJ's comprehensive formative manufacturing services, which include expert engineering team support for Design for Manufacturability (DFM) feedback to ensure your parts are optimized for cost and quality from the start.
| Costly Design Choice | Cost-Effective Alternative |
|---|---|
| Sharp internal corners | Add an internal radius (e.g., at least 1/3 of the cavity depth) |
| Very thin walls (<0.8mm for metal) | Increase wall thickness to improve stability and reduce vibration |
| Deep pockets (depth > 4x width) | Limit pocket depth to reduce machining time and tool wear |
| Non-standard hole sizes | Use standard drill bit sizes to avoid extra milling operations |
| Engraved text | Remove text or use a more cost-effective post-process like silk screening |
Strategic Material Selection: Balancing Cost and Performance
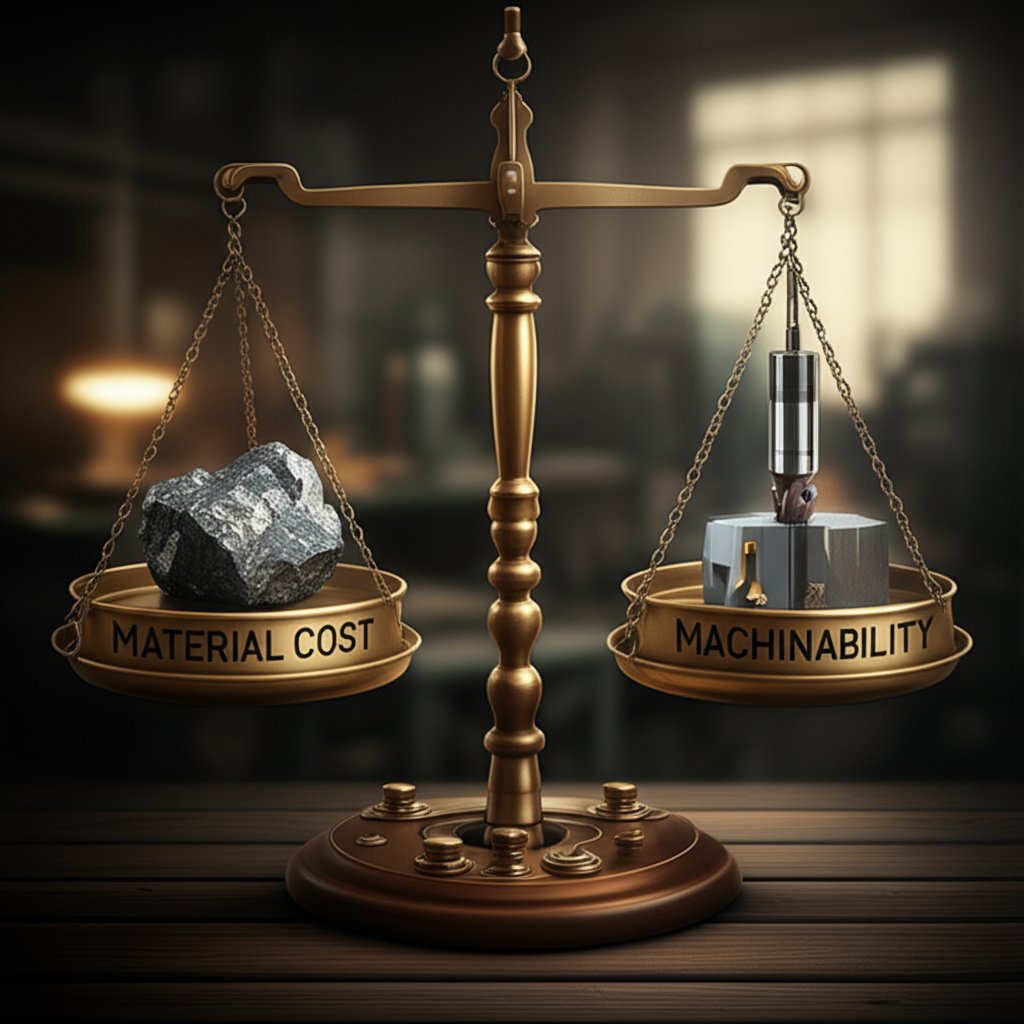
The material you choose for your part has a two-fold impact on the final cost: the price of the raw material itself and its machinability. Machinability refers to how easily a material can be cut, which directly affects the speed of the CNC machine and the lifespan of the cutting tools. A material that is cheaper to purchase may end up costing more if it is difficult to machine, so a strategic balance is essential.
Raw material costs can vary dramatically. For example, common materials like ABS plastic and Aluminum 6061 are relatively inexpensive, while high-performance polymers like PEEK or specialty metals like titanium are significantly more costly. According to data from several sources, Aluminum 6061 is often the most cost-effective metal for prototypes due to its excellent machinability and moderate price. When your design's functional requirements allow for flexibility, always start by considering the lowest-cost material that can do the job.
However, machinability is a crucial modifier. Some materials are simply harder on tools and require slower cutting speeds. For instance, while 304 stainless steel is a common choice for its corrosion resistance, it is much tougher to machine than 303 stainless steel, which is specifically formulated for better machinability. As noted by Fathom, harder materials increase tool wear and machining time. Softer metals like brass and aluminum are generally easier and faster to machine than most steels. For plastics, POM (Delrin) and ABS are known for being easy to machine, whereas others can melt or deflect if not handled carefully.
Making an informed decision requires weighing these factors. Below is a comparison of common material choices:
-
Aluminum (e.g., 6061):
- Pros: Excellent machinability, good strength-to-weight ratio, low cost, corrosion resistant.
- Cons: Lower strength compared to steel.
-
Mild Steel (e.g., 1018):
- Pros: Low cost, good machinability, can be case-hardened.
- Cons: Poor corrosion resistance, heavy.
-
Stainless Steel (e.g., 304 vs. 303):
- Pros: High strength, excellent corrosion resistance.
- Cons: More expensive and generally harder to machine than aluminum (303 is a more machinable exception).
-
Plastics (e.g., ABS, POM/Delrin):
- Pros: Low cost, lightweight, good for prototyping.
- Cons: Lower strength and thermal resistance than metals, can be dimensionally unstable.
The best practice is to identify the absolute minimum performance requirements for your part and select the most machinable, lowest-cost material that meets them. For early-stage prototypes, using an inexpensive material like ABS or aluminum can provide valuable functional insights without a large investment.
Optimizing Setups, Tolerances, and Finishes
Beyond part design and material choice, significant cost savings can be found by optimizing the manufacturing process itself. Three key areas to focus on are machine setups, dimensional tolerances, and surface finishes. Each of these can add substantial time and cost to a project if not carefully considered.
Minimizing machine setups is paramount. A setup refers to each time the part must be oriented or fixtured in the CNC machine. As MakerVerse highlights, repositioning a part is often a manual process that adds labor costs and time. If a part has features on multiple faces, it will require multiple setups. A complex part might even require custom fixtures to hold it, adding another layer of expense. The ideal part can be machined completely in a single setup. If your design requires features on all six sides, consider whether it could be redesigned or split into multiple components that are assembled after machining.
Tolerances are another major cost driver. A tolerance is the acceptable range of variation for a dimension. While it's tempting to specify very tight tolerances for all features, this should be avoided unless absolutely critical for the part's function. Tighter tolerances require more precise measurement, slower machining speeds, and potentially extra finishing steps like grinding, all of which increase cost. As Protolabs advises, if no tolerance is specified, parts are typically made to a standard tolerance (e.g., ±0.125 mm), which is sufficient for most non-critical features. Apply tight tolerances only to the specific surfaces and features where it is functionally necessary, such as mating surfaces or bearing bores.
Finally, consider the surface finish. The standard finish for a CNC part is "as-machined," which will have visible tool marks. While this is perfectly functional for many applications, parts sometimes require secondary finishing operations like bead blasting, anodizing, or polishing for aesthetic or protective reasons. Each of these steps adds cost and time. If a specific finish is not essential for your part's function or appearance, sticking with the as-machined finish is the most economical choice. If multiple finishes are needed on a single part, this will require masking and extra labor, further increasing the cost. Specify finishes only when and where they are truly needed.
Leveraging Economies of Scale and Order Volume
The business side of CNC machining offers one of the most straightforward ways to reduce per-part costs: ordering in higher volumes. The principle of economies of scale is particularly powerful in CNC machining due to high initial setup costs. These non-recurring engineering (NRE) costs, which include CAM programming and machine setup, are fixed regardless of whether you order one part or one hundred.
When you order a single prototype, the entire NRE cost is applied to that one part, making it feel very expensive. However, when you order a larger batch, that same fixed cost is amortized, or spread across all the units. This drastically reduces the cost per part. The effect is most dramatic when moving from a single prototype to a small batch. It's not uncommon for the price of ten parts to be only slightly more than the price of two or three.
Data from industry sources consistently shows a steep decline in unit price as quantity increases. For example, moving from an order of one to five pieces can often cut the per-part cost in half. As the volume increases into the hundreds or thousands, the NRE costs become a negligible fraction of the total price, and the cost converges toward the price of the raw material and the machine run time per part. This is a critical consideration for anyone planning to move from prototyping to low-volume production.
The practical application of this principle is to plan your orders strategically. If you are confident that you will need multiple copies of a part for testing or for a small production run, ordering them all at once in a single batch is far more cost-effective than placing several smaller orders over time. Many online CNC machining platforms provide instant quotes that clearly show these price breaks at different quantities. Use these tools to your advantage to understand the financial impact of volume and make informed purchasing decisions that align with your project's budget and long-term needs.
Final Thoughts on Smart Machining
Ultimately, reducing CNC machining costs is an exercise in thoughtful planning and design. By embracing Design for Manufacturability, you can eliminate the majority of unnecessary expenses before production even begins. Simple, robust designs with standard features will always be more affordable than complex, delicate ones. Pairing an optimized design with a smart material choice—one that balances performance with price and machinability—further strengthens your cost-saving strategy. Finally, understanding the business dynamics of setups, tolerances, and order volume empowers you to make strategic decisions that have a real impact on your bottom line. By applying these principles, you can achieve high-quality machined parts that meet both your engineering requirements and your budget.
Frequently Asked Questions
1. How to reduce tooling cost?
Reducing tooling costs in CNC machining primarily involves designing parts that can be made with standard, off-the-shelf tools. This means using standard hole sizes that correspond to common drill bits, as this avoids the need for a more time-consuming milling operation to create a custom-sized hole. Additionally, designing internal corners with a large radius allows for the use of larger, more common end mills. Avoiding very deep and narrow cavities also prevents the need for specialty long-reach tools, which are more expensive and fragile. By standardizing features, you minimize the need for custom tooling and reduce the number of tool changes, which saves both time and money.
-
Posted in
cnc machining, cnc tips, cost reduction, design for manufacturability, manufacturing costs


