
8 Steps To Aluminium Stick Welding That Actually Work
Step 1: Understand Aluminium Stick Welding Fundamentals
What Makes Aluminium Challenging to SMAW
Ever wondered why aluminium stick welding gets a reputation for being tough? Imagine trying to weld a metal that forms a stubborn oxide layer, melts at a low temperature, and pulls heat away faster than you can deliver it. That’s exactly what you face with aluminum. The oxide layer on its surface melts at a much higher temperature than the underlying metal, making it difficult to achieve proper fusion. Plus, aluminum’s high thermal conductivity means heat dissipates quickly, which can lead to incomplete welds or burn-through if you’re not careful. This is why special flux-coated aluminum stick electrodes are required—they help break up the oxide and shield the weld pool from contamination.
When Aluminium Stick Welding Makes Sense
So, can you stick weld aluminum? Yes, but it’s not always the best fit. Stick welding aluminum shines when you’re tackling:
- Field repairs where portability matters and shielding gas isn’t practical
- Thicker aluminum sections (often over 3/16") where high heat is needed
- Quick fixes or maintenance jobs, especially outdoors or in breezy conditions
- Situations where you only have basic equipment—just an arc welder and the right rod
However, for thin sheet or projects where the appearance of the weld is critical, gas metal arc welding aluminum (MIG) or TIG is typically preferred. These methods offer more control, cleaner welds, and are less likely to damage delicate materials.
| Process | Portability | Learning Curve | Cleanup | Finish Quality |
|---|---|---|---|---|
| SMAW (Stick) | Excellent (no gas needed) | Medium | Requires slag removal | Functional, not cosmetic |
| MIG (GMAW) | Good (needs gas) | Easy | Minimal | Clean, decent appearance |
| TIG (GTAW) | Limited (gas and more gear) | Challenging | Minimal | Best, high precision |
For those comparing mig welding vs tig welding aluminum: MIG is faster and easier for beginners, while TIG offers unmatched control and finish for critical applications (AWS Welding Digest).
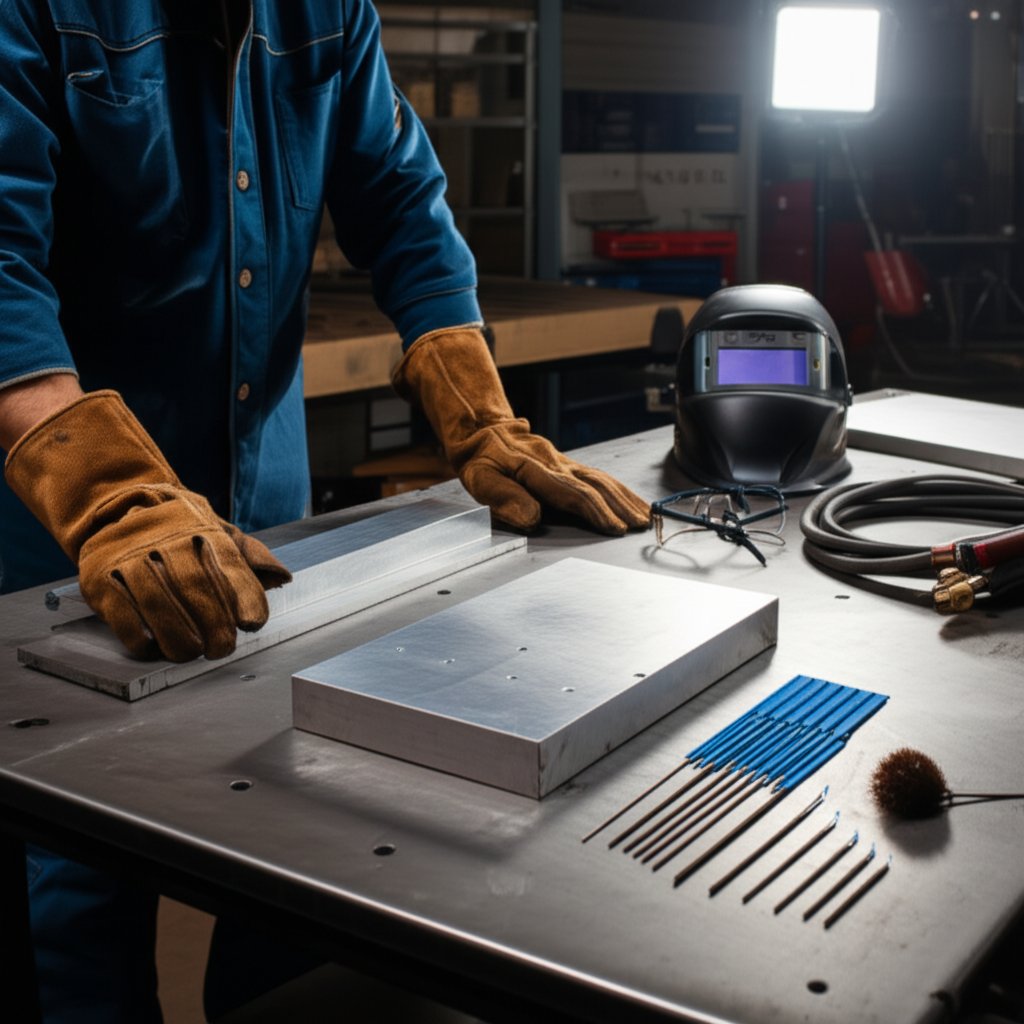
Safety Essentials Before You Strike an Arc
Before you even think about striking an arc, safety comes first. Aluminum welding—especially with flux-coated rods—produces fumes that require good ventilation. Always wear proper PPE:
- Auto-darkening helmet with a clear lens for better puddle visibility
- Welding gloves and a flame-resistant jacket
- Respirator suitable for welding fumes
- Eye protection for both welding and prep work
Check that your workspace is free from flammable materials and that you have a hot-work permit if required. Good housekeeping and preparation are as important as technique for safe, successful stick welding aluminum.
SMAW on aluminum is viable for repairs and thicker sections when you choose the right electrode, prep meticulously, and control heat.
This guide will walk you step-by-step through everything from prepping your metal and choosing electrodes to troubleshooting your welds. By the end, you’ll be able to answer not just can you weld aluminium with a stick welder, but also when and how to do it right—safely and effectively.
Step 2: Choose the Right Electrodes and Polarity for Aluminium Stick Welding
Electrode Categories and Intended Uses
Sounds complex? Choosing the right aluminum welding rod for stick welding is all about understanding the job at hand. Not all aluminum stick welding rods are created equal—each type is formulated for specific applications and base alloys. Let’s break it down:
- E1100 Aluminum Electrodes: Best for pure aluminum and industrial-grade alloys where high plasticity and conductivity are needed. These rods are often used for simple repairs on pure aluminum components.
- E3003 Aluminum Electrodes: Designed for welding both pure aluminum and 3003 aluminum alloy. They offer good plasticity and are suitable for general repair work.
- E4043 Aluminum Electrodes: The go-to for general-purpose work, especially when you want excellent fluidity and easier weld puddle control. E4043 rods are widely used for 6xxx and 5xxx series alloys (with low magnesium), aluminum-silicon castings, and also for joining pure aluminum to similar alloys. If you’re grabbing aluminum stick rods for thick sections or cast repairs, E4043 is often the practical choice.
| Electrode Category | Best For | Joint Types | Notes on Bead and Cleanup |
|---|---|---|---|
| E1100 | Pure aluminum, simple repairs | Butt, fillet | Soft bead, minimal slag, easy cleanup |
| E3003 | Pure/3003 alloy, general repair | Butt, fillet, lap | Good plasticity, moderate slag, manageable cleanup |
| E4043 | 6xxx/5xxx alloys, castings, thick sections | Butt, fillet, lap, cast repair | Excellent fluidity, more slag, needs thorough cleaning |
Matching Rods to Joints and Thickness
When you’re staring at a stack of aluminum welding rods for stick welder, how do you choose the right one? Think about:
- Thicker sections: Choose rods (like E4043) recommended for higher deposition and penetration.
- Cast repairs: Use casting-friendly rods with strong cleaning action—again, E4043 is a top pick.
- Joint type: For butt joints, keep gaps tight and select a rod that wets out smoothly. For fillet and lap joints, a rod with good fluidity helps tie-in both sides of the joint evenly.
Always refer to the manufacturer’s technical bulletin for the specific aluminum stick electrodes you’re using. They’ll specify recommended joint types, positions, and base alloy compatibility.
Polarity and Power Source Considerations
Ever wondered why some welds look clean and others are riddled with defects? The answer often lies in polarity. Most aluminum welding electrodes require a specific polarity for best results—usually DCEP (Direct Current Electrode Positive), but some may work with AC or DCEN. Never guess: always check the package or technical datasheet for your chosen rods. Using the wrong polarity can lead to poor arc stability, spatter, and weak welds (YesWelder).
Rod Storage and Preconditioning: Protecting Your Investment
Aluminum stick welding rods are highly sensitive to moisture. If the flux coating absorbs water, it can cause excess spatter, porosity, or even weld failure. Here’s how to keep your aluminium stick welding rods in top shape:
- Store sealed and dry, away from humid air.
- If recommended by the manufacturer, use a rod oven or warming method. Only follow drying times and temperatures from the datasheet—never guess.
- Once opened, keep rods in a moisture-proof container or holding oven until use.
Imagine prepping everything perfectly, only to have a weld ruined by damp rods. Proper storage is just as important as choosing the right aluminum electrodes.
Choosing the right aluminum stick electrodes and following manufacturer guidance on polarity and storage is the fastest way to a sound weld and less cleanup.
With the right rod and attention to detail, you’re ready to prep your metal and workspace for success. Next, we’ll cover how to clean, fit, and set up your aluminum for the best first arc.
Step 3: Prepare the Metal and Workspace for Successful Aluminium Stick Welding
Surface Cleaning for Sound Aluminum Welds
Wondering why your first arc sometimes fizzles or leaves a porous, weak bead? It usually comes down to prep. When it comes to how to stick weld aluminum successfully, nothing is more critical than removing every trace of oil, oxide, and moisture from your workpiece. Aluminum’s natural oxide layer melts at a much higher temperature than the metal itself, blocking fusion and trapping hydrogen that causes porosity (Miller Welds).
- Degrease first: Use a cleaner formulated for aluminum—avoid anything that leaves a residue. Wipe dry with a lint-free, absorbent cloth or paper towel. Don’t use shop rags or compressed air, which can deposit oil or moisture.
- Mechanically remove oxide: After degreasing, use a dedicated stainless-steel wire brush (never used on other metals) or a non-contaminating abrasive. Always brush in one direction, and clean the brush regularly to avoid cross-contamination.
- Final wipe: Clean again after brushing. Oxide dust can redeposit and contaminate your weld if left behind.
This rigorous cleaning routine is crucial whether you’re tackling thick plate or welding sheet metal with stick welder—thin material is even more prone to defects from contamination, so don’t cut corners.
Fit-Up, Fixturing, and Tacking Strategy
Once your metal is spotless, focus on fit-up. For butt joints, minimize gaps to prevent burn-through and ensure full fusion. On fillet and lap joints, keep the root face consistent and clamp firmly to maintain alignment. Tack weld at intervals to hold everything in place—these tacks also act as heat sinks, reducing distortion and helping with heat control, especially when learning how to weld aluminium with a stick welder.
- Use robust clamps to secure your workpiece and avoid shifting during welding.
- Plan tack locations to distribute heat evenly and lock alignment.
- For thin metal stick welding, use more frequent, smaller tacks to limit heat input and prevent warping.
Preheat and Environmental Controls
Preheat can be your friend—especially for thick or cast aluminum sections. A uniform, moderate preheat helps the weld puddle start smoothly and reduces the risk of cold lap or lack of fusion. But always follow the electrode and base alloy guidance from manufacturer technical bulletins; overheating can weaken the joint. For welding aluminium with stick welder on thin material, preheat is rarely needed and can actually increase the risk of burn-through.
- Shield your workspace from drafts to prevent rapid cooling and contamination.
- Keep the workpiece dry—condensation introduces hydrogen and porosity.
- Set up fire safety barriers and route cables to avoid trip hazards.
PPE and Final Checks
Before you strike an arc, double-check your personal protective equipment:
- Use an auto-darkening helmet set for clear puddle visibility (especially important for aluminum).
- Wear gloves and a jacket rated for welding to protect from heat and UV.
- Use a respirator appropriate for welding fumes—aluminum flux and base metal can produce hazardous gases.
- Verify your ground clamp is on clean, bare metal to ensure a stable arc.
- Degrease with residue-free cleaner
- Mechanically deoxidize with a dedicated stainless brush or abrasive
- Final wipe to remove oxide dust
- Fit-up and clamp joints securely
- Preheat if recommended by electrode/base alloy guidance
- Set PPE: helmet, gloves, respirator
- Verify ground clamp on clean metal
Clean again after brushing; oxide dust can redeposit and contaminate your weld.
By following this prep sequence, you’ll dramatically reduce the risk of porosity, lack of fusion, and contamination—setting yourself up for success whether you’re welding thick plate or tackling thin metal stick welding jobs. Next, you’ll dial in your machine and practice beads to build confidence before moving to real joints.
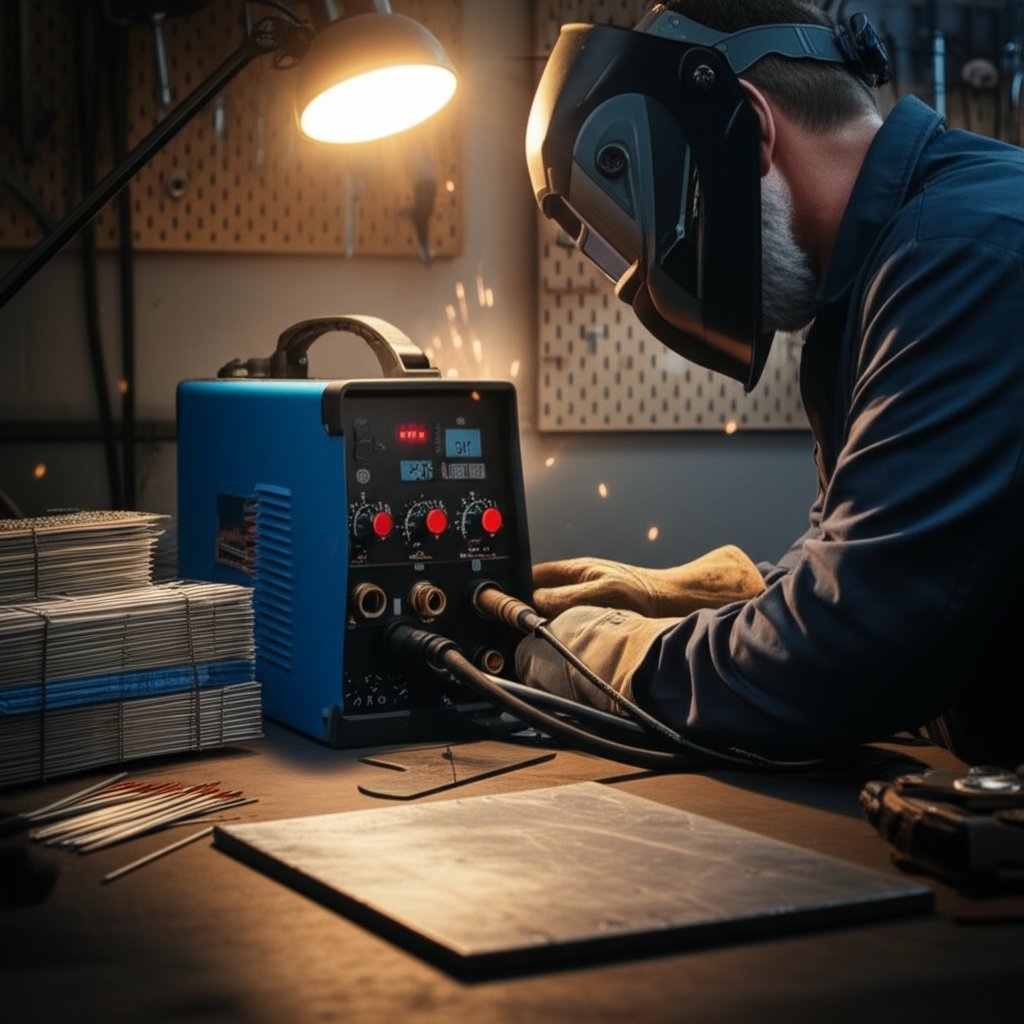
Step 4: Set Machine Parameters and Practice Beads for Reliable Arc Welding Aluminum
Dialing In Machine Settings the Right Way
Ever tried to arc weld aluminum and wondered why the results vary so much? The secret often lies in the details of your machine setup. Before you start welding aluminum with a stick welder, always check the electrode packaging or technical bulletin for the manufacturer’s recommended current range and polarity. Never guess—aluminum stick electrodes are less forgiving than steel, and the right settings make all the difference.
Most rods for arc welding aluminum will specify a direct current electrode positive (DCEP) polarity, but some may work with alternating current (AC) or even DCEN. Your welder should offer adjustable amperage within the rod’s recommended range—typically, thicker rods and thicker material call for higher amps. Don’t have a fancy machine? As long as you can set the amperage and match polarity, you’re ready to go.
- Verify polarity matches the electrode’s datasheet.
- Set starting amperage as specified by the manufacturer.
- Strike an arc on scrap aluminum of similar thickness.
- Adjust amperage in small increments if needed.
- Observe slag peel, bead shape, and puddle behavior.
Sounds simple, right? But each step is crucial for repeatable, high-quality welds. If you’re new to welding aluminum with arc welder setups, start at the low end of the recommended range and increase as needed for full fusion without excess spatter.
Arc Length, Angle, and Travel Speed
Now, let’s talk about hand technique. Unlike steel, aluminum’s puddle solidifies quickly and is easy to overheat. You’ll want a short arc—keep the tip about equal to or slightly less than the rod diameter from the workpiece. A tighter arc improves control, helps maintain a wet puddle, and reduces spatter (AWS Welding Digest).
Angle-wise, use a slight push or neutral drag, depending on how the slag behaves. The goal is to ride the leading edge of the puddle and maintain fusion at both toes of the bead. Travel speed is key: too slow and you risk burn-through or a sticky electrode; too fast and you’ll get poor fusion. Imagine moving just fast enough for the puddle to stay shiny and fluid, but not so quickly that it cools before tying in.
- Puddle edges visible
- Slag peels cleanly
- No hissing or erratic arc
These cues help you know you’re on the right track. If you hear excessive hissing or the arc wanders, check your arc length and adjust your stick welding settings as needed.
Practice Beads That Predict Real Results
Still feeling unsure? Practice is your best friend. Run straight beads on scrap aluminum of similar alloy and thickness before touching your actual part. Focus on consistency—watch how the bead wets out, how the slag releases, and whether the tie-in at the toes is smooth. If the bead looks dull or the slag is hard to remove, slightly adjust your amperage or technique.
Try overlapping stringer beads to see how the puddle behaves with more heat input. This is where smaw welding tips pay off: evaluate each practice pass, make one change at a time, and note the effect. The more you practice, the more muscle memory you’ll build—making it much easier to arc weld aluminum confidently when it counts.
Remember, even experienced welders benefit from dialing in their stick welding settings on scrap before tackling critical joints. This extra step saves time and frustration down the line.
Good prep, correct machine settings, and focused practice on scrap are the foundation for quality aluminum stick welds—don’t skip the basics.
Once you’re comfortable with your setup and practice beads, you’re ready to tackle real joints. Next, we’ll break down proven techniques for butt, fillet, and lap joints so you can put your skills to work on actual projects.
Step 5: Master Joint Techniques That Actually Work for Aluminium Stick Welding
Butt Joints with Reliable Fusion
Ever tried to stick weld aluminum and ended up with a weak, porous seam? Butt joints demand a disciplined approach for solid results, especially when welding aluminum with stick rods. Here’s a proven sequence that works for thin-to-moderate thickness:
- Prep and align: Ensure both edges are meticulously cleaned and fit with a tight, consistent root opening—too wide and you risk burn-through; too tight and you’ll struggle with fusion (YesWelder).
- Tack weld at intervals: Place tacks every few inches to lock alignment and minimize distortion.
- Strike the arc: Use a short arc length—about equal to or just less than the rod diameter. A tight arc keeps the puddle wet and reduces spatter.
- Steady travel: Move at a brisk but controlled pace. Too slow and you’ll risk undercut or burn-through, too fast and fusion suffers.
- Slag removal: After each pass, chip and wire-brush the slag thoroughly. This is critical—trapped slag or oxide will cause defects in the next layer.
- Multiple passes (if needed): For thicker sections, stagger your starts and stops between passes for a uniform appearance and strength.
- Do: Clean between every pass, maintain a tight arc, and watch for full bead wet-out.
- Don't: Rush the end—fill the crater before breaking the arc to avoid cracks.
Fillet and Lap Joints with Clean Tie-In
When welding aluminium with stick on fillet and lap joints, joint orientation and heat control are everything. Here’s how to get it right:
- Position for gravity assist: Arrange the joint so gravity helps the puddle flow into the root, especially important for vertical or overhead welds.
- Tack securely: Tacks at both ends and midpoint prevent shifting and warping.
- Arc at the leading edge: Keep the arc on the front of the puddle, watching both legs of the fillet or the overlap in lap joints for full wet-out.
- Stringer beads: Unless the electrode manufacturer specifies, avoid wide weaves—use overlapping stringers for better control and less risk of slag entrapment.
- Heat focus for lap joints: Direct heat to the thicker or lower piece first, then wash into the upper edge. This prevents burn-through and ensures both layers fuse properly.
- Stitch segments: For long lap joints or thin material, use short stitch welds to manage heat and reduce distortion.
- Slag removal: Clean thoroughly between passes or segments.
- Do: Use overlapping stringers if you’re unsure about weaving, and always clean the joint area between passes.
- Don't: Let the puddle outrun your arc—this leads to cold lap and poor tie-in.
Special Notes for Cast Aluminium Repairs
Cast aluminum brings its own set of challenges—porosity, brittleness, and unpredictable impurities. When smaw aluminum welding on castings, these steps can save your repair:
- Identify the alloy: Whenever possible, confirm the exact cast alloy for filler compatibility.
- Meticulous cleaning: Remove all oil, dirt, and oxide. Castings are porous and can trap contaminants deep inside.
- Preheat if needed: For thick or crack-prone castings, uniform preheat (as per manufacturer or AWS guidelines) helps reduce thermal shock and cracking.
- Tack and check: Tack in several places and inspect for new cracks or voids before the main weld.
- Controlled heat input: Use lower amperage and shorter weld segments to minimize stress and distortion.
- Slag and inspection: Clean thoroughly after each pass and inspect for porosity or cracks. If defects appear, stop, re-clean, and re-weld as needed.
- Do: Prioritize cleanliness, use compatible rods, and allow slow cooling after welding.
- Don't: Attempt peening—unlike steel, peening is not recommended for aluminum stick welds.
Clean between passes; trapped slag and oxide guarantee defects.
By following these step-by-step methods, you’ll gain confidence in tackling the most common joint types and even the tricky cast repairs. Whether you’re laying a simple aluminum stick weld or addressing a complex casting, the right technique and attention to detail with welding aluminum with stick rods will make all the difference. Up next, we’ll cover how to spot and fix common defects, so your welds are not just strong, but reliable every time.
Step 6: Troubleshoot Defects with a Practical Matrix for SMAW Aluminum
Reading the Bead and Slag: Diagnosing Common Problems
Ever finished a weld only to find holes, cracks, or a bead that just won’t clean up? When tackling smaw aluminum, even experienced welders can run into issues that make you wonder, “Can aluminum be stick welded without a headache?” The answer is yes—if you know how to read your welds and address problems quickly. Let’s break down what your bead and slag are telling you so you can fix issues before they become failures.
| Defect | Observable Symptom | Probable Cause | Corrective Action | Prevention |
|---|---|---|---|---|
| Porosity | Visible pinholes or cavities in bead | Contamination (oil, oxide, moisture), damp rods, long arc length | Re-clean base metal, dry aluminum arc rods, reduce arc length | Thorough pre-cleaning, store rods dry, clean again before welding |
| Lack of Fusion | Bead sits on surface, poor tie-in | Low amperage, fast travel, improper angle, contaminated joint | Increase current, slow travel, correct angle, re-clean joint | Set current within recommended range, check fit-up, clean thoroughly |
| Slag Inclusions | Dark spots, trapped material in weld | Incomplete slag removal between passes, weaving too wide | Chip and brush slag fully, use stringer beads | Disciplined interpass cleaning, avoid excessive weaving |
| Cracking | Cracks along or across bead after cooling | Rapid cooling, high stress, contaminated or incorrect filler | Preheat if allowed, slow cooling, use correct rod | Uniform preheat (if recommended), match rod to base alloy, avoid stress risers |
| Undercut | Groove at bead edge, joint not filled | High amperage, fast travel, poor manipulation | Reduce amps, slow travel, pause at edges | Set current per datasheet, practice steady movement |
| Excessive Spatter | Small metal droplets around weld | Dirty metal, long arc, high current, damp rods | Clean thoroughly, shorten arc, adjust amps, dry rods | Store rods properly, maintain correct arc length, clean before welding |
| Difficult Slag Peel | Slag sticks hard, bead looks rough | Wrong polarity, improper rod angle, contaminated surface | Check polarity, adjust angle, re-clean | Follow rod manufacturer guidance, prep surface, confirm machine settings |
Fixing Porosity, Lack of Fusion, and Undercut
If you spot pinholes or a rough, bubbly bead, porosity is the likely culprit. This is almost always linked to contamination or moisture—either on your base metal or in your aluminum stick welder rods. The best fix? Clean again, dry your rods per the datasheet, and keep your arc length tight. If your bead isn’t tying into the base or looks like it’s just sitting on top, you’re dealing with lack of fusion. Bump up your amperage, slow your travel, and double-check your joint prep. For undercut, slow down and pause at the bead edges; if the groove persists, lower your current slightly and refine your hand movement.
Wondering what purpose does flux serve in welding aluminum? In stick welding, flux is your shield. It forms a protective gas and slag layer that keeps atmospheric contaminants away from the molten pool. If you skip prep or let flux absorb moisture, you’ll lose this protection—leading to porosity, slag inclusions, and weak welds (Erie Institute of Technology).
Preventative Habits That Save Time
- Keep rods dry: Store aluminum arc rods in sealed containers and recondition as recommended.
- Dedicated aluminum brushes: Never use your cleaning brush on other metals—cross-contamination introduces defects.
- Clean immediately before welding: Oxide and moisture can build up in minutes, so always prep right before your arc.
- Shield from drafts: Prevent rapid cooling and airborne contaminants.
- Disciplined interpass cleaning: Always remove slag between passes to avoid inclusions.
Most porosity in aluminum SMAW traces back to contamination—clean twice, weld once.
By following this troubleshooting matrix and preventative routine, you’ll answer the question, “Can aluminum be stick welded reliably?” with a confident yes. Next, you’ll learn how to decide if welding or machining is the best option for your specific project.
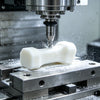
Step 7: Decide When to Weld or Machine for the Best Result
When Welding Is Right and When Fabrication Wins
Ever found yourself weighing whether to repair a part with SMAW or have it remade from scratch? Imagine your aluminum component is cracked: can I weld aluminium with a stick welder, or would CNC machining deliver a better long-term fix? The answer depends on several practical factors:
- Function and load: Does the part bear heavy loads or is it mostly cosmetic?
- Required tolerances: Is a precise fit or alignment critical to your project’s success?
- Cosmetic expectations: Will the part be visible, or is a rougher finish acceptable?
- Material thickness: Stick welding is best for thick sections; thin or intricate parts may distort.
- Access and repair feasibility: Can you reach and clean the area for a reliable weld, or is it better to remake the part?
- Total lifecycle cost: Consider not just repair cost, but downtime, rework, and future reliability.
Stick welding is ideal when you need a quick, strong repair on thick, structural components—think agricultural equipment, frames, or field repairs. But for high-precision, complex shapes, or repeated failures, CNC machining often comes out ahead.
Balancing Strength, Tolerance, and Aesthetics
Let’s break down what each method offers. Can you weld aluminum with an arc welder and expect tight tolerances? Not always. Stick welding gives you robust joints for heavy-duty use, but it can’t match the repeatability or fine finish of machining. CNC machining delivers ultra-tight tolerances (as tight as ±0.005mm) and smooth, consistent finishes—ideal for parts that must fit together perfectly or look flawless.
If your part will be assembled with others, see repeated wear, or needs to be identical to a CAD drawing, machining is the clear winner. For one-off repairs, non-critical fit, or where a stick welder for aluminum is the only tool available, welding may be the way to go.
| Service | Capabilities | Tolerances | Lead Time | Surface Finish | Repeatability | Best Use Cases |
|---|---|---|---|---|---|---|
| XTJ CNC Machining Services | 4 & 5-axis CNC, complex shapes, all aluminum grades | Ultra-tight (±0.005mm) | Rapid (from 3 days) | Consistent, smooth, cosmetic | High—identical parts every time | Precision parts, fixtures, prototypes, replacements |
| DIY Aluminium Stick Welding | Strong joints, thick sections, field repairs | Moderate (depends on skill/equipment) | Immediate (on-site) | Functional, may need grinding | Low—manual process, variable | Quick fixes, heavy equipment, non-cosmetic repairs |
| Local Fabricator | Welding, basic machining, small batch work | Varies (shop skill/equipment) | Days to weeks | Shop-finished, moderate consistency | Moderate—depends on shop setup | Custom jobs, small runs, moderate precision |
Realistic Lead Times and Cost Tradeoffs
Still torn? Consider how quickly you need the part back in service. DIY stick welding can be done immediately if you have the tools and skills. Local fabricators may offer fast turnarounds for simple jobs, but complex or high-tolerance work can take longer. CNC machining services, especially through specialized providers like XTJ, delivers rapid results for intricate or high-precision parts—often in just a few days.
For those who only need a aluminum welder rental for a one-time fix, stick welding is cost-effective. If you require repeatability, tight fits, or a flawless finish, machining may cost more upfront but saves on rework and downtime over the part’s life.
- Tip: If you choose machining, measure your part’s critical dimensions, note the alloy, and share any distortion from previous welds when requesting a quote. This helps ensure the new part fits perfectly and performs as needed.
When tolerances, repeatability, or design complexity exceed what field welding can deliver, CNC machining is a practical, value-driven solution—especially for mission-critical or cosmetic parts.
By weighing these factors, you’ll know when to reach for your stick welder for aluminum and when to call in a precision machining partner. Up next: a print-ready checklist to keep your welding workflow on track—no matter which path you choose.
Step 8: Print-Ready Checklist and Reference Wrap-Up for Aluminium Stick Welding
Print-Ready Pre-Weld Checklist
Imagine you’re about to start a weld—wouldn’t it be great to have a one-page guide to avoid the most common mistakes? Whether you’re new to aluminum welding with stick welder or a seasoned pro, a clear checklist can save time, reduce rework, and boost confidence. Here’s a field-tested sequence you can print and bring to any jobsite:
- Identify the alloy: Confirm base metal type and temper—use manufacturer specs or alloy markings.
- Joint prep: Fit-up joints with minimal gaps; clamp securely for alignment.
- Degrease and deoxidize: Clean with an aluminum-safe solvent, then brush with a dedicated stainless-steel brush. Wipe again to remove oxide dust.
- Verify ground: Attach ground clamp to clean, bare metal.
- Select electrode category: Choose the right welding rods for aluminium stick welding (e.g., E4043, E1100, or E3003) based on alloy, joint, and thickness.
- Confirm polarity: Set machine polarity as specified by the electrode manufacturer.
- Set current: Adjust amperage within the recommended range for your chosen aluminium arc rods.
- Test beads on scrap: Practice on similar material; check for arc stability, bead wet-out, and easy slag peel.
- Tack plan: Tack at intervals to hold alignment and create heat sinks where needed.
- Interpass cleaning: Remove all slag and oxide between passes with a wire brush.
- Final inspection: Look for uniform bead, no trapped slag, and consistent toe blending.
Electrode Storage and Preconditioning Notes
Ever had a weld ruined by hidden moisture or a sticky coating on your aluminum arc welding rods? Proper storage and conditioning are just as important as prep and technique. Here’s how to keep your rods ready for top performance:
- Keep flux-coated rods sealed and dry—store in a moisture-proof container or holding oven.
- Follow manufacturer datasheets for drying times and temperatures; never guess or use ad-hoc settings.
- If rods are exposed to humidity, recondition them as recommended before use.
- Bring rods and base metal to room temperature before welding—avoid condensation.
Quick inspection cues before striking an arc:
- Uniform bead with no undercut or excessive convexity
- No trapped slag or visible porosity
- Consistent toe blending along the weld
Authoritative References to Consult
Don’t rely on memory alone—bring credible resources to the jobsite for quick lookups and troubleshooting. Here are the top references used by professionals for aluminum welding with stick welder:
- AWS Welding Handbook – Comprehensive guidance on aluminum SMAW, joint prep, and troubleshooting.
- Hobart Aluminum Welding Guide – In-depth technical bulletins on aluminum arc welding rods, storage, and process parameters.
- Major OEM/equipment manufacturer technical notes – For machine setup and rod compatibility.
Save digital copies to your phone or tablet, or print key pages for field reference. Staying informed is the best way to reduce mistakes and ensure a quality result every time.
Preparation and clean technique fix more aluminum SMAW problems than any knob on the machine.
With this checklist and reference toolkit, you’re ready to tackle any aluminum stick welding job—confidently and efficiently. Keep your welding rods for aluminium stick welding in top condition, follow each step, and consult the right resources when questions arise. That’s how you turn solid preparation into strong, reliable welds every time.
FAQs on Aluminium Stick Welding
1. Can you stick weld aluminum, and when is it practical?
Yes, you can stick weld aluminum, especially for field repairs, thick sections, or when only basic equipment is available. It's most practical where portability and quick fixes are needed, but for thin or cosmetic work, MIG or TIG welding is usually better.
2. What type of electrodes should be used for aluminium stick welding?
Use flux-coated aluminum electrodes such as E1100, E3003, or E4043, chosen based on the base alloy and joint type. Always follow the manufacturer's recommendations for polarity and storage to ensure quality welds.
3. How do you prepare aluminum for stick welding?
Thoroughly degrease and mechanically deoxidize the surface using a dedicated stainless-steel brush. Ensure tight fit-up, secure clamping, and preheat thick or cast sections if recommended. Clean again before welding to remove any oxide dust.
4. What are common problems in aluminium stick welding and how do you fix them?
Common issues include porosity, lack of fusion, and slag inclusions. These are often caused by contamination, incorrect settings, or damp rods. Fixes include meticulous cleaning, using dry rods, adjusting amperage, and following proper arc technique.
5. When should you choose CNC machining over aluminium stick welding?
Opt for CNC machining when your project demands high precision, tight tolerances, or complex shapes that stick welding can't reliably achieve. Machining is also ideal for cosmetic parts or when repeatability and rapid turnaround are required.
-
Posted in
aluminium stick welding, aluminum welding electrodes, CNC machining vs welding, stick welding tips, welding troubleshooting

