
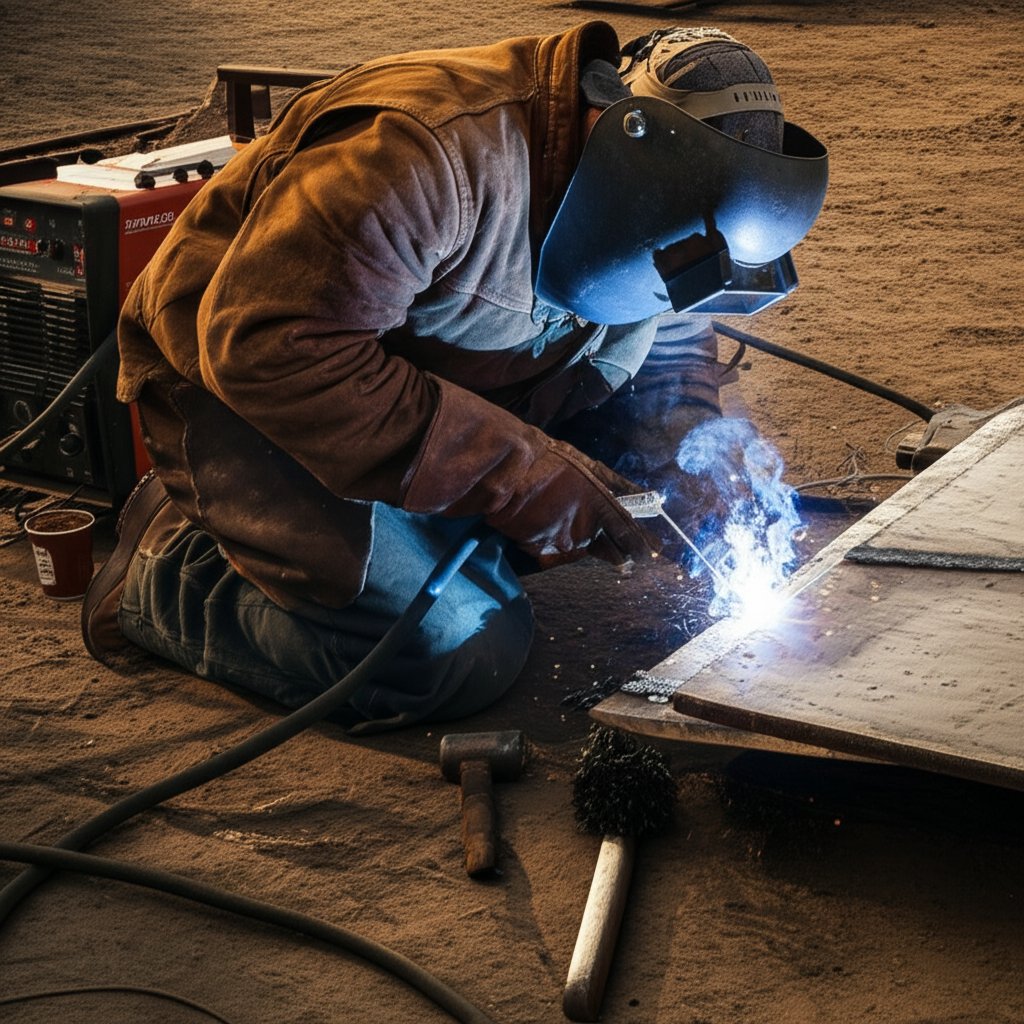
MMA Welding Aluminium Without Porosity: 9 Steps That Work
Step 1 Understand the process and limits of MMA welding aluminium
Why stick welding aluminum is different
Ever wondered why mma welding aluminium (also known as SMAW or stick welding aluminum) is considered a challenge, even for seasoned welders? Unlike steel, aluminum presents a unique set of hurdles: a stubborn oxide layer, high thermal conductivity, and unpredictable slag behavior. These factors make the process far less forgiving than mig welding aluminum or aluminium welding with tig, which are often the first choice for clean, high-quality joints.
- Oxide Layer: Aluminum forms a tough oxide coating that melts at a much higher temperature than the base metal, making fusion difficult unless it’s thoroughly removed.
- High Thermal Conductivity: Heat dissipates quickly, requiring more amperage and precise technique to keep the weld pool stable.
- Slag Formation: The flux on aluminum stick electrodes behaves differently, sometimes causing erratic arc action and making slag removal more difficult than with steel.
Oxide removal is non-negotiable: Any remaining oxide will prevent proper fusion and lead to weak, porous welds.
When MMA makes sense and when it does not
So, can you stick weld aluminum? Yes, but it’s not always the best method. Here’s when SMAW (Shielded Metal Arc Welding) shines:
- Field repairs where portability and minimal equipment are crucial (no shielding gas required)
- Thick sections (usually 1/8 inch or thicker), where burn-through is less of a risk
- Simple joints that don’t require a cosmetic finish
- Outdoor or windy conditions where MIG and TIG shielding gases would be blown away
But for thin sheet, intricate joints, or projects demanding top-tier appearance and minimal post-weld cleanup, mig welding aluminum or aluminium welding with tig are far superior choices.
Setting realistic expectations before you start
Pros of SMAW (MMA) on Aluminum
- Highly portable and simple setup
- Works outdoors in adverse conditions
- No gas cylinders or hoses needed
- Effective for quick, robust repairs on thick material
Cons of SMAW (MMA) on Aluminum
- More challenging to master due to oxide and heat control
- Bead appearance is rougher and requires more cleanup
- Limited to thicker sections—thin aluminum is prone to burn-through
- Electrodes are sensitive to moisture and can be expensive
Imagine you’re on-site, miles from the nearest workshop. Your only option is a stick welder and a handful of aluminum electrodes. In these scenarios, aluminium stick welding is not only possible—it’s practical. But don’t expect the flawless, stacked-dime look you’d get from aluminium welding with tig.
Success with smaw aluminum welding hinges on three things:
- Meticulous joint prep and oxide removal
- Choosing the correct electrode and following the manufacturer’s datasheet for polarity (often DCEP) and amperage—never substitute with generic settings
- Mastering a short, fast arc and steady travel speed
In summary, stick welding aluminum is a specialized skill for specific jobs, not a universal solution. If you’re tackling thick, structural repairs outdoors or in a pinch, it’s a powerful tool in your kit. For everything else, especially where aesthetics and minimal porosity are critical, consider mig welding aluminum or aluminium welding with tig as your go-to processes.
Step 2 Select electrodes and match alloys for MMA welding aluminium
Choose the correct aluminum stick electrodes
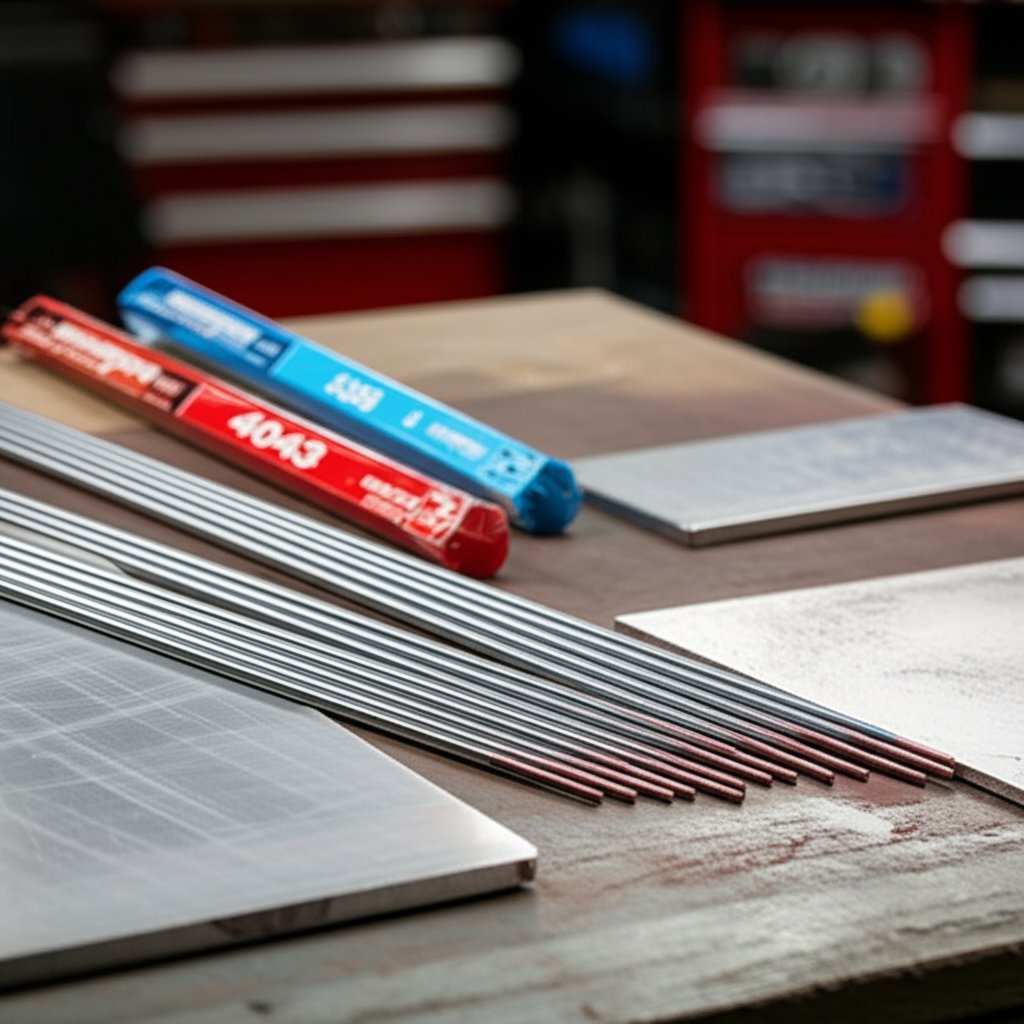
Sounds complex? Selecting the right aluminum stick welding rods is one of the most critical decisions you’ll make in mma welding aluminium. Unlike steel, aluminum requires electrodes with specialized coatings and core alloys to overcome challenges like oxide layers, high thermal conductivity, and porosity risk. Not all smaw aluminum rods are created equal—using the wrong one can result in cracks, weak joints, or ugly, porous beads.
Most aluminum stick rods are classified under the AWS A5.3 standard. You’ll see designations like E4043 or E5356 on the packaging. Here’s how to decode them:
- E = Electrode
- First digit = Usability (position/current type)
- Last three digits = Alloy composition (matches filler alloy series)
For example, E4043 is an aluminum-silicon alloy—perfect for many general-purpose repairs. E5356 is an aluminum-magnesium alloy, offering higher strength and better crack resistance for certain applications.
Match filler to base alloy and application
Imagine you’re repairing a 6061 aluminum plate or joining a 5XXX series marine alloy. Do you grab any welding rod for aluminum? Not if you want a sound weld. The secret is pairing your electrode to the base material and service conditions:
| Base Alloy Family | Recommended Electrode Class Options | Why Choose It | Notes |
|---|---|---|---|
| 1XXX (Pure Aluminum) | E1100 | Best conductivity, ductility, and color match | Use only for pure aluminum; not for alloyed base metals |
| 5XXX (Al-Mg Alloys: 5083, 5086, 5454, etc.) | E5356, E5183 | High strength, excellent corrosion and crack resistance | Ideal for marine and structural work; E5356 is general-purpose, E5183 for higher strength |
| 6XXX (Al-Mg-Si Alloys: 6061, 6063) | E4043, E5356 | E4043 for crack resistance and fluidity; E5356 for greater strength or anodizing | Use E5356 if weld will be anodized (better color match) |
| Cast Aluminum (3XX series) | E4043 | Superior fluidity, reduces cracking in castings | Do not use 5XXX rods—risk of brittle welds |
Why does this matter? Each alloy family responds differently to heat, cracking, and corrosion. For example, E4043 is less likely to crack and gives a smoother finish, making it great for general repairs and castings. But if you’re working on marine parts or need higher strength, E5356 is the better pick. Always check the base material and consult the electrode manufacturer’s datasheet before choosing your welding rods aluminium (reference).
Dial in electrode diameter for material thickness
Have you ever tried to weld thin sheet with a thick rod? You’ll notice burn-through and lack of control. Here’s a simple guide:
- Thin sheet (around 3 mm or less): Use smaller diameter aluminium rods for welding (consult datasheet, but typically 2.4 mm or smaller)
- Thicker plate: Larger diameter rods (3.2 mm or more) provide better deposition and arc stability
Choosing the right diameter helps you control the weld pool, avoid excessive heat input, and reduce the risk of porosity—one of the main challenges in mma welding aluminium.
Stock and store rods properly to prevent porosity
Even the best aluminum welding rods for stick welder can become useless if exposed to moisture. Always store your aluminum stick rods in sealed containers and, if possible, use a rod oven for pre-weld conditioning. Moisture absorbed by the flux can cause hydrogen porosity, ruining your welds (reference).
- Keep rods dry and sealed until use
- Only open the package when ready to weld
- Discard any rods that show signs of moisture or white powder on the coating
By carefully selecting and caring for your aluminum stick welding rods, you’re setting yourself up for success in every weld. Next, let’s get your metal and joints prepared for the best possible results.

Step 3 Prepare the metal and joints for MMA welding aluminium
Degrease and deoxidize the right way
When you start welding aluminium with stick, don’t underestimate the importance of a spotless surface. Aluminum’s oxide layer and any trace of oil or moisture are your biggest enemies—both can cause porosity, lack of fusion, and weak joints. Sounds tedious? It’s non-negotiable if you want to avoid the most common pitfalls of mma welding aluminium or even welding cast aluminum.
- Solvent wipe: Use a non-chlorinated degreaser, acetone, or a purpose-made cleaner for aluminum. Apply with white industrial paper towels (never shop rags, which can carry contaminants). Wipe all joint surfaces thoroughly.
- Mechanical oxide removal: After degreasing, scrub the weld area with a dedicated stainless steel wire brush (one used only for aluminum). Brush in one direction with medium pressure. Replace brushes that show embedded debris or wear.
- Final wipe: Remove any loose particles with a fresh, clean towel. If using a chemical oxide remover, rinse and dry the part fully before proceeding.
- Immediate welding: Assemble and weld as soon as possible after cleaning. If you wait more than a few hours, repeat the cleaning—aluminum re-oxidizes quickly.
Always use a dedicated stainless brush only for aluminum to avoid cross-contamination from steel or other metals, which can trigger weld defects.
Why this sequence? Oils and hydrocarbons trap hydrogen, while hydrated oxides hold moisture—both are leading causes of porosity. If you’re learning how to weld aluminium with a stick welder, skipping these steps is a recipe for frustration and rework (source). For best results, keep all materials dry and at room temperature, and never use compressed air to blow off joints—moisture and oil can sneak in from air lines.
Joint design and fit-up for aluminum
Ever noticed that some welds just seem to “flow” better? That’s often thanks to smart joint design and fit-up. Because aluminum has high thermal conductivity and stick electrodes have a sluggish puddle, joint prep is critical, especially for welding aluminium with stick welder in field repairs or thick sections.
- Bevel thick edges: For plate or heavy sheet, use a small bevel (30–45°) on the joint edges. This helps the arc reach the root and promotes full fusion, which is otherwise tough with SMAW’s limited puddle wetting.
- Maintain tight, even fit-up: Gaps lead to burn-through and inconsistent bead shape. Clamp or tack the parts so they stay aligned throughout welding.
- Choose joint types for control: Butt and fillet joints are most common. For welding cast aluminum, avoid overly wide root openings—these can trap slag and make cleaning between passes difficult.
For thin aluminum, tight fit-up is even more critical. Any gap will make it much harder to control heat input and avoid burn-through. If you’re using aluminium welding rods for arc welder on sheet, consider backing bars or copper chill blocks to absorb heat and support the weld pool.
Tacking to control movement
Aluminum expands and contracts much more than steel as it heats and cools. If you don’t control this movement, you’ll end up with warping or misaligned parts. Tack welds—short, evenly spaced beads—are your best friend here:
- Place tacks every few inches along the joint before running your main weld. This holds everything in place and minimizes distortion.
- Keep tacks small and clean—remove any slag before continuing. For thick sections, stagger tacks on both sides for better alignment.
- Re-clean if needed—if you pause for more than a few minutes, brush the area again before welding.
Imagine you’re prepping a boat hatch or a heavy equipment bracket. By following these steps, you’re not just making life easier—you’re laying the foundation for a strong, defect-free weld. Whether you’re tackling welding aluminium with stick for the first time or fine-tuning your results, meticulous prep and fit-up are the secret to success.
Now that your metal is clean and your joints are ready, you’re set to dial in your welder for the next step in achieving high-quality MMA aluminum welds without porosity.
Step 4 Configure settings and parameters for welding aluminum with stick welder
Set polarity and amperage by the datasheet
When you’re ready to fire up your welding aluminum stick welder, the first thing to remember is this: Always follow the electrode manufacturer’s datasheet. Unlike steel, aluminum stick electrodes (like E4043) have very specific requirements for polarity and amperage. Most commonly, you’ll use DCEP (Direct Current Electrode Positive), but some electrodes may call for DCEN—so double-check every time. Never guess or substitute generic stick welding settings; even a small mismatch can cause excess spatter, weak fusion, or porosity (reference).
For amperage, start at the lower end of the datasheet’s range for your chosen rod and material thickness. If the puddle is sluggish or the rod sticks, gradually increase amperage until you see smooth wetting and arc stability—without excessive spatter or burn-through. Remember, aluminum’s high thermal conductivity means you’ll often need more amps than you would for steel of the same thickness, but too much heat can quickly cause burn-through or a rough, uncontrollable puddle.
Control arc length and travel speed
Sounds tricky? It is—but here’s a practical approach. For smaw aluminum, the arc length is critical: keep it as short as possible, just enough to prevent the electrode from sticking. A long arc will make the weld pool unstable and introduce porosity. You’ll notice that the best results come from a tight, steady arc—imagine just barely dragging the flux along the weld bead.
Travel speed is just as important. Go too slow, and you risk burn-through or letting the puddle freeze before it fuses. Move too fast, and you’ll get poor penetration or cold laps. For most applications, a fast, consistent travel is your best bet. If you’re new to how to weld aluminum with a stick welder, practice on scrap to find the pace where the bead stays smooth and the slag follows the weld pool without trapping inclusions.
| Electrode Diameter | Base Thickness Examples | Typical Amperage Range | Arc Length Cue | Travel Speed Cue |
|---|---|---|---|---|
| 2.4 mm (3/32") | 3–5 mm (1/8–1/4") | Follow datasheet (start low, increase as needed) | Very short—almost touching | Fast, steady; avoid lingering |
| 3.2 mm (1/8") | 6–10 mm (1/4–3/8") | Follow datasheet (start low, adjust upward) | Short—keep flux close to pool | Moderate to fast; keep puddle fluid |
| 4.0 mm (5/32") | 10 mm+ (3/8"+) | Follow datasheet (higher amps, but watch for spatter) | Short—do not let arc wander | Steady, with minimal pauses |
This table is a guide—always adjust based on your specific electrode and the job at hand. If you’re unsure, start with a short arc and quick travel, then fine-tune based on bead appearance and puddle control.
Preheat and interpass cleanliness
Do you need to preheat? Only if the electrode datasheet or a reputable welding handbook recommends it. Preheating is sometimes used for very thick aluminum to slow cooling and improve fusion, but it’s rarely needed for most field repairs or maintenance jobs. Overheating can actually make things worse by increasing distortion and porosity risk. When in doubt, skip preheat unless your electrode or base material specifically calls for it.
What’s non-negotiable is interpass cleaning. After each weld pass, chip off all slag and wire-brush the area with a dedicated stainless brush. If you’re running multiple passes with your welding aluminum with stick welder, this is one of the top smaw welding tips for clean, strong beads. Never try to “burn through” leftover slag—it will only create inclusions and weaken the joint (reference).
- Strike the arc on a run-on tab if possible, to avoid crater defects at the weld end.
- Start at the low end of the amperage range and adjust upward as needed for smooth wetting.
- Chip slag and wire-brush thoroughly between passes—no shortcuts here.
By dialing in these parameters and focusing on cleanliness between passes, you’ll maximize the quality of your welding aluminum with arc welder results. Next, you’ll learn how to execute the weld itself—bringing together all your prep and setup for a strong, porosity-free bead.
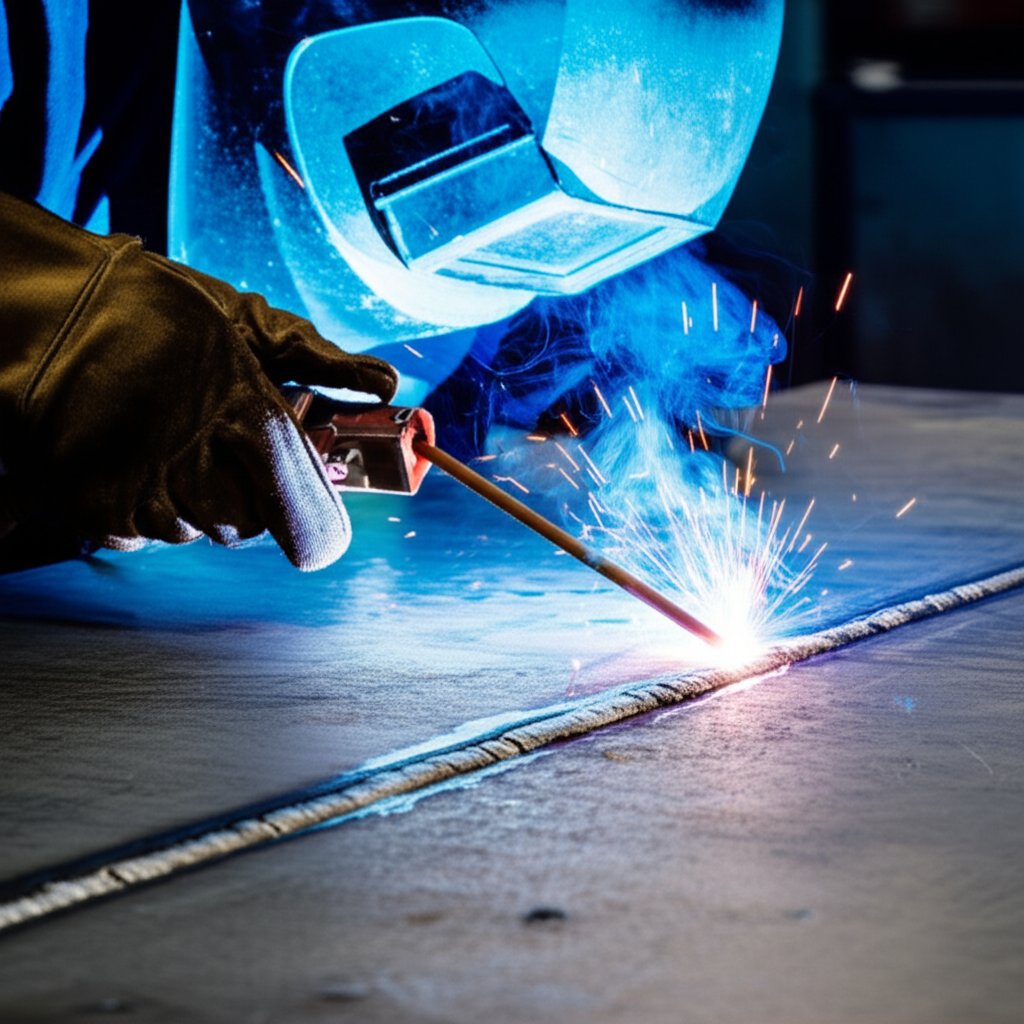
Step 5 How to stick weld aluminum with confidence
Run your first bead with confidence
Ready to put torch to metal? When it comes to how to stick weld aluminum, technique is everything. Even with perfect prep and settings, your bead quality depends on how you handle the electrode and manage the puddle. Imagine you’re about to repair a thick aluminum bracket or lay a root pass on a heavy plate—here’s how to approach aluminum stick welding for strong, low-porosity results.
- Position yourself comfortably. Make sure your hand is steady and you have a clear view of the joint. If possible, brace your arm for better control, especially on longer welds.
- Strike the arc smartly. Use a run-on tab or start just off the joint, then move onto the weld area. This helps avoid crater defects and keeps the start of your stick weld aluminum clean.
- Keep a tight, short arc. Maintain the arc length as close as possible to the rod diameter (just shy of touching the workpiece). A long arc introduces porosity and instability, while a short arc keeps the puddle controlled and minimizes spatter.
- Drag, don’t push—unless the datasheet says otherwise. Most aluminum stick electrodes work best with a slight drag (pull) angle, around 5–15° back from vertical. This lets the slag float to the top and away from the fusion zone. Only use a slight forward whip or push if the electrode manufacturer specifically recommends it.
- Travel at a steady pace. Move the electrode smoothly along the joint. Too slow, and you risk burn-through or excessive buildup; too fast, and you’ll see cold laps or lack of fusion. The goal is a consistent, fluid puddle that follows your motion.
- Use stringer beads, not wide weaves. For stick aluminum welding, stringer beads—straight, narrow passes—reduce the risk of porosity and slag inclusions. Wide weaves can trap slag and make heat control harder, especially on thin sections (reference).
- Pause briefly at the toes. As you reach the edge of the joint, hesitate just long enough for the puddle to tie in both sides. Don’t linger—aluminum melts quickly and can burn through.
- Watch the slag behavior. The slag should trail behind the puddle, peeling up as the bead cools. If it runs ahead or covers the arc, adjust your angle or travel speed.
- Fill the crater at the end. Before breaking the arc, back up slightly to fill the end crater—this helps prevent cracks and ensures a solid finish.
Stringers, not wide weaves: Control heat and porosity
Why are stringer beads so important for aluminium welding with stick? Wide weaves increase heat input and can cause the puddle to overheat, leading to excessive porosity and erratic bead shape. With aluminum, less is more: run multiple stringer passes for wider joints instead of trying to fill with a single, wide weave. This approach also makes slag removal easier between passes.
- Do keep a tight arc and steady pace.
- Do use stringer beads for better control and less porosity.
- Do pause briefly at the toes for full fusion.
- Don’t weave widely—this traps slag and overheats the puddle.
- Don’t linger in one spot—move steadily to avoid burn-through.
- Don’t try to “burn out” slag—always clean between passes instead.
Slag removal and multi-pass sequence
After each pass, let the weld cool slightly, then chip and wire-brush the slag thoroughly. Aluminum slag can be stubborn, but skipping this step almost guarantees inclusions in the next layer. For multi-pass aluminum stick weld jobs, clean every bead before laying the next—no shortcuts here. If you notice hard-to-remove slag, try a power brush or needle scaler, but be careful not to gouge the base metal.
On thick sections, sequence your passes to balance heat and minimize distortion—alternate sides or stagger beads as needed. For thin aluminum, limit the number of passes and allow cooling between beads to prevent warping.
Mastering these steps in stick aluminum welding will help you produce strong, clean welds with minimal porosity. Next, you’ll learn how to troubleshoot and fix common defects, ensuring your work stands up to real-world demands.
Step 6 Diagnose and fix common defects in MMA welding aluminium
Eliminate porosity and contamination
Ever finished a weld and spotted tiny holes or a rough, bubbly surface? That’s porosity—a common headache when you weld aluminum with MMA. Porosity isn’t just cosmetic; it weakens joints and can lead to leaks or failures. Why does it happen? The main culprit is hydrogen: it sneaks into the weld pool from moisture, grease, or hydrated oxides, and gets trapped as the metal solidifies.
| Symptom | Likely Causes | Immediate Fixes | Prevention Next Time |
|---|---|---|---|
| Porosity (tiny holes, spongy bead) | Moisture or oil on base metal/rod; hydrated oxide layer; damp aluminum rods for welding | Stop, re-clean joint and rod, switch to fresh aluminum electrodes | Meticulous degreasing, wire brushing, and dry rod storage; weld soon after prep |
| Lack of Fusion (cold lap, visible seam) | Arc too long; travel too fast; low amperage; poor joint fit-up | Shorten arc, slow down, check amperage, and improve fit-up | Practice tight arc and steady pace; bevel thick joints; always follow datasheet settings |
| Hot Cracking (cracks in bead or crater) | Wrong electrode for base alloy; excessive restraint; rapid cooling | Grind out crack, switch to crack-resistant rod, preheat if datasheet allows | Match aluminum electrodes to alloy; avoid over-restraining parts; use proper bead sequencing |
| Slag Inclusions (dark spots, trapped material) | Incomplete slag removal between passes; weaving too wide | Stop, chip and brush thoroughly, run stringers | Always clean between passes; avoid wide weaves |
| Undercut (groove along bead edge) | Too high amperage; fast travel; poor torch angle | Lower amperage, slow travel, adjust angle | Follow datasheet amps; maintain correct rod angle |
Quick troubleshooting checklist
- Re-prep the joint—cleanliness is everything
- Check for dry, uncontaminated aluminum rods for welding
- Verify correct polarity and amperage per datasheet
- Maintain a tight, short arc—avoid letting it wander
- Chip and brush slag after every pass
Clean, short arc, and fast travel beat chasing higher amperage.
Fix lack of fusion and cold lap
When your aluminum weld looks lumpy or you can see a seam between passes, you’re facing lack of fusion or cold lap. This often happens when the arc is too long, travel is too fast, or the base metal isn’t beveled enough—especially on thick sections. The fix? Shorten your arc, slow down, and ensure your joint is properly beveled and fitted. If you’re tackling welding tips and tricks cast aluminum, remember that castings often need extra cleaning and may require a more fluid electrode (like E4043) to help the weld tie in smoothly.
Prevent hot cracking in sensitive alloys
Cracking—especially at the bead ends or craters—can be a sign you’re using the wrong filler or the joint is cooling too fast. Can you weld cast aluminum without cracks? Yes, but only if you match your aluminum electrodes to the base alloy and avoid over-restraining the part. For example, E4043 is preferred for most castings due to its crack resistance. If you spot a crack, grind it out completely and re-weld with the correct rod. For sensitive alloys, stagger your bead sequence and, if allowed, consider a light preheat to slow cooling (always check the datasheet).
Slag inclusions and undercut: Cleanliness and control
Trapped slag or undercut along the bead edges usually means you’re moving too fast, weaving too wide, or not cleaning thoroughly between passes. Always chip and wire-brush after each bead, and stick to stringer passes. If slag is stubborn, use a dedicated stainless brush or a gentle power tool—never gouge the base metal.
Remember, some aluminum castings are naturally more porous. If you’ve cleaned, prepped, and still see porosity, consult your electrode datasheet—switching to a different alloy or rod class may be the answer. High-quality aluminum rods for welding stored properly can make all the difference in defect-free results.
Master these troubleshooting steps, and you’ll dramatically improve your results the next time you weld aluminum with MMA. In the next section, you’ll learn how to inspect your finished welds and document your work for repeatable, professional outcomes.
Step 7 Inspect finish and document your work
Visual acceptance cues for aluminum SMAW
So, you’ve cleaned, prepped, and welded—now what? How do you know if your aluminum weld is up to standard? Sounds tricky, but it’s all about looking for the right cues. According to MIL-STD-370 and AWS D1.2, a sound aluminum weld made with stick (SMAW) should display uniformity, fusion, and minimal defects. It’s important to inspect before moving on to finishing or putting the part into service.
- Uniform bead profile: The weld bead should be consistent in width and height, with no abrupt changes.
- Fusion at toes: The edges of the weld (toes) must blend smoothly into the base metal—no visible separation or overlap.
- Minimal porosity: Occasional tiny pinholes may occur, but clusters or large pores are a sign of trouble.
- No undercut: The base metal should not be gouged alongside the bead; undercut weakens the joint.
- Consistent ripple pattern: The surface should show regular, even ripples—erratic or rough patterns signal erratic travel or arc length.
Imagine inspecting a bracket welded with your favorite aluminum welding machine. If you see smooth transitions, no big holes, and a regular bead, you’re on the right track. But if the weld looks lumpy, has deep grooves, or shows excessive porosity, it’s time to rework.
Post-weld cleaning and dressing
Before you judge the final quality, there’s one non-negotiable step: slag removal. Aluminum SMAW slag can be tough, but it must come off completely to reveal the true bead underneath. Sounds tedious? It’s essential for accurate inspection and long-term performance.
Always remove all slag before judging bead quality.
- Let the weld cool slightly, then chip away slag with a chipping hammer designed for aluminum or a gentle tap with a blunt tool.
- Follow up with a dedicated stainless steel wire brush—never a brush used on steel.
- Inspect the bead closely after cleaning. If defects are uncovered, address them before moving to finishing or painting.
- If heavy slag is present, avoid gouging the base metal—work patiently and use the right tool for your aluminium welding set.
After dressing, the weld should be free of loose slag, spatter, and sharp edges. For cosmetic or safety-critical parts, you can use a fine file or abrasive pad to smooth the surface, but don’t remove too much material—over-grinding can weaken the joint.
| Observed Issue | Acceptance Decision | Rework Action |
|---|---|---|
| Uniform bead, good fusion, minor isolated porosity | Accept | None needed |
| Clustered or large porosity, undercut, overlap at toes | Reject | Grind out, re-clean, re-weld with correct welding rod and technique |
| Slag inclusions, rough or erratic bead | Reject | Remove slag, re-brush, re-weld as needed |
| Excessive spatter, lack of fusion | Reject | Adjust settings, check welding rod type, re-weld |
Record settings with weld symbols and notes
Want repeatable results or need to hand off work to another welder? Proper documentation is your friend. Start by logging your key parameters: type of welding rod used, amperage, polarity, base material, and prep method. This log becomes invaluable for future jobs or troubleshooting.
- Record the electrode class and diameter (e.g., E4043, 3.2 mm).
- Note the welding machine settings and any preheat or interpass cleaning steps.
- Include sketches or reference drawings with weld symbols to specify joint type (fillet, groove, etc.), size, and location.
- Attach photos of the finished weld, if possible, for visual records.
Understanding weld symbols is key for anyone using an aluminium welding set in a professional environment. Weld symbols provide a universal language for describing joint type, size, length, and finish, ensuring clarity across teams and projects. If you’re new to these marks, ANSI/AWS A2.4 is the go-to reference for decoding them.
By following this acceptance and documentation workflow, you’ll not only meet industry standards but also set yourself up for consistent, high-quality results—whether you’re working solo or as part of a team of aluminum welders. Next up, see how precision machining can further streamline your setup for repeatable, professional outcomes.

Step 8 Use precision machining to set up success in MMA welding aluminium
When machining helps aluminum SMAW
Ever tried to stick weld aluminium and wondered why some joints just come together cleaner and faster? The secret often lies in how well the parts are prepared before you ever strike an arc. For complex projects, repeatable production, or any job where tight tolerances matter, precision machining can be the difference between frustration and flawless results. Imagine showing up with perfectly beveled aluminum sheets that fit together like puzzle pieces—your setup is faster, your welds are stronger, and your risk of distortion drops dramatically.
Think about field repairs versus shop fabrication. In the field, you might have to make do with a grinder and a steady hand. But when you have access to CNC-prepped parts or custom jigs, suddenly your welding machines for aluminum become even more effective. The joint gaps are consistent, the fit-up is tight, and you spend less time correcting mistakes and more time laying down quality beads.
Pre-machined bevels, tabs, and fixtures: Consistency is king
Sounds like overkill? Not when you’re chasing repeatability or working with high-complexity geometries. Pre-machined bevels ensure that your electrodes reach the root of the joint every time, especially on thick welding aluminum to aluminum applications. Tab-and-slot features, which are easy to create with CNC, act as self-locating guides—making it nearly impossible to misalign parts during assembly. And when it comes to minimizing distortion, precision fixtures hold everything in place, countering aluminum’s tendency to warp or move as it heats and cools.
| Preparation Method | Bevel Accuracy | Repeatability | Setup Time | Scrap Risk |
|---|---|---|---|---|
| CNC-prepped parts by XTJ | Ultra-precise (±0.005mm) | Identical for every part, batch after batch | Minimal—ready to weld out of the box | Very low—tight tolerances mean fewer fit-up errors |
| Manual prep (grinding, hand layout) | Varies by operator skill, typically less precise | Inconsistent—each part may differ slightly | Longer, especially for large batches or complex joints | Higher—mistakes can lead to rework or scrap |
For critical jobs, consider outsourcing the machining of fixtures or joint preps to a specialist, while keeping the actual welding in-house. This approach lets you take advantage of high-precision features—like slot-and-tab joints or custom jigs—without investing in expensive equipment yourself. The result? Faster fit-up, less distortion, and welds that pass inspection the first time.
Collaborate with machinists for better fit-up
Imagine you’re working on a batch of custom brackets or a structural frame with multiple identical joints. By sharing your target weld symbols, joint geometry, and desired root gaps with a machinist or CNC service, you can have parts delivered that are perfectly aligned with your welding plan. This is especially valuable when tackling high-complexity or production work, where every minute spent on setup or rework eats into your bottom line.
For example, if your project calls for a series of aluminum sheets to be joined with minimal gap and precise angles, a CNC-prepped kit can save hours of manual fitting. Fixtures designed in CAD and produced via CNC not only hold parts steady during welding but also help less experienced welders achieve professional results (reference).
- Provide machinists with your detailed joint drawings, including weld symbols and tolerances
- Specify the intended welding process (SMAW, TIG, MIG) so features are optimized for your method
- Request test coupons or sample assemblies to verify fit and weldability before full production
By investing in precision prep—whether for a single prototype or a production run—you’ll notice your stick weld aluminium joints go together faster, with less stress and fewer surprises. And when setup is streamlined, you can focus on what matters most: laying down strong, defect-free welds, every time.
Next up, you’ll learn how to turn these best practices into a repeatable workflow and lock in your results for future jobs.
Step 9 Lock in best practices and next steps
Recap and action plan: Your nine-step workflow for success
Wondering how to weld aluminum and consistently get strong, low-porosity results? The answer lies in following a proven sequence—every time. Whether you’re a seasoned fabricator or just starting out, it pays to develop the habit of documenting your process, consulting authoritative sources, and refining your technique with each job. Here’s a quick takeaway checklist to keep your workflow on track:
- Understand the unique process and limits of MMA welding aluminium
- Select the right electrodes and match them to your base alloys
- Meticulously prepare metal and joints—cleanliness is non-negotiable
- Configure welder settings and parameters strictly by the electrode datasheet
- Execute the weld with a short arc, fast travel, and careful stringer beads
- Troubleshoot and correct common defects as soon as they appear
- Inspect, finish, and document your work using weld symbols and logs
- Use precision machining for repeatable, high-tolerance setups
- Lock in your best practices and reference habits for every future job
Clean metal, correct electrode, controlled technique.
Turn trial runs into a WPS/PQR: Build a repeatable process
Imagine you’ve just dialed in a perfect bead on a tricky aluminum repair—how do you repeat that success? The answer is to convert your best trial runs into a Welding Procedure Specification (WPS) and Procedure Qualification Record (PQR). Start by logging:
- Electrode type and diameter (e.g., E4043, 3.2 mm)
- Exact welder settings: amperage, polarity, travel speed
- Base alloy, joint prep method, and any preheat/interpass cleaning steps
- Photos or sample coupons of the finished weld
Refer to reputable handbooks and always consult the electrode manufacturer’s datasheet for each new alloy or joint configuration. Over time, you’ll build a library of settings and techniques—making each new job faster and more reliable. This is especially important if you’re working in a team or need to train others in how to weld aluminum or even can you weld aluminium to different materials.
When to use CNC-prepped parts and fixtures: Boosting consistency
Ever faced a project where repeatability and tight tolerances are critical? That’s when outsourcing joint preps, bevels, or fixtures to a CNC machining specialist can save hours of frustration and rework. If your job involves complex assemblies, batch production, or you’re exploring advanced joining methods like welding aluminum to steel, pre-machined features ensure every part fits up the same—reducing scrap and making your welding process more predictable.
For those tackling high-mix, high-complexity work, consider leveraging services like XTJ CNC Machining. Their ISO-certified facilities deliver ultra-tight tolerances (±0.005mm) on aluminum, steel, and titanium parts—ideal when you want to streamline fit-up, minimize distortion, or even prepare for specialized joints where can you weld aluminum to steel using transition inserts or coatings.
- Share your weld symbols and process notes with your machinist to align joint geometry and root gaps
- Request test coupons or pilot runs to verify fit and weldability before full production
- Use precision jigs and fixtures for high-volume or high-complexity assemblies
By integrating CNC-prepped features into your workflow, you not only reduce setup time and scrap risk, but also make it easier to tackle jobs that require joining dissimilar metals—like welding aluminum to steel—using bimetallic transition inserts or specialized coating methods.
Lock in your best practices for every job
To wrap up: Always anchor your technique in data-backed sources—consult datasheets, AWS codes, and respected welding handbooks for every new alloy or application. Save your parameter logs, sample coupons, and WPS/PQR documents for future reference. And when the job demands precision, don’t hesitate to bring in CNC-prepped parts or fixtures to give yourself a head start.
Ready to take your next project to the next level? For precise, ready-to-weld parts or fixtures that will help you master even the toughest aluminum SMAW jobs—including those rare but critical cases where can you weld aluminum to steel is required—explore XTJ CNC Machining Services as a trusted resource.
Frequently Asked Questions About MMA Welding Aluminium
1. Can MMA weld aluminum effectively?
MMA (Manual Metal Arc) welding, or stick welding, can be used on aluminum, especially for field repairs and thick sections where portability is key. However, it is more challenging than MIG or TIG welding due to aluminum's oxide layer and heat conductivity. Proper surface preparation, correct electrode choice, and following manufacturer datasheets are crucial for strong, low-porosity welds.
2. Is stick welding aluminum as strong as MIG or TIG welding?
Stick welding aluminum can produce durable joints in the right circumstances, but the process is less forgiving than MIG or TIG. The resulting welds may not have the same appearance or consistency as those from MIG or TIG, and are best suited for robust repairs rather than cosmetic or precision applications.
3. What are the disadvantages of MMA welding for aluminum?
MMA welding aluminum has a steep learning curve, requires meticulous cleaning, and is generally limited to thicker materials. The process produces rougher beads and more slag than MIG or TIG, and improper storage of electrodes can cause porosity. For thin or complex joints, other methods are recommended.
4. How do I choose the right electrode for welding aluminum with a stick welder?
Select electrodes based on your base alloy and application needs. Common options include E4043 for general repairs and E5356 for higher strength or marine environments. Always match the electrode to the base material and follow the manufacturer's datasheet for polarity, amperage, and storage recommendations.
5. When should I use CNC-prepped parts for MMA welding aluminum?
CNC-prepped parts are ideal for projects requiring high precision, repeatability, or tight tolerances. Pre-machined bevels, tabs, and fixtures can significantly speed up fit-up, reduce distortion, and lower scrap risk, making them valuable for production runs or complex assemblies.
-
Posted in
aluminum welding rods, aluminum welding tips, CNC machining for welding, mma welding aluminium, stick welding aluminum


