
How Do I Clean Aluminium Without Damage? Anodized To Bare Metal

Prepare and Assess Your Aluminum Surface
Ever wondered why some aluminum surfaces shine for years while others dull or discolor quickly? The answer often lies in how you start the cleaning process. Before you reach for any cleaner or scrubber, it’s crucial to assess your aluminum and set up safely. This not only protects your metal from accidental damage but also ensures your efforts give the best results—whether you’re cleaning a kitchen pan, a window frame, or an industrial part.
Finish Identification Checklist
Not all aluminum is the same, and knowing what you’re working with determines the right cleaning approach. Ask yourself: What type of finish does my aluminum have?
- Bare/mill finish: Matte to slightly shiny, with no visible coating. It oxidizes over time to a dull gray. Common in industrial and DIY materials.
- Polished aluminum: Highly reflective, mirror-like surface. Shows fingerprints and fine scratches easily. Often found in decorative trims and appliances.
- Anodized/hard-anodized: Uniform color, sometimes with a subtle sheen. The surface is harder and more resistant to wear, but can be sensitive to strong chemicals. Used in architectural frames and cookware.
- Painted or powder-coated: You’ll notice a visible paint or powder layer—often with a specific color or slight texture. This finish is common on window frames, doors, and some outdoor furniture.
- Cookware: Cast or stamped aluminum pans may be bare or have a nonstick coating. Each type needs different care to avoid damage.
Identifying your finish is the foundation of the aluminum how to clean process. Using the wrong method can lead to streaks, etching, or even permanent discoloration. If you’re unsure, start with the gentlest cleaning method and observe the results.
Spot Test and Observation Notes
Before applying any cleaner to the whole surface, always perform a spot test:
- Pick a hidden or inconspicuous area.
- Apply a small amount of your chosen cleaner or method.
- Wait a few minutes, then wipe and check for any color change, streaking, or dullness.
- If you notice any negative reaction, switch to a milder cleaner or technique.
This simple step is especially important for coated, anodized, or colored aluminum. A failed spot test can save you from a much bigger problem down the line.
PPE and Tool Staging
Setting up your workspace and personal protection will make cleaning aluminum safer and more efficient. Here’s a quick checklist to gather before you begin:
- Soft microfiber cloths and non-scratch sponges
- Soft-bristle nylon brush and toothbrush (for crevices)
- pH-neutral dish soap, baking soda, white vinegar, distilled water
- Nitrile gloves, safety glasses, optional respirator for aerosols
- Plastic measuring cups/spoons, spray bottles, buckets
- Masking tape and plastic sheeting (to protect nearby surfaces)
Keep your tools and cleaning agents free from grit or debris to avoid scratching. Always work on surfaces that are cool to the touch and out of direct sunlight—this prevents flash-drying, which can lead to streaks or water spots.
Always rinse thoroughly with distilled water on precision parts to avoid mineral spotting.
Remember, the process you’ll follow is: prep → clean → rinse → neutralize (if acid/alkali used) → dry → protect. By starting with careful assessment and preparation, you’ll set the stage for effective cleaning aluminum that preserves both appearance and performance. Whether you’re learning how to wash aluminum for the first time or refining your routine, this foundational step is essential for every project.
Begin with Gentle Cleaning Methods
When you first look at a dull or dirty aluminum surface, it’s tempting to grab the strongest cleaner you have. But did you know that starting gently is the best way to protect your aluminum’s finish? Whether you’re working on cookware, window frames, or decorative trim, a mild approach helps prevent scratches and preserves that signature shine. Here’s how to clean aluminum safely and effectively, step by step.
Soap-First Method: The Foundation of Aluminum Cleaning
Sounds simple? That’s because it is! For most jobs, a basic soap wash is all you need to start. This method is gentle on all finishes—bare, anodized, or coated—and sets the stage for more targeted cleaning if needed.
- Mix 1 teaspoon of pH-neutral dish soap with 1 quart of warm water.
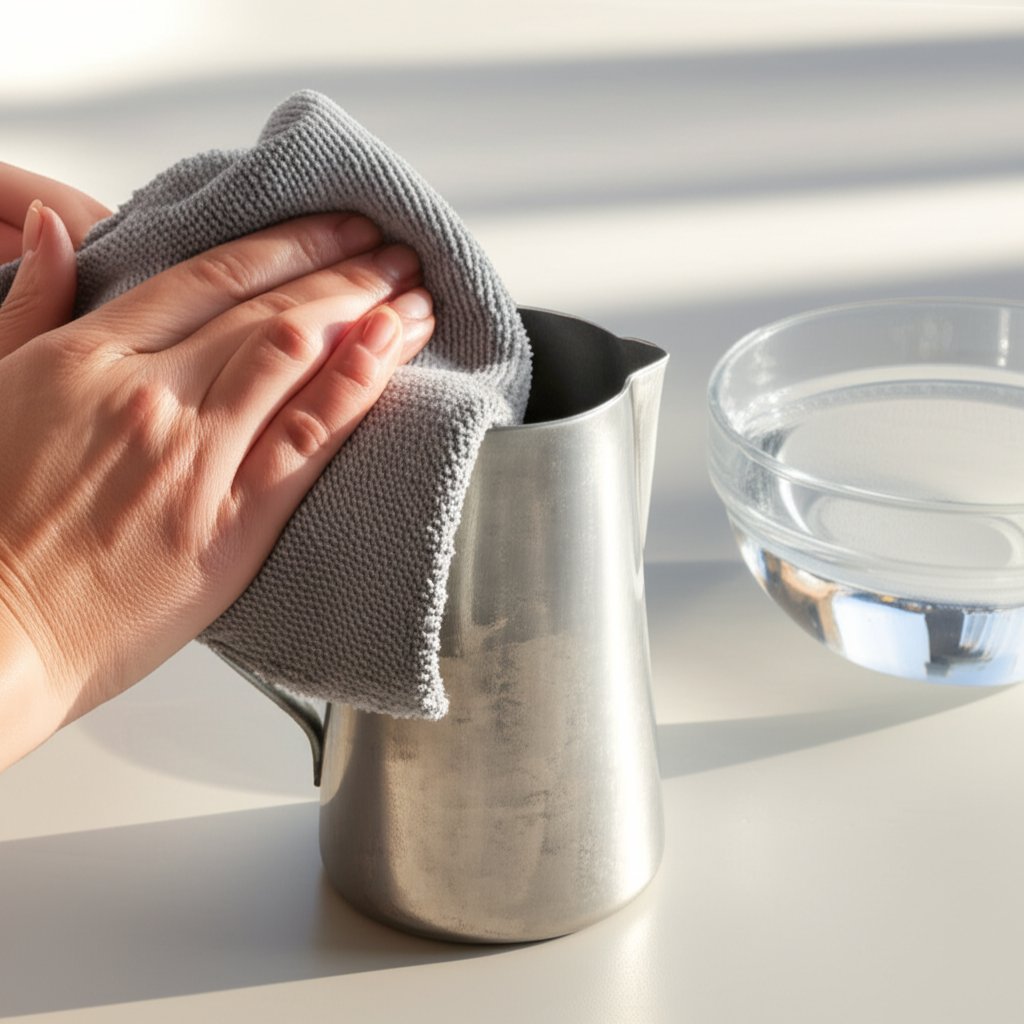
- Dip a soft microfiber cloth or non-scratch sponge into the solution.
- Wipe the aluminum surface, moving in straight lines to avoid micro-marring.
- Rinse thoroughly with clean water to remove all soap residue.
- Dry immediately with a clean towel to prevent water spots.
You’ll notice that this basic step often restores much of the original luster. For those searching “how to clean aluminum” or the best aluminum cleaner for everyday use, this is your starting point.
Baking Soda Paste for Grime and Light Stains
Got a greasy pan or a stubborn spot that won’t budge? Baking soda is your friend. It acts as a gentle abrasive without scratching the metal.
- Mix 3 parts baking soda with 1 part water to form a spreadable paste.
- Apply a thin layer of the paste to the soiled area.
- Let it dwell for 3–5 minutes to loosen grime.
- Gently rub with a soft sponge, focusing on the stained spots.
- Rinse thoroughly and dry with a towel.
This method is especially effective for cleaning aluminum pans and kitchen items. It’s also a great option if you’re looking for non-toxic cleaners for aluminum surfaces around the home.
White Vinegar for Cleaning Aluminum Film: Proceed with Caution
Imagine you’re dealing with mineral deposits or a faint haze—especially common with hard water or light oxidation. Here’s where vinegar comes in, but remember: use it only on uncoated, bare aluminum, and always dilute it.
- Mix white vinegar and water in equal parts (1:1 ratio).
- Lightly apply the mixture to the affected area using a soft cloth.
- Allow it to dwell for up to 2 minutes—never longer.
- Agitate gently, then rinse immediately with clean water.
- If you used vinegar, follow up with a mild baking soda rinse (1 teaspoon per cup of water) to neutralize any remaining acid.
- Dry thoroughly.
Why so careful? While cleaning aluminum with vinegar or opting to clean aluminium with vinegar is effective for removing mineral film, vinegar on aluminum can dull or etch the surface if left too long or used on coated finishes. Always test in an inconspicuous spot first.
- Do: Use gentle agitation, rinse thoroughly, and dry right away.
- Don’t: Use undiluted vinegar, let acidic solutions sit, or scrub with steel wool or abrasive pads.
Use distilled water for final rinse in hard-water areas to reduce spotting.
By starting with these gentle methods, you’ll protect your aluminum surfaces and set a solid foundation for deeper cleaning if needed. If stains or oxidation persist, the next step is to escalate safely—but for most situations, these mild cleaners for aluminum are all you’ll need. Ready to tackle more persistent issues? Next, we’ll show you how to address oxidation without risking your finish.
Tackle Aluminum Oxidation Safely
Ever noticed your once-bright aluminum turning dull, chalky, or even powdery? That’s oxidation at work—a natural process where aluminum reacts with oxygen, forming a stubborn layer of aluminum oxide. While this oxide protects the metal from deeper corrosion, it also hides the shine and can worsen over time, especially in moist or harsh environments. So, how do you tackle cleaning oxidized aluminum without risking damage? Let’s break it down by severity, using the safest and most effective methods.
Oxidation ID and Test: Know What You’re Dealing With
First, identify the extent of oxidation. Light oxidation appears as a faint haze or thin film, while moderate to severe oxidation looks chalky, white, or gray and may even feel gritty. Always start with a spot test in a hidden area to check how your chosen method affects the surface. This is especially important for anodized or coated aluminum—if you’re unsure, stick to gentler methods.
Light Oxidation: Gentle Acid for Surface Restoration
- Wash the area thoroughly with pH-neutral soap and water to remove dirt and grease.
- Mix a solution of white vinegar and water (1:1 ratio)—this mild acid can dissolve light oxidation on bare aluminum only.
- Apply the solution with a soft nylon brush or microfiber cloth. Let it dwell for 1–3 minutes, agitating gently.
- Rinse thoroughly with clean water to remove all acid residues.
- Neutralize any remaining acid by wiping with a mild baking soda solution (1–2 teaspoons per cup of water).
- Dry completely to prevent water spots.
This process is ideal for those learning how to remove oxidation from aluminum around the home, such as on window frames or patio furniture. Remember, vinegar is best for surface-level oxidation; for deeper issues, you’ll need to escalate.
Moderate Oxidation: When to Use an Aluminum Oxide Remover
- Choose a dedicated aluminum oxide remover labeled safe for your finish. These products are formulated to dissolve thicker oxidation without harming the underlying metal.
- Follow the manufacturer’s dilution and dwell time instructions carefully—usually a few minutes is enough.
- Keep the surface wet during treatment; agitate lightly with a nylon brush or non-scratch pad.
- Rinse thoroughly with plenty of water.
- Neutralize if needed (check the product label—some removers are acidic or alkaline and require a neutralizing rinse).
- Dry well to prevent new spots from forming.
These steps are especially helpful for cleaning oxidized aluminum on vehicles, trailers, or outdoor structures exposed to the elements. For best results, always rinse and neutralize thoroughly to avoid residue or streaking.
Severe Oxidation and Pitting: When Chemical Cleaning Isn’t Enough
If you’re dealing with heavy, stubborn oxidation or visible pitting, repeat the above cleaning cycles rather than increasing dwell time. Mechanical abrasion—using fine sandpaper or a stainless steel brush—may be necessary, but be cautious: excessive abrasion can scratch or thin the metal. Chemical cleaning will not fill pits; deep damage may require professional restoration or refinishing.
- Black residue on your cloth? That’s oxide being removed—progress is happening.
- Persistent chalkiness after several passes? Stop and reassess before proceeding to harsher methods.
- Visible pitting? Chemical methods can’t restore lost metal—consider mechanical or professional solutions.
Never mix acids and bleach; toxic gas can form.
Neutralization Steps Between Passes
After each acid or alkaline treatment, always neutralize and rinse thoroughly. This prevents leftover chemicals from continuing to react with your aluminum, which could cause streaks, discoloration, or even new corrosion. Use a mild baking soda solution after acids, and a diluted vinegar rinse after alkaline products, followed by a final water rinse.
When to Stop and Reassess
Keep track of each cleaning pass and evaluate your results. Over-treating can dull the finish or expose fresh metal, making it more vulnerable. If you’re not seeing improvement after a few cycles, or if the aluminum is pitted or rough, it’s time to consider mechanical refinishing or consult a professional for restoring aluminium.
By following these progressive steps, you’ll achieve effective aluminum oxidation removal while protecting your surface for the long term. Next, we’ll cover how to restore and polish bare or mirror-finish aluminum for that like-new shine.
Polish and Protect Bare or Mirror Finishes
Ever run your hand across a once-glossy aluminum surface, only to feel roughness or see a dull haze? It’s a common scenario—especially after tackling oxidation or tough stains. The good news: with the right approach, you can bring back that mirror finish and even make it last longer. Here’s how to polish aluminum, remove fine scratches, and seal your hard work for lasting brilliance.
Polishing Aluminum by Hand: A Step-by-Step Guide
Hand polishing is the safest, most controllable way to revive bare or polished aluminum—no fancy machines required. Imagine working on a vintage wheel lip, a boat railing, or a decorative trim: all you need is patience, the best polish for aluminum, and a few simple tools. Follow this workflow for optimal results:
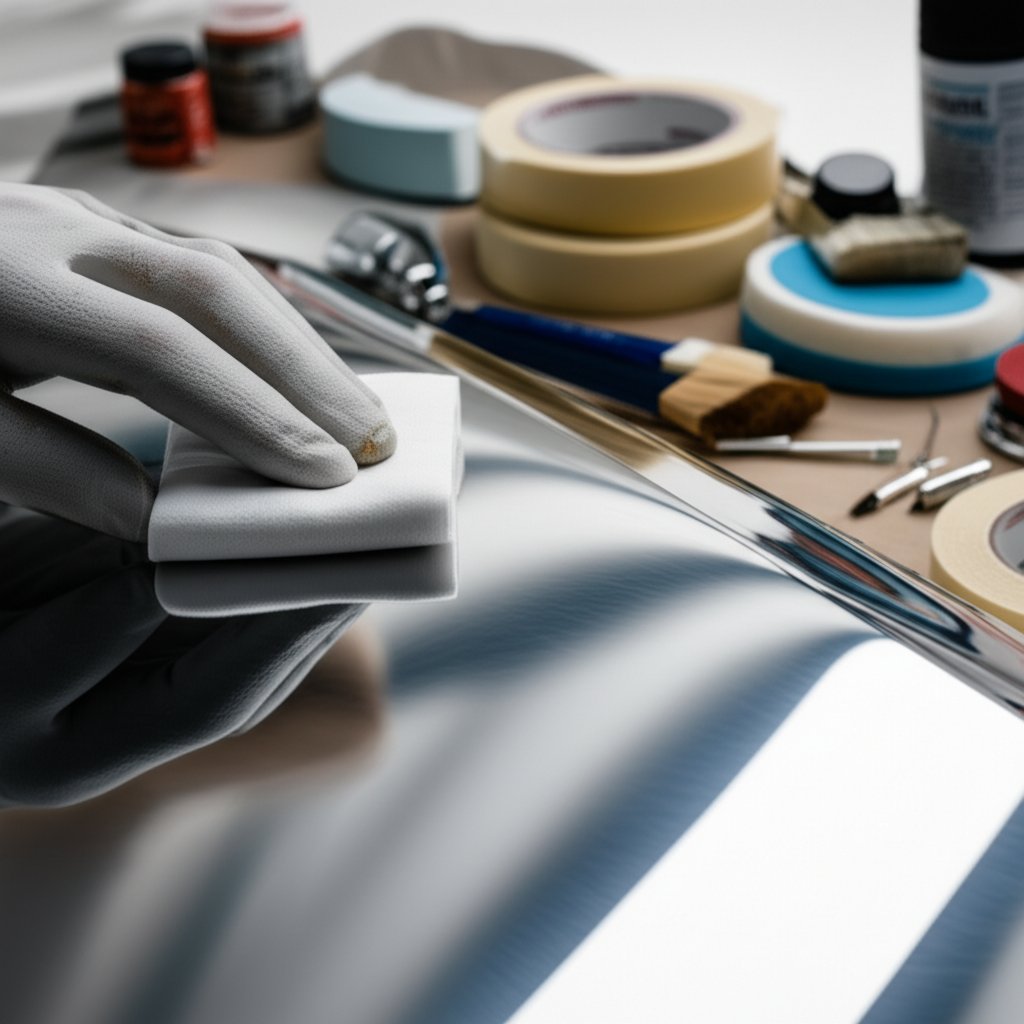
- Mask off adjacent materials with painter’s tape to prevent accidental scratching or polish residue on other surfaces [wikihow.com].
- Apply a small amount of aluminum polish to a microfiber cloth or applicator. For heavy oxidation, start with terrycloth; for light oxidation, use a soft cotton t-shirt or microfiber.
- Work in straight lines (not circles), following the grain if visible. Apply moderate, even pressure until the polish residue darkens—this means it’s lifting oxidation and fine scratches.
- Buff off the residue with a clean, soft towel. For a show-quality finish, do a final pass with cotton rounds, which are softer than t-shirt cloth and leave fewer micro-marks.
- Repeat as needed for stubborn spots, always overlapping slightly into previously polished areas for an even shine.
Wondering how to polish aluminum by hand without streaks? The secret is to use clean applicators for each stage and avoid letting polish residue dry on the surface.
Grit Progression for Bare Aluminum: How to Remove Scratches and Haze
If you see persistent scratches or cloudy spots after polishing, don’t worry—it’s possible to go further. Here’s how to remove scratches from aluminum safely:
- Start with 800-grit sandpaper (wet or dry, as appropriate). Lubricate with water or a light oil (like WD-40) to minimize scratching.
- Sand in straight strokes, always following the grain if present. Wipe away residue before moving to the next grit.
- Progress to 1000- and then 1500-grit sandpaper, repeating the same motion and cleaning between steps. For a near-mirror finish, you can finish with 2000- or even 3000-grit.
- After sanding, polish again by hand with a quality aluminum polish, as described above. You’ll notice the surface becomes progressively glossier with each step.
Important: Never sand anodized or coated aluminum—stick to bare metal only. Deep gouges may not fully disappear, but most scuffs and haze can be vastly improved with this method.
Seal and Protect to Retain Shine
After all that effort, you’ll want your polished aluminum to stay bright as long as possible. Here’s how:
- Apply a non-abrasive metal sealant or synthetic wax using a microfiber applicator. These products create a barrier that slows future oxidation and makes cleaning easier.
- Buff gently to a streak-free finish. For maximum durability, consider a ceramic coating designed for metals [drbeasleys.com].
- Reapply protection every few months, or whenever you notice water no longer beading on the surface.
Pros/Cons of Hand Polishing Aluminum
- Pros: High gloss, removable defects, controllable by hand
- Cons: Labor-intensive, risk of introducing fine scratches if technique lapses
Hand polishing is ideal for those wanting full control and a personal touch—especially on cherished items or intricate parts. For larger or heavily oxidized surfaces, machine polishing may save time, but the fundamentals remain the same.
By following these steps, you’ll master polishing aluminum and keeping it protected for the long haul. Next, we’ll cover the unique care needed for anodized and coated finishes, so you can clean every type of aluminum with confidence.
Safely Clean Anodized and Coated Finishes
When you encounter an aluminum surface that’s colored, matte, or has a uniform sheen, chances are you’re dealing with anodized or coated aluminum. These finishes are built for durability, but their true strength lies in their ability to resist corrosion—not harsh chemicals or abrasive scrubbing. So, how do you clean anodized aluminum or powder-coated surfaces without risking permanent stains or damage? Let’s break it down with practical, real-world advice you can trust.
How to Clean Anodized Aluminum Safely
Imagine you’re cleaning a storefront frame, window, or a specialty panel. The key is to keep it gentle and pH-balanced. For light dirt or environmental soil, use a soft microfiber cloth or non-scratch sponge with a solution of pH-neutral dish soap and warm water. Wipe in straight lines, then rinse thoroughly with clean water and dry with a soft towel. If you encounter stubborn stains, a mild citrus-based cleaner diluted according to the manufacturer’s label can be used—just be sure to spot-test first in an inconspicuous area.
- Do: Use only mild, pH-neutral cleaners (pH 6–8), such as gentle dish soap or a recommended specialty cleaner.
- Do: Rinse thoroughly to remove all residues, and dry completely to avoid water spots or streaks.
- Don’t: Use abrasive pads, steel wool, or strong acid/alkaline cleaners—they can dull or strip the protective oxide layer.
- Don’t: Attempt any aluminium acid wash or use aluminum cleaner acid unless specifically labeled safe for anodized finishes.
Regular cleaning anodized aluminum extends its lifespan and maintains its appearance. For surfaces exposed to heavy soils or industrial pollutants, increase cleaning frequency as needed.
Do not use oven cleaner, harsh degreasers, or wire brushes on anodized or coated aluminum.
Best Practices for Coated Finishes: Painted and Powder-Coated Aluminum
When cleaning painted or powder-coated aluminum—think window frames, outdoor furniture, or architectural panels—the process is similar to washing a car. Use a soft mitt, two-bucket method (one for soapy water, one for rinsing), and always work in the shade on cool surfaces. A solution of mild soap and filtered water is best. For stubborn grime or stains, choose a cleaner specifically labeled as safe for coated surfaces, following the product instructions closely. Avoid solvent-heavy or caustic products, as these can soften or stain the coating, leading to premature failure or chalking.
- Do: Use only soft cloths or brushes—never abrasive pads or scouring powders.
- Do: Rinse with filtered or distilled water to prevent mineral stains, especially in hard water areas.
- Do: Apply a polymer sealant or non-abrasive wax designed for coated finishes to help repel dirt and UV damage.
- Don’t: Use petroleum solvents, strong degreasers, or perform an aluminium acid wash on coated surfaces.
Pressure washing can be used on a low setting for large outdoor items, but always test first and keep the nozzle at a safe distance to avoid damaging the coating.
Preventing Discoloration and Chalking
Ever notice a powdery residue or a faded look on your aluminum? This is called chalking—a natural effect of weathering, especially on coated finishes. Uniform dulling or discoloration may be permanent etching, so focus on gentle cleaning and regular protection rather than aggressive stain removal. Applying a compatible sealant or wax after cleaning helps lock in color and reduce future aluminum stain issues.
- Do: Clean regularly to prevent buildup that accelerates chalking.
- Do: Store or use aluminum products out of harsh sun when possible to slow UV damage.
- Don’t: Attempt to polish or sand coated or anodized finishes—this can irreversibly damage the surface.
If discoloration persists or you’re unsure about the finish, consult a professional before trying more aggressive methods. For those searching how to clean anodised aluminium, remember: less is more when it comes to chemical strength and abrasion.
By following these safe, proven practices, you’ll keep anodized and coated aluminum looking its best for years to come. Next, we’ll tackle how to clean aluminum cookware and address burnt-on messes without harming your pots and pans.
Clean Aluminum Pots and Burnt Pans Safely
When you pull out a favorite pan and see blackened stains or stubborn residue, it’s easy to wonder: how do you clean aluminum pots without causing damage? Aluminum cookware—whether it’s a family heirloom or your go-to clean sheet pan—needs special care to stay shiny and functional. Let’s break down the safest, most effective steps for daily cleaning, tackling burnt-on messes, and removing stains, so you can keep your pots and pans in peak condition.
How to Clean Aluminum Pans: Daily Care Routine
- Let your cookware cool completely before cleaning. Cleaning hot pans can warp the metal and make stains harder to remove.
- Wash with warm water and pH-neutral dish soap. Use a non-scratch sponge or soft cloth to gently remove food and grease. Avoid abrasive pads or steel wool, which can scratch the surface [highperformancecookers.com].
- Rinse thoroughly to remove all soap residue.
- Dry promptly with a clean towel to prevent water spots and mineral deposits. Hard water can leave chalky marks if left to air-dry.
- Safe tools: Non-scratch sponge, soft-bristle brush, pH-neutral dish soap, microfiber towel.
This approach works for both cast and stamped aluminum. For nonstick pans, always use the gentlest touch to preserve the coating.
How to Clean a Burnt Pan Safely: Boil and Lift Method
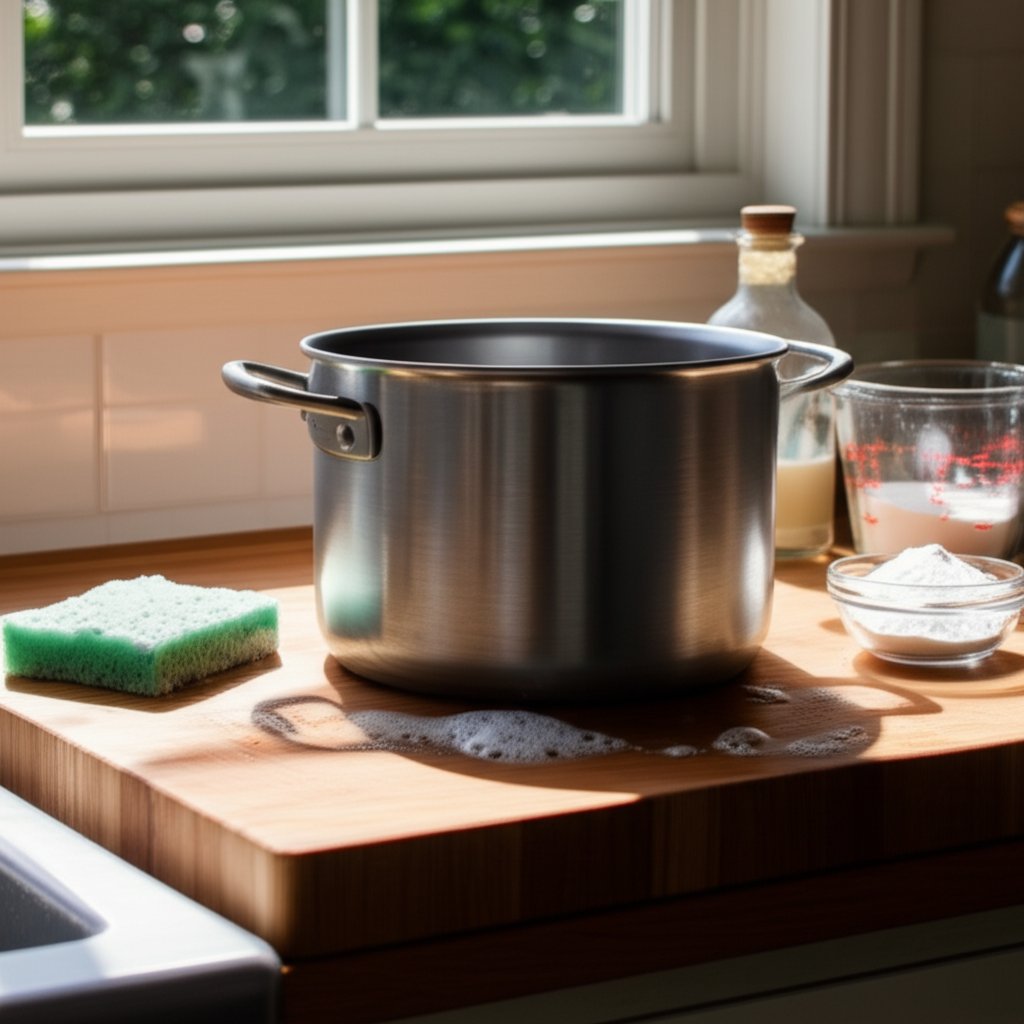
- Fill the pan with enough water to cover the burnt residue.
- Add 2–3 tablespoons of baking soda or 1–2 tablespoons of white vinegar per quart of water. Both help break down stubborn grime, but never mix them together in the same boil.
- Simmer on the stove for 10–15 minutes. The heat loosens burnt food and stains.
- Let the pan cool until safe to touch.
- Gently scrape the residue with a plastic or wooden scraper. Avoid metal utensils that can scratch the aluminum.
- Repeat if needed for tough spots, or try a baking soda paste for extra cleaning power.
- Rinse and dry thoroughly after cleaning.
- Tip: For those searching how to clean a burnt pan with salt, sprinkle coarse salt onto a damp pan and rub gently with a soft sponge to lift stuck-on bits. Salt is mildly abrasive but safe for aluminum when used gently [marthastewart.com].
This method is effective for how to clean burnt pots and pans without risking scratches or chemical damage.
Neutralize and Rinse for Food Safety: Stain and Odor Removal
- For lingering stains on uncoated aluminum, wipe with a 1:1 solution of white vinegar and water. This helps dissolve mineral deposits and oxidation.
- Rinse immediately with clean water to remove all traces of vinegar.
- Neutralize by wiping with a mild baking soda solution (1 teaspoon baking soda per cup of water) to ensure no acidic residue remains.
- Final rinse and dry completely to keep your cookware safe and spotless.
- Never use bleach or oven cleaner on aluminum. These harsh chemicals can discolor, pit, or even weaken your cookware.
- For a clean sheet pan or large cookware, use the same boil-and-lift method, scaling up the solution as needed.
Do not use oven cleaner on aluminum; it can discolor and pit the surface.
Wondering how do you clean aluminum pots that look permanently blackened? With these steps, even tough stains and burnt-on messes can be lifted safely. For pans that remain dull or have stubborn marks after cleaning, gentle polishing or a vinegar bath may help restore shine, but always avoid abrasive pads or harsh chemicals. By following these cookware-specific tips, you’ll extend the life of your aluminum pans and keep every meal tasting its best. Up next, we’ll explore safe chemistry and disposal practices to protect both your cookware and your health.
Safety, Neutralization, and Disposal Essentials
When you’re tackling stubborn grime or oxidation, it’s tempting to reach for the strongest acid to clean. But before you dive into an aluminum acid wash or try out new products, it’s crucial to understand the safety, neutralization, and disposal steps that protect both you and your aluminum. Imagine cleaning a railing, only to see it fizz, streak, or dull—often, this is the result of unsafe chemistry or skipped rinse steps. Let’s break down how to handle acids, bases, and disposal the right way, so your cleaning routine is both effective and safe.
PPE Checklist: Gear Up Before You Start
Before using any acid for aluminium cleaning or commercial aluminum acid wash products, always protect yourself. Many aluminum cleaners contain strong acids (like phosphoric or hydrofluoric acid) that can cause severe burns or eye damage [nielsenchemicals.com]. Here’s what you should have ready:
- Nitrile gloves (acid-resistant and disposable)
- Safety glasses or a face shield
- Long-sleeved clothing and closed-toe shoes
- Respirator (if working with sprays or poor ventilation)
Always review the Safety Data Sheet (SDS or MSDS) for your chosen aluminum cleaner. The SDS outlines hazards, first-aid measures, and disposal requirements. Only use acid washed aluminum products outdoors or in well-ventilated areas to minimize exposure to fumes.
Compatibility: What Not to Mix With Aluminum Cleaners
Mixing the wrong chemicals can be dangerous for both you and your metal. For example, using muriatic acid on aluminum is a common mistake—this acid can rapidly corrode aluminum, causing pitting, black streaks, or even structural damage. Similarly, combining acids and bleach or ammonia can release toxic gases. Here’s a quick guide:
-
Never mix:
- Acids (including vinegar and aluminum cleaners) with bleach
- Acids with ammonia
- Muriatic acid on aluminum or any strong acid with aluminum
- Strong caustics (like lye) with acids
-
Always:
- Test in a hidden spot first
- Follow the manufacturer’s instructions for every acid to clean or neutralizer used
Test in an inconspicuous area first; stop immediately if you see fizzing, dark streaks, or rapid dulling.
Neutralization Quick Guide: Stop the Reaction, Protect the Metal
After using an acid for aluminium cleaning—whether it’s a vinegar and aluminum solution or a commercial product—neutralizing is essential. This step stops the chemical reaction and prevents further etching or staining. Here’s how to do it safely:
- After acidic treatments (e.g., vinegar, phosphoric acid): Wipe or rinse the area with a mild baking soda solution (1–2 teaspoons per cup of water). This neutralizes any leftover acid and protects the aluminum.
- After alkaline treatments (e.g., strong degreasers): For bare aluminum only, use a diluted vinegar-water wipe (1 part vinegar to 4 parts water), then rinse thoroughly. Avoid this step on anodized or coated finishes unless the manufacturer says it’s safe.
- Always: Finish with a thorough rinse using plenty of clean water. Distilled water is best for precision parts or in hard water areas to prevent spotting.
Skipping neutralization can leave your aluminum vulnerable to ongoing chemical attack or discoloration, especially after an aluminum acid wash.
Disposal and Environmental Care: Handle Runoff Responsibly
After cleaning, you’ll need to dispose of spent solutions and rinse water. While many household cleaning products can be rinsed down the drain, some strong acids or industrial aluminum cleaners require special handling. Here’s what to keep in mind:
- Capture runoff whenever possible, especially when using aggressive acids or large quantities.
- Follow local regulations for hazardous waste disposal—never pour strong acids or spent aluminum acid wash solutions directly onto soil or into storm drains.
- Check product labels and SDS for disposal instructions. When in doubt, contact your local waste authority for guidance [cleaninginstitute.org].
- Empty containers can usually be recycled or discarded with regular waste, but rinse thoroughly first.
By practicing safe chemistry and responsible disposal, you protect your health, your aluminum, and the environment. These habits are especially important when using acid to clean, as improper handling can cause lasting harm. Next, we’ll help you choose the best aluminum cleaner for your needs by comparing product categories and safety considerations.

Compare Cleaner Categories Before You Buy
Standing in the cleaning aisle or browsing online, you might wonder: which is the best aluminum cleaner for my project? With so many options—household acids, alkalis, chelators, solvents, and specialty products—the choice can feel overwhelming. The secret is matching your cleaner to both the type of soil and the finish you want to protect. Let’s break down the main categories so you can choose confidently and safely.
Cleaner Categories at a Glance
| Category | Best For | Not For | Typical Approach | Neutralization Needed | Safety Flags |
|---|---|---|---|---|---|
| Dedicated Aluminum Cleaners | Heavy oxidation, industrial soil, prepping for polish | Anodized, coated, or painted finishes unless labeled safe | Apply per label, agitate, rinse thoroughly | Check product; many require baking soda rinse | Wear gloves and goggles; ventilate area |
| Household Acids (e.g., vinegar, lemon juice) | Light oxidation, mineral film, water spots on bare aluminum | Coated, anodized, or painted surfaces | Apply diluted (1:1 with water), short dwell, rinse, neutralize with baking soda | Yes, always neutralize with baking soda solution | Short contact only; can dull or etch if overused |
| Mild Alkalis (e.g., baking soda, mild dish soap) | General cleaning, grease, light stains | Heavy oxidation, pitted surfaces | Baking soda paste or soapy water, gentle scrub, rinse well | Not usually, but rinse thoroughly | Avoid strong alkalis (like lye); can damage aluminum |
| Chelators (e.g., citric acid blends, specialty removers) | Removing hard water stains, complex mineral deposits | All finishes if not labeled safe; test first | Apply per label, short dwell, rinse and neutralize | Yes, check product instructions | Spot test; can strip protective layers |
| Solvents (e.g., isopropyl alcohol, mineral spirits) | Removing grease, oil, adhesive residue | Painted, powder-coated, or sensitive finishes | Apply with cloth, wipe away, rinse if needed | No, but rinse for food-contact items | Flammable; use with ventilation |
Footnotes:
- Always spot-test any cleaner on a hidden area first, especially with chelators or acids.
- Never use strong acids (like muriatic or hydrofluoric acid) or strong alkalis (like lye) on aluminum—they cause severe damage. [calpaclab.com]
- For anodized or coated aluminum, use only products specifically labeled as safe for those finishes.
- Start with the least aggressive cleaner that will do the job—often, mild dish soap or a baking soda paste is enough for most cleaning aluminum needs.
- For stubborn oxidation, a dedicated aluminum oxidation remover or a specialized cleaner is the best cleaner for aluminum, but only if your finish is compatible.
- Polished aluminum cleaner products are formulated for shine—avoid abrasive powders or pads that can scratch.
- Always rinse thoroughly and dry to prevent water spots, especially after using any alumi clean product or chemical.
Use the least aggressive chemistry that gets the job done, then rinse and protect.
When to Choose an Aluminum Cleaner and Polish
Imagine you’re faced with a heavily oxidized patio chair or a dull boat railing. If gentle cleaners aluminum solutions haven’t restored the shine, it’s time to reach for a commercial aluminum oxidation remover or a polished aluminum cleaner. These are the best chemical to clean aluminum when standard methods fall short, but always read the label for finish compatibility and safety instructions. For everyday cleaning or light touch-ups, household acids (like vinegar) or mild alkalis (like baking soda) are often sufficient—and safer for most finishes.
Safety Flags by Chemistry
- Never use strong acids or caustics—these can cause irreversible damage and void warranties.
- Always wear gloves and eye protection when handling commercial or concentrated products.
- Work in a well-ventilated area, especially when using solvents or specialty removers.
- When in doubt, consult the manufacturer’s guidelines or a preservation specialist, particularly for historic or delicate items [gsa.gov].
By understanding these categories and their best uses, you’ll find it much easier to select the best aluminum cleaner for your project—whether you’re doing routine maintenance or tackling heavy oxidation. Next, let’s look at how to keep your aluminum protected and when professional help might be the smartest move.
Protect Results and Decide on Professional Help
Ever wondered why some aluminum looks great for decades, while other pieces seem to dull, pit, or corrode almost overnight? The secret isn’t just in how you clean—it’s in what you do after the cleaning is done. Whether you’re maintaining a kitchen pan, an outdoor enclosure, or a precision part, a little strategic care goes a long way in keeping aluminum strong, shiny, and functional.
Long-Term Protection Plan: Keep Corrosion at Bay
Imagine you’ve just finished cleaning aluminium corrosion from a patio chair or restoring aluminium trim on your car. What next? The answer: protect your work. After every deep clean or aluminum corrosion removal, apply a dedicated metal sealant or wax to slow down oxidation and repel dirt. This thin barrier helps prevent moisture and air from reaching the metal, which is key since exposure is what causes aluminum to tarnish or form that familiar white, chalky oxide layer.
- In coastal or industrial areas, reapply sealant every few months—salt, humidity, and pollutants accelerate corrosion.
- For indoor items, an annual touch-up is often enough.
- Check for worn spots, especially on high-touch or outdoor pieces, and recoat as needed.
- Inspect caulking and seals on enclosures or equipment to maintain insulation and weather resistance.
Regular maintenance doesn’t just keep things looking good—it can extend the life of your aluminum by years, even decades. For those wondering, "does aluminum tarnish?"—yes, but a good protection plan makes it much less likely.
DIY vs Professional Refinishing: When Cleaning Isn’t Enough
Sometimes, no matter how many times you clean, polish, or protect, the aluminum never quite returns to its original glory. If you notice deep pitting, warped panels, or areas where the metal feels rough or thin, you may be facing damage that goes beyond surface cleaning. This is especially true for critical parts—think machine components, architectural panels, or food production equipment that must meet strict standards.
Here’s a practical escalation framework to help you decide when to tackle it yourself and when to call in the pros:
- Gentle wash: For light soil and regular upkeep
- Targeted stain removal: For isolated marks, light tarnishing, or minor corrosion
- Oxidation remover: For stubborn white or chalky layers that don’t respond to soap and water
- Mechanical polish (bare metal only): For haze, fine scratches, or restoring aluminium shine
- Professional refinishing: If you see etching, color change, exposed substrate, or structural issues
Trying to clean corroded aluminium that’s deeply pitted or structurally compromised? Mechanical grinding, sanding, or even re-machining may be required—tasks best left to professionals with the right tools and expertise.
Decision Triggers to Call a Pro
Sounds complex? It can be, but here’s an easy checklist to help you decide if it’s time to escalate beyond DIY cleaning and polishing:
- Deep pitting or holes remain after cleaning
- Critical parts require precise tolerances or cosmetic uniformity
- Warping, bending, or structural weakness is visible
- Repeated cleaning cycles yield no further improvement
- Restoration is needed for historic, architectural, or high-value items
In these situations, professional services—like XTJ's CNC machining—can restore function and finish to exacting standards. Precision re-machining, surface finishing, and even remanufacturing are all options when standard cleaning or aluminum corrosion removal isn’t enough. This is especially important for industries where performance, appearance, and compliance can’t be compromised.
When cleaning reveals deeper damage—such as pitting, warping, or critical-surface defects—precision services can restore your aluminum beyond what DIY methods can achieve.
By following this escalation framework and knowing when to call in expert help, you ensure your aluminum stays strong, attractive, and fit for its intended use. With the right long-term care, you’ll rarely need more than basic maintenance—but when you do, professional support makes all the difference.
Frequently Asked Questions About Cleaning Aluminium
1. What should you avoid when cleaning aluminium?
Avoid harsh chemicals such as alkaline cleaners, bleach, oven cleaners, or strong acids like muriatic acid. These can cause etching, discoloration, or even structural damage to aluminium surfaces. Instead, use pH-neutral soap, mild abrasives like baking soda, and always spot-test in a hidden area before cleaning the entire item.
2. How do you remove oxidation from aluminium safely?
Start by washing with pH-neutral soap and water. For light oxidation, use a diluted white vinegar solution (1:1 with water) on bare aluminium, followed by a thorough rinse and a mild baking soda neutralization. For moderate oxidation, a dedicated aluminium oxide remover is effective—just ensure it's safe for your finish and follow up with rinsing and neutralizing.
3. Can you clean aluminium with vinegar?
Yes, you can clean bare aluminium with a diluted vinegar solution to remove mineral deposits and light oxidation. However, avoid using vinegar on anodized, coated, or painted aluminium, as it can dull or damage the finish. Always rinse thoroughly and neutralize with a baking soda solution after using vinegar.
4. What is the best way to clean burnt aluminium pans?
For burnt-on residue, fill the pan with water and add baking soda or white vinegar. Simmer for 10–15 minutes, let it cool, then gently scrape with a plastic or wooden utensil. Rinse thoroughly and dry. Avoid using oven cleaner or abrasive pads, as these can damage the pan.
5. When should you seek professional help for aluminium cleaning or restoration?
If you notice deep pitting, warping, or critical-surface defects that cleaning cannot fix, or require precise cosmetic restoration, it's best to consult a professional. Services like CNC machining can restore or remanufacture aluminium components to precise standards, especially for structural or high-value items.
-
Posted in
aluminum cleaner tips, anodized aluminum care, cleaning aluminum, remove aluminum oxidation, restore aluminum shine


