
Brass Cleaner Showdown: Stop Tarnish Fast Without Damage
Shining Brass Made Simple
When you reach for a brass cleaner, what are you really hoping for? Most people want a fast, safe way to clean brass—restoring a brilliant shine without risking damage to cherished pieces. But with so many products and DIY tips out there, it’s easy to get overwhelmed or, worse, make mistakes that can leave permanent marks. This guide cuts through the noise, highlighting the best way to clean brass for every scenario, from gentle touch-ups to heavy-duty tarnish removal.
Why Most Brass Cleaner Advice Backfires
Sounds simple, right? Yet, common brass cleaner advice often overlooks the nuances of finish, age, and material. Many well-meaning tips can actually strip away delicate coatings, accelerate corrosion, or erase the valued patina that makes antiques unique. That’s why understanding both the science behind tarnished brass and the ethics of preservation is essential before you polish away years of character.
When to Polish and When to Preserve Patina
Imagine inheriting a vintage candlestick—should you scrub it until it gleams? Not always. For antiques and sentimental items, that warm brown or green patina is more than just brass oxidation; it’s a sign of history and value. Conservation experts agree: preserve the patina when possible, and only restore shine when it’s appropriate for the object’s use and significance (Canadian Conservation Institute).
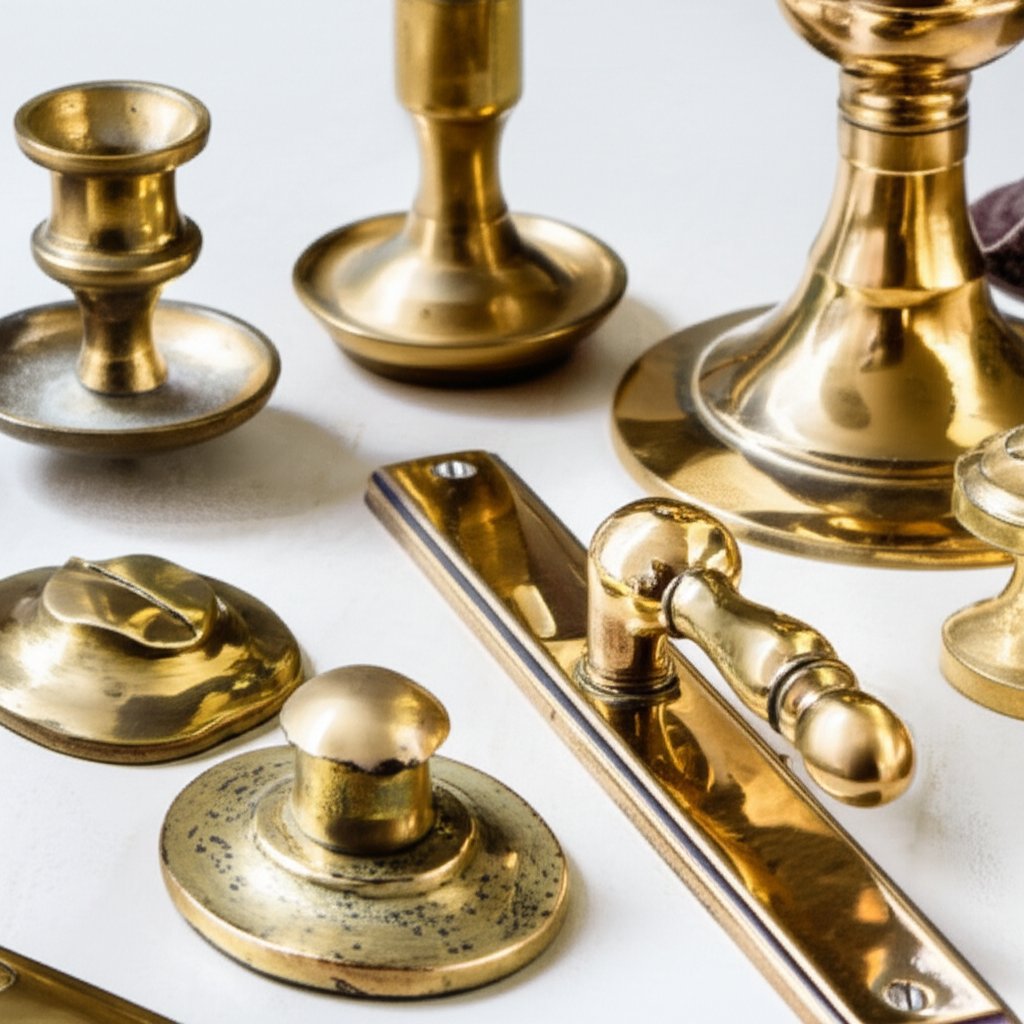
How to Tell If It Is Solid, Plated, or Lacquered
Before grabbing any brass polish, you’ll want to know exactly what you’re working with. Here’s a quick test: hold a magnet to the item. If it sticks, you’re likely dealing with brass-plated steel, not solid brass. Plated items need extra care—scrubbing or harsh chemicals can wear through the thin brass layer, exposing the base metal beneath. Solid brass feels heavy and is non-magnetic, while lacquered brass often looks shinier and resists tarnish longer but can be damaged by acidic dips or abrasive cleaners.
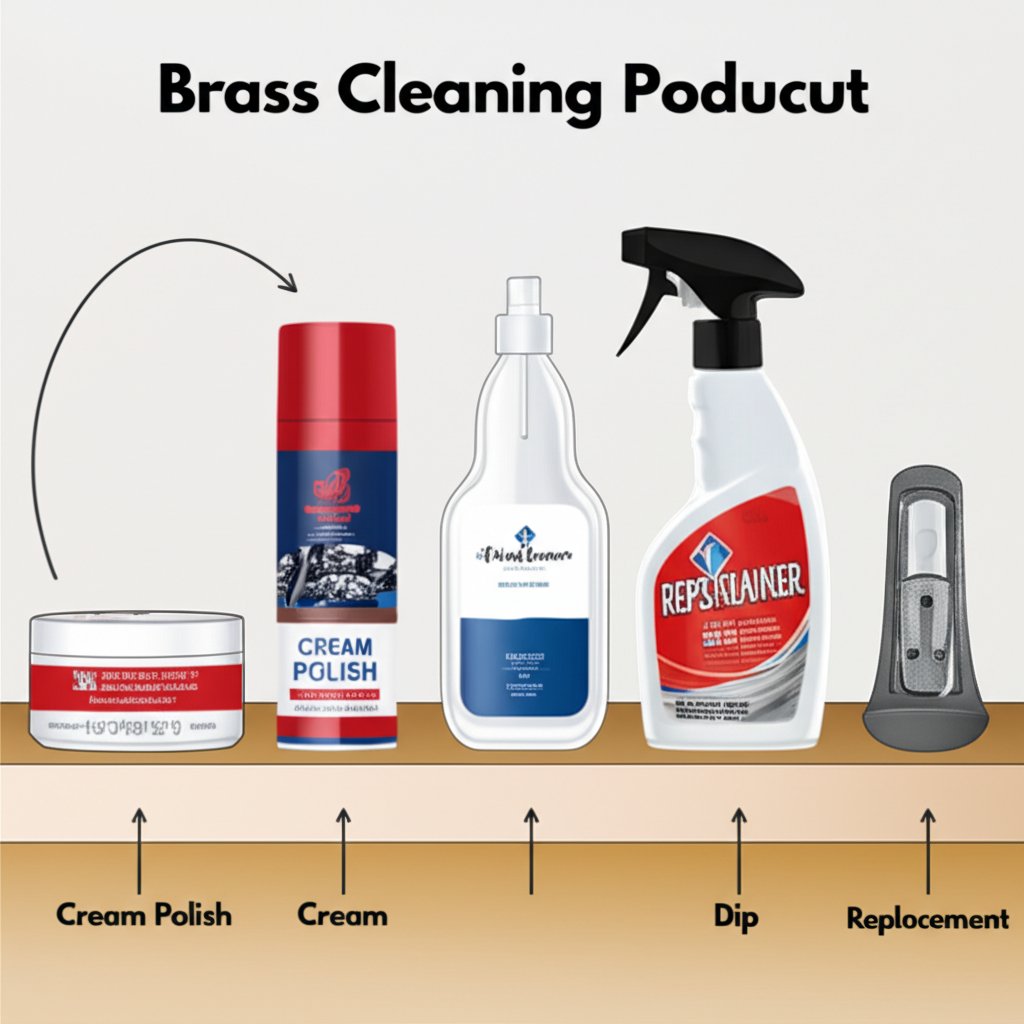
Brass Cleaner Picks at a Glance
- Scrubbing plated brass—risking base metal breakthrough
- Using acidic dips on lacquered pieces—causing clouding or peeling
- Skipping gloves or eye protection—exposing yourself to harsh chemicals
- Polishing away patina on antiques—losing historical value
- Not testing on a hidden spot—leading to unexpected damage
Always test finish compatibility on a hidden spot before committing.
This showdown will walk you through a proven methodology—including a lacquer test and safety checklist—then review six top brass cleaner options (both DIY and commercial). You’ll find a comparison table for quick decisions and an action-oriented recommendation for every level of tarnish. From gentle cream polishes to aggressive dips, and even a professional solution for items that are beyond cleaning, you’ll discover how to clean brass without sacrificing safety or shine.
Ready to stop tarnish fast—without damage? Let’s get started.
Methodology and Buyer Checklist
Ever wondered why some brassware cleaning attempts leave pieces worse than before? The secret isn’t just in the product—it’s in the method. Whether you’re tackling brass tarnish on a treasured lamp or planning routine brassware cleaning, a neutral, safety-first approach is essential. Let’s break down how to choose, test, and use any brass cleaner with confidence.
Buyer’s Checklist for Commercial Brass Cleaners
| ✔️ | Label claims: Is it explicitly safe for brass? |
| ✔️ | Finish exclusions: Does it warn against use on lacquered, plated, or antique surfaces? |
| ✔️ | Abrasive vs. chemical action: Is it a polish (abrasive) or a chemical dip/remover? |
| ✔️ | Rinse/neutralization requirements: Will you need to rinse or neutralize after use? |
| ✔️ | VOCs/odor: Does it require extra ventilation? |
| ✔️ | PPE guidance: Are gloves and eye protection recommended? |
| ✔️ | Mentions plated/antique items: Is there guidance specific to delicate or valuable pieces? |
Always read the label fully. Many products that remove tarnish from brass may also strip protective coatings or damage plating if misused.
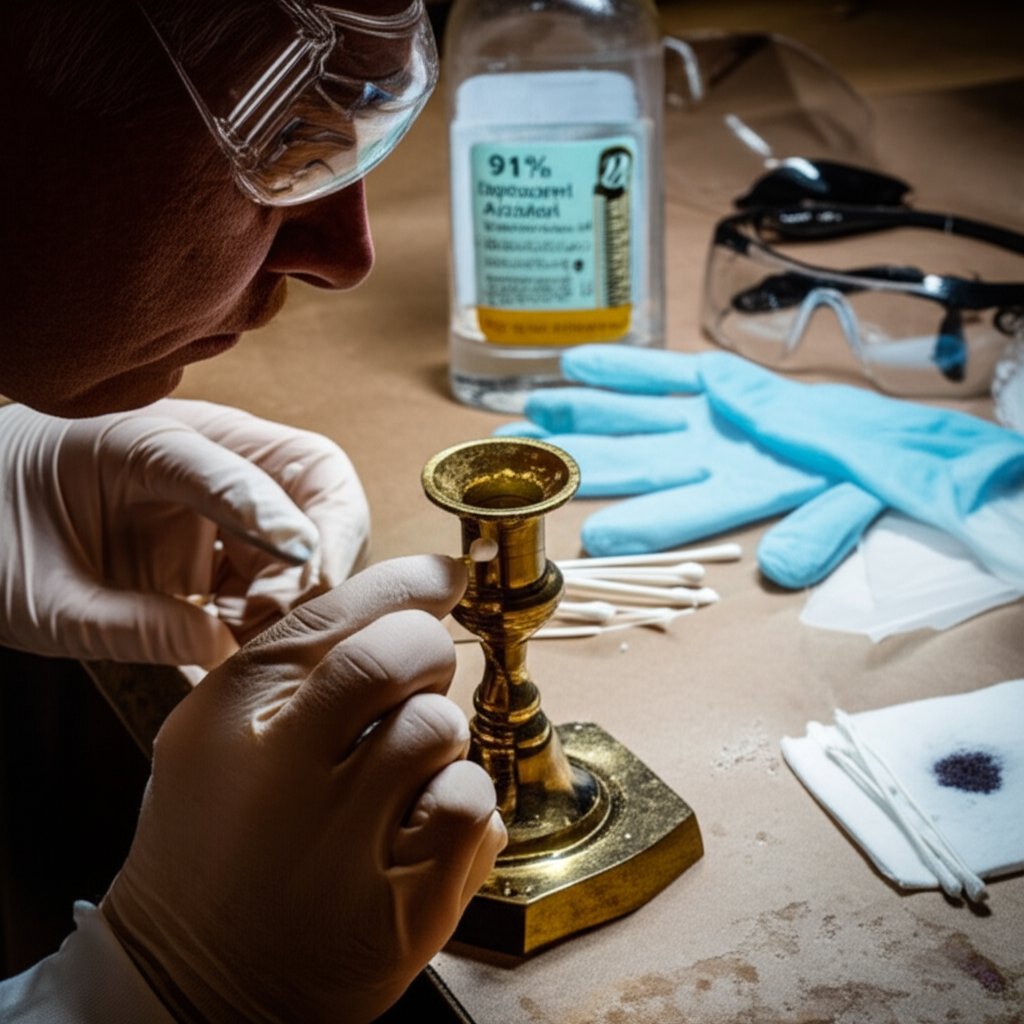
The Lacquer or Clearcoat Test
How do you clean lacquered brass safely? First, you need to know if your item is lacquered. Here’s a simple test:
- Wipe the surface with warm water and mild soap to remove dust and grime.
- Dab a cotton swab with isopropyl alcohol and gently rub a hidden spot.
- If the swab picks up a glossy, clear residue, your item is lacquered—avoid strong acids or abrasives. If nothing comes off, it’s likely unlacquered.
- If you’re unsure, stop and consult a professional or opt for the gentlest cleaning method.
Lacquered brass is protected from air and moisture, so aggressive cleaning can cloud or peel the finish, leading to uneven brass oxidation or permanent marks (Vigorous Home).
Compatibility Matrix for Brass Types and Conditions
| Item Type | Recommended Methods | Methods to Avoid |
|---|---|---|
| Solid Brass (Unlacquered) | Cream polish, DIY vinegar paste, spray cleaner | None, if gentle; avoid harsh abrasives for routine care |
| Brass-Plated | Gentle cream polish, mild soap, soft cloth | Dipping brass to clean, strong abrasives, chemical dips |
| Lacquered Brass | Mild soap and water, soft cloth | Acids, abrasives, most commercial polishes |
| Antique/Patinated | Dusting, soft cloth, conservation wax | Any polishing, dipping, or acid-based cleaners |
| Verdigris (Green Corrosion) | Consult professional; very gentle removal with soft brush if needed | Acids, scrubbing, metal tools |
| Pitted/Structurally Damaged | Professional help only | All DIY or commercial cleaning |
For cleaning brassware with unknown finishes or sentimental value, always start with the least aggressive method. If you notice color change, base metal showing, or loss of detail, stop immediately.
Safety, PPE, and Disposal Fundamentals
- Read the product SDS/MSDS before use—some brass cleaners contain strong acids or solvents.
- Wear gloves and eye protection, especially with chemical dips or polishes.
- Work in a well-ventilated area to avoid inhaling fumes from VOCs or ammonia-based products.
- After using acidic products, neutralize any residues with a mild baking soda rinse if recommended.
- Dispose of used cloths and leftover chemicals according to local regulations—never pour strong acids or solvents down the drain.
Escalate cleaning strength only if needed: try the mildest approach first, step up one tier if there’s no improvement after the product’s dwell time, and stop if you see plating or detail loss. These steps help you safely remove tarnish from brass while preserving your item’s finish for years to come (GSA Technical Procedures).
Now that you know how to evaluate both your brassware and your cleaning options, let’s see how these rules apply to specific products and DIY solutions—starting with a fast-acting commercial remover.
Flitz Instant Tarnish Remover
Ever faced a piece of brass so tarnished that gentle methods just won’t cut it? That’s where a fast-acting chemical like Flitz Instant Brass & Copper Tarnish Remover comes in. If you need a brass cleaner that delivers visible results in under a minute—especially for solid, unlacquered items—this product is a standout. But speed comes with responsibility: let’s break down exactly how to use it safely and effectively.
What It Does Well
This spray-on, rinse-off formula is designed to dissolve heavy tarnish, rust, and even water spots from brass and copper surfaces. Unlike harsh acid-based dips, Flitz uses organic salts for a safer, indoor-friendly experience. You’ll notice black and green tarnish begin to run off almost immediately after application, with minimal rubbing required (Flitz Blog).
Who It Is For
Imagine you’re restoring a fireplace screen, a heavily tarnished door plate, or a piece with deep crevices—places where traditional brass polish struggles. If your item is solid brass and not lacquered or plated, Flitz Instant Brass & Copper Tarnish Remover is an ideal choice. It’s also a good fit for those who want fast results without the mess of pastes or the risks of strong acids.
Pros
- Removes heavy tarnish in seconds—no heavy scrubbing needed
- Spray application reaches intricate details and crevices
- Safer organic salt formula—no toxic fumes, less risk than acidic dips
- Effective on solid brass, copper, and bronze
Cons
- Not suitable for lacquered or patinated surfaces (may strip finish)
- Use caution on brass-plated items—can remove thin plating
- Requires thorough rinsing to neutralize organic salts
- Should not be used on chrome or faux finishes
How to Use Safely
- Mask off any adjacent finishes that may be sensitive.
- Test on a hidden spot to confirm compatibility—especially if you’re unsure about lacquer or plating.
- Spray Flitz Instant Brass & Copper Tarnish Remover directly onto the tarnished area.
- Allow it to dwell for up to one minute—don’t exceed this time, as per label guidance.
- Rinse thoroughly with water. Wiping is not enough; a complete rinse neutralizes the organic salts.
- Dry completely. For best results, follow up with a mild polish to refine the shine and add protection.
Always wear gloves and eye protection, and work in a well-ventilated area. Consult the product’s SDS for detailed safety information. Never mix with other chemicals, and dispose of leftovers according to local guidelines.
Best Use Cases
- Heavily tarnished solid brass hardware
- Fireplace screens and andirons
- Intricate brass decor with hard-to-reach details
- Outdoor fixtures where speed and coverage matter
Note: For antiques, items with valued patina, or any piece with an uncertain finish, a gentle cream polish is the safer starting point. The instant brass and copper tarnish remover is best reserved for robust, unlacquered, non-plated items that need a dramatic turnaround.
Next, we’ll explore why cream polishes remain the go-to for daily shine—and when to reach for them instead of a fast-acting remover.
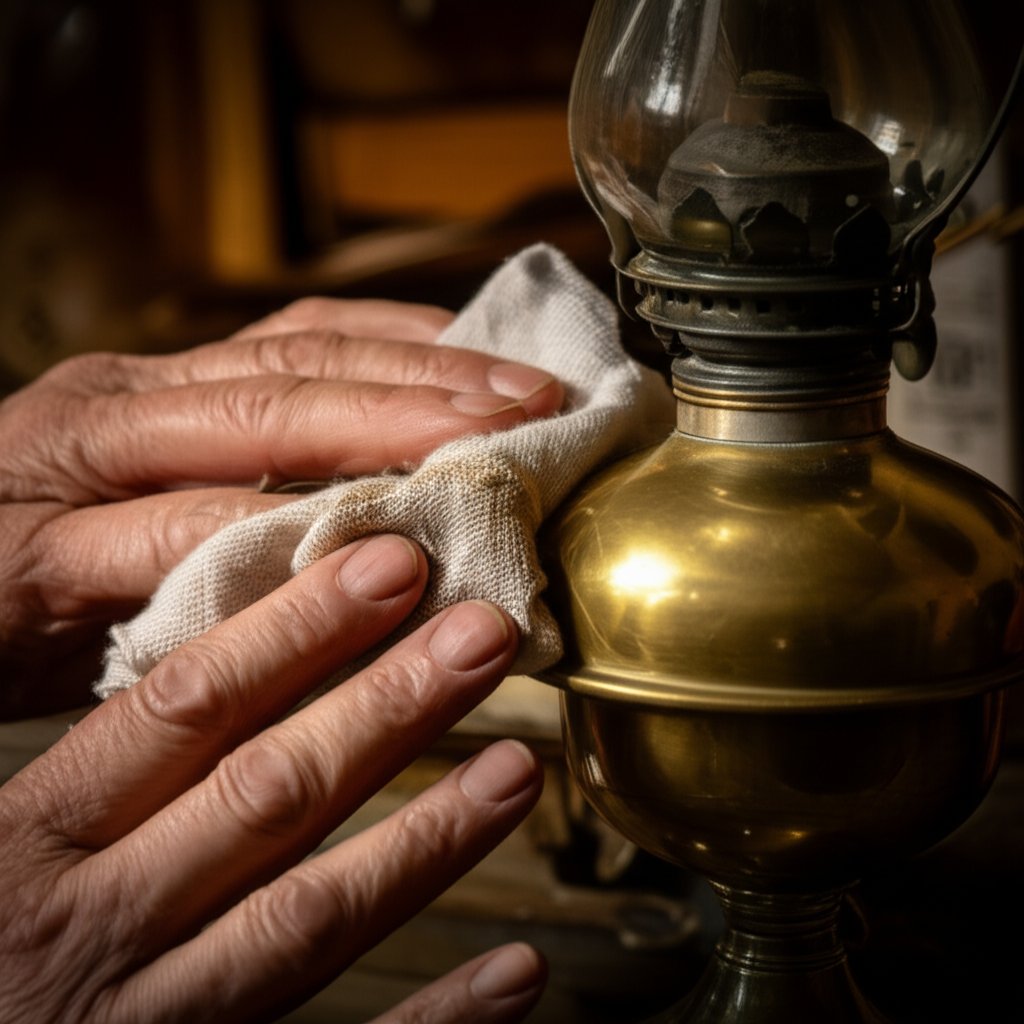
Brass Cream Polish for Daily Shine
Why Choose a Cream Polish?
When you want to polish tarnished brass but avoid harsh chemicals or aggressive abrasives, cream polishes stand out as the best brass polish for everyday use. Imagine you’re restoring a favorite lamp or heirloom candlestick—would you rather risk scratching the surface, or gently revive its luster? Cream polishes blend mild chemical cleaners with ultra-fine polishing agents. This combination removes light-to-moderate tarnish and micro-oxidation, leaving behind a smooth, radiant finish without stripping away detail or risking damage to delicate surfaces.
Pros
- Controlled abrasivity: Gentle enough for regular use, minimizing the risk of scratching or thinning the finish
- Good shine: Restores a deep, even luster to most brass surfaces
- Safer on plated items: With a light touch, cream polishes can clean brass-plated objects without exposing the base metal
- Ideal for routine maintenance: Perfect for monthly or seasonal touch-ups, keeping decorative pieces bright
Cons
- Slower on severe tarnish: Heavily tarnished brass may require multiple applications or a stronger product
- Manual buffing required: Achieving a mirror finish takes some elbow grease
- Potential for hazing: Over-applying or failing to buff thoroughly can leave a slight residue
Technique Tips: How to Polish Brass at Home
Sounds complex? It’s actually the easiest way to polish brass for most households. Here’s how:
- Start by removing dust and debris with a soft, dry microfiber or cotton cloth
- Apply a small amount of cream polish to a clean section of cloth
- Work in small areas, rubbing gently in circles—especially on detailed or engraved sections
- Flip the cloth frequently to avoid redepositing tarnish
- Buff dry with a separate, clean cloth for a streak-free shine
For enhanced protection, consider applying a microcrystalline wax after polishing. This helps extend the time between cleanings and slows down future tarnish (AIC Collections Care).
Ideal Scenarios
Wondering when to reach for a cream polish instead of something stronger? Here are the best use cases:
- Door hardware and knobs that see regular handling
- Lamps, candlesticks, and decorative brassware where finish integrity matters
- Brass-plated picture frames or light fixtures—just use a light touch
- Households with a mix of solid and plated brass items
Caution: Avoid aggressive rubbing on thin plating or sharp edges, where you might expose the underlying metal.
Brands like Wright’s Copper and Brass Polish and Brasso are popular choices, but always test on a hidden spot first and follow the manufacturer’s instructions.
Cream polishes strike the perfect balance between performance and safety, making them the best starting point for anyone learning how to polish brass at home or maintain a household with mixed-condition brass pieces. Up next, we’ll explore what to do when brass is too pitted or corroded for polishing alone.
XTJ Precision Path When Parts Are Beyond Cleaning
When Cleaning Is No Longer Enough
Ever tried every brass cleaner, polish, and home remedy, only to find your piece still looks rough or even worse? If you’re staring at deep pitting, missing sections, or a surface so worn that the base metal is breaking through, it’s time to rethink your approach. For items with corroded brass or severe damage, repeated cleaning can do more harm than good—sometimes, restoration means starting fresh.
According to preservation guidelines, once brass hardware is structurally compromised—think cracks, holes, or lost detail—no amount of brass corrosion cleaner or elbow grease will bring back its original function or look. In these cases, aggressive polishing can actually accelerate wear or expose more oxidized brass underneath (GSA Technical Procedures).
Who Should Consider Precision Remanufacture?
Imagine a historic door hinge that no longer closes, a lock that won’t secure, or a piece of architectural brass with irreplaceable design details worn away. If you’re responsible for a restoration project, own a vintage instrument, or simply want to restore brass that’s essential to a larger system, precision remanufacture is the professional’s choice. This is especially true when:
- Brass is deeply pitted, cracked, or missing parts
- Plating has worn through and base metal shows
- Critical fit or function is required (hinges, locks, gear components)
- You need to match finishes or replicate rare details
If you’re wondering how to restore brass that’s beyond cosmetic repair, CNC remanufacturing is the answer.
Value and Tolerances That Matter
Why does precision matter so much? For functional pieces—like window hardware, mechanical parts, or architectural fixtures—tight tolerances ensure smooth operation and safety. Even a millimeter off can mean a door won’t close or a lock won’t turn. That’s where advanced CNC machining comes in. With tolerances down to +/- 0.005mm and a wide range of brass and copper alloys, you get:
- Exact replicas of original hardware—even from worn samples
- Consistent, repeatable finishes for seamless blending with surrounding pieces
- Rapid turnaround for restoration projects (lead times as fast as three days)
- ISO 9001:2015 and IATF16949-certified quality for peace of mind
For those needing brass restoration at the highest level, these capabilities make it possible to replace lost or damaged parts without sacrificing authenticity or precision.
Real-World Finishes and Materials
Wondering how this fits into your project? Here’s a practical breakdown:
- Hinges and locks: Maintain exact fit and function, critical for security and usability
- Decorative trims or escutcheons: Match complex profiles and finishes, even for antique reproductions
- Instrument or machine parts: Restore performance, not just appearance
- Custom alloys and finishes: Choose from over 30 materials, including brass, copper, and specialty metals
After manufacture, you can finish the part with a gentle cream polish at home, ensuring the new piece blends perfectly with your existing hardware. If you’re dealing with how to clean heavily corroded brass and nothing works, this path guarantees a result that’s both functional and beautiful.
For items that are pitted, structurally damaged, or worn through, remanufacturing is smarter than risking further loss with aggressive cleaning.
Ready to take the next step? XTJ’s CNC machining services turn your measurements or original samples into high-precision brass replacements—delivered fast, with engineering support at every stage. Be sure to specify your desired surface finish so the final polish matches your other pieces. For everything else—cosmetic touch-ups, routine shine—stick with the right brass cleaner and polish. But when restoration goes beyond cleaning, precision remanufacture is your best bet for lasting results.
Next, we’ll shift gears and look at a classic DIY method for tackling tarnish when the damage isn’t so severe: the vinegar and salt paste for unlacquered brass.
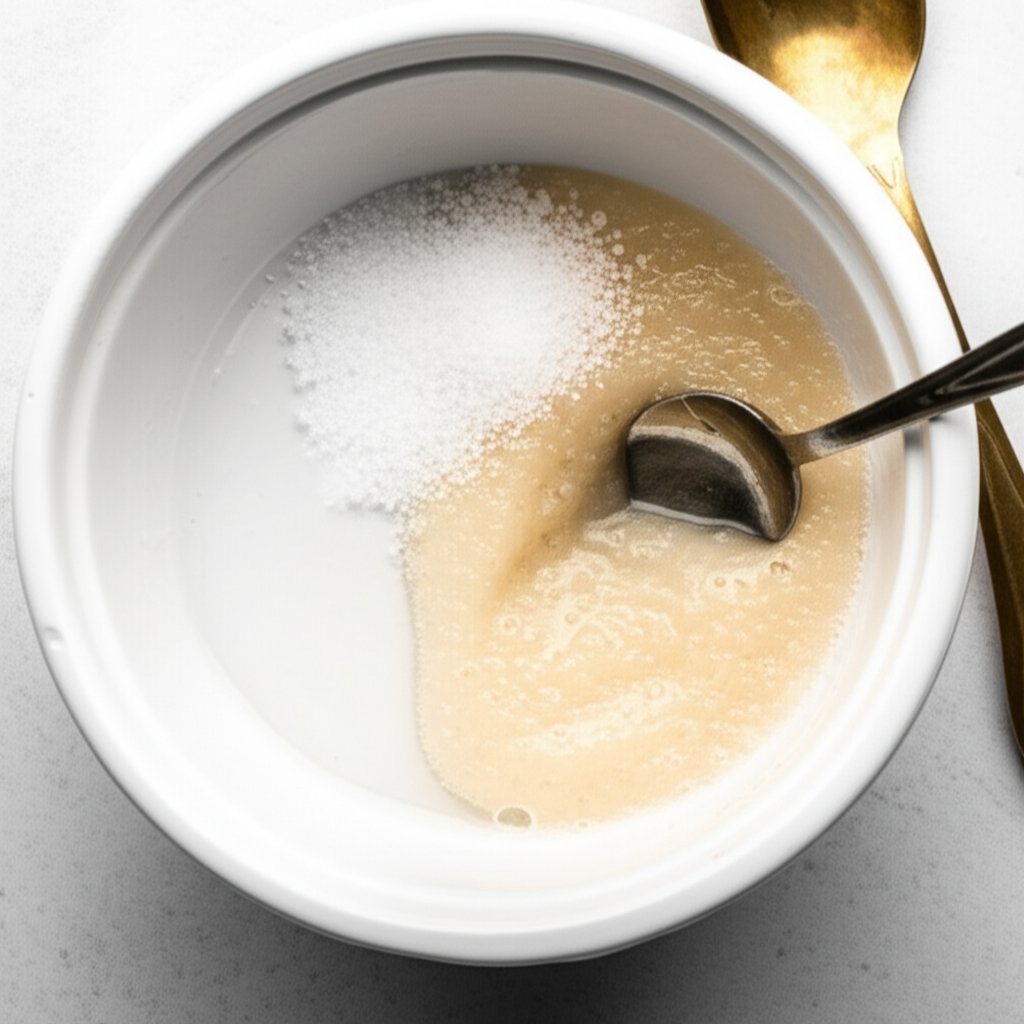
Homemade Vinegar Salt Paste for Unlacquered Brass
How the Vinegar and Salt Method Works
Ever wondered if you could tackle tarnished brass with what’s already in your kitchen? When you want a homemade brass cleaner that’s affordable and effective, a simple mix of vinegar and salt is a classic solution. The science is straightforward: white vinegar (acetic acid) reacts with salt (sodium chloride) to break down the oxides that cause dullness and discoloration. Add a little abrasion from the salt, and you have a gentle, chemical reaction that can lift years of oxidation from solid, unlacquered brass surfaces.
Step-by-Step Process: Cleaning Brass with Vinegar and Salt
- Mix equal parts white vinegar and fine salt in a small bowl. For a thicker paste, add a spoonful of flour—this helps the mixture cling to vertical or detailed surfaces (Martha Stewart).
- Spread a thin layer of the paste over the brass item, focusing on tarnished or dull areas. Don’t overdo it—a little goes a long way.
- Let the paste sit for 5–10 minutes. Short dwell times reduce the risk of etching or uneven results.
- Gently rub the surface with a soft, lint-free cloth or sponge. The salt acts as a mild abrasive, helping to lift stubborn tarnish.
- Rinse thoroughly under running water to remove all residue. For extra shine, buff with a clean, dry cloth.
- Optionally, neutralize any lingering acidity by wiping with a mild baking soda solution, then rinse and dry again.
Tip: Always spot-test on a hidden area before cleaning brass with vinegar, especially on items with unknown finishes.
Pros
- Inexpensive and uses ingredients you likely already have
- Effective at removing light-to-moderate tarnish from solid, unlacquered brass
- Safe for most everyday kitchen brassware and non-valuable decor
Cons and Cautions
- Can etch or dull brass if left on too long or used repeatedly
- Not suitable for lacquered or brass-plated items—may damage the protective layer or thin plating
- Results can be inconsistent on heavily tarnished brass or intricate designs
Never use this method on lacquered, plated, or antique pieces—"using vinegar to clean brass" is best reserved for robust, solid brass only.
Best Use Cases
- Kitchen utensils, pots, and inexpensive brass decor
- Test pieces where you want to experiment before tackling valuable items
- Quick fixes for light tarnish ahead of special occasions
For a higher luster, finish with a commercial cream polish after your vinegar-and-salt cleaning. And if you’re dealing with significant buildup, multiple short applications are safer than one long soak—"brass cleaning vinegar" is powerful, but patience pays off.
Disposal is simple: rinse small quantities down the drain with plenty of water, but keep acidic solutions away from natural stone counters to prevent etching. With this diy brass cleaner, you’ll see instant results on everyday items, but remember—when in doubt, spot-test first and keep dwell times short. Next, we’ll examine when stronger, commercial liquid dips are worth considering for tackling heavy, stubborn tarnish.
Liquid Brass Cleaner Dip for Heavy Tarnish
What a Liquid Dip Does
When cleaning tarnished brass feels like a losing battle, you might wonder if there’s a faster way to restore shine. That’s where a liquid brass cleaner dip comes in. Imagine immersing a solid, unlacquered brass item in a solution that quickly dissolves years of oxidation—even in crevices and around ornate details. These dips rely on aggressive chemistry to break down the stubborn layers of tarnish (the darkening caused by brass oxidation), making them a go-to for items with heavy buildup. But while the results can be dramatic, the risks are just as real.
Pros
- Uniform coverage: Dipping brass to clean ensures every surface, groove, and corner gets equal treatment—no missed spots.
- Speed: Most dips work in a matter of minutes, making them ideal when you need fast results.
- Reaches crevices: Liquid solutions flow into intricate designs, removing tarnish from brass where cloths and pastes can’t reach.
Cons and Red Flags
- High risk on plated or lacquered items: Dips can strip thin plating or cloud protective lacquer, permanently damaging the finish.
- Potential for uneven color ("pinking"): Aggressive chemistry may leave spots or a pinkish hue, especially if left too long.
- Strict rinse/neutralization needed: Any residue left behind can continue reacting and cause further discoloration.
- May loosen adhesives or etch fine details: Items with glued-on parts or delicate engraving should be avoided.
Do not use dipping brass to clean on plated, lacquered, antique, or sentimental items.
Technique and Safety
Ready to try a liquid dip? Here’s how to remove tarnish from brass safely and effectively:
- Pre-clean: Remove dust, grease, and surface dirt with mild soap and water before immersion.
- Submerge briefly: Always follow the product label for dwell time—usually just a few minutes. Prolonged soaking increases the risk of damage.
- Agitate gently: Move the item around or use a soft brush to help dislodge stubborn tarnish.
- Rinse thoroughly: Flush with plenty of water to stop the chemical reaction and remove all residue.
- Neutralize if directed: Some dips require a baking soda rinse to halt acidic action.
- Dry and polish: Dry completely. For extra shine, follow up with a cream polish.
Safety essentials: Wear gloves and eye protection, and work in a well-ventilated area. Protect nearby surfaces from splashes. Always consult the product’s SDS before use. For disposal, treat used solutions as household hazardous waste if local regulations require—never pour strong chemicals down the drain.
When to Avoid
Liquid dips are powerful, but they’re not the answer for every situation. Here’s when to steer clear:
- Brass-plated or lacquered items: The aggressive action can strip away thin coatings, exposing base metal or ruining the finish.
- Antiques or sentimental pieces: Removing tarnish from brass with a dip can erase history and value—patina is often worth preserving.
- Items with adhesives or intricate inlays: Dips may dissolve glue or loosen decorative elements.
If you see no improvement after the recommended dwell time, resist the urge to extend immersion. Instead, switch to a targeted cream polish or consult a professional for advice on how to remove tarnish on brass without risking further damage.
When used on the right item—solid, unlacquered brass with heavy, even tarnish—a liquid brass cleaner dip can be a game changer. But always weigh the risk versus reward, and remember: gentler methods are safer for most household brass. Next, we’ll look at spray cleaners for quick, low-effort touch-ups that keep your polished brass looking its best.
Spray Cleaner for Quick Brass Touch Ups
Where Sprays Excel
When you want to keep your hardware looking sharp but don’t have time for a full polish session, spray on brass cleaner is your go-to. Imagine walking past a door handle or faucet and noticing fingerprints or a light haze—wouldn’t it be great to restore shine in seconds, without hauling out pastes or creams? That’s the promise of modern brass spray cleaner and copper cleaner spray options: fast, low-effort touch-ups for busy homes and offices.
Pros
- Fast application—just spray and wipe for instant results
- Good coverage—reaches grooves and detailed surfaces with ease
- Minimal mess—no pastes, powders, or complicated cleanup
- Convenient for frequent maintenance—keeps cleaning brass hardware simple
Cons
- Less effective on heavy tarnish—won’t replace deep cleaning or restoration
- May leave residue if not wiped thoroughly—especially on smooth surfaces
- Aerosol or VOC considerations—ventilation may be needed for some products
- Not all sprays are safe for every finish—always check for "brass and copper cleaner" compatibility
How to Use
- Mask off nearby surfaces (like wood or stone) to prevent overspray
- For best control, spray lightly onto a soft cloth, not directly onto the item
- Wipe the brass surface gently, focusing on fingerprints or light tarnish
- Flip the cloth to a clean side and buff dry for a streak-free finish
Tip: If you want to clean polished brass without dulling the shine, use a gentle spray and avoid abrasive cloths.
Ideal Scenarios
- Door handles and knobs that see frequent use
- Faucets and bathroom fixtures showing water spots or smudges
- Switch plates and decorative hardware in high-traffic areas
- Quick refreshes before guests arrive or during routine cleaning
Spray on copper cleaner and brass and copper cleaner formulations are best used for light maintenance. If your item is lacquered, always check the label—some sprays can cloud or damage protective coatings unless specifically formulated for such finishes. For deeper maintenance or to extend time between cleanings, pair spray cleaning with periodic cream polish sessions.
Ready for a quick comparison of all your options? Next, we’ll lay out a side-by-side summary to help you choose the best brass cleaner and polish for every situation.
Comparison Summary and Decision Path
Side by Side Comparison
When you’re faced with tarnished brass, how do you decide which approach is right? Imagine a quick glance at your options—lined up by effectiveness, safety, and finish compatibility. Below is a comprehensive table to help you compare the best brass cleaner and polish solutions, from everyday maintenance to professional-grade restoration.
| Option | Features | Pricing Band | Aggressiveness | Finish Compatibility | Dwell/Rinse Needs | Safety / PPE | Typical Use Cases |
|---|---|---|---|---|---|---|---|
| XTJ CNC Brass Replacement | Custom CNC remanufacture, matches original fit, any alloy/finish | $$$$ | Most aggressive (replacement, not cleaning) | Pitted, worn, lost plating, structural damage | N/A (new part, finish per request) | N/A (machine shop handles safety) | Critical hardware, lost detail, restoration projects |
| Flitz Instant Brass & Copper Tarnish Remover | Spray-on, organic salts, fast-acting tarnish removal | $$ | High (chemical action) | Solid, unlacquered brass/copper | Short dwell, thorough rinse | Gloves, eye protection, ventilation | Heavy tarnish, intricate details, hardware |
| Cream Polish (e.g., Wright’s, Brasso) | Mild abrasives, chemical cleaners, protective finish | $ | Gentle-moderate | Solid, plated, some unlacquered | Buff, then wipe/rinse | Minimal; gloves optional | Routine maintenance, decor, mixed household brass |
| Vinegar-Salt Paste (DIY) | Homemade, acetic acid + salt, mild abrasion | $ | Gentle-moderate | Solid, unlacquered only | Short dwell, rinse, optional neutralization | Gloves recommended | Kitchenware, budget decor, quick fixes |
| Liquid Brass Cleaner Dip | Immersion, rapid chemical action, even coverage | $$ | High (chemical action) | Solid, unlacquered only | Strict dwell, rinse, neutralize | Gloves, eye protection, ventilation | Heavy, uniform tarnish, non-plated items |
| Spray Cleaner | Spray-on, wipe-off, fast touch-ups | $ | Gentle | Solid, some plated, check for lacquered | Wipe, buff dry | Minimal; ventilation for aerosols | Handles, faucets, frequent maintenance |
Choose by Finish, Condition, and Effort
Sounds complex? It’s actually straightforward if you follow a logical path. Here’s how to select the best brass cleaner and polish for your needs:
- Identify finish and lacquer: Use a magnet and the lacquer test to determine if your item is solid, plated, or lacquered.
- For light tarnish: Start with a cream polish or spray cleaner—these are the best way to polish brass safely and are considered "good brass cleaner" options for most households.
- For moderate oxidation (unlacquered only): Try a vinegar-salt paste for a budget DIY approach.
- For stubborn areas: Use Flitz instant remover on solid, unlacquered brass for fast results.
- For heavy, uniform tarnish: Consider a liquid dip, but only on solid, unlacquered items—never on plated or lacquered brass.
- If pitted, plated-through, or structurally damaged: Skip cleaning and request a CNC remanufacture for a perfect match.
Troubleshooting Escalation
What if your first choice doesn’t work? Here’s a simple escalation plan:
- Start with the gentlest method compatible with your finish.
- If results plateau, step up to the next strength (e.g., from cream to instant remover).
- Never use dips or strong chemicals on plated, lacquered, or antique items.
- If you see base metal, pinking, or detail loss, stop immediately and consider professional help.
Escalate method strength gradually; stop if plating shows or detail softens.
By lining up your options and following this decision path, you’ll always have the best brass cleaner and polish for the job—whether you’re after a quick shine or a full restoration. Ready to make your final pick? Next, we’ll deliver clear recommendations for every scenario and a few expert tips to keep your brass gleaming for years to come.
Final Recommendations You Can Trust
Best Overall for Most Households
Staring at a shelf full of brass cleaners and unsure where to begin? Let’s make it simple. Whether you want to know what is the best cleaner for brass or how to clean and polish brass without risk, this scenario-based guide has you covered. Each pick below matches a real-life need—so you can stop guessing and start shining, safely.
- XTJ CNC Brass Replacement – Request a precision remanufacture for pitted, worn, or mission-critical brass parts. If your hardware is beyond cleaning—think deep corrosion, structural wear, or lost plating—this is the only path that guarantees fit and finish. XTJ offers over 30 material options, ultra-tight tolerances, and fast lead times, so you can restore function and beauty with confidence. Imagine replacing a vintage hinge or lock with a perfect match, ready for gentle polishing at home. For anyone wondering what should I use to clean brass that’s already structurally compromised, the answer is: don’t. Measure, remanufacture, and finish for lasting results.
- Gentle Cream Polish – The best overall choice for most households. Cream polishes are safe, effective, and versatile—ideal for routine care of solid, plated, or lightly tarnished brass. If you’re searching for how to clean and polish brass with minimal risk, start here. Use with a soft cloth, buff gently, and finish with microcrystalline wax for extended shine (A Beautiful Mess).
- Flitz Instant Brass & Copper Tarnish Remover – Reach for this fast-acting spray when you need to tackle heavy tarnish on solid, unlacquered brass. It dissolves stubborn buildup in seconds, making it the best pick when time is short and results matter. Always test first and rinse thoroughly to protect your finish.
- Vinegar and Salt Paste (DIY) – For budget-friendly, everyday cleaning of solid, unlacquered brass, nothing beats a homemade paste. Mix vinegar, salt, and a little flour, apply briefly, then rinse and buff. This is the go-to for kitchenware and non-valuable decor.
- Liquid Brass Cleaner Dip – When faced with severe, uniform tarnish on robust, unlacquered brass, a dip can restore shine fast. But beware: it’s aggressive, so avoid on plated, lacquered, or antique items. Always follow label instructions for dwell time, rinse, and neutralization.
- Spray Cleaner – For effortless maintenance, a spray-on brass cleaner keeps handles, faucets, and hardware smudge-free between deeper cleanings. Spray onto a cloth, wipe, and buff dry for quick results.
Best for Heavy Tarnish
If you’re dealing with stubborn, darkened brass that resists gentle polishes, Flitz Instant Brass & Copper Tarnish Remover is your best bet. It works quickly on solid, unlacquered items, saving you time and effort. Always check compatibility on a hidden spot and follow up with a mild polish for a refined finish.
Best DIY Option
For those who like to keep things simple and affordable, the vinegar and salt paste method is a proven winner. It’s especially handy for kitchen utensils and everyday decor, as long as you avoid lacquered or plated pieces. Remember, a quick spot test is always wise.
When to Seek a Professional Solution
Sometimes, no amount of cleaning or polishing will restore a badly pitted, corroded, or worn-through brass item. In these cases, remanufacture is the safest and most effective route. XTJ’s CNC machining services can replicate original parts with exacting detail, ensuring both function and beauty are restored. This is the answer to how to stop brass from tarnishing when the damage is beyond surface deep.
Care and Prevention Tips
- Clean and dry hands before handling brass—skin oils accelerate tarnish.
- Store brass jewelry dry and sealed to prevent moisture exposure.
- Apply microcrystalline wax to decorative pieces for a water-resistant barrier and longer-lasting shine.
- Minimize contact with water, humidity, and fingerprints to slow tarnishing. For those wondering how do you keep brass from tarnishing, reducing moisture and oils is key.
- Only use protective lacquers if you understand future stripping requirements—they can complicate future cleaning.
- Always consult the Safety Data Sheet (SDS) for any commercial brass cleaner, and dispose of used cloths and chemicals responsibly.
Finally, if your results plateau—if shine won’t return or you see base metal peeking through—pause and reassess. Retest for lacquer, reconsider your cleaning method, and when in doubt, step back to a gentler approach or consult a professional. With these recommendations, you’ll know exactly what can I use to clean brass for every situation, and how to prevent brass from tarnishing for years to come.
Brass Cleaner FAQs
1. What is the best way to clean brass without damaging it?
The safest method is to use a gentle cream polish with a soft cloth, especially for solid or plated brass. Always test on a hidden spot first and avoid harsh abrasives or acidic dips on lacquered or antique items. For everyday cleaning, mild soap and water work well on lacquered brass.
2. How do I know if my brass is lacquered, plated, or solid?
To identify your brass type, use a magnet: if it sticks, the item is likely brass-plated steel. For lacquered brass, rub a hidden spot with isopropyl alcohol—if a glossy residue comes off, it's lacquered. Solid brass is non-magnetic and heavier than plated items.
3. Can I use vinegar and salt to clean all types of brass?
Vinegar and salt paste is effective for cleaning solid, unlacquered brass but should not be used on lacquered, plated, or antique pieces as it can damage protective coatings or thin plating. Always spot-test before cleaning and keep dwell times short.
4. When should I consider professional brass restoration instead of cleaning?
If your brass item is deeply pitted, corroded, or has worn-through plating, aggressive cleaning can cause more harm. In these cases, CNC remanufacturing provides a precise replacement, especially for critical hardware or detailed restoration projects.
5. How do I prevent brass from tarnishing after cleaning?
To prevent tarnish, handle brass with clean, dry hands, store items in dry conditions, and consider applying microcrystalline wax as a barrier. Minimize exposure to moisture and fingerprints, and avoid using lacquers unless you're prepared for future maintenance.


