
Brass Melting Point, In °C And °F: Real Values, Charts, Resources
Understanding the Brass Melting Point
What brass is and why its melting point is a range
Ever wondered why the brass melting point isn’t a single number? If you’ve searched for “what is the melting point of brass,” you’ve likely seen a range—and there’s a good reason for that. Brass isn’t a pure metal; it’s a copper and zinc alloy, sometimes with traces of lead, tin, or iron. This means its properties—including its melting behavior—are controlled by both the copper and zinc content and any impurities that sneak in during production. The result? The melting point of brass can shift, depending on its exact composition and even how it was processed.
Solidus versus liquidus explained in plain language
Here’s where things get interesting. When heating brass, it doesn’t instantly jump from solid to liquid at one temperature. Instead, it starts to melt at its solidus temperature and finishes melting at its liquidus temperature. Imagine heating a block of ice: it starts softening around the edges before it becomes a puddle. Brass behaves similarly—there’s a “mushy zone” between solidus and liquidus where both solid and liquid phases exist. This is why the brass melting temperature is always given as a range. If you’re looking for a technical definition of melting temperature, it’s the point where a material changes from solid to liquid, but for alloys like brass, that transition happens over a span of degrees rather than at a single spot.
Where brass fits among common types of metals
So, how does brass compare to other metals? In the world of metal melting points, pure copper melts at a much higher temperature than brass, while pure zinc melts at a much lower one. Brass, as a copper zinc alloy, lands right in the middle. This makes it more versatile than pure zinc for high-temperature applications, but easier to work with than copper. When you’re comparing bronze vs brass, remember that bronze (a copper-tin alloy) generally melts at a higher temperature than most brasses, making brass a go-to choice for processes that require moderate heat resistance.
Why melting behavior matters for casting and machining
Why should you care about the melting point of brass? Because this range directly impacts how you cast, braze, or machine brass components. If you’re melting brass for casting, you need to know both the solidus and liquidus to avoid incomplete fills or excessive zinc loss. For machining, brass’s moderate melting point means it can handle the heat generated by cutting tools without warping or losing its finish. This is why brass is a favorite for everything from decorative hardware to precision gears.
- Casting: Choosing the right temperature ensures complete mold filling and clean part release.
- Soldering/Brazing: Knowing the melting range prevents joint failure or accidental melting of the base metal.
- Heat Treatment: Correct process temperatures improve hardness and durability without damaging the part.
- Machining: Brass’s stable melting range supports high-speed cutting and excellent surface finish.
Brass does not have one melting point; composition and phases control when it starts and finishes melting.
In summary, understanding the melting behavior of brass isn’t just about numbers—it’s about making smarter decisions in manufacturing, repair, and design. Whether you’re comparing bronze vs brass or just looking for the right alloy for the job, knowing why brass melts over a range helps you pick the right process and avoid costly mistakes. For those who want exact figures and detailed charts, stay tuned: later sections provide data-backed tables and deeper dives into alloy families, with references to ASM and ASTM standards for validation.
Cu–Zn Phase Behavior Made Practical
Reading the Cu–Zn phase diagram without the jargon
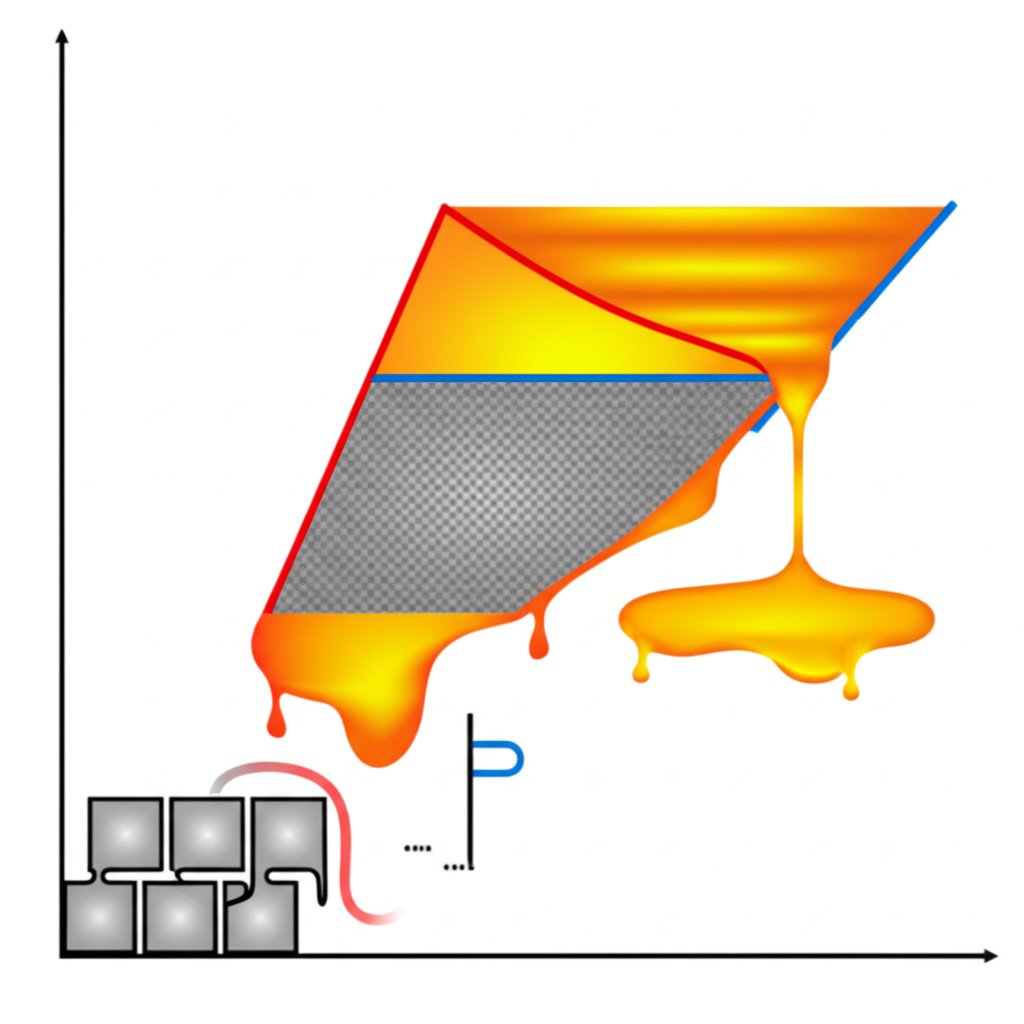
When you hear “phase diagram,” does it sound intimidating? Don’t worry—you don’t need to be a metallurgist to use the Cu–Zn (copper-zinc) phase diagram for better brass melting results. Imagine the diagram as a map that shows how brass behaves as you heat it up, with the melting temperature of brass depending on the exact copper and zinc mix. The two most important lines are:
- Solidus: The temperature where brass starts to melt. Below this, it’s all solid.
- Liquidus: The temperature where brass is fully liquid. Above this, you have a pourable melt.
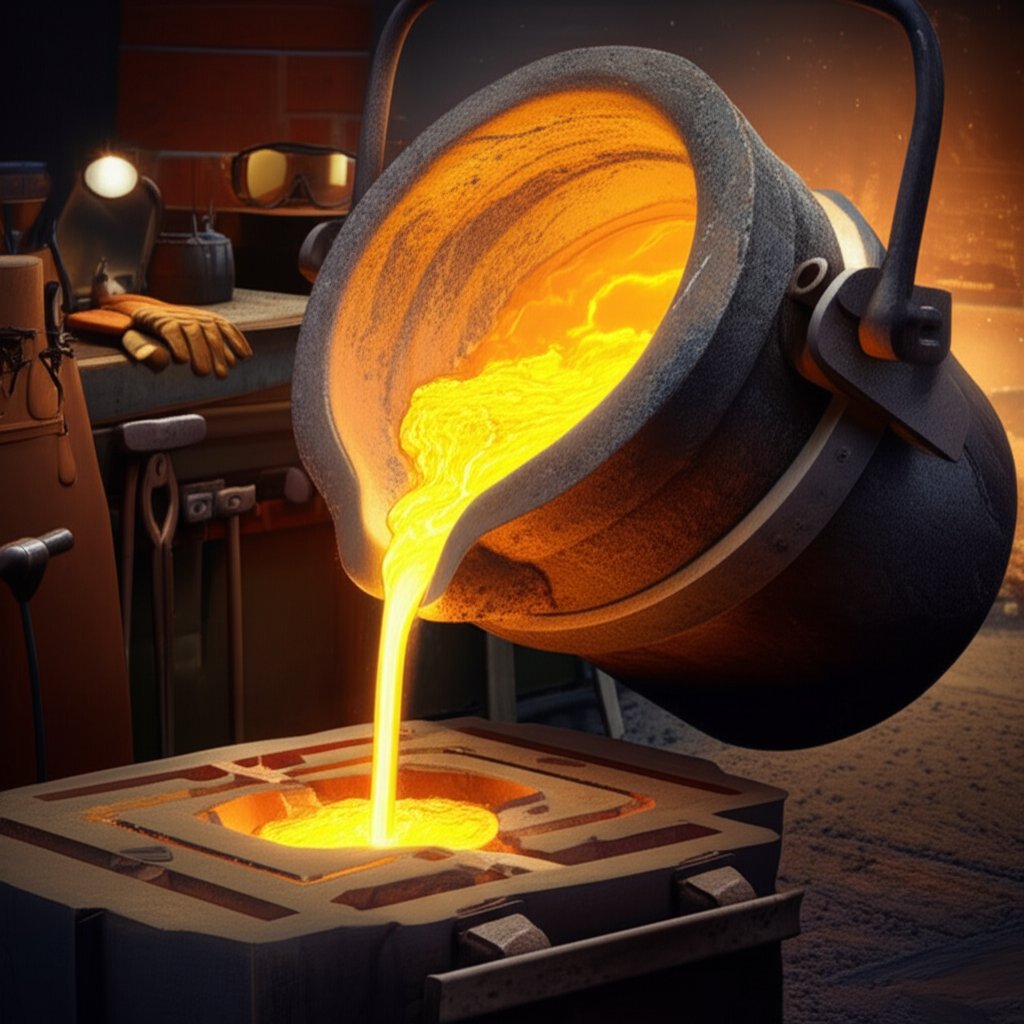
Between these lines, the alloy is in a “mushy” state—a mix of solid and liquid. This is why the melt point of brass is a range, not a single number. In a furnace, you’ll see the charge begin to soften and partially liquefy before it flows freely. That’s the practical effect of the phase diagram in action.
Alpha, alpha–beta, and what they mean for melting control
Why does this matter for your furnace or foundry? The answer lies in the phases:
- Alpha brass: Up to about 30-35% zinc, brass stays in the alpha phase—a single, uniform structure. Melting is more predictable, and the alloy is easy to work with.
- Alpha–beta brass: With more zinc (typically 30–45%), the alloy contains both alpha and beta phases. This creates a wider melting range and changes how the metal flows and solidifies (DoITPoMS).
In the furnace, alpha brasses will start melting at a lower temperature and flow more smoothly. Alpha–beta brasses, on the other hand, may become “pasty” before fully melting, which affects pouring and mold filling. This is why knowing your alloy’s phase region helps you hit the right brass melt temperature for casting or brazing.
Solidus versus liquidus and safe superheat margins
If you’re melting brass, you want to go just above the liquidus—hot enough to ensure the alloy is fully liquid, but not so hot that you risk excessive zinc loss (since zinc boils at a much lower temperature than copper). This is where understanding the metal melting points pays off: you set your furnace just above the liquidus, then pour promptly. Too much superheat can lead to zinc vaporization and gas pickup, causing defects in the final casting.
Operate above liquidus but with limited superheat to reduce Zn loss and gas pickup.
Using a digital pyrometer or temperature probe is a smart way to monitor the melt and avoid overshooting the ideal brass melt temperature.
Why eutectic behavior demands tighter temperature control
Some brasses approach a eutectic point—a specific composition where the alloy melts at the lowest possible temperature for that system. Near this point, the melting range narrows sharply, so even a small temperature overshoot can cause the entire charge to liquefy suddenly. This makes temperature control critical for certain brass grades, especially if you’re working with thin-walled castings or need precise microstructures.
- Pouring too cold? You’ll get incomplete fills and rough surfaces.
- Pouring too hot? Expect zinc loss, gas porosity, and shrinkage defects.
By reading the phase diagram and knowing at what temperature brass melts for your specific alloy, you can optimize your process for better results—whether you’re casting, brazing, or heat treating. And if you’re ever in doubt, remember that the melting temperature of brass is always a range, shaped by both composition and the unique properties of copper and zinc.
Next, we’ll see how changing the alloy composition further shifts this melting window—and what that means for your casting performance and process control.
How Composition Shifts the Melting Range of Brass Alloys
How composition changes the melting window
Ever wondered why the melting temperature for brass can vary so much from one part to another? The answer lies in the alloy composition of brass. By adjusting the ratio of copper to zinc—and sometimes adding elements like lead, tin, or manganese—manufacturers can fine-tune not only the physical properties but also the brass melt point. In general, as you increase the zinc content in a copper zinc alloy, the melting point drops at first, then the melting range (the difference between solidus and liquidus) can widen, and the alloy’s casting behavior shifts in ways that matter for both performance and process control.
Cartridge, free-cutting, and naval brasses compared
To make this concrete, let’s compare some of the most common brass families. Each type has a distinct brass composition, which influences its melting range, fluidity, and susceptibility to process challenges like zinc loss or dezincification. Here’s a side-by-side look:
| Brass Family | Common UNS No. | Typical Composition | Melting Range(℃) | Melting Range(℉) |
|---|---|---|---|---|
| Cartridge Brass | C26000 | ~70% Cu / 30% Zn | 915 – 955°C | 1680 – 1750°F |
| Free-Cutting Brass | C36000 | ~61.5% Cu / 35.5% Zn / 3% Pb | 885 – 900°C | 1625 – 1650°F |
| Naval Brass | C46400 | ~60% Cu / 39.2% Zn / 0.8% Sn | 885 – 905°C | 1625 – 1660°F |
| Admiralty Brass | C44300 | ~71% Cu / 28% Zn / 1% Sn | 905 – 935°C | 1660 – 1715°F |
| High-Manganese Brass | C67500 | ~58.5% Cu / 39% Zn / 1.4% Fe / 1% Sn / 0.1% Mn | 870 – 890°C | 1598 – 1634°F |
As you can see, the melting temperature brass depends on the specific alloy family. Free-cutting brasses, for instance, melt at lower temperatures thanks to both higher zinc and added lead, while naval and admiralty brasses, with their tin additions, are engineered for better corrosion resistance, which also influences their specific melting windows. These differences arise directly from the alloy composition of brass and are critical for choosing the right material for your project.
Practical implications for pouring and defect control
So, what does all this mean when you’re at the furnace or foundry? Here’s what you’ll notice as you adjust the zinc content in your copper zinc alloy:
- Higher zinc content generally lowers the initial brass melt point, and also affects the melting range (the gap between solid and liquid)—making temperature control even more important for clean castings.
- Alloys with more zinc flow better in the mold, but are also more prone to zinc vaporization (white fumes) if overheated or poorly ventilated.
- Lead-containing brasses (free-cutting) are superb for machining but require extra care during melting to avoid hazardous fume exposure.
- Naval and admiralty brasses, with tin additions, resist dezincification and are ideal for marine or corrosive environments.
- Overheating any brass alloy can cause zinc loss, altering the final brass composition and potentially leading to defects or reduced corrosion resistance.
Managing zinc loss and maintaining alloy integrity
If you’re aiming for reliable, high-quality castings, managing zinc vaporization is essential. Here are some do’s and don’ts as you adjust superheat for alloys with higher zinc:
- Do use precise temperature control—stay just above the liquidus, not far into the superheat zone.
- Do provide good ventilation and wear appropriate PPE, especially with leaded or high-zinc brasses.
- Don’t overheat the melt—this accelerates zinc loss and can change the brass composition mid-process.
- Don’t reuse scrap indiscriminately; verify the alloy composition of brass to avoid unpredictable melting behavior.
In summary, the melting point brass isn’t just a number—it’s a moving target shaped by the copper, zinc, and alloying elements that define your chosen brass. By understanding how each element affects the melting range and process risks, you can make smarter choices in casting, machining, and selecting the right copper zinc alloy for your application. Next, we’ll look at the safety practices essential for melting brass—because protecting yourself is as important as protecting your material.
Safety Practices for Melting Brass
Ventilation and fume control for zinc-containing alloys
When you fire up a brass melting furnace, do you ever notice a whitish smoke or sharp metallic odor? That’s zinc vapor—an unavoidable byproduct when brass approaches its melting range. If you’ve ever wondered what temp does brass melt at and why fume control matters, here’s the answer: as temperatures rise toward the upper end of the brass melting range, zinc can vaporize, producing fumes that are hazardous to breathe. Inhaling these fumes can cause metal fume fever, with symptoms like chills, fever, and muscle aches, sometimes hours after exposure. That’s why robust ventilation is non-negotiable for melting brass safely.
- Install forced local exhaust ventilation directly above the melt zone to capture zinc fumes at the source.
- If working indoors, supplement with general room ventilation—open windows and use fans to keep air moving.
- For small-scale or hobby setups, consider portable fume extractors with HEPA or P100-rated filters.
- Never melt brass in an enclosed, unventilated space—fume buildup can be dangerous even at modest scales.
Remember, controlling fumes isn’t just about comfort—it’s about preventing serious health risks and ensuring a clean, defect-free pour. Excess zinc vapor can also lead to burnt brass surfaces and increased dross, so good ventilation protects both you and your castings (HVAC Reviews).
Essential PPE and safe furnace practices
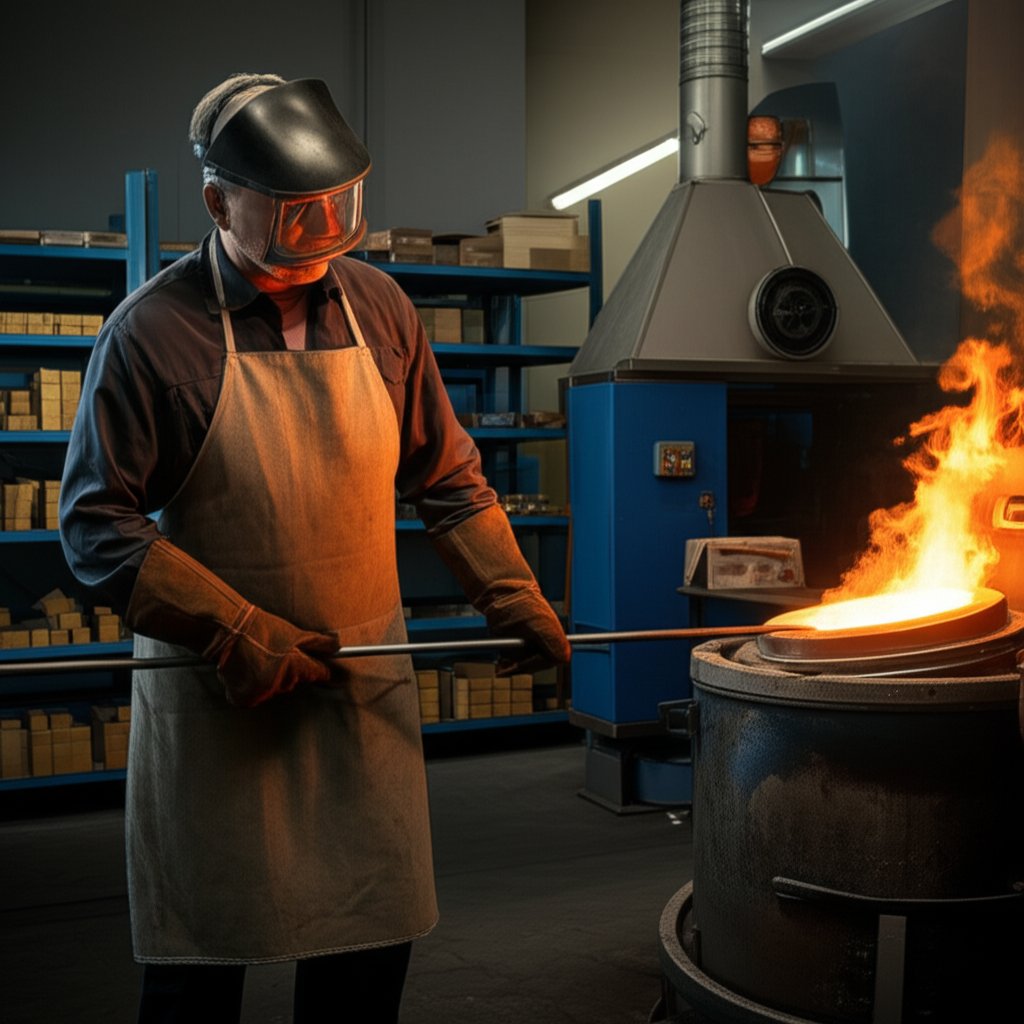
Imagine a splash of molten brass hitting your skin or eyes. Sounds scary? That’s why personal protective equipment (PPE) is a must every time you use a brass melting furnace. Here’s what you need for every melt:
- Heat-resistant gloves (preferably leather or specialized foundry gloves)
- Full-face shield or safety goggles rated for impact and splash
- Leather apron or jacket to protect your torso and arms
- Closed-toe, non-slip footwear (leather or composite)
- P100 or equivalent respirator if working in areas where zinc fumes may accumulate
Before you begin, run through these safety checks to avoid accidents and ensure a smooth melt:
- Inspect the brass melting furnace and confirm it’s clean, dry, and free from cracks or leaks.
- Check crucibles and tongs for structural integrity—replace any that show wear or damage.
- Ensure all scrap and ingots are completely dry and free from surface moisture.
- Set up your ventilation and verify it’s running before starting the melt.
- Lay out fluxes, dross skimmers, and molds in a dry, organized workspace.
Never charge wet scrap; moisture can cause steam explosions in molten brass.
Following these steps helps prevent dangerous incidents—like explosions from wet scrap or accidental contact with molten metal—and supports consistent, high-quality results every time you melt brass.
Scrap identification and sorting before re-melt
Ever wondered how to tell if that pile of scrap is safe to re-melt brass? Sorting and identifying your metal before charging the furnace prevents contamination and unpredictable melting behavior. Here’s how to do it:
- Visual cues: Brass is usually a gold or yellow color, but beware of painted or oxidized surfaces. Clean the surface to reveal true color.
- Magnet test: Brass is non-magnetic. If a magnet sticks, you likely have iron or steel—don’t mix these with your brass charge.
- Spark test: On a grinder, brass produces short, dull sparks. Ferrous metals produce longer, brighter sparks.
- Professional analysis: For unknown or high-value scrap, use X-ray fluorescence (XRF) or optical emission spectroscopy (OES) to confirm alloy content.
- Segregate leaded from unleaded brasses: Mixing can introduce unwanted lead into new castings, so keep streams separate for quality and safety.
Proper scrap sorting keeps your alloy composition consistent and minimizes the risk of burnt brass or unexpected defects in finished parts.
Emergency response for burns and fume exposure
Even with the best precautions, accidents can happen. If you or someone else is exposed to molten metal or fumes, quick action is critical:
- Thermal burns: Immediately cool the affected area with clean, running water—do not apply ice. Remove contaminated clothing, but do not pull off anything stuck to the burn. Seek medical attention for anything beyond a minor burn.
- Fume inhalation: Move to fresh air immediately. If symptoms like coughing, fever, or chest tightness develop, seek medical help. Metal fume fever can onset hours after exposure (Brass MSDS).
- Eye exposure: Rinse eyes with water for at least 15 minutes and get prompt medical care.
- Spill response: Allow spilled molten brass to cool completely before handling. Use tongs or a shovel to collect solidified metal for recycling.
Having a first aid kit, eyewash station, and fire extinguisher nearby is a smart move for any melting setup.
In summary, safe melting brass is about more than knowing at what temp does brass melt—it’s about controlling your environment, using the right PPE, and handling materials with care. By following these practices, you’ll reduce risks, protect your health, and ensure every melt delivers clean, reliable results. Up next, we’ll walk through a step-by-step protocol for melting and casting brass, so you can put these safety tips into action and achieve professional-quality castings every time.
Step by Step Brass Melting and Casting Protocol
Equipment and Crucible Selection for Clean Melts
Wondering how to melt brass safely and efficiently? The right equipment is your foundation for quality results. For most small foundries or workshops, a dedicated metal melting furnace that can reach at least 2,000°F (1,100°C) is essential—this ensures you can reach the full melting temp of brass and maintain a safe margin above liquidus for pouring. Choose a furnace that matches your batch size and preferred fuel type (propane, waste oil, or solid fuel), and always verify it’s constructed from refractory materials that can withstand repeated use.
Next, select your crucible. Graphite or clay-graphite crucibles are highly recommended for brass melting due to their durability and resistance to chemical attack. Always dedicate each crucible to a single alloy family—using the same crucible for aluminum, iron, or other metals can introduce contamination and alter the final brass casting properties. Before first use, preheat the crucible to drive off moisture and avoid dangerous spattering.
Flux Selection, Degassing, and Dross Management
Clean metal is the starting point for defect-free brass casting. After charging the furnace, fluxes are used to remove oxides and impurities from the melt. The right flux depends on your alloy and process:
- General-purpose fluxes (e.g., Reeli-Klean®): For most copper and zinc alloys, these minimize dross, reduce gas pickup, and help produce a cleaner, more fluid melt.
- Specialty fluxes (e.g., Maxiflux® CU-704): Ideal for red and yellow brasses, these aid in removing slag and controlling inclusions.
- Degassing tablets: Used when gas porosity is a concern, especially in thicker castings or when using recycled material.
Once the melt reaches the proper temperature, gently skim off dross (the oxidized layer on top) with a preheated steel spoon. Avoid excessive stirring, which can introduce air and increase gas porosity.
Superheat Targets and Controlled Pouring Sequence
How do you melt brass without losing zinc or introducing defects? The answer is precise temperature control. Brass melting temp typically ranges from 900°C to 940°C (1,650°F to 1,720°F), depending on composition. Use a pyrometer to monitor the melt, and aim for a modest superheat—just 20–40°C (35–70°F) above the liquidus—so the metal is fully liquid but not excessively hot. Excessive superheat accelerates zinc vaporization and increases the risk of oxidation (WikiHow).
- Prepare your workspace: Ensure all tools, molds, and safety equipment are clean, dry, and organized. Preheat molds to drive off moisture and avoid dangerous spatter.
- Charge the furnace: Place clean, dry brass into the preheated crucible. Add flux as needed based on your alloy and process.
- Heat to just above liquidus: Monitor temperature closely, using a pyrometer if available. Observe for a bright orange-yellow color as a visual indicator if you lack instrumentation.
- Skim dross: Use a preheated skimming spoon to remove surface oxides and impurities without excessive agitation.
- Pour promptly: Once the melt is clean and at target temperature, carefully lift the crucible and pour into preheated molds. Pouring over dry sand minimizes spatter and risk.
- Allow to cool: Let castings solidify completely before handling. Turn off the furnace and allow it to cool safely.
Mold Design Notes and Shrinkage Allowances
Choosing the right mold material impacts both the surface finish and the dimensional accuracy of your brass casting. Here’s a quick comparison:
| Mold Material | Surface Finish | Gating/Feeding Considerations | Typical Use Case |
|---|---|---|---|
| Sand | Rougher, requires post-finishing | Larger gates/risers to accommodate shrinkage | Prototyping, large or simple shapes |
| Investment (Ceramic) | Smooth, fine detail | Smaller gates, precise control | Intricate or high-detail parts |
| Permanent (Metal) | Best finish, high repeatability | Requires draft angles; fast solidification | High-volume, simple geometries |
Remember, brass contracts as it cools—so always account for shrinkage in your pattern or mold design. Consult ASM Handbook or relevant ASTM standards for specific shrinkage guidelines if your project requires tight tolerances.
For brazing or soldering, never exceed the solidus of your base brass; select filler metals with lower melting points and always consult manufacturer datasheets for recommended process temperatures.
By following this protocol, you’ll master how to melt brass and achieve reliable, high-quality results—whether you’re casting art, machine parts, or prototypes. In the next section, we’ll explore troubleshooting tips to help you diagnose and resolve common casting defects, so your brass melting efforts always pay off.
Troubleshooting Brass Casting Defects
Recognizing Brass Casting Defects Quickly
Ever pulled a casting from the mold and found holes, cracks, or odd discolorations? If so, you’re not alone. Whether you’re new to casting brass or a seasoned foundry pro, identifying defects early can save time, material, and frustration. Brass, with its unique melting point of brass metal and zinc content, is prone to specific flaws—some visible, others hidden until machining or use. Let’s break down the most common defects and what they look like in practice.
| Symptom | Probable Cause | Verification Step | Corrective Action |
|---|---|---|---|
| Gas Porosity (bubbles, pinholes inside casting) | Entrapped gas from rapid pouring, excess moisture, or zinc vaporization above zinc melting temp | Cut or X-ray casting; look for round, shiny voids | Dry all charge materials; control pouring speed; optimize venting and mold permeability; avoid overheating |
| Shrinkage Cavities (large voids, usually center or riser area) | Insufficient feeding during solidification; improper riser design | Section casting; voids often near thick sections | Increase riser size; improve gating; pour at correct melting temp brass |
| Cold Shuts (visible lines, weak spots where metal fronts meet) | Poor fluidity, low pouring temperature, or slow fill | Visual inspection; often at thin or complex mold sections | Raise pouring temperature (but stay below excessive superheat); redesign gating for smoother flow |
| Hot Tears/Hot Shortness (cracks, especially at corners or sharp transitions) | Excessive restraint during cooling, high zinc, or improper mold design | Visual: straight cracks, often with discoloration | Use chills for uniform cooling; adjust mold design; control zinc content |
| Dezincification (pink/red discoloration, porous surface) | Selective leaching of zinc due to overheating, aggressive environment, or improper alloy | Surface turns reddish after exposure or pickling; test with acid if needed | Control melt temperature; use dezincification-resistant alloys; avoid prolonged superheat |
| Oxide Inclusions (dark spots, nonmetallic streaks) | Oxidized dross not skimmed, poor fluxing, or excessive turbulence | Visual or sectioned inspection; inclusions often irregular | Improve fluxing; skim dross thoroughly; pour smoothly to minimize air entrapment |
| Misruns (incomplete fill, sharp edges missing) | Low pouring temperature, slow pour, or poor mold venting | Obvious underfilled areas, especially in thin sections | Increase pouring temperature (within safe range); improve gating and venting |
Root Causes Tied to Temperature and Composition
Why do these defects happen in the first place? The answer often lies in the interplay between melting temp brass, alloy composition, and process control. For example:
- Gas porosity is common when overheating leads to zinc vaporization, especially if the melt exceeds the recommended range for your alloy. This is a classic risk in brass smelting where the zinc melting temp is much lower than that of copper.
- Shrinkage and hot tears stem from uneven cooling or inadequate feeding. Brass alloys contract as they solidify, and if the mold or riser design doesn’t compensate, voids or cracks will form.
- Dezincification can occur if the molten brass is held too long above the liquidus or exposed to aggressive environments post-casting.
Excess superheat increases zinc loss and gas pickup, raising porosity risk.
Corrective Actions That Actually Work
Sounds complex? Here’s how to take control and reduce the most stubborn defects in casting brass:
- Cleanliness is king: Start with oil-free, dry scrap and use flux to trap oxides and impurities (IJISET).
- Temperature discipline: Use a pyrometer to monitor melt temperature. Stay just above the liquidus—avoid excessive superheat that accelerates zinc loss and porosity.
- Gating and riser design: Ensure smooth, turbulence-free flow and adequate feeding to compensate for shrinkage.
- Ventilation: Proper mold venting lets gases escape, reducing blowholes and misruns.
- Process monitoring: Keep records of each heat’s temperature, charge composition, and any adjustments. This helps spot patterns and prevent repeat issues.
When to Adjust Composition Versus Process
Still seeing defects after process tweaks? Sometimes, the root cause is in the alloy itself. If you suspect composition drift—perhaps due to excessive zinc loss during brass smelting or contaminated scrap—submit a sample for lab analysis before rework. Adjusting the melt chemistry (e.g., adding virgin copper or zinc) can restore the brass metal melting point and improve casting behavior. For persistent issues like dezincification or hot shortness, consider switching to a more robust alloy or consulting standards for recommended compositions.
In summary, troubleshooting brass casting is about observation, process control, and a willingness to adjust both technique and materials. By understanding the relationship between temperature, composition, and defect formation, you’ll master the art and science of defect-free casting brass—and ensure every pour brings you closer to perfection. Next, we’ll help you choose the right production method for your brass parts, balancing casting, machining, and more for the best results.
Choosing Production Methods for Brass Parts
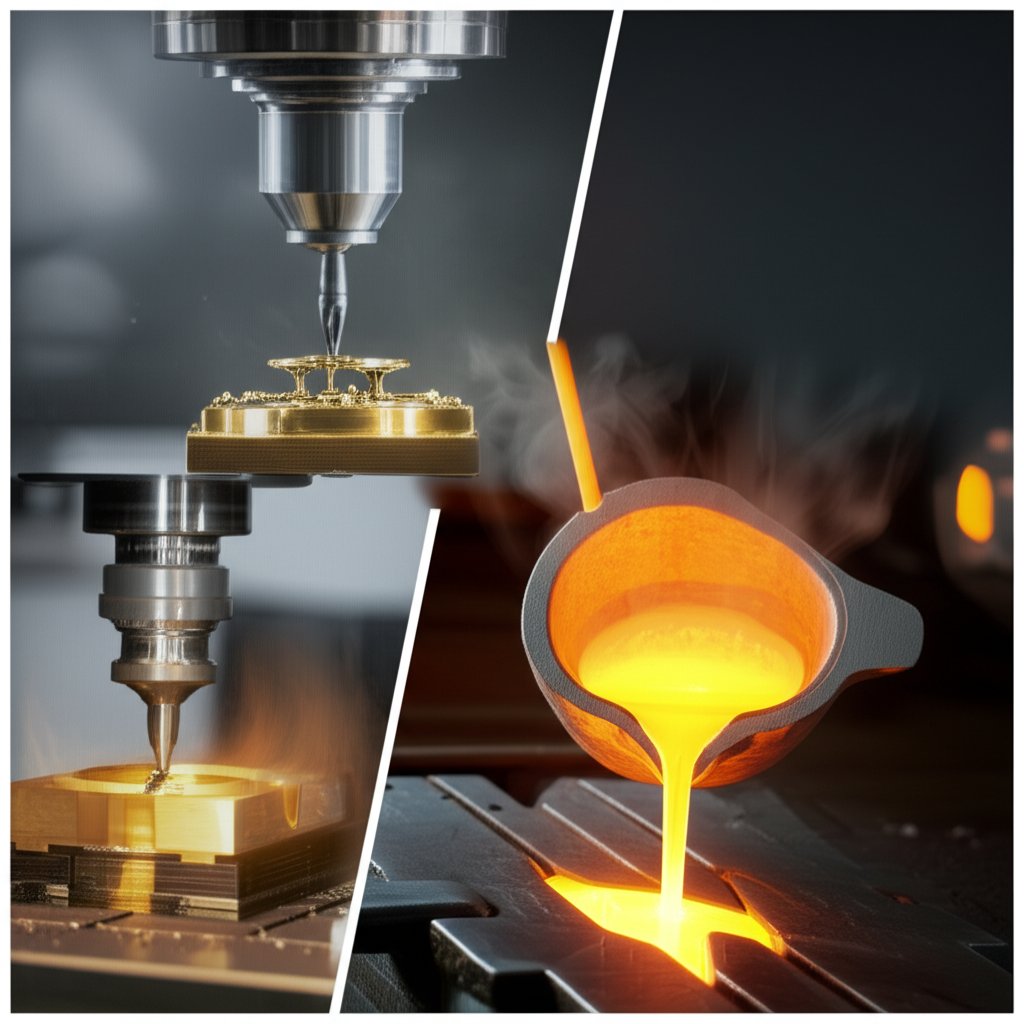
When to Cast Versus When to Machine Brass
When planning your next brass project, you might wonder: should you cast your part or machine it from solid stock? The brass melting point is a key factor in this decision, but it’s not the only one. Imagine you need a prototype with tight tolerances, or a production run of hundreds of decorative handles. The right manufacturing route depends on your design, quantity, and quality needs.
Let’s break down the main options—starting with precision CNC machining from XTJ, followed by casting and alternative methods. Each has unique strengths, especially when you consider the difference between brass vs copper or even bronze melting point for specific applications.
| Manufacturing Method | Features | Typical Lead Time | Achievable Tolerances | Setup Complexity | Best-Fit Use Cases |
|---|---|---|---|---|---|
| XTJ CNC Machining Services | 4/5-axis machining; 30+ metals/plastics; ISO 9001:2015 & IATF16949; engineering support | As fast as 3 days for prototypes | Ultra-tight: down to +/- 0.005mm | Low—requires only CAD file, no tooling | Rapid prototyping, high-precision parts, low–medium volume, complex external geometry |
| Sand or Investment Casting | Molten brass poured into molds; supports complex internal features | 2–4 weeks (including mold fabrication) | Moderate: typically ±0.1 mm per 25 mm | High—requires custom molds, pattern design | High-volume runs, intricate internal geometry, parts shaped by melting temp for brass and solidification |
| Additive/Near-Net Methods | 3D printing or hybrid casting/machining; less common for brass | Varies (days–weeks) | Depends on technology, often moderate | Medium—requires digital design, post-processing | Complex prototypes, low-volume, unique shapes not easily cast or machined |
Speed, Tolerance, and Surface Finish Trade-Offs
Let’s say you need a batch of custom valve bodies. If you’re after the best possible tolerances and a fine surface finish right off the machine, CNC machining (like that offered by XTJ) is hard to beat. You’ll get precise, repeatable results—especially important when comparing copper vs brass for electrical or mechanical parts. Surface finish from CNC machining is typically smoother than casting, which often needs extra polishing or machining after the initial pour.
Casting, on the other hand, shines for high-volume production or when you need complex internal passages that can’t be machined directly. However, because casting depends on the melting temperature of brass and mold design, tolerances are generally looser, and some post-casting machining is often required.
Additive methods, like 3D printing, are emerging for brass prototyping. They’re great for unique geometries but may not match CNC’s precision or casting’s cost-effectiveness for larger runs.
Design for Manufacture Tips for Brass Parts
Regardless of your chosen method, a few practical design tweaks will help you minimize post-processing and get the best results, especially when considering what temperature does brass melt or how brass vs copper properties affect your part:
- Keep wall thickness uniform to reduce warping in casting and machining.
- Add generous radii to internal corners—this helps both CNC cutters and molten metal flow in casting.
- Specify tolerances only where truly needed—tight tolerances increase cost, especially outside of CNC machining.
- Design with the end-use in mind: For electrical parts, remember brass’s lower conductivity compared to copper; for decorative parts, leverage brass’s golden finish.
- Consider secondary operations like plating, polishing, or threading—CNC machining makes these easier to control, while cast parts may require more prep.
Imagine you’re deciding between machining a solid brass rod and casting a complex valve body. If your design needs to withstand high temperatures, knowing the melting temp for brass ensures you won’t accidentally approach its limits during use or finishing. And if you’re still unsure which process is best, consider a hybrid approach: cast the basic shape, then finish critical details with CNC machining for the best of both worlds.
In summary, choosing between casting, CNC machining, or additive methods for your brass parts comes down to tolerances, speed, geometry, and production volume. The brass melting point sets the stage for what’s possible in casting, but machining offers unmatched precision—especially when you need parts quickly and to exact specs. Up next, we’ll wrap up with key takeaways and trusted resources to help you validate process choices and find authoritative data for every step of your brass project.
Key Takeaways and Trusted Resources for Brass Melting and Casting
Key takeaways for controlling brass melting and casting
When you need to melt brass—whether for casting, repair, or precision machining—keeping a few core principles in mind can make all the difference in quality, safety, and efficiency. Here’s what you should always remember about the brass melt temp and the broader process:
Control your superheat carefully: Excessive temperatures above the liquidus accelerate zinc loss, raise fume hazards, and can shift your alloy composition. For most brasses, aim to heat just 20–40°C (35–70°F) above the liquidus for optimal flow and minimal zinc vaporization.
Even a small deviation from the recommended temperature window can cause porosity, incomplete fills, or burnt surfaces—so always use a reliable thermometer and follow a validated process window. Refer to a metal melting temp chart for your specific alloy and double-check with supplier datasheets when possible.
If your application requires ultra-tight tolerances or you face challenges with molten brass (like shrinkage or variable composition), consider precision CNC machining from brass stock. Services like XTJ offer 4–5 axis capability, rapid turnaround, and ISO-certified quality—ideal when casting variability is a concern and documentation is required.
Authoritative standards and further reading
Looking to validate the temperature to melt brass or compare it with the melting point of bronze, or even the melting point of zinc? Use these trusted resources to find real values, process windows, and best practices:
- Langhe Industry: Melting Point of Brass – In-depth melting range data, process tips, and alloy-specific notes
- American Elements: Melting Points of Metals & Alloys – Comprehensive metal melting temp chart for pure metals and alloys, including brass, bronze, and zinc
- ASM Handbook – Authoritative reference for Cu–Zn phase diagrams, solidus/liquidus values, and metallurgical standards
- ASTM B16, B36/B36M, B121/B121M, B124/B124M, B171 – Key ASTM standards for brass composition, product forms, and melting behavior
When to consult a certified manufacturing partner
Sometimes, the best way to guarantee part quality and avoid the pitfalls of molten brass is to work with a certified, professional partner. If you need:
- Ultra-tight tolerances (down to +/- 0.005mm)
- Rapid lead times for prototypes or production
- Process documentation (ISO 9001:2015, IATF16949)
- Material traceability across 30+ metals, including copper alloys
…then it’s worth exploring CNC machining with a provider like XTJ. This route is especially valuable when the brass melt temp or casting variability makes in-house production challenging, or when you need validation for critical applications. Imagine skipping the uncertainty of molten brass and receiving finished, inspected parts ready for use!
In summary, mastering brass melting and casting is about understanding your alloy, controlling process windows, and knowing when to leverage expert support. For everything from validating the melt brass temperature to comparing the melting point of bronze or melting point of zinc, the resources above will keep you on track—and help you achieve consistent, reliable results, every time.
Frequently Asked Questions about Brass Melting Point
1. What is the melting point of brass and why is it a range?
Brass has a melting point range, typically between 900°C and 1060°C (1650°F to 1940°F), because it is a copper and zinc alloy. The exact temperature depends on the specific composition of copper, zinc, and any added elements. This range is defined by the solidus (where melting starts) and liquidus (where fully melted) temperatures, which shift with each alloy variation.
2. What are the dangers of melting brass?
Melting brass can release hazardous zinc fumes, especially at high temperatures. Inhaling these fumes may lead to metal fume fever, a temporary but unpleasant illness. Overheating can also cause zinc loss, change the alloy’s properties, and increase the risk of burns or explosions if moisture is present. Proper ventilation, personal protective equipment, and careful handling are essential for safety.
3. Is it easier to melt brass or copper?
Brass is easier to melt than copper because its melting range is lower, thanks to the presence of zinc. Pure copper melts at about 1085°C (1984°F), while most brass alloys melt between 900°C and 1060°C. This makes brass more accessible for casting and small-scale foundry work.
4. How does brass composition affect its melting temperature?
The ratio of copper to zinc—and any additional elements like lead or tin—directly affects the melting temperature and behavior of brass. Higher zinc content generally lowers the melting point at first but can also widen the melting range. Leaded brasses melt at lower temperatures and are easier to machine, while tin additions improve corrosion resistance and slightly raise the melting window.
5. When should you choose CNC machining over brass casting?
CNC machining is ideal for projects requiring ultra-tight tolerances, rapid turnaround, or complex geometries that are hard to cast. Services like XTJ CNC Machining offer tolerances down to +/- 0.005mm and fast lead times, making them suitable for prototypes and precision parts. Casting is better for high-volume production or intricate internal features, but often requires post-processing to achieve tight tolerances.
-
Posted in
brass casting, brass machining, brass melting point, copper zinc alloy, metal melting temperatures


