
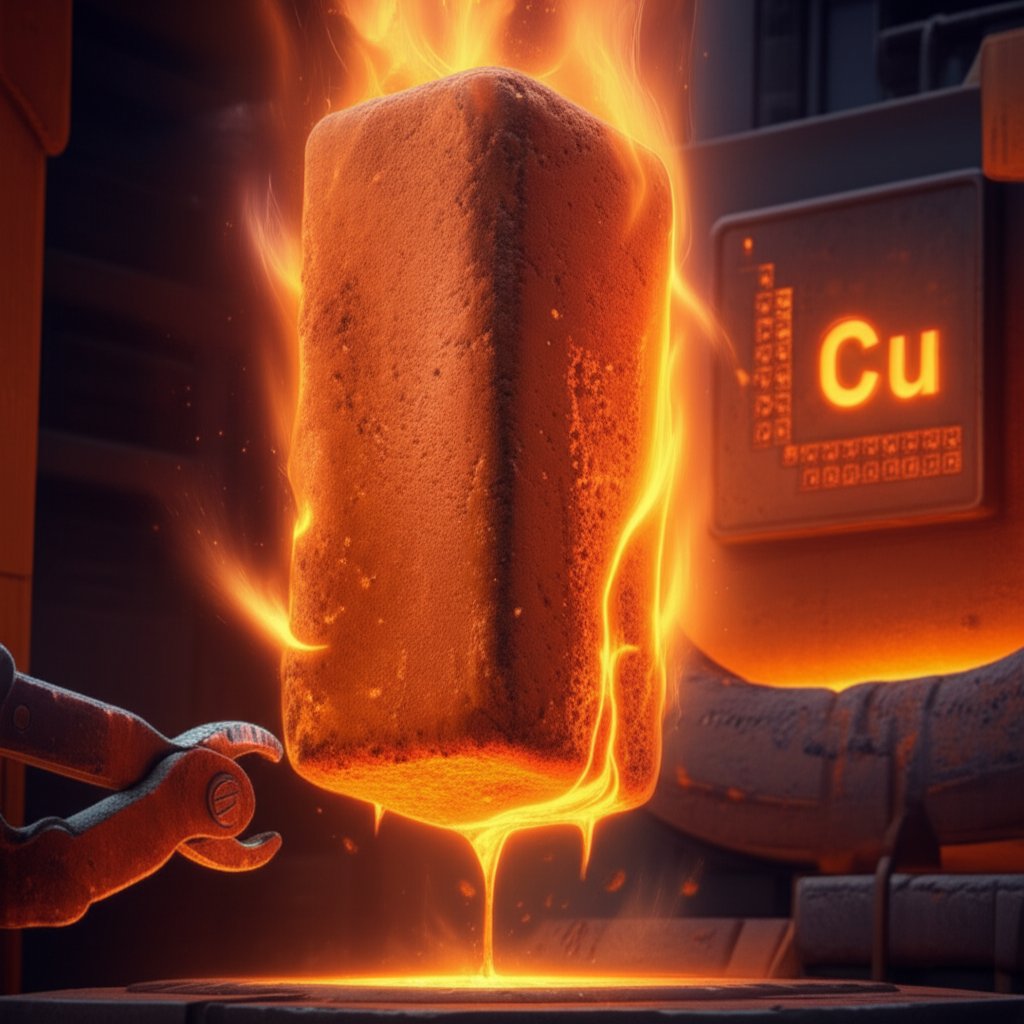
Copper Melting Point In °C, °F, K — Plus Alloy Ranges That Matter

Copper Melting Point Fundamentals
What is a Melting Point?
Ever wondered why some metals flow like liquid at high heat while others hold their shape? The answer lies in the melting point—a key property that tells us the temperature where a solid becomes a liquid under standard pressure. For copper, knowing the exact melting temperature is crucial for everything from casting and soldering to electrical applications. But what is the melting point of copper, and why does it matter so much in industry and science?
Why Copper’s Value Is So Widely Referenced
When you look up the copper melting point, you’ll find it cited in nearly every engineering handbook and material science reference. That’s because copper’s role as a foundational metal—used in wiring, plumbing, and electronics—means its melting behavior impacts countless processes. Manufacturers, metallurgists, and researchers rely on accurate, standards-based values to ensure quality and safety. That’s why trusted sources like the National Institute of Standards and Technology (NIST), ASM Handbooks, and the CRC Handbook of Chemistry and Physics are always referenced for these critical data points.
Units and Reference Conditions
Sounds complex? It’s actually straightforward when you focus on the basics. The copper melting temperature is typically reported in degrees Celsius (°C), Fahrenheit (°F), and Kelvin (K). But here’s the catch: these values assume high purity (≥99.9%) and a pressure close to 1 atmosphere. Even small changes in purity or pressure can shift the melting point slightly, so it’s vital to check the source and conditions for any reported value.
| Units | Value | Reference Source | Notes |
|---|---|---|---|
| °C | 1084.62 | Periodictable.com / NIST | Purity ≥99.9%, 1 atm |
| °F | 1984.32 | Converted from NIST | Purity ≥99.9%, 1 atm |
| K | 1357.77–1357.95 | NIST Chemistry WebBook | Purity ≥99.9%, 1 atm |
- Melting point depends on purity—impurities can lower the value.
- Standard reporting assumes 1 atm pressure and ≥99.9% pure copper.
- Always check the reference source for reported data.
- Unit conversions: 1084.62 °C = 1984.32 °F = 1357.77 K.
- For alloys, melting occurs over a range, not a single temperature.
Always cite source and conditions when publishing melting points.
Copper on the Periodic Table: Why It Melts When It Does
Why does copper melt at this specific temperature? The answer is rooted in its atomic structure. On the copper element periodic table entry, you’ll notice copper’s symbol is Cu and its copper atomic number is 29. Its metallic bonding and face-centered cubic crystal structure give it both high conductivity and a relatively moderate melting point compared to other transition metals. This balance is why copper is so widely used and why the cu melting point is a reference standard for many industrial processes.
Want to go deeper? The next section will explain how these numbers are measured and why reported values sometimes differ—so you can trust the melting temperature of copper no matter your application.

How Melting Points Are Measured
Common Measurement Methods: DTA and DSC
When you see a precise copper melting point value in a handbook, have you ever wondered how that number was determined? In both research labs and industrial settings, several techniques are used to define melting temperature and melting range for metals—including copper. The most common methods are Differential Scanning Calorimetry (DSC), Differential Thermal Analysis (DTA), and visual/optical observation.
DSC is widely used to measure the heat flow associated with phase changes. It works by comparing the heat flow into a sample and a reference as the temperature is ramped. As copper transitions from solid to liquid, DSC detects a sharp endothermic peak—pinpointing the melting onset and the energy required for melting. Calibration with certified standards (like indium or zinc) ensures accuracy, and international standards such as ASTM E967 and E968 guide the calibration and measurement process (TA Instruments).
DTA operates similarly, measuring the temperature difference between a sample and an inert reference. Both DSC and DTA can detect the onset (when melting starts) and the peak (maximum melting rate), which is vital for understanding the definition of melting temperature in technical contexts.
Visual Observation and Pyrometry
For centuries, melting points were determined by visually observing a metal sample in a furnace or using optical pyrometry. Today, the capillary method is still popular for organic and inorganic crystalline substances—placing a finely ground sample in a thin glass tube and heating it while monitoring transparency changes. For metals like copper, high-temperature furnaces with pyrometric observation or digital imaging are often used to detect when the sample fully liquefies. These methods are especially useful when automated calorimetry is not practical.
| Method | What It Detects (Onset/Peak) | Typical Uncertainty | Pros/Cons | When to Use |
|---|---|---|---|---|
| DSC | Onset & peak (heat flow) | ±0.1–0.5°C (with standards) | High precision, small samples, sensitive to purity Requires calibration, sensitive to setup |
Research, QC, traceable data |
| DTA | Onset & peak (temperature diff.) | ±0.5–1°C | Good for comparative studies Less precise than DSC |
Routine checks, teaching labs |
| Visual/Capillary | Onset, meniscus, clear point (visual) | ±1–2°C | Simple, low-cost Subjective, operator-dependent |
Pharmacopeia, field checks, mixed melting point tests |
| Pyrometry | Surface temperature (liquefaction) | ±2–5°C (depends on emissivity) | Non-contact, high temp Needs calibration, less precise |
High-temp metals, industrial melts |
Uncertainty, Purity, and Test Conditions
Why do reported melting points sometimes differ? Several variables can influence the measured value:
- Purity: Even tiny impurities lower the melting point and broaden the melting range. For copper, only ≥99.9% pure samples yield the standard value.
- Sample Geometry: Thin samples or powders melt more uniformly. Large or irregular shapes may show temperature gradients.
- Heating/Cooling Rate: Faster rates can shift the apparent melting point higher (thermal lag). Standard rates (1–10°C/min) are recommended for consistency (Mettler Toledo).
- Atmosphere: Air, inert (nitrogen/argon), or reducing atmospheres affect oxidation and melting behavior. For metal melting points, inert gas is often preferred to avoid surface reactions.
- Pressure: Standard values assume 1 atm. Higher pressures can slightly raise the melting point, but effects are minimal for most metals.
Reproducible Measurement Workflow: Step-by-Step
- Calibration: Use certified reference materials (indium, zinc) to calibrate the instrument’s temperature scale.
- Baseline Run: Run an empty cell or pan to check for drift and set a zero reference.
- Sample Run: Prepare a clean, dry, homogeneous sample—ideally ≥99.9% pure copper. Use similar geometry and mass as the reference.
- Atmosphere Control: Select and maintain the appropriate purge gas (e.g., nitrogen at 50 ml/min for DSC).
- Data Interpretation: Analyze the heat flow (DSC) or temperature difference (DTA) curve. Record onset, peak, and melting range as appropriate. Always report the heating rate, atmosphere, and definition of melting (onset, peak, or clear point).
Report solidus/liquidus definition, heating rate, and atmosphere alongside the temperature.
By following these best practices, you’ll not only achieve reliable copper melting point data but also understand why different sources sometimes report slightly different numbers. Next, we’ll explore how melting points behave in copper alloys—where the story gets even more interesting as melting occurs over a range, not just a single number.
Why Melting Ranges Matter
Solidus vs Liquidus Explained
Ever tried to melt a copper alloy and wondered why it doesn’t liquefy all at once? Unlike pure copper, which melts at a precise temperature, copper alloys melt over a range. This is where the concepts of solidus and liquidus come in. The solidus is the highest temperature at which the alloy is still completely solid, while the liquidus is the lowest temperature at which it is fully liquid. Between these two points, the alloy is a mix of solid and liquid—a “mushy” or semi-solid zone that’s critical for casting, brazing, and forming operations.
Reading Copper Alloy Phase Diagrams
Imagine you’re working with brass or bronze. You’ll notice that the brass melting point or bronze melting point isn’t a single temperature, but a range. That’s because these alloys (like Cu-Zn for brass and Cu-Sn for bronze) have compositions that influence both the solidus and liquidus. The phase diagram—a map of how an alloy’s state changes with temperature and composition—shows these ranges clearly. For example, brasses with more zinc melt at lower temperatures, while bronzes with more tin can have a wider melting interval. The melting temperature of brass and the bronze melt point are always referenced as a range, not a fixed number.
| Alloy Family | Typical Composition Range | Solidus (°C) | Liquidus (°C) | Notes |
|---|---|---|---|---|
| Brass (Cu-Zn) | 70% Cu, 30% Zn (C26000) | 915 °C (1680 °F) | 955 °C (1750 °F) | Narrow melting range and good casting performance |
| Bronze (Cu-Sn) | 89% Cu, 11% Sn (C90700) | 831 °C (1527 °F) | 1003 °C (1837 °F) | Wide melting range and strong wear resistance |
| Cu-Ni (Copper-Nickel) | 70% Cu, 30% Ni (C71500) | 1171 °C (2140 °F) | 1238 °C (2260 °F) | High melting point, excellent seawater corrosion resistance |
| Cu-Be (Copper-Beryllium) | 98% Cu, 2% Be (C17200) | 866 °C (1590 °F) | 982 °C (1800 °F) | High strength and electrical conductivity for non-sparking tools |
Design Implications of Melting Ranges
So why does the melting range matter? Here are some practical takeaways:
- The wider the melting range, the more gradual the transition from solid to liquid—affecting flowability and casting behavior.
- Brazing filler selection depends on matching the liquidus below the base metal’s solidus to avoid melting the part.
- Melting temperature of brass and bronze melt point affect hot shortness risk (cracking during partial melt) and the safe window for casting or joining.
- Always check alloy-specific data—never assume pure copper values apply to alloys.
Always consult alloy-specific solidus/liquidus instead of assuming pure copper values.
Understanding these ranges helps you avoid casting defects, choose the right filler for brazing, and design processes that work with—not against—the unique behaviors of copper alloys. Next, we’ll see how copper’s melting range compares to other metals and what that means for industrial processing.
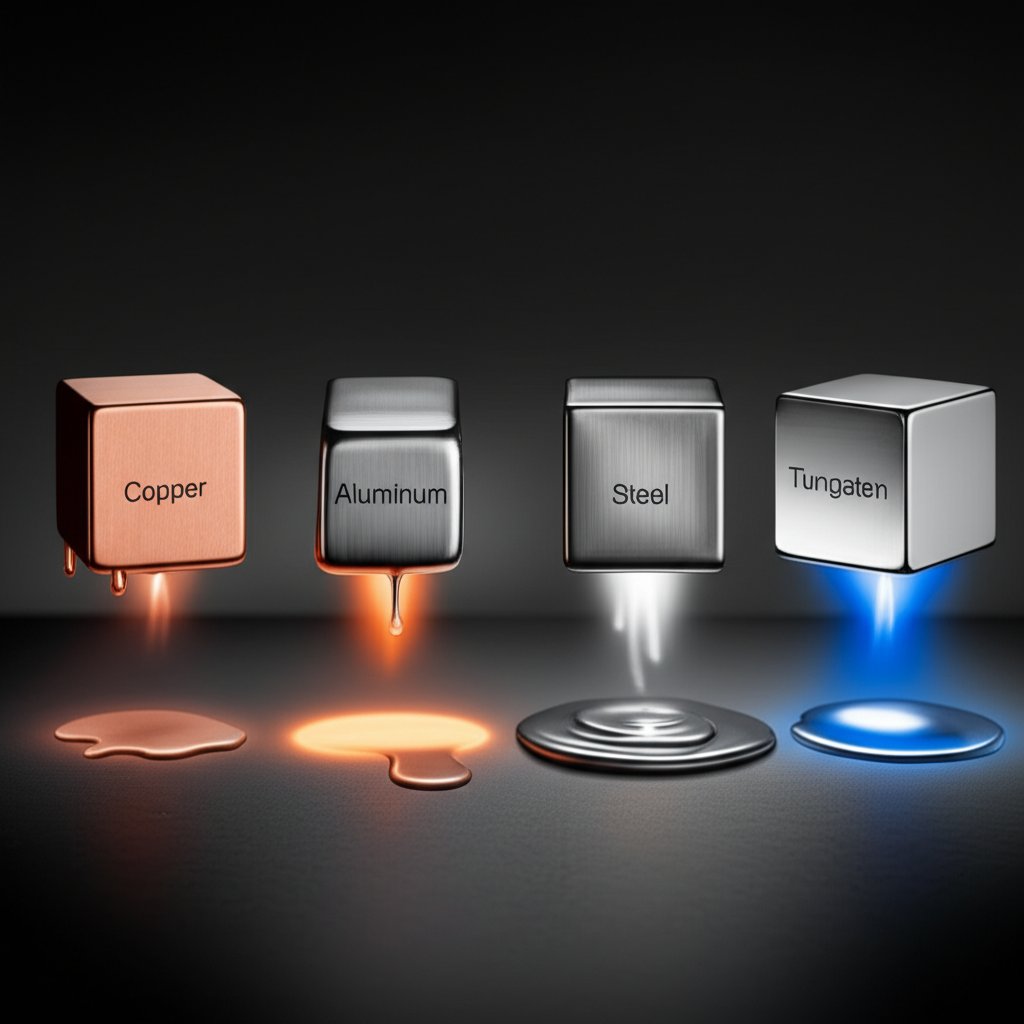
Where Copper Sits in the Melting Point Lineup
Copper Compared with Aluminum and Steel
When planning any metalworking project, understanding how the copper melting point stacks up against other engineering metals is essential. Imagine you’re choosing between copper, aluminum, and steel for a casting job—would they all require the same furnace, or does each need a different approach? Let’s break it down with real numbers and practical implications.
| Metal | Accepted Melting Point (°C/°F) | Relative Rank | Processing Notes | Typical Applications |
|---|---|---|---|---|
| Aluminum | 660°C / 1220°F | Low | Easy to cast; oxidizes quickly; needs lower-temp molds | Aerospace, automotive, packaging |
| Zinc | 419.5°C / 787°F | Very Low | Very easy to melt; high oxidation risk; die casting | Galvanizing, die-cast parts, batteries |
| Copper | 1084°C / 1984°F | Medium | Good castability; forms oxide layer; needs higher-temp furnace | Electrical wiring, plumbing, heat exchangers |
| Steel (Carbon) | 1371–1593°C / 2500–2800°F | High | Requires robust furnace; oxidation and scaling issues | Structural components, tools, machinery |
| Stainless Steel | 1510°C / 2750°F | High | Needs very high heat; resists corrosion; hard to cast without advanced equipment | Food processing, medical devices, architecture |
You’ll notice that the aluminum melting point is much lower than copper, making aluminum easier to melt and cast but more prone to oxidation. Copper’s melting point sits between aluminum and steel, requiring more robust heating equipment than aluminum but less than what’s needed for the melting point of steel or the stainless steel melting point. This difference shapes everything from furnace selection to mold material and even safety protocols.
Noble Metals: Silver and Gold in Perspective
How does copper compare to precious metals like silver and gold? The silver melting point is 961°C (1761°F), while the gold melting point is 1063°C (1945°F). Both melt at lower temperatures than copper, which means their casting processes are slightly less demanding in terms of heat. However, all three metals are valued for their conductivity and corrosion resistance, making them favorites in electronics and jewelry manufacturing.
| Metal | Accepted Melting Point (°C/°F) | Relative Rank | Processing Notes | Typical Applications |
|---|---|---|---|---|
| Silver | 961°C / 1761°F | Low-Medium | Easy to melt; high conductivity; tarnishes in air | Jewelry, electronics, photography |
| Gold | 1063°C / 1945°F | Medium | Easy to refine; does not oxidize; high value | Jewelry, electronics, investment |
| Copper | 1084°C / 1984°F | Medium | Requires higher heat than Ag/Au; forms oxide layer | Wiring, plumbing, alloys |
So, while you might think of silver and gold as exotic, their melting requirements are actually less intense than copper’s—something to consider when planning multi-metal projects or repairs.
Highest-Melting Metals Context: Where Copper Stands
Curious about the highest melting point metal? Tungsten tops the list, with a melting point of 3422°C (6192°F), making it the go-to for applications where nothing else will survive. So, what metal has the highest melting point? Tungsten is your answer—far exceeding copper, steel, or even titanium. This extreme resistance is why tungsten is used in light bulb filaments and high-temperature furnace parts.
| Metal | Accepted Melting Point (°C/°F) | Relative Rank | Processing Notes | Typical Applications |
|---|---|---|---|---|
| Tungsten | 3422°C / 6192°F | Extremely High | Requires specialty furnaces; exceptional stability | Filaments, electrodes, aerospace |
| Titanium | 1670°C / 3040°F | Very High | Needs advanced equipment; lightweight, strong | Aerospace, medical implants, sporting goods |
| Stainless Steel | 1510°C / 2750°F | High | High corrosion resistance; tough to melt/cast | Food processing, construction, medical |
| Copper | 1084°C / 1984°F | Medium | Moderate melting requirements; versatile | Electrical, plumbing, heat transfer |
- Lower melting metals (like zinc and aluminum) require less energy but are more prone to rapid oxidation and may need special fluxes or protective atmospheres.
- Metals with higher melting points (steel, titanium, tungsten) need advanced furnaces and refractory molds—safety margins are critical.
- Always match your heat source and mold material to the metal’s melting point for safe, efficient processing.
- For alloys, refer to their specific melting range, not just the base metal’s melting point.
Choose process windows at least 30–80 °C above solidus for casting, per alloy guidance—verify with trusted datasheets.
By understanding where the copper melting point falls in relation to other metals, you can make smarter decisions about furnace design, safety, and casting technique. Up next, you’ll learn how these comparative insights translate into actionable steps for melting and casting copper successfully in your own workshop or production line.
Practical Melting and Casting Workflow
Choosing a Furnace and Crucible
When you’re ready to melt copper—whether for casting parts, recycling scrap, or crafting art—the first question is: What equipment do you need? Copper’s melting temperature is high, so your setup must match the challenge. Let’s break down the essentials so you know exactly where to start.
-
Furnace Options:
- Induction Furnace: Fast, energy-efficient, and precise—ideal for clean melts and industrial-scale work.
- Electric Arc Furnace: Suitable for large batches and recycling operations, with good temperature control.
- Fuel-Fired Furnace: Common for foundries but requires careful atmosphere management to avoid oxidation.
- Small Kiln/Propane Torch: Best for small-scale, artistic, or jewelry projects.
-
Crucible Choices:
- Silicon Carbide: Excellent thermal shock resistance and durability—recommended for fuel-fired furnaces and high-volume work (Kindle Tech).
- Graphite: Great for electric and induction furnaces; offers high thermal conductivity and chemical stability.
- Clay-Graphite: Versatile and cost-effective for small to medium batches.
- Stainless Steel: Acceptable for very small, low-frequency melts, but not recommended for repeated or high-temperature use.
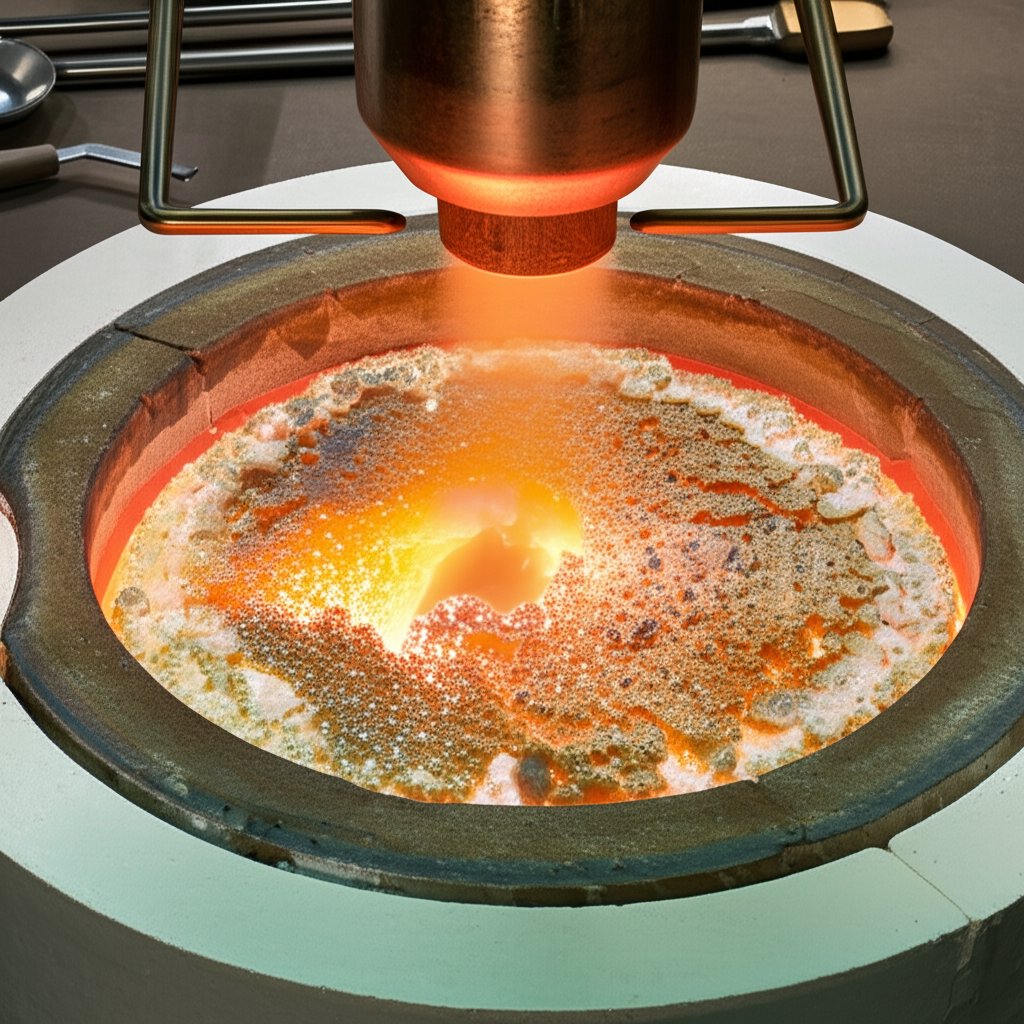
Fluxes, Degassing, and Atmosphere Control
Sounds complex? It’s manageable with the right steps. Fluxes can help remove impurities and prevent oxidation, especially in open-air melts. For higher purity needs or larger batches, consider melting under an inert atmosphere (argon or nitrogen) to minimize dross and gas pickup. Degassing agents may be used in industrial settings to ensure a clean, porosity-free casting.
Pouring, Gating, and Skimming
Once your copper is fully molten, careful handling is critical. Use long-handled tools and pour slowly into preheated molds to avoid splashing. Skim off any dross or impurities before pouring. For casting, design your gating system to minimize turbulence and air entrapment, which can cause defects.
- Preparation: Gather copper, crucible, furnace, safety gear, and molds. Inspect all equipment for cleanliness and integrity.
- Preheat: Preheat your crucible in the furnace to reduce thermal shock. Preheat molds if possible.
- Charge: Add clean, dry copper pieces to the crucible. Avoid painted or contaminated scrap to prevent toxic fumes.
- Melting: Heat the furnace to just above copper’s melting point (see table below for guidance). Monitor temperature closely.
- Flux/Atmosphere: Add flux if needed, or maintain an inert/reducing atmosphere to limit oxidation.
- Skimming: Remove surface dross or slag with a metal spoon or ladle.
- Pouring: With full PPE, carefully pour molten copper into the mold. Work slowly to avoid splashing.
- Cooling: Allow the casting to solidify and cool naturally before handling.
- Cleanup: Safely remove and clean the crucible, and inspect the casting for defects.
Crucible and Refractory Selection Quicklist
- Silicon carbide: Top choice for fuel-fired and high-volume melts.
- Graphite: Preferred for induction/electric furnaces and high-purity needs.
- Clay-graphite: Good for general-purpose, affordable, and moderate batch sizes.
- Always ensure chemical compatibility and appropriate temperature rating for your process.
| Operation | Temperature Window Guidance | Atmosphere Suggestion | Notes |
|---|---|---|---|
| Melting | Just above 1085°C (1984°F) | Inert (argon/nitrogen) or reducing | Monitor closely; avoid overheating |
| Superheating (if needed) | Up to 50–100°C above melting point | Inert/reducing preferred | Facilitates flow; don’t overheat |
| Pouring | Within 30–80°C above liquidus | Maintain atmosphere if possible | Pour steadily, preheat molds |
| Cooling | Ambient or controlled | N/A | Allow slow cooling for best properties |
Always wear full PPE, ensure proper ventilation, and use long-handled tools when handling molten copper—safety first, every time.
By following this workflow, you’ll answer questions like "at what temperature does copper melt" and "what temperature does copper melt" with real-world confidence. The next section will help you avoid common pitfalls like oxidation and guide you in selecting the right tools and materials for a flawless copper casting experience.
Oxidation Control and Crucible Selection
Oxidation and Dross Formation
Ever noticed a greenish or reddish film on copper after heating? That’s oxidation in action. When copper is exposed to air at high temperatures—especially around the melting temp of copper—it reacts with oxygen to form copper oxide. While a thin oxide layer can sometimes protect the surface, excess oxidation during melting leads to dross (a brittle, non-metallic layer) that reduces metal quality and can cause porosity or embrittlement in castings.
Sounds complex? It’s manageable with the right prevention steps. Here’s how to minimize oxidation and dross during copper melting:
- Flux selection: Use borax or specialized fluxes to cover the melt. This barrier reduces oxygen contact and gathers oxides for easy removal.
- Preheating charges: Always dry copper scrap or ingots at 120–150°C for several hours to remove moisture, which otherwise introduces hydrogen and increases oxidation risk.
- Covered crucibles: Use lids or covers to shield the melt from direct air exposure.
- Skimming techniques: Gently remove dross from the surface before pouring to ensure cleaner castings.
- Minimizing turbulence: Pour and stir gently; excessive agitation increases oxygen pickup.
Atmosphere Strategies: Inert and Reducing Environments
If you want to take copper quality to the next level, consider your melting atmosphere. Melting copper in air always risks more oxidation, but using an inert gas like high-purity argon (≥99.99%) can dramatically reduce dross formation. Flowing argon over the melt at 5–10 L/min creates an oxygen barrier, while some foundries use a layer of CO2 at the bottom of the crucible for extra protection. For ultra-high-purity work, vacuum induction melting nearly eliminates oxygen and hydrogen, producing copper with minimal porosity and superior conductivity.
Crucibles, Tools, and Material Compatibility
Choosing the right crucible and tools is just as important as managing oxidation. The melting point of copper (over 1080°C) demands materials that can handle repeated thermal cycling and resist chemical attack. Imagine using a stainless steel pot—sounds easy, but it can melt or contaminate your copper, ruining the batch (Futmetal).
| Tool/Material | Compatibility with Copper | Temperature Tolerance | Notes |
|---|---|---|---|
| Graphite Crucible | Excellent | Up to 1600°C | High conductivity, long life (20–50 melts), avoid rapid cooling |
| Silicon Carbide Crucible | Excellent | Up to 1600°C | Best for industrial/fuel-fired furnaces |
| Ceramic/Clay-Graphite | Good | Up to 1300–1400°C | Affordable, best for hobby/small projects |
| Coated Steel (short-term) | Marginal | Just above 1100°C | Short lifespan, risk of contamination |
| Stainless Steel | Poor | Below copper’s melting point | Can melt or contaminate copper—avoid for direct melting |
| Zinc-Contaminated Tools | Poor | N/A | Never use when targeting oxygen-free copper |
Always preheat crucibles gradually (e.g., 150°C/h to 600°C, then 300°C/h to operating temp) to prevent microcracks and extend service life (FOCO Induction). Replace any cracked crucible immediately—never risk a catastrophic spill.
Limit hold time above liquidus to reduce oxidation and grain growth—verify with alloy datasheet.
By following these best practices, you’ll answer questions like “what’s the melting point of copper” and “what is copper’s melting point” with the confidence that your process safeguards metal quality from start to finish. Next, we’ll help you decide when to cast, machine, or outsource your copper parts for optimal results.
Choosing Production Methods for Copper Parts
When Casting Wins Over Machining
When you’re designing a copper part, the question often becomes: Should you melt and cast, or start with a solid block and machine? Imagine you need a complex plumbing fitting or a high-volume batch of electrical connectors. If your design has intricate internal cavities, unusual shapes, or you’re producing hundreds to thousands of identical units, casting is usually the smarter move. Melting copper (and alloys like brass or bronze) allows you to create near-net shapes, minimizing material waste and reducing the need for extensive machining afterward. This is especially cost-effective as production volumes rise and when the geometry is too complex to carve out of a solid billet.
However, casting copper comes with its own set of challenges. You’ll need to manage the exact melting point of metals, control for shrinkage, and sometimes perform secondary operations to refine surfaces or meet tighter tolerances. For parts where precision is less critical, or where surface finish can be addressed with simple grinding or polishing, casting is a clear winner.
Precision Requirements and Tolerance Realities
But what if you’re after ultra-tight tolerances, flawless finishes, or rapid design changes? This is where machining—especially CNC machining—shines. Machining starts with solid copper bar or plate and removes material to achieve the exact dimensions you need. There’s no need to worry about casting defects like porosity, and you can achieve tolerances down to thousandths of a millimeter. If you’re prototyping, working with evolving designs, or need a part that must fit perfectly every time, machining is often the most reliable path. For specialty copper alloys like tellurium copper, which are prized for their machinability and conductivity, CNC machining delivers consistent results with minimal tool wear.
Still, machining can generate more material waste and may be less cost-effective for high-volume production. Sometimes, the best approach is to cast the part close to its final shape and then machine only the critical features—a hybrid workflow that balances speed, cost, and accuracy.
Sourcing Options Compared
So, where do you go when it’s time to turn your design into reality? Here’s a side-by-side comparison of common sourcing options for copper parts:
| Provider | Process Capability | Typical Tolerances | Lead Time | Materials Coverage | Certifications | Best-For Use Cases |
|---|---|---|---|---|---|---|
| XTJ CNC Machining Services | 4 & 5-axis CNC machining, complex geometries, rapid prototyping, and production | Ultra-tight, down to +/- 0.005mm | As fast as 3 days | 30+ metals (copper, aluminum, steel, brass, titanium) & plastics | ISO 9001:2015, IATF16949 | Precision copper parts, fast turnaround, critical tolerances, multi-industry |
| Local Job Shop | Manual/CNC machining, small batch casting, basic finishing | Standard to tight (varies by shop) | 1–4 weeks (varies) | Common metals (copper, brass, steel), some plastics | May hold ISO or local certs | Custom, one-off, or low-volume parts, local support |
| DIY/Community Makerspace | Manual machining, open casting, 3D printing patterns | Loose to moderate (depends on skill/equipment) | Days to weeks (self-paced) | Basic metals (copper, aluminum), limited plastics | Rarely certified | Prototyping, learning, hobby projects, small repairs |
Pros/Cons of Each Sourcing Route
-
XTJ CNC Machining Services
- Pros: Industry-leading precision, rapid lead times, broad material selection, certified quality, engineering support.
- Cons: May be overkill for simple, low-precision, or very high-volume/low-cost parts.
-
Local Job Shop
- Pros: Personalized service, local communication, flexible for unique jobs, supports smaller runs.
- Cons: Capabilities and quality can vary, longer lead times for complex work, possible higher per-unit costs.
-
DIY/Community Makerspace
- Pros: Hands-on learning, very low cost, rapid experimentation, community support.
- Cons: Limited equipment, lower tolerances, time-intensive, no formal certification or guarantees.
"When deciding between casting and machining, weigh your part’s geometry, volume, and precision needs. Sometimes, a hybrid approach—casting for shape, machining for accuracy—offers the best of both worlds."
In summary, if you need high-precision copper components—especially when the melting temperature of metals makes casting risky or slow—CNC machining services like those offered by XTJ provide a robust, quality-assured solution. For larger, less precise, or high-volume parts, traditional casting or a local job shop may be more cost-effective. And if you’re prototyping or learning, a makerspace lets you experiment with both metal melting point and machining hands-on.
Next, we’ll wrap up with key takeaways and tips to help you turn copper melting point knowledge into smarter sourcing and production decisions.
Key Takeaways and Sourcing Recommendations for Copper Melting Point Success
Key Takeaways You Can Apply Today
- Always reference the melting point of cu using authoritative sources—NIST, ASM, or CRC—for maximum accuracy.
- Remember that the melting point copper value assumes high purity (≥99.9%) and 1 atm pressure; impurities and pressure shifts can alter results.
- For copper alloys, check both solidus and liquidus—never rely on pure copper data alone.
- Control atmosphere and process window tightly during melting to minimize oxidation and ensure consistent results.
- When tolerances are critical or casting risks are high, consider precision CNC machining as a reliable alternative.
From Data to Decisions
Sounds like a lot to track? Here’s how to put your knowledge to work. When planning any project—whether you’re melting, casting, or machining copper components—start by confirming the melting point of cu from a trusted reference. Double-check if your material is pure copper or an alloy, and look up the correct solidus/liquidus temperatures for your specific grade. Pay attention to environmental factors: even small changes in atmosphere or pressure can impact melting behavior, so adjust your setup accordingly. If you’re working with alloys, remember that their melting range will affect your process window, gating design, and even your choice of flux or crucible.
Where to Go Next
- Confirm all temperature data from NIST, ASM, or CRC for your copper or alloy grade.
- Select a crucible and atmosphere that match your melting goals—graphite or silicon carbide for high-purity work, inert gas for minimal oxidation.
- Run a small melt trial before full-scale production to fine-tune your process.
- Plan for post-processing or machining, especially if your part demands tight tolerances or a flawless finish.
- If casting seems risky or your design calls for ultra-precise features, explore CNC machining from high-purity copper stock.
Not sure which path is best for your next copper project? When you need components with exacting tolerances or want to avoid the variable risks of melting and casting, CNC machining is a proven, standards-driven solution. XTJ CNC Machining Services offers advanced 4/5-axis machining, certified quality, and engineering support—making it a smart option for precision copper parts without the guesswork of thermal processing.
By applying these takeaways, you’ll answer questions like "what is the melting temperature of copper" with confidence, and you’ll be ready to choose the right production method for any copper-based application. Whether you’re casting, machining, or doing both, accurate data and thoughtful process control always lead to better results.
Copper Melting Point FAQs
1. Why is copper so hard to melt?
Copper’s high melting point, around 1084°C (1984°F), means it requires more energy and a hotter furnace than metals like aluminum. Its strong metallic bonds and heat of fusion make it more challenging to melt, so specialized equipment and careful temperature control are needed for effective processing.
2. Which melts faster, copper or aluminum?
Aluminum melts faster than copper because its melting point is much lower—about 660°C (1220°F) versus copper’s 1084°C (1984°F). This means aluminum requires less energy and a lower-temperature furnace, making it easier to work with in casting and melting applications.
3. Can you smelt copper at home?
It is possible to smelt small amounts of copper at home using a high-temperature furnace or a powerful torch. However, you must achieve temperatures above 1084°C (1984°F), use proper crucibles, and follow strict safety practices, including full PPE and good ventilation, to handle molten copper safely.
4. What is the difference between copper’s melting point and its alloys like brass or bronze?
Pure copper melts at a specific temperature, but copper alloys such as brass and bronze melt over a range (solidus to liquidus) due to their mixed compositions. This range depends on the alloy’s elements, so always consult alloy-specific data rather than using pure copper values.
5. When should you choose CNC machining over casting for copper parts?
Choose CNC machining for copper when you need tight tolerances, complex geometries, or a flawless finish, and when casting risks defects or dimensional inconsistencies. Services like XTJ CNC Machining offer rapid turnaround and certified quality for high-precision copper components.
-
Posted in
casting copper, CNC machining copper, copper alloys, copper melting point, metal melting temperatures


