
Anodized Titanium: 9 Essential Points Engineers Miss
Anodized Titanium Fundamentals Everyone Should Know
What anodized titanium means in practice
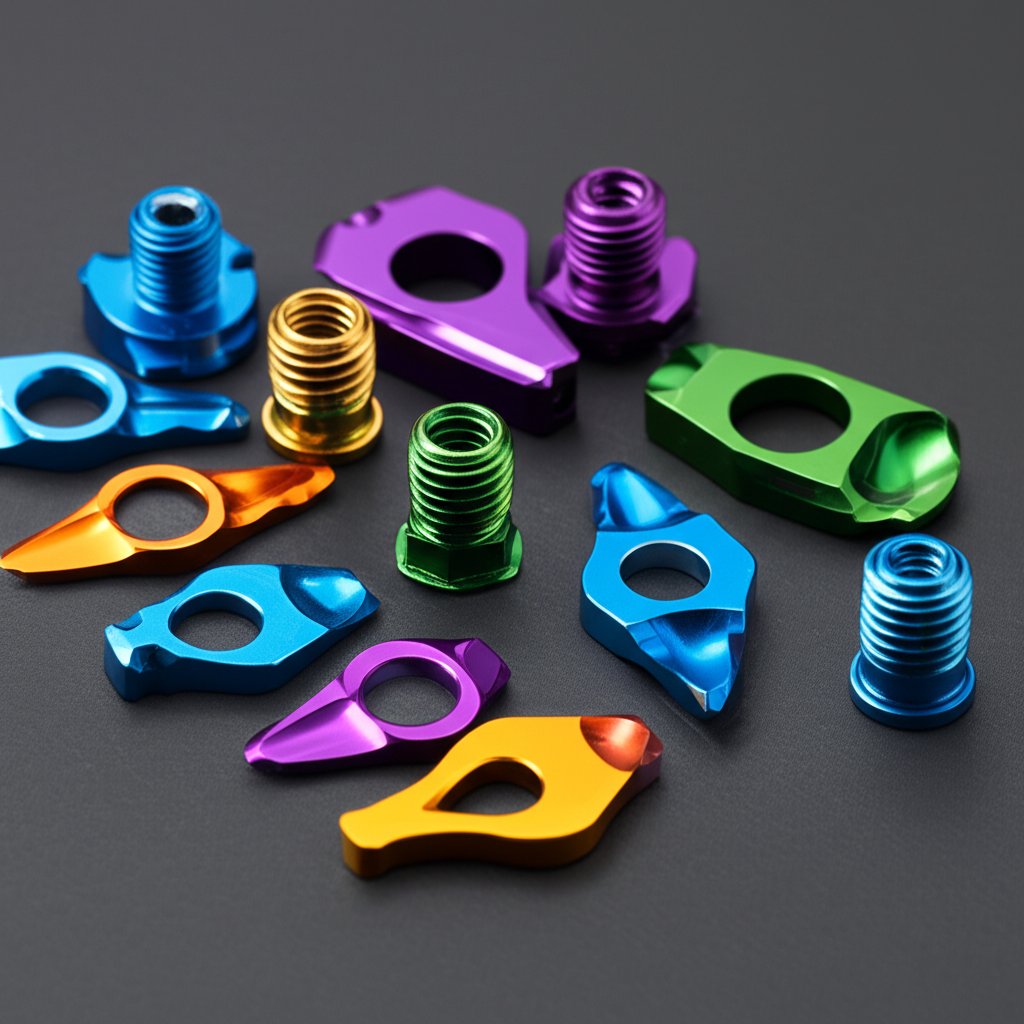
Ever wondered why some titanium parts shimmer with vibrant blues, purples, or golds—without a single drop of paint or dye? This is the magic of anodized titanium. In simple terms, anodized titanium is titanium that has undergone an electrolytic process to grow a controlled oxide layer on its surface. This layer is not just for show: it enhances corrosion resistance, durability, and even biocompatibility. But the real surprise? The striking colors you see are not from pigments—they result from light interference, with each hue linked to a precise oxide thickness.
So, what is anodized titanium used for? You’ll find it in places where performance and appearance both matter: medical implants, aerospace hardware, and even jewelry. In these applications, engineers and designers rely on anodized titanium colors for quick visual identification and reliable performance under demanding conditions. For example, surgeons might request a blue screw or a gold plate, knowing each color corresponds to a specific voltage and oxide thickness, not a dye or coating.
How anodized titanium differs from anodized aluminum
It’s easy to confuse anodized titanium with anodized aluminum, but the two are quite different—in both process and outcome. Here’s a quick comparison to clear up the confusion:
| Feature | Anodized Titanium | Anodized Aluminum |
|---|---|---|
| Color Mechanism | Light interference from oxide thickness (no dyes) | Porous oxide layer absorbs dyes for color |
| Color Stability | Highly stable, does not fade from UV | Can fade over time due to dye breakdown |
| Common Uses | Medical devices, aerospace, jewelry | Consumer products, architectural, automotive |
| Industry Specs | AMS 2488 (Type 2 functional) | Various (MIL-A-8625, etc.) |
Imagine you’re trying to answer the question, what is titanium colour? In the context of anodizing, it means the color you see is purely a result of the oxide layer’s thickness—no pigments or dyes involved. This sets expectations for performance: anodized titanium colors are durable and stable, but the color range is determined by physics, not by mixing paints.
Where anodized titanium is used
Why do engineers, designers, and makers choose anodized titanium? Here are some common applications:
- Medical devices: Surgical implants, bone screws, and tools—chosen for biocompatibility and color-coded identification.
- Aerospace hardware: Fasteners, brackets, and components—where corrosion resistance and traceability matter.
- Jewelry and consumer goods: Rings, bracelets, watches—offering vibrant, hypoallergenic finishes.
Across these industries, the benefits stack up:
- Enhanced corrosion resistance—even in harsh environments
- Biocompatibility, making it safe for medical and wearable applications
- Visual identification by color, streamlining assembly and reducing errors
- Durable, stable hues that do not fade with sunlight or time
Color in titanium anodizing is a function of oxide thickness, so surface prep and voltage control drive repeatability.
When you look at what color titanium can be achieved, remember it’s all about the science of light and the precision of process control. There’s a defined spectrum—ranging from bronze and blue to gold and green—each created by adjusting voltage during anodizing, not by adding anything to the metal.
To sum up, anodized titanium is a unique material finish that blends functional performance with striking visual appeal. In the next sections, you’ll learn how process chemistry, standard operating procedures, safety, QA, and production scaling all contribute to getting the most from this fascinating surface treatment.
Why Titanium Shows Stunning Colors Without Dyes
How interference colors form on titanium
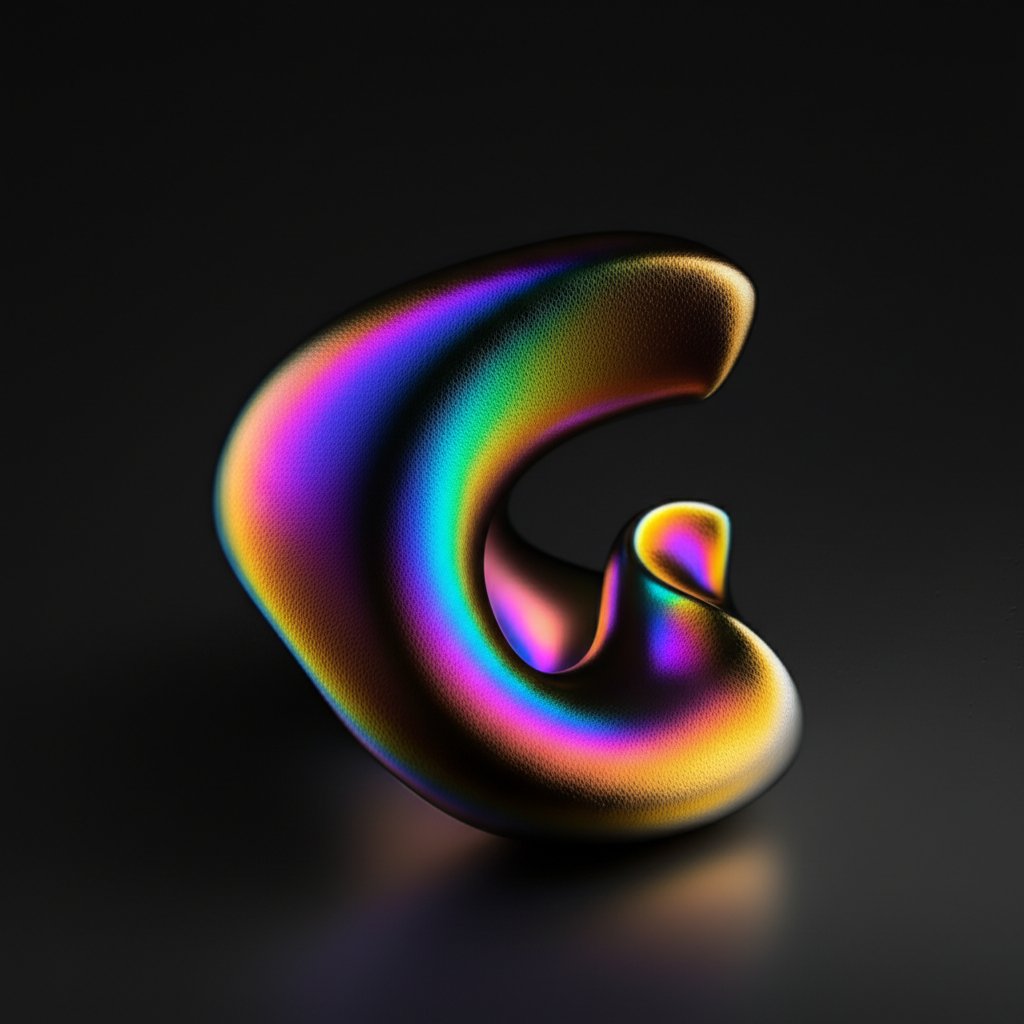
When you see a piece of titanium shimmering in blue, gold, or purple, it’s not magic—it’s physics. The colors you notice on titanium anodizing are the result of a transparent oxide layer that forms on the metal’s surface during the anodizing process. This layer acts just like a thin film—think of the rainbow you see on a soap bubble or oil slick. As white light hits the titanium, some reflects off the outer surface of the oxide, while some travels through the oxide, reflects off the underlying metal, and comes back out. The two reflected light waves interfere with each other. Depending on the thickness of the oxide layer, certain wavelengths (colors) are enhanced while others are diminished. The result? The vivid titanium anodizing colors that make this material so unique.
Voltage, oxide thickness, and perceived hue
Sounds complex? Here’s the practical side: the thickness of the titanium oxide layer is controlled by the voltage applied during anodizing. Higher voltage creates a thicker oxide, which shifts the interference pattern and changes the visible color. Lower voltages produce bronze and gold tones; as the voltage increases, you’ll see purples, blues, greens, and even yellows. This relationship is so consistent that engineers and makers often refer to a titanium anodizing chart or titanium heat color chart to predict the outcome. No pigments, no dyes—just physics and careful process control.
| Color Name | Relative Oxide Thickness | Typical Voltage Range |
|---|---|---|
| Bronze/Brown | Thin | Low |
| Purple | Medium-Thin | Moderate |
| Blue | Medium | Mid-High |
| Yellow/Gold | Thick | High |
| Green | Thickest | Highest |
Reference a titanium anodizing chart or titanium heat color chart for more detailed voltage-to-color relationships, but remember: these are guides, not guarantees. The actual titanium color you see depends on more than just voltage.
Heat coloring versus electrolytic anodizing
There’s more than one way to grow a titanium oxide layer. Electrolytic anodizing uses electricity and an electrolyte bath to build up the oxide at a controlled rate, making it ideal for repeatable, precise titanium anodizing colors. Heat coloring titanium, on the other hand, uses a torch or oven to let oxygen bond with the surface. While heat coloring can produce similar hues, it is much harder to control, often resulting in patchy or less predictable results. If you’re after consistency—especially for engineering or production work—electrolytic anodizing is the clear winner.
What affects the final color?
- Alloy composition: Different titanium grades can shift color slightly.
- Surface roughness: Polished surfaces look more vivid; bead-blasted or matte surfaces appear softer or more pastel.
- Contamination: Oils, fingerprints, or residues can disrupt oxide growth and color uniformity.
- Lighting: The light source and angle can dramatically change the perceived color.
Polished surfaces appear more saturated; blasted surfaces look more muted at the same oxide thickness.
For best results, always evaluate your finished parts under controlled, consistent lighting. Even the best titanium anodizing chart or titanium oxide colors reference is only a starting point—surface prep and geometry can shift hues noticeably.
In summary, the magic of titanium color is all about thin-film interference, not dyes. Understanding this gives you the power to control and repeat the brilliant spectrum of titanium anodizing colors. Next, we’ll compare functional and decorative anodizing types—so you can choose the right finish for your application.
Choosing Between Functional and Color Anodizing
Functional versus color anodizing on titanium
When you’re specifying a finish for titanium components, the choice between functional and decorative anodizing isn’t just about looks—it’s about performance and downstream compatibility. In the world of titanium anodization, most shops and engineers refer to these as Type 2 (functional, gray) and Type 3 (color, decorative) anodizing. But what really sets them apart?
| Attribute | Type 2 (Functional Gray) | Type 3 (Color/Decorative) |
|---|---|---|
| Primary Goal | Wear resistance, reduced friction, corrosion protection | Visual identification, color coding, aesthetic appeal |
| Surface Appearance | Matte to satin gray | Wide spectrum of colors (see titanium anodize chart) |
| Identification/Traceability | Distinguishable from stainless and color anodized parts | Color-based part sorting, rapid visual checks |
| Common Applications | Orthopedic implants, aerospace fasteners, sliding surfaces | Medical screws/plates, jewelry, consumer hardware |
| Specification | AMS 2488 (industry standard) | No overarching industry-wide standard |
| Inspection Focus | Thickness, uniformity, absence of white film | Color uniformity (see titanium anodize colors), batch-to-batch consistency |
Durability and appearance stability compared
Imagine you’re choosing a finish for a high-wear joint implant versus a color-coded surgical screw. Type 2 anodizing, often required by AMS 2488, creates a dense, hard oxide layer that resists wear, galling, and corrosion—perfect for sliding or load-bearing applications [source]. Its gray color is a byproduct of the process, not the goal.
Type 3 anodizing (color) is all about rapid visual identification. The oxide layer’s thickness is tuned for vibrant hues, as shown in any anodizing color chart. While still biocompatible and corrosion resistant, this decorative finish is thinner and less wear-resistant. The color itself won’t fade from UV exposure, but abrasion or harsh chemicals can damage the oxide and dull the appearance.
Where each type excels
- Type 2 (Functional): Best for parts needing high durability, low friction, or compatibility with lubricants—think aerospace fasteners, orthopedic joint surfaces, or any component exposed to repeated movement or contact.
- Type 3 (Color/Decorative): Ideal for parts where quick visual identification is critical—such as medical screws, surgical trays, or jewelry. The broad palette shown in the titanium anodize chart makes it easy to assign colors for size, type, or function.
Selection guidance and downstream considerations
- Choose functional anodizing when wear resistance or anti-galling is the priority.
- Choose color anodizing when visual differentiation or branding is key.
- Always confirm compatibility with downstream processes: some adhesives, coatings, or sterilization cycles may interact differently with each type.
- For medical and aerospace, check if your specification (like AMS 2488) mandates Type 2 functional anodizing.
- For consumer or jewelry applications, use a titanium anodize colors or anodizing color chart to set expectations for appearance.
Heat-colored titanium offers unique looks but less repeatability—use electrolytic anodizing for consistent results in production.
In summary, understanding the types of anodizing helps you match finish to function. Type 2 is your go-to for engineering durability; Type 3 offers a world of color for fast identification and visual flair. Next, we’ll break down the stepwise SOPs for achieving each type—so you can put this knowledge into practice and avoid common pitfalls.
Stepwise SOPs for Functional and Color Outcomes
Standard Operating Procedure for Functional (Type 2) Anodizing
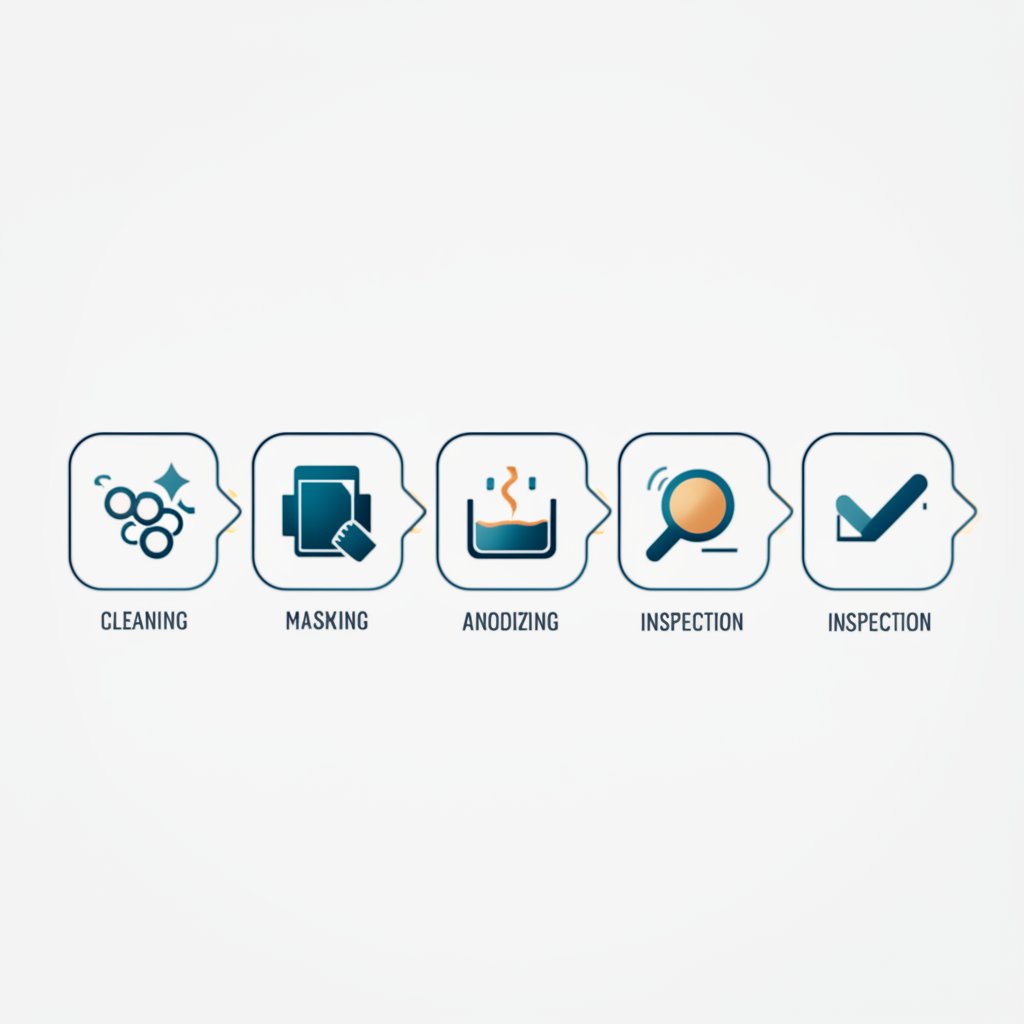
When you’re aiming for a durable, corrosion-resistant finish—think aerospace fasteners or medical implants—functional anodizing is the go-to. But how do you ensure consistent, reliable results every time? Here’s a step-by-step guide to how to anodize titanium for functional outcomes, using proven shop-floor practices and insights from industry references:
-
Pre-clean and Surface Preparation
- Degrease parts with acetone or isopropyl alcohol to remove oils and residues.
- Rinse thoroughly in distilled or deionized water.
- Optional: Etch in a mild acid bath (e.g., nitric or hydrofluoric acid) to remove existing oxides.
- Choose mechanical finish (polished, bead-blasted) to match target appearance and performance.
- Prevent cross-contamination—use dedicated tools and gloves.
-
Masking and Fixturing
- Identify areas to protect (threads, bearing surfaces, sealing lands) and apply appropriate masking materials.
- Plan electrical contact points for consistent current flow; avoid color variation by ensuring secure connection.
- Use titanium wire for anodizing or racks for robust, repeatable fixturing.
-
Electrolyte Preparation and Bath Verification
- Prepare electrolyte—common choices are trisodium phosphate (TSP) or sulfuric acid solutions.
- Verify bath cleanliness and document lot/batch IDs.
- Set up the titanium anodizing machine (power supply, cathode, anode) per shop protocol.
-
Anodizing Run
- Submerge parts in the bath, ensuring they do not touch the cathode directly.
- Apply voltage and ramp up as specified by internal or referenced standards.
- Agitate gently to prevent gas bubble marks and ensure uniform oxide growth.
- Log time, voltage, and operator details for traceability.
-
Rinse and Post-Treatment
- Remove parts and rinse in distilled or deionized water to eliminate electrolyte residues.
- Optional: Apply a clear sealant or lubricant, especially for high-contact components.
-
Dry, Unmask, and Inspect
- Allow parts to air dry or use clean, lint-free towels.
- Remove masking carefully, inspecting for clean edges and no under-mask creep.
- Check for uniform gray appearance, absence of white film, and intact masking areas.
Standard Operating Procedure for Color (Type 3) Anodizing
For those vibrant blues, purples, and golds you see in jewelry or medical hardware, the steps are similar but with some extra attention to detail. Here’s how to get repeatable anodizing titanium color outcomes:
-
Pre-clean and Surface Prep
- Follow the same cleaning and degreasing steps as above.
- Polish or bead-blast as needed—remember, finish impacts color vibrancy.
- Handle with gloves to avoid fingerprints, which can cause color flaws.
-
Masking and Fixturing
- Mask areas where color is not desired, using high-quality tapes or liquid maskants.
- Establish reliable contact using titanium wire for anodizing to avoid current dropouts and color shifts.
- Secure parts so all surfaces are exposed evenly to the electrolyte.
-
Electrolyte Setup
- Mix electrolyte (TSP or similar) in clean, non-metallic containers.
- Set up your anodizing equipment—ensure the power supply is at zero before connecting leads.
- Document bath lot and operator ID for traceability.
-
Anodizing Process
- Submerge the part, ensuring it does not touch the cathode.
- Apply voltage gradually, monitoring color development—higher voltage produces thicker oxide and different hues.
- Avoid voltage spikes or interruptions to prevent streaks or patchy color.
-
Rinse and Dry
- Rinse thoroughly in distilled water to remove all electrolyte.
- Allow to air dry in a dust-free area.
-
Unmask and Inspect
- Remove masking, checking for crisp color boundaries.
- Inspect for uniform color, no streaks, and proper masking of protected areas.
- Photograph under controlled lighting for records.
Masking, Fixturing, and Acceptance Checkpoints
Masking and fixturing are critical for both functional and color anodizing. Here’s what to keep in mind:
- Always clean areas to be masked—residues under the mask can cause bleed-through or poor adhesion.
- Use purpose-made tapes, plugs, or liquid maskants rated for your electrolyte and bake cycles.
- For fixturing, titanium wire for anodizing is preferred for conductivity and chemical compatibility.
- Check contact points before and after anodizing; inconsistent contact leads to color variation or incomplete oxide growth.
- Document every stage: part ID, operator, bath lot, fixtures used, and final visual outcome.
- Capture photos under standardized lighting for QA and traceability.
| Acceptance Checkpoint | What to Document |
|---|---|
| Surface Cleanliness | Visual check, cleaning method, operator initials |
| Masking Integrity | Masking method, areas covered, contact points |
| Bath Verification | Electrolyte composition, lot/batch ID, test results if applicable |
| Anodizing Parameters | Voltage profile, time, temperature, agitation |
| Final Inspection | Color/appearance (for Type 3), coverage, masking removal, photo record |
Consistent fixturing and thorough documentation are just as important as voltage control when you want to repeat color or performance outcomes.
Mastering how to anodize metal—especially titanium—requires attention to detail at every step. With these SOPs, you’ll be equipped to produce both functional and decorative finishes that meet engineering and aesthetic standards. In the next section, we’ll cover safety, PPE, and responsible waste management to keep your shop and team protected as you scale up your anodizing operations.
Safety, PPE, and Responsible Waste Management
Electrical and Process Safety Essentials
Thinking about diy anodizing or setting up a home anodizing kit? Whether you’re working in a professional shop or anodizing at home, safety is non-negotiable. The anodizing process uses electricity and chemicals—both require respect and careful controls. Before you flip the power switch or mix your electrolyte, ask yourself: Is my setup safe for me and the environment?
-
Electrical Safety:
- Use GFCI-protected outlets and circuits to minimize shock risk.
- Lockout/tagout procedures for maintenance on power supplies or baths.
- Cover bus bars and exposed wiring to prevent accidental contact.
- Keep your work area dry—never operate with wet hands or standing water nearby.
- Remove conductive jewelry and watches before starting.
Even small-scale anodizing at home can pose real hazards if electrical safety is ignored. Always double-check connections and never leave a running bath unattended.
PPE and Chemical Handling Checklist
Handling acids and electrolytes is core to titanium anodizing. Proper personal protective equipment (PPE) and chemical handling routines keep you safe from splashes, fumes, and accidental exposures.
| PPE Item | Purpose |
|---|---|
| Eye/Face Protection | Shields against splashes and fumes |
| Chemical-Resistant Gloves | Protects skin from acids and bases |
| Chemical Apron/Lab Coat | Prevents clothing and skin exposure |
| Ventilation or Fume Extraction | Reduces inhalation risks |
| Insulated Footwear | Guards against electrical and chemical spills |
-
Chemical Handling Best Practices:
- Label all chemical containers clearly; never use food or drink containers.
- Store acids and bases in secondary containment trays to catch leaks.
- Keep a spill kit and neutralizing agents nearby, but only use them per the chemical's SDS.
- Ensure easy access to Safety Data Sheets (SDS) for every chemical in use.
For anyone using a home anodizing kit, these controls are just as important as in a commercial shop. A little preparation goes a long way toward preventing accidents and injuries.
Waste Handling, Neutralization, and Records
What happens to your spent electrolyte or rinse water? Responsible waste management is essential—both for legal compliance and environmental stewardship. Regulations vary by location, but there are some universal best practices for any scale, from do it yourself anodizing to full production lines.
- Segregate waste streams: Keep spent acids, rinse water, and other process wastes in separate, clearly labeled containers.
- Verify local regulations: Contact your local environmental agency or treatment works to learn about permissible disposal methods and required permits [Finishing.com].
- Neutralize per SDS/manufacturer guidance: Never dump chemicals down the drain without proper neutralization and approval. Always follow the instructions in your Safety Data Sheet.
- Rinse and capture effluent: Rinse anodized parts in a separate container; treat rinse water as process waste unless your facility has a validated discharge plan.
- Document everything: Record the date, volume, and disposal method for each waste batch. Keep these records for at least the minimum period required by your local regulations.
- Use licensed disposal services where required: For larger volumes or hazardous materials, contract a certified waste handler. You are responsible for your waste even after it leaves your site.
Treat rinse water as process waste unless your environmental team has validated a discharge plan.
Training, written procedures, and regular reviews are essential. Even if you’re just anodizing a few pieces at home, start with good habits—what seems simple at first can quickly become a legal or environmental headache if ignored. Regulations change, so stay informed and always put safety and responsibility first.
Up next, we’ll walk through practical QA methods to ensure your anodized titanium meets color and quality expectations—giving you confidence in every part you produce.
Quality Control and Color Verification That Hold Up
Visual Inspection and Acceptance Criteria
Ever finished a batch of anodized titanium parts and noticed the colors just don’t match? Achieving consistent, reliable color is one of the biggest challenges in titanium finishing. That’s why a robust quality control (QA) process is essential—especially for engineering, medical, or branding applications where color is more than just decoration.
Start with a thorough visual inspection. Here’s a practical checklist you can use for every part or batch:
- Uniform hue and coverage: The color should be even across the surface, without patches or gradients.
- Absence of streaks, water spots, or fingerprints: These can indicate poor rinsing or handling and will affect both looks and durability.
- Controlled contact marks: Check that electrical contact points are discreet and consistent; random marks can signal fixturing issues.
- Correct masking: Areas that should remain bare must be cleanly masked, with sharp boundaries and no color creep.
- Legible identification marks: Part numbers, batch codes, or laser marks should remain clear and unaffected by the anodizing process.
Lighting and Photography for Consistent Evaluation
Have you ever noticed that a titanium part looks blue under one light and purple under another? Lighting makes a huge difference in perceived color. To ensure repeatable QA, always evaluate color under standardized lighting conditions—ideally, in a light booth with a fixed color temperature (such as D65 daylight). This minimizes subjective variation and allows you to compare parts to your target color reliably.
For documentation and traceability, photograph each part or batch using a color reference card next to the part. Store these images with metadata (part number, batch, date, operator) for future reference. This approach not only supports internal QA but also helps when sharing results with customers or suppliers.
Color Measurement Terminology and Records
Want to move beyond "looks about right"? Quantitative color measurement is the next step. The most common system is the CIELAB L*a*b* color space, which describes color in three dimensions: lightness (L*), green–red (a*), and blue–yellow (b*). Delta E (ΔE) is used to quantify the difference between two colors—critical for setting pass/fail criteria in production.
When a customer specifies a color from a titanium anodizing color chart or titanium colour chart, record the target L*a*b* values and allowable Delta E tolerance. This ensures everyone is aligned on what "acceptable" looks like, regardless of lighting or monitor differences. For high-precision work, use a calibrated spectrophotometer to measure and document these values for every batch.
| Inspection Step | Evidence to Capture | Disposition |
|---|---|---|
| Visual Uniformity | Photo under standard lighting, color reference card | Accept or send for rework |
| Masking Integrity | Close-up image, checklist confirmation | Accept or review masking process |
| Contact Marks | Location and consistency noted | Accept or adjust fixturing |
| Color Measurement | L*a*b* values, Delta E calculation, compare to chart | Accept, rework, or escalate |
Reference an anodized titanium color chart or anodizing colors chart as your baseline, but always remember: these are guides, not guarantees. Real-world outcomes depend on surface prep, geometry, and lighting.
Color charts are guides; define pass/fail with lighting, angle, and surface prep held constant.
With these QA methods in place, you’ll be equipped to deliver consistent, high-quality results—batch after batch. Next, we’ll explore how alloy selection and surface finish further influence color and performance, giving you the confidence to make the right choices for your application.
Alloys, Finishes, and Application-Specific Choices
How alloy and surface finish affect color
Ever wondered why two "gold anodized titanium" rings can look so different, even if both are labeled titanium? The answer lies in the interplay between alloy composition and surface finish. Not all titanium is created equal—commercially pure (CP) titanium and Ti-6Al-4V (the most common alloy) each have unique microstructures that influence how the anodized oxide layer forms and, ultimately, how the color appears.
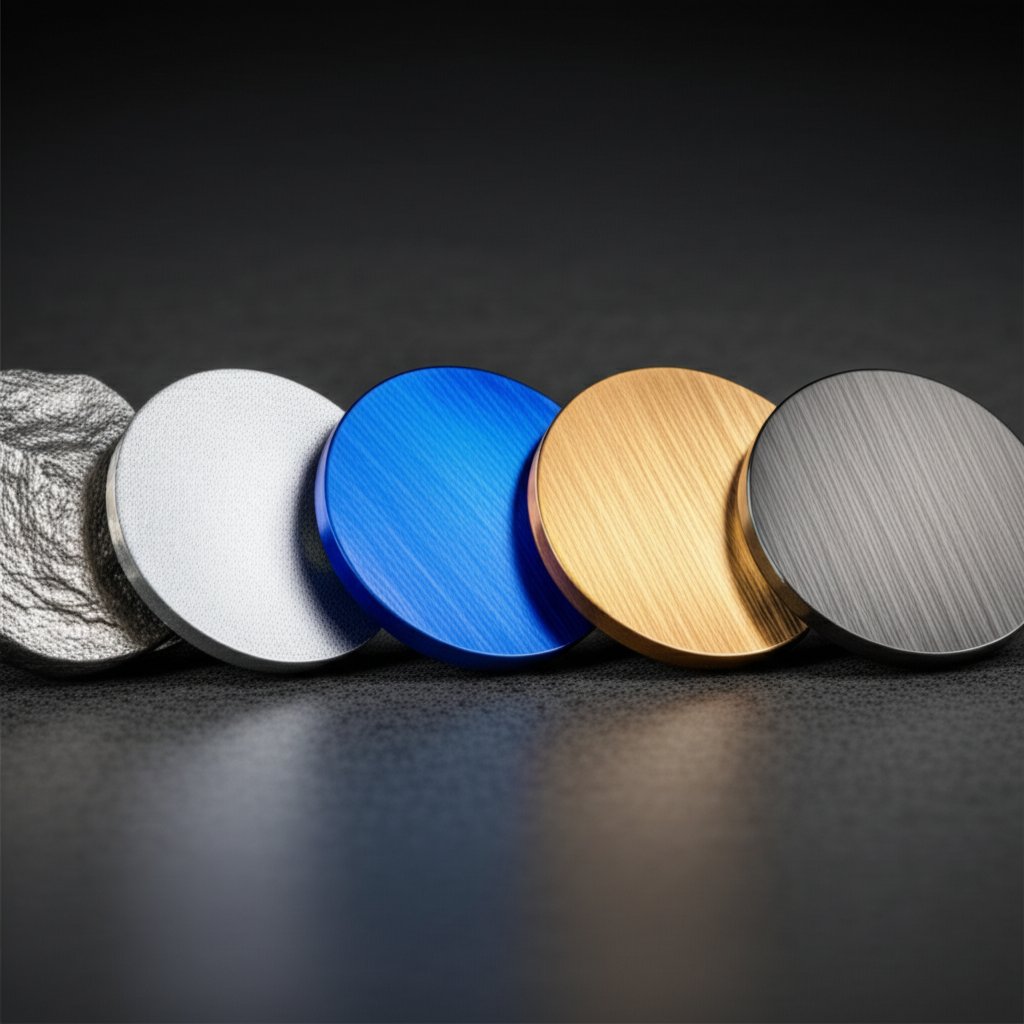
Surface finish is just as critical. A highly polished surface reflects more light, making colors appear bold and saturated, while a bead-blasted or matte finish diffuses light, creating softer, more muted tones. This means that for the same oxide thickness (and thus the same voltage), a polished anodized titanium jewelry piece will display a brighter hue than a bead-blasted fastener or implant.
| Base Condition | Color Vibrancy | Appearance Stability | Fingerprint Visibility | Typical Applications |
|---|---|---|---|---|
| CP Ti, Polished | Very high—saturated, vivid colors | Stable; best for visual appeal | High—shows fingerprints easily | Anodized titanium jewelry, display pieces |
| CP Ti, Bead-Blasted | Moderate—muted, pastel tones | Highly stable; resists glare | Low—hides fingerprints well | Medical hardware, surgical tools |
| Ti-6Al-4V, Polished | High—slightly less saturated than CP Ti | Good; alloying elements can subtly shift hues | Moderate | Anodized titanium ring, premium fasteners |
| Ti-6Al-4V, Bead-Blasted | Moderate to low—soft, understated colors | Very stable; ideal for utilitarian parts | Very low | Industrial fasteners, orthopedic implants |
So, if you’re aiming for the most vibrant titanium anodized colors, start with a fine polish and choose CP titanium when possible. For applications where glare and fingerprints are a concern—like surgical trays or tools—a bead-blasted finish on Ti-6Al-4V may be more practical.
Application-driven recommendations
- Anodized titanium jewelry: For items like anodised titanium jewellery or a gold anodized titanium ring, prioritize a fine polish and strict color verification. This ensures deep, saturated hues that catch the eye and take advantage of titanium’s hypoallergenic properties. Consistent surface prep is key for matching sets.
- Medical hardware: In surgical implants and tools, color isn’t just for looks—it’s for identification. Choose bead-blasted finishes for reduced glare and improved handling. Confirm that your titanium coloring process aligns with medical standards like ASTM F86 (for surface prep) and AMS 2488 (for anodic treatment), especially for parts that require repeated sterilization cycles.
- Industrial fasteners: Quick visual differentiation is essential in assembly lines. Use uniform coverage and robust fixturing to ensure every batch matches the intended color code. Matte finishes can help minimize fingerprint visibility and maintain appearance over time.
Downstream process compatibility
Before finalizing your finish, consider the next steps in your workflow. Will the part be engraved or laser-marked? Both processes work well on anodized titanium, but test for contrast and legibility—especially on darker hues. If adhesives or lubricants are involved, confirm compatibility with the oxide layer to avoid peeling or reduced performance.
For jewelry and medical hardware, repeated cleaning and sterilization can gradually dull the surface. Choose surface prep and color that will stand up to the intended environment. And always maintain tight process control to ensure that each anodized titanium ring or implant matches its color specification batch after batch.
Matching alloy, finish, and color process to your application is the surest way to achieve both performance and visual consistency.
Now that you know how alloy and finish choices shape the final look and function of anodized titanium, the next section will guide you through scaling your process from prototype to production—ensuring repeatability and efficiency at every stage.
Scaling Anodized Titanium from Prototype to Production
Fixturing and Contact Strategy for Repeatability
When you’re ready to move from a single eye-catching prototype to a full batch of anodized titanium parts, the rules of the game change. Suddenly, it’s not just about getting one perfect color—it’s about making sure every part matches, every time. Have you ever noticed subtle color shifts from one piece to the next? That’s often a fixturing or contact issue, not just a voltage problem. Here’s how to set yourself up for scalable, repeatable results:
- Modular racks: Use modular racking systems designed for titanium anodizing equipment, ensuring consistent current paths and minimizing variation caused by part placement.
- Standardized contact geometries: Define and document exactly where the electrical connection is made on each part. This reduces the risk of uneven oxide growth and color shifts, especially in complex assemblies or curved surfaces.
- Quick-change masking: Implement masking methods that are easy to repeat and remove, supporting higher throughput without sacrificing quality.
- Batch grouping: Group similar parts together so that geometry and surface area are consistent within each run, further reducing color variability.
Imagine you’re running an anodizing plant: the more you standardize your fixturing and contact strategy, the more predictable your titanium finishing outcomes will be.
Process Control and Documentation
Scaling up production isn’t just about more parts—it’s about more control. You need systems that catch problems early, document every step, and help you trace any issue back to its source. Here’s a process control flow that supports both small and large-scale titanium work:
- Pre-run bath checks and cleanliness audits: Always verify electrolyte quality and cleanliness before each batch, as contaminants can cause inconsistent results.
- Lot travelers: Use paperwork or digital travelers to link every part to its fixture, operator, and process parameters. This is essential for traceability and troubleshooting.
- Controlled lighting inspection: Inspect color and coverage under standardized lighting to catch subtle variations early.
- Photo records: Document each batch with photographs, including a color reference card, to support both internal QA and customer communication.
- Periodic verification runs: Run known control coupons or test parts at regular intervals to confirm process stability, especially after maintenance or changes to your titanium anodizing equipment.
These steps help ensure that your anodizing process remains consistent, even as volumes grow. They also support compliance with supplier quality systems and make it easier to resolve nonconformances quickly.
Sampling Plans and Traceability
How do you know when a batch is good enough to ship? Sampling strategies evolve as you move from prototype to production. Here’s a simple table to guide your approach:
| Stage | Sampling Approach | Purpose |
|---|---|---|
| Prototype | 100% visual inspection | Catch every issue, learn process limits |
| Pilot | First-article records, tightened sampling | Validate process, document results |
| Production | Risk-based sampling (aligned to defect history) | Maintain quality, optimize efficiency |
As you scale, make sure your sampling plan is flexible—ready to tighten if issues arise, or relax as you build confidence in your titanium anodizer process.
Consistency in contact location is your fastest path to color repeatability.
Aligning your documentation, fixturing, and sampling with best practices not only reduces scrap and rework, but also makes your anodizing plants more agile and responsive to customer needs. As you refine your titanium finishing process, these habits will pay off in both quality and lead time. Next, we’ll look at how to select the right partners and workflows to keep your anodized titanium program running smoothly from machining to final inspection.
Selecting Partners and Workflows for Anodized Titanium
When to Coordinate Machining with Finishing
Ever received beautifully machined titanium parts, only to have the anodizing come back inconsistent or patchy? That’s a classic sign the handoff between machining and finishing wasn’t fully aligned. For titanium anodizing service projects—especially where color, durability, or tight tolerances are critical—coordinating CNC machining and anodizing from the outset is essential. Why? Because every detail, from surface finish to edge breaks, impacts how the oxide layer forms and how your final titanium finishes look and perform.
Imagine you’re working on a batch of surgical implants or premium consumer hardware. If your CNC partner understands the nuances of ti anodizing, they’ll program for optimal surface prep, avoid deep tool marks, and ensure all features are accessible for masking and fixturing. This upfront planning avoids costly surprises—like "anodize near me" shops struggling to deliver consistent color because of hidden burrs or rough spots.
What to Look for in a Titanium-Capable Supplier
Choosing the right partner for your anodized titanium workflow is more than just finding a supplier who can machine or finish titanium. Here’s what separates a good titanium finishing co from a great one:
- Technical expertise in both machining and finishing: Look for suppliers who understand how CNC parameters influence anodizing outcomes.
- Certification and quality assurance: ISO 9001, IATF 16949, or relevant medical/aerospace certifications signal a commitment to repeatability and traceability.
- Integrated workflow support: Partners who can handle everything from CAD review to final inspection reduce handoff errors and lead times.
- Experience with your application: Whether it’s jewelry, medical, or aerospace, proven results in your sector mean fewer surprises.
- Transparent communication: The best suppliers provide clear documentation, color samples, and inspection records—so you know exactly what to expect.
Workflow Options Compared
Not sure which workflow fits your needs? Here’s a comparison to help you decide:
| Option | Key Features | Coordination Support | Typical Use Cases |
|---|---|---|---|
| XTJ CNC Machining Services |
|
|
|
| Local Anodizer + Separate Machine Shop |
|
|
|
| In-House Machining and Anodizing |
|
|
|
Selection Tips for Reliable Anodized Titanium Results
- Ask for sample color panels or reference parts—this sets clear expectations for your titanium anodizing service.
- Verify the fixturing and masking strategy—especially for complex geometries or tight-tolerance features.
- Review inspection records and QA protocols—ensure your supplier documents every step, from machining to final color check.
- Clarify communication channels—know who to contact if there’s a question or issue at any stage.
- Check for experience in your application—medical, aerospace, or jewelry each have unique requirements for ti anodizing and finishing.
Integrated machining and anodizing workflows reduce errors, improve color consistency, and streamline delivery—especially for demanding titanium finishing projects.
By carefully selecting your workflow and partners, you’ll ensure every batch of anodized titanium meets your performance, appearance, and delivery goals—whether you’re producing a handful of prototypes or scaling up to full production. With the right team, your next titanium project will shine, inside and out.
Anodized Titanium FAQs
1. Is anodized titanium good?
Anodized titanium is highly valued for its durable, non-fading colors and enhanced corrosion resistance. The process creates a stable oxide layer that not only protects the metal but also enables easy part identification by color, supporting quality assurance in industries like medical, aerospace, and jewelry.
2. How does titanium get its color through anodizing?
Titanium develops color during anodizing due to a transparent oxide layer that forms on its surface. This layer causes light interference, resulting in different visible colors depending on its thickness. The color is determined by the voltage applied, not by dyes or pigments, making each hue both durable and repeatable.
3. What are the main differences between anodized titanium and anodized aluminum?
Anodized titanium gets its color from light interference in the oxide layer, while anodized aluminum uses dyes absorbed into a porous oxide. Titanium’s colors are more stable and resistant to fading, making it ideal for medical, aerospace, and jewelry applications, whereas aluminum is common in consumer and architectural products.
4. Can I anodize titanium at home, and what safety precautions should I take?
Yes, titanium can be anodized at home using a suitable power supply and electrolyte, but strict safety measures are essential. Always use PPE (goggles, gloves, apron), ensure proper ventilation, avoid conductive jewelry, and handle chemicals responsibly. Dispose of waste according to local regulations and never pour chemicals down the drain without proper neutralization.
5. How do I ensure consistent color and quality in anodized titanium parts?
Consistency in anodized titanium is achieved by controlling surface preparation, voltage, fixturing, and inspection under standardized lighting. Documenting process steps, using color charts as guides, and photographing parts with reference cards help maintain quality. For critical projects, partnering with certified CNC and finishing services can further improve repeatability.
-
Posted in
anodized titanium, titanium anodizing, titanium anodizing service, titanium color chart, titanium finishes


