
Prototype Aluminium Extrusions: 8 Essential Points To Get Right

uild a Reliable Foundation for Prototyping Decisions
What prototype aluminium extrusions mean for product teams
When you’re developing a new product, how do you ensure your design will perform as intended—without overcommitting to costly production tooling? Prototype aluminium extrusions are the answer for engineering teams seeking to validate geometry, fit, and function before investing in full-scale dies. Unlike production runs, these prototypes bridge the gap between CAD concepts and real-world parts, letting you learn quickly and adjust confidently.
Sounds complex? Imagine you need a custom aluminum extrude for a unique connector or frame. Instead of immediately ordering a production die, you can leverage prototype aluminum extrusions or machine an aluminum prototype from billet or standard extruded aluminium shapes. This approach helps you check assumptions, reduce risk, and control costs while keeping your project on schedule.
When to prototype versus going straight to production
Not every project justifies jumping into production tooling. Teams typically prototype when:
- Geometry is unproven or likely to change
- Alloy selection or temper is still being evaluated
- Critical fit, assembly, or tolerance requirements must be validated
- Downstream finishing or secondary operations (like machining or anodizing) need real-world testing
By prototyping, you avoid the high costs and long lead times of production dies, allowing for iterative learning and design optimization. This is especially valuable for custom aluminum extrusions, where unique profiles or features are involved.
From CAD to first articles without overcommitting
The journey from a digital model to a physical part can follow several routes. Here’s a quick comparison of common prototype aluminium extrusion methods and their typical use cases:
| Prototype Route | Typical Usage Intent |
|---|---|
| Short-run extrusion | Testing near-net-shape profiles in the intended alloy with minimal secondary machining; ideal for optimizing geometry and wall thickness before production |
| CNC from billet | Rapidly producing a single or few parts for fit, assembly, or mechanical testing; especially when profile complexity is moderate |
| CNC from standard profiles | Utilizing off-the-shelf extruded aluminium shapes for basic validation, with more extensive machining for custom features |
| 3D-printed surrogates | Form and fit checks or fixture development, especially for complex geometries or when metal properties are not yet required |
- Fit validation: Ensure your design integrates with mating components
- Tolerance learning: Assess achievable precision before scaling up
- Supply risk reduction: Identify manufacturability or material sourcing issues early
- Faster iteration: Adapt geometry or features without long die lead times
Design choices that balance wall thickness and flow paths tend to prototype faster and scale better, with or without production dies.
Choosing the right prototyping approach depends on your goals—whether you’re prioritizing speed, representativeness, or cost. For example, short-run aluminum extrusion can deliver near-final profiles in days or weeks, while CNC machining from billet offers flexibility for rapid changes, especially for an aluminum prototype or prototype aluminum extrusions with tight timelines.
As you move forward, you’ll want to:
- Select the right alloy to match performance and finish needs
- Apply design-for-extrusion rules to minimize manufacturing risk
- Compare prototyping methods for schedule, cost, and accuracy
- Set and verify tolerances based on credible standards
- Understand cost drivers and lead times for each route
- Prepare thorough RFQs to get apples-to-apples quotes
By grounding your process in these fundamentals, you’ll keep your team aligned and your project on track—whether you’re working with custom aluminum extrusions, standard profiles, or exploring new aluminum prototype workflows. Ready to dive deeper? Next, we’ll explore how alloy selection shapes your prototyping success.
Select the Right Alloy for Prototyping Outcomes
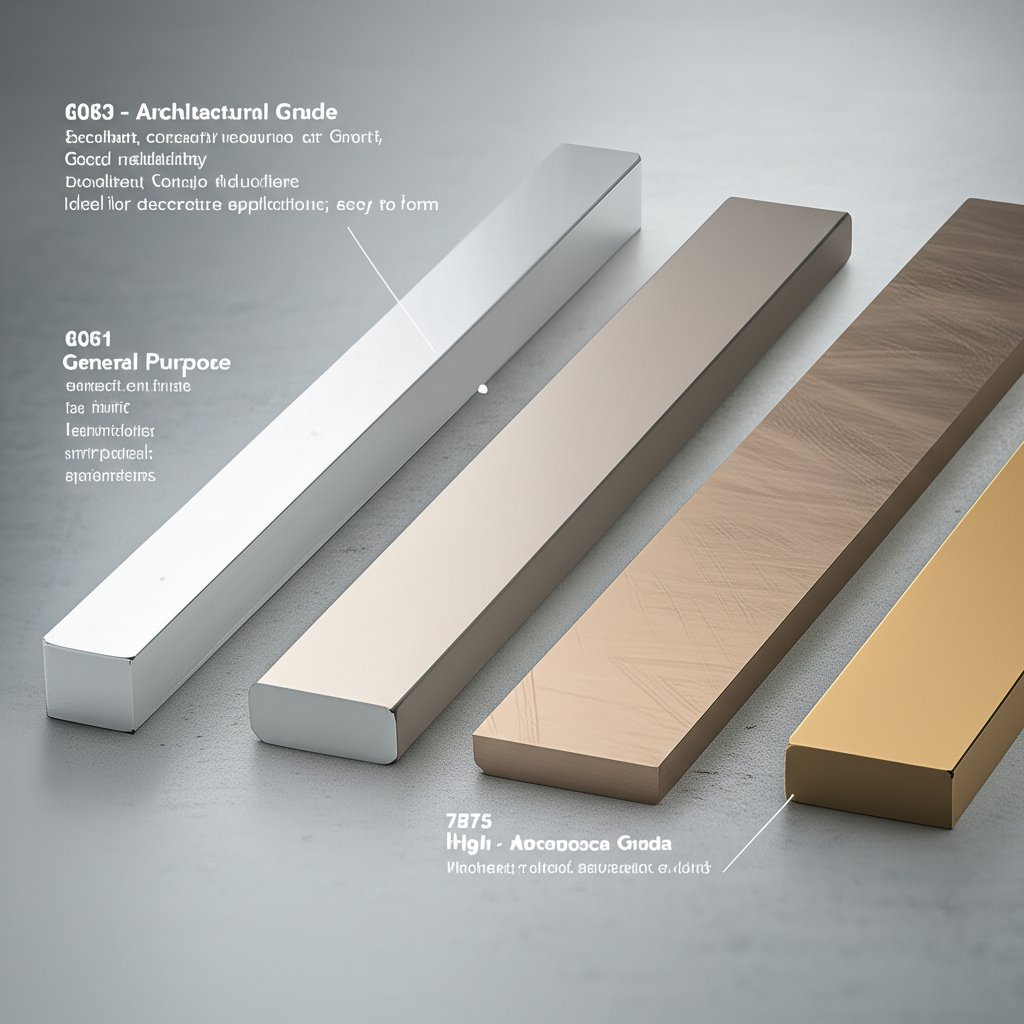
Choosing Between 6063, 6061, and 7075 for Prototypes
When you’re planning prototype aluminium extrusions, alloy selection is one of your earliest and most important decisions. Sounds complex? Imagine you need to balance machinability, surface finish, and strength, all while keeping your prototype process efficient. The most common choices—6063, 6061, and 7075—each offer a unique blend of properties that affect everything from extrusion speed to downstream finishing. But how do you decide which alloy is right for your aluminum prototype?
| Alloy | Typical Strength Class | Surface Finish Tendency | Machinability | Common Prototype Uses |
|---|---|---|---|---|
| 6063 | Medium | Excellent (smooth finish, good for anodizing) | Good | Cosmetic parts, architectural extruded aluminum profiles, intricate aluminium extrusion profiles |
| 6061 | Medium-High | Good (suitable for machining and coating) | Very Good | General-purpose prototypes, fixtures, mechanical test articles |
| 7075 | High | Fair (can be more difficult to finish well) | Moderate | High-strength applications, aerospace, structural prototypes |
According to industry guidance, 6061 and 6063 are the go-to alloys for most prototype aluminum extrusions, thanks to their balance of strength, corrosion resistance, and formability. 7075 is favored when you need exceptional strength, but it’s trickier to extrude and finish, often requiring more attention from your aluminium profile suppliers or aluminium profile manufacturer partners.
Temper and Finish Considerations That Affect First Articles
Not all alloys respond equally to tempering or finishing processes. For instance, 6063 is prized for its smooth surface and is a top pick when cosmetic anodizing is critical. 6061, while slightly rougher, machines well and is versatile for both structural and decorative aluminum extrusion shapes. If your prototype calls for advanced forming or coating after extrusion, be sure to check with your aluminium profile suppliers about temper options and post-processing compatibility. This helps avoid surprises when scaling to production.
Standards That Govern Alloy Properties and Tolerances
How do you ensure your prototype matches the final requirements? Start by referencing the right standards. This keeps your communication clear with any aluminium profile manufacturer and helps you get accurate, comparable quotes for aluminum extruded profiles. Here’s where to look:
- ASTM B221: For aluminum and aluminum-alloy extruded bars, rods, wire, profiles, and tubes
- EN 755 series: For European dimensional tolerances and mechanical properties
- Aluminium Association temper designations: For understanding heat treatment and temper options
Choosing the alloy for your prototype is about representativeness—how well its strength and finish behavior forecast production results—more than just cost.
Before you commit, always confirm with your aluminium profile suppliers how your alloy choice will affect available press sizes, minimum order quantities, and the complexity of possible aluminum extrusion shapes. For example, 7075 may limit the size or detail of your extruded aluminum profiles, while 6063 and 6061 are more forgiving for intricate aluminium extrusion profiles and custom shapes. Align these constraints with your prototype goals, whether that’s strength testing, cosmetic evaluation, or assembly trials.
With your alloy decision made, you’re ready to tackle design-for-extrusion rules—ensuring your prototype aluminum extrusions are not only feasible, but also optimized for learning and scaling. Next, we’ll break down practical design principles to help your prototypes run cleanly and avoid costly setbacks.
Design for Extrusion to De-Risk Your Prototype
Design Principles That Help Prototypes Run Cleanly
When you’re moving from concept to prototype aluminium extrusions, it’s tempting to push the limits on geometry. But have you ever wondered why some prototype aluminum profiles run smoothly, while others cause delays or require costly rework? The answer usually lies in how well your design fits the real-world rules of extrusion aluminium processes. Getting this right not only saves time and cost—it’s the foundation for learning that actually scales to production.
- Keep wall thickness as uniform as possible: Uneven walls can lead to flow imbalances, resulting in distortion or breakage during extrusion. If you’re unsure about acceptable ranges, ask your supplier to reference standards or their aluminium extrusion tooling guidelines (AEC).
- Use generous inside radii: Sharp corners impede metal flow and can create stress points in the die. Rounded transitions help maintain consistent flow, especially for small aluminum extrusions or miniature extrusions where detail is critical.
- Minimize deep, isolated pockets: Features like deep slots or narrow tongues slow down press speeds and increase the risk of die failure. Consider integrating ribs or webs to support these areas.
- Balance mass around the neutral axis: Symmetrical designs are easier to extrude and reduce the risk of twist or bow in long extruded profiles.
- Anticipate hollow sections: Hollows require more complex aluminium extrusion tooling, such as bridge or porthole dies. Reducing the number or complexity of voids can lower tooling cost and speed up delivery.
Uniform section thickness is the fastest path to stable extrusion behavior and predictable distortion.
Balancing Wall Thickness and Flow
Imagine you’re designing a prototype that needs both rigidity and lightweight properties. Sounds like a challenge? The trick is to use the right balance of wall thickness and strategically placed ribs. Thicker walls can slow down extrusion speeds and increase material use, while thin, unsupported sections may warp or tear. For complex extrusion profiles, early collaboration with your extrusion partner helps you set realistic wall thicknesses and radii. If you need numeric thresholds, reputable sources like the AEC or your supplier’s design manual are the best places to look.
- Thicker is not always better: Excess thickness can cause cooling issues and increase cycle time. Instead, reinforce with ribs or webs where strength is needed.
- Flow simulation and DFM reviews: For intricate aluminum extruded shapes, consider having your design reviewed with flow simulation tools. This helps catch flow bottlenecks or areas at risk for die breakage before you commit to aluminium extrusion tooling.
Features That Frequently Delay or Derail Prototypes
Which features should you watch out for? Here’s a practical table to help you anticipate where secondary machining or design tweaks may be needed:
| Feature Consideration | Prototype Implication |
|---|---|
| Ribs | Improve stiffness and support thin walls; should be balanced and not too tall relative to spacing. Excessive height-to-gap ratios can cause die stress. |
| Slots & Deep Grooves | May require temporary closure webs or post-extrusion machining for tight tolerances. Narrow, deep slots slow press speed and risk distortion. |
| T-slots | Common in modular extrusion profiles; require careful design to ensure die strength and ease of removal. May need additional machining for final fit. |
| Screw Bosses | Best placed close to main walls; deep bosses can be hard to fill and may require secondary drilling or tapping. |
| Undercuts | Rarely feasible in direct extrusion; usually require post-process machining. Avoid unless absolutely necessary. |
| Snap Features | Feasible for some small aluminum extrusions, but may need post-extrusion coining or forming for tight tolerances. |
For all these features, confirm with your extrusion partner or machining vendor during the DFM review. They can advise on which elements are best integrated into the extrusion, and which are better left for secondary operations.
- Integrate drill starters or pilot grooves to reduce downstream machining
- Design for punch-friendly wall access if holes or cutouts are required
- Specify finish class early—cosmetic requirements impact die care and run speed
- Share preliminary sections with your supplier for early risk assessment
By following these extrusion aluminium design rules, you’ll not only reduce the risk of costly prototype failures but also set the stage for smoother transitions to production. Next, we’ll compare prototyping methods—so you can choose the best path for your specific timeline, budget, and learning goals.
Compare Prototyping Methods and Choose with Confidence
Choosing the Right Path to First Articles
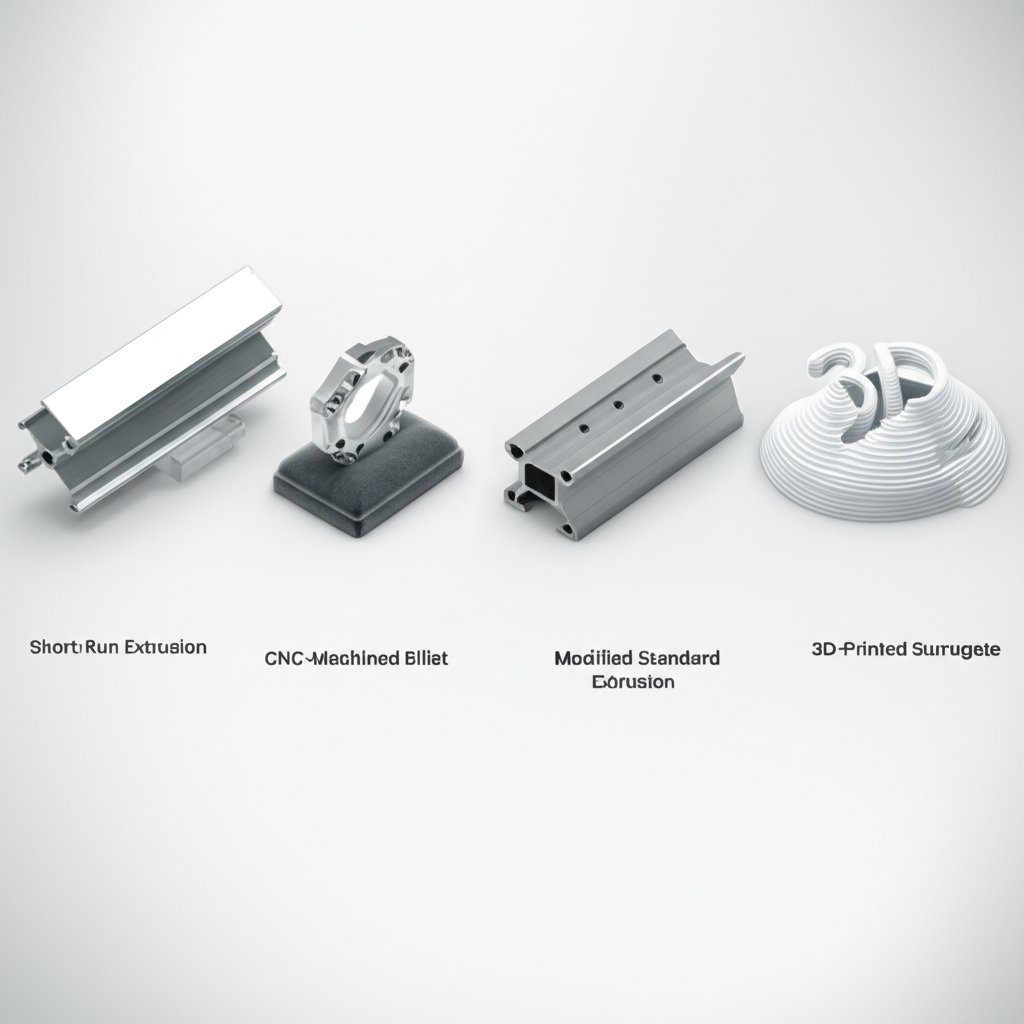
When you’re ready to bring your prototype aluminium extrusions off the screen and into your hands, the route you choose can make or break your schedule—and learning outcomes. Sounds overwhelming? Let’s break it down. Whether you’re eyeing short-run extrusion, CNC machining from billet, modifying standard aluminum extrusion profiles, or even 3D-printed surrogates, each method offers distinct tradeoffs for speed, cost, and representativeness.
| Prototyping Method | Upfront Tooling | Unit Cost Trends | Lead-Time Band | Dimensional Accuracy | Surface Finish | Material Representativeness | Best Use Cases |
|---|---|---|---|---|---|---|---|
| Short-Run Extrusion | Medium (prototype die required) | Decreases with quantity | Medium (profile-dependent) | Medium (profile-dependent) | Good (with post-processing) | High (matches production alloy) | Testing custom extruded profiles, wall thickness, and finish in intended alloy |
| CNC from Billet | Low (no die) | High per piece | Short (if billet is in stock) | High (tight tolerances possible) | Excellent (machined finish) | High (matches production alloy) | Critical fit, mechanical testing, highly asymmetric or small batch custom profile extrusions |
| Machining Standard Profiles | Low (use off-the-shelf shapes) | Low to medium | Short | High (for machined features) | Good (may require additional finishing) | Medium (if alloy/shape is a close match) | Assembly trials, rapid prototyping of simple extrusion shapes |
| 3D-Printed Surrogates | None | Low for single pieces | Shortest | Medium to low | Varies (depends on technology) | Low (not true aluminum unless using DMLS) | Form/fit checks, fixtures, early design validation |
*Values above are qualitative and may vary based on profile size, alloy, and vendor capacity. Always confirm specifics with your extrusion services provider.
When CNC Beats Short Run Extrusion
Ever wondered why some teams opt for CNC machining over a custom extrusion, even when they want a near-final profile? For thin or highly asymmetric extruded aluminum shapes, CNC from billet can deliver parts faster and with less risk of distortion—especially when you need just a few pieces for testing. While the per-part cost is higher, you’ll often gain critical insights sooner, which can be invaluable for complex custom extruded aluminum projects.
For thin or highly asymmetric profiles, machining from billet may deliver faster learning than waiting on prototype dies, even if per-piece cost is higher.
Using 3D Prints to Validate Form Only
Need to check fit or assembly before committing to metal? 3D-printed surrogates are a fast, low-cost way to evaluate geometry, especially for complicated extrusion shapes or fixtures. However, remember that unless you use direct metal laser sintering (DMLS), these parts won’t reflect the true mechanical properties of aluminum extrusion parts. Use them for early-stage validation, not for functional testing.
- Do you need to test mechanical properties in the production alloy?
- Is your design likely to change after assembly trials?
- Are you evaluating cosmetic finishes or anodizing?
- How many pieces do you need—and how quickly?
- Does your timeline support waiting for a prototype die, or is fast iteration more valuable?
By weighing these triggers, you’ll notice that custom extruded profiles and custom profile extrusions each come with unique strengths—so matching your prototyping method to your learning goals is essential. Whether you’re after a functional test article or a quick fit check, aligning with the right extrusion services or machining partner keeps your project moving efficiently.
Curious about the step-by-step processes behind aluminum prototypes? For a deeper dive into how each method works—and practical tips for choosing—check out this detailed guide: What Are the Processes in Aluminum Prototypes?
Next, we’ll explore how to set tolerances and inspection plans that keep your prototypes credible and your schedule on track.
Tolerances, QA, and Credible Inspection for Prototypes
Which Standards to Cite on Drawings
When you’re specifying prototype aluminium extrusions, how do you make sure your parts are measured and inspected fairly—without slowing down your project? The answer starts with citing the right standards on your engineering drawings. For most precision aluminum extrusion projects, the industry relies on standards like ASTM B221 for dimensional tolerances and EN 755-9 for form and straightness. These documents define what’s achievable for typical aluminium extrusion parts and extruded aluminum parts, providing a common language between engineering and your supplier.
- ASTM B221: Covers aluminum and aluminum-alloy extruded bars, rods, wire, profiles, and tubes. Use this for U.S.-based projects or when working with suppliers familiar with North American norms.
- EN 755-9: Specifies tolerances on form and dimensions for aluminum extrusions profiles in Europe and globally recognized projects.
- Aluminum Association Data: Reference Tables 11.5–11.14 and 12.2–12.14 for dimensional tolerances and precision classes. Many extruders can exceed standard tolerances, but always confirm with your vendor (AEC).
By referencing these standards, you help your supplier understand the target tolerances for your aluminium extrusion die and avoid miscommunication that could delay your prototype schedule.
Inspection Steps That Catch the Big Risks Early
Sounds overwhelming? Imagine you receive your first batch of prototype aluminum extrusions—how do you know they’re good enough to test, assemble, or send onward? A clear, step-by-step inspection plan lets you catch major issues early, without overburdening your timeline or budget. Here’s a practical sequence you can follow for most prototype aluminum projects:
- Verify cross-section: Measure profile dimensions against the drawing and standards callouts. Use calipers, micrometers, or optical comparators as appropriate.
- Check length, twist, and bow: Lay the part on a flat surface and use straightedges or digital tools to check for warping. Excessive twist or bow can derail assembly.
- Inspect machined features: After secondary operations, measure critical holes, slots, or cutouts. This is especially important for precision aluminum extrusion builds where fit is crucial.
- Review surface quality: Look for chatter, die lines, pick-up, or scratches. These can indicate issues with the aluminium extrusion die, tooling wear, or poor handling.
- Confirm temper and heat treatment paperwork: Ask for mechanical property certificates or hardness test results to ensure the correct alloy and temper were used.
For more advanced applications, you might also request tensile strength, hardness, or corrosion resistance tests—especially for safety-critical extruded aluminum parts. Fitment testing, where profiles are assembled with mating components, can reveal issues not visible through measurement alone.
Surface and Straightness Checks That Matter
Surface quality and straightness aren’t just cosmetic—they impact how your parts perform in the real world. For example, die lines or scratches can affect downstream anodizing, while excessive bow or twist makes assembly difficult. Here’s a quick guide to common prototype routes and their typical inspection focus:
| Prototype Route | Typical Tolerance Approach | Surface Notes |
|---|---|---|
| Short-run extrusion | Standard per ASTM B221 or EN 755-9; tighter possible by agreement | May show minor die lines; surface finish improves with die conditioning and post-processing |
| CNC from billet | Machining tolerances (typically tighter than extrusion); confirm with vendor | Machined finish; suitable for high-precision or cosmetic trials |
| Machining standard profiles | Depends on as-extruded profile and secondary ops | May show both extrusion and machining marks; review for critical surfaces |
| 3D-printed surrogates | Depends on print technology; not representative of metal | Use for form/fit only; not for surface or mechanical evaluation |
Always align your inspection plan with how are aluminum extrusions made for your chosen prototype route—knowing whether you’re looking at a machined, extruded, or printed part helps set realistic expectations for aluminum extrusions profiles.
Align your tolerance callouts with the prototyping method’s actual capability—overly tight specs can lead to false rejections and wasted time.
- Include clear acceptance criteria for first-article approval—define what’s a must-have versus a nice-to-have.
- Document concessions made for learning builds; not every prototype needs to hit production-level tolerances.
- For ISO 9001-certified suppliers, ask for sample First Article Inspection (FAI) reports and confirm that their measurement equipment is traceable and calibrated.
- Consider requesting 100% inspection only for high-value or safety-critical aluminium extrusion parts, as this can increase cost and lead time.
By following these steps, you’ll keep your prototype process efficient, credible, and focused on learning—rather than chasing perfection at the expense of schedule. Next, we’ll break down the cost drivers and lead time levers that let you plan and budget your prototype aluminium extrusions with confidence.
Cost Drivers, Lead Times, and Smart Budgeting for Prototype Aluminium Extrusions
What Drives Prototype Cost and How to Influence It
When you’re planning prototype aluminium extrusions, do you ever wonder why costs can swing so much from one quote to another? Imagine you’ve finalized your design—now, the next challenge is building a realistic budget and timeline that keeps your project moving. Understanding what goes into the custom aluminum extrusion cost helps you make smarter decisions, avoid surprises, and communicate clearly with your team and suppliers.
Here’s a breakdown of typical cost drivers for prototype and custom aluminium extrusion projects. Use this table to organize supplier quotes and spot where you can influence cost or lead time:
| Cost Element | What It Covers | Influence/Notes |
|---|---|---|
| Tooling Die | Custom die fabrication for your profile | Cost rises with complexity; amortized over order size. Typical range: $400–$2,000 |
| Material (Alloy & Temper) | Raw aluminum billet or bar, alloyed and tempered as specified | Base price fluctuates; special alloys or tempers may require premium or longer lead time |
| Press Time & Setup | Extrusion run, including setup and changeover | Shorter runs cost more per unit; complex shapes slow down press speed |
| Secondary Machining | Drilling, milling, slotting, or other post-extrusion ops | Simple ops: $200–$300/ton; complex features add tooling and time |
| Surface Finish (Anodize, Powder Coat) | Cosmetic or protective treatments | Anodizing/powder coating: $1,200–$1,400/ton; special finishes cost more |
| Heat Treatment | Tempering for strength or formability | Often included if volumes are sufficient; check with supplier |
| Inspection & Documentation | QA checks, certs, first article inspection | May be bundled or quoted as extra for tight tolerances or custom aluminum extrusion profiles |
| Packaging & Freight | Protective packaging and shipping | Highly variable; international freight can be $8,000–$20,000 per container |
*Ranges above are from supplier references and are subject to profile size, region, and project complexity. For the most accurate custom aluminum extrusion cost, always get supplier-verified quotes.
Lead Time Levers from CAD to Delivered Parts
How long will it take to get your prototype in hand? Lead times for custom extrusion aluminum projects depend on several factors. Here’s a practical table to help you compare methods and risk factors:
| Prototyping Method | Typical Lead-Time Band | Key Risk Factors |
|---|---|---|
| Short-Run Extrusion | 4–6 weeks (including die creation and sample approval) | Die complexity, alloy availability, secondary ops, finish schedule |
| CNC from Billet | 1–3 weeks (if billet is in stock) | Material availability, machining queue, profile complexity |
| Machining Standard Profiles | 1–2 weeks | Stock profile match, machining workload |
| 3D-Printed Surrogates | Days to 1 week | Printer capacity, file prep, non-metal material |
Lead-time bands above are based on typical industry experience and supplier guidance. For cheap aluminium extrusion or fast turnaround, simplify your design and use standard alloys where possible.
Amortization Strategy for Bridging to Production
Ever noticed how ordering more parts can dramatically lower your per-piece cost? That’s because fixed costs—like the custom cut aluminum extrusion die—are spread across more units. For small prototype runs, the die cost can dominate the budget. But as you scale up, material and process costs become the main drivers. This is why it’s smart to quote multiple quantity bands and test how your custom aluminium extrusion cost curve changes as you approach production volumes.
Quote multiple quantity bands to clarify unit-cost curves and to test amortization of any prototype die.
- Simplify cross-sections for your first build—complexity raises both cost and lead time
- Consolidate secondary operations where possible to minimize hand-offs and logistics
- Confirm surface finish and anodize lead times up front—these steps often add days or weeks
- Plan for learning: If your design is likely to change, budget for a re-run or secondary machining
- Ask suppliers about refund or amortization policies for tooling if you move to production later
By understanding these cost and schedule drivers, you’ll be able to set expectations, negotiate credibly, and keep your team aligned. This is especially important for custom aluminum extrusion profiles and when comparing custom aluminium extrusion quotes across vendors. Next, we’ll tackle how to build a robust RFQ package and select suppliers who can deliver the quality and lead time your project demands.

RFQ Checklist and Supplier Selection Made Practical
What to Include in a Complete RFQ
When you’re ready to turn your prototype aluminium extrusions from concept into physical parts, creating a thorough RFQ (Request for Quote) package is key. Sounds like a lot of paperwork? Imagine sending out half-baked requests—only to receive quotes that are impossible to compare or miss critical details. A complete RFQ not only streamlines the quoting process but also sets the stage for a smoother partnership with your aluminum extrusion manufacturer.
- PDF drawing with a fully dimensioned cross-section, including all tolerances and clear callouts to standards such as ASTM B221 or EN 755-9.
- STEP file (or similar CAD format) of the profile and any machined features for direct import into the supplier’s CAM system.
- Alloy and temper specification to ensure material properties match your prototype aluminum requirements.
- Length and cut tolerances—define both nominal and acceptable ranges.
- Quantity bands (e.g., 5, 25, 100 units) to reveal cost scaling and minimum order policies.
- Critical-to-quality features—highlight dimensions, fits, or surfaces that are non-negotiable for your application.
- Surface finish specification and, if appearance matters, provide a sample chip or reference image.
- Test and inspection requirements—specify what reports or certifications you expect (e.g., FAI, CMM, hardness, or chemical composition).
- Required certifications (ISO 9001, IATF 16949, etc.), especially for regulated industries or critical applications.
- Target lead date and ship-to address to align logistics and delivery expectations.
By providing this level of detail, you’ll help custom aluminum extrusion manufacturers and custom aluminum extrusions suppliers quote accurately and reduce back-and-forth. This also makes it easier to compare offers from different aluminum extruder partners or top aluminum suppliers for custom products.
Questions That Separate Capable Suppliers
How can you tell if a supplier is truly up to the task? Beyond price and lead time, it’s about technical depth, transparency, and process control. Here are practical questions to ask during your vetting process, adapted from industry checklists and buyer’s guides (Aluminum Processing Hub):
- How is aluminum extrusion made at your facility for small lots? Can you show recent die designs or sample runs?
- What is your minimum run length for prototype aluminum extrusions, and do you support pilot or trial runs?
- What press tonnage and billet sizes are available—can you accommodate my profile’s width and complexity?
- Do you offer in-house secondary operations (machining, anodizing) or use subcontractors?
- What quality management certifications do you hold (ISO 9001, IATF 16949)?
- Can you share sample first-article inspection (FAI) reports and recent tolerance matrices?
- How do you manage die maintenance and ensure repeatability for custom profiles?
- What are your standard lead times for similar projects, and how do you handle expedited requests?
- Do you provide technical support for DFM (Design for Manufacturability) reviews?
- What is your experience with projects in my industry/application?
These questions will help you distinguish experienced aluminum extrusion manufacturers from less capable vendors and identify those who can truly deliver on your custom profile needs.
How to Compare Quotes Apples to Apples
Ever received quotes that seem impossible to compare? To make an informed decision, you need a structured comparison. Here’s a simple table template you can use to evaluate suppliers side by side:
| Supplier | Lead-Time Estimate | Capabilities (Press Size, Machining, Finishing) | Quality Certifications | Notes | Total Cost of Ownership (TCO) |
|---|---|---|---|---|---|
| Supplier A | 3 weeks | 7-inch press, in-house CNC, anodizing | ISO 9001 | Can support small lots, strong DFM team | $X,XXX (all-in) |
| Supplier B | 5 weeks | 8-inch press, outsourced machining | ISO 9001, IATF 16949 | Requires MOQ of 100 units | $X,XXX |
| Supplier C | 4 weeks | 6-inch press, in-house finishing | ISO 9001 | Limited hollow profile support | $X,XXX |
Use this table to compare not only price, but also capabilities, lead times, and quality systems—ensuring you choose the right aluminum extrusion manufacturer for your prototype aluminum project. If you’re unsure where to buy aluminum extrusion for your application, this approach helps clarify fit and risk.
Before you place a PO, align your team on acceptance criteria and sample size for first articles—this ensures everyone knows what "success" looks like and avoids costly misunderstandings down the road.
By following this checklist and asking the right questions, you’ll identify the best profile extrusion company or custom aluminum extrusions suppliers for your needs. Next, we’ll wrap up with an action plan to help you move from RFQ to credible first articles—fast and with confidence.
Action Plan and Expert Help for Rapid Progress
From Concept to Credible First Articles
When you’re racing to turn a CAD model into a physical part, how do you make sure your prototype aluminium extrusions deliver fast, actionable learning? The key is to align your team on a clear, week-one action plan—so you avoid bottlenecks and get the most out of every prototype iteration. Imagine you’re building a new product: what steps should you take in the first week to set up for success?
- Finalize your alloy and temper intent—know if you’ll use 6061, 6063, or 7075 and why
- Lock down critical dimensions and reference standards (ASTM B221, EN 755-9)
- Clarify tolerance expectations and which features are critical-to-quality
- Choose your prototyping route: short-run extrusion, cnc aluminium extrusion, or machining from standard profiles
- Prepare a complete RFQ package with drawings, STEP files, and all surface/inspection requirements
- Engage with suppliers early—ask about lead times, DFM feedback, and capacity for custom aluminium extrusions
When to Machine Profiles Instead of Cutting a Die
Ever wondered if you should skip the prototype die and go straight to machining? For many aluminium prototypes—especially when geometry is likely to change or you need only a handful of parts—CNC machining from billet or standard profiles can be the fastest path to learning. This method is ideal when:
- Your design is evolving and you need quick iteration cycles
- Only a small quantity of parts is needed for early testing
- High precision or surface finish is critical (think machined aluminum extrusion for cosmetic or fit checks)
- You want to avoid the upfront investment and lead time of custom dies
According to industry comparisons, CNC machining offers unmatched flexibility for unique extrusions and custom aluminum profiles, especially in the prototype phase. You’ll notice that while per-part cost is higher, the ability to rapidly iterate and validate features often outweighs the initial savings of a die—especially if your design will change.
| Prototype Goal | Recommended Route | Notes |
|---|---|---|
| Cosmetic evaluation | Machining from billet, anodize trials | Excellent for surface finish and color checks; fast turnaround |
| Strength screening | 6061 or 7075 billet machining | Matches production alloy; ideal for mechanical testing |
| Assembly fit | Modify standard profile, CNC ops | Quickly adapt off-the-shelf shapes for fit/function |
| Complex geometry validation | CNC aluminium extrusion | Best for intricate or evolving cross-sections |
| Functional prototype, low volume | Machined aluminum extrusion or hybrid approach | Combine machining and stock profiles for fast, cost-effective results |
Credible prototypes prioritize learning speed with just enough representativeness to inform production decisions.
Partnering for Fast DFM and Quality Assurance
How do you bridge the gap between a learning build and a production-ready profile? The answer is to work with suppliers who offer not just custom metal extrusion services, but also proactive DFM (Design for Manufacturability) support and quality assurance. This is where rapid prototyping services—like those from XTJ—can make a real difference. When prototype dies aren’t justified, CNC machining of aluminum 6061 or 7075 can produce extrusion-like cross-sections, enable finish trials, and deliver tight tolerances, all while maintaining ISO 9001 quality discipline. Their experienced engineers can review your design, provide actionable DFM feedback, and help you optimize for both performance and cost-efficiency.
But remember—no single service is right for every project. For the best results, compare multiple suppliers on their ability to deliver unique extrusions, support complex or custom aluminum profiles, and respond quickly to design changes. Look for rapid turnaround, transparent communication, and a willingness to iterate with you as your aluminium prototypes evolve.
- Finalize your prototype goal and match it to the right process—don’t default to dies if machining is faster
- Leverage suppliers who offer both DFM and flexible production for custom aluminium extrusions
- Request sample reports and confirm ISO 9001 or equivalent certifications to ensure quality
- Plan for learning: treat every prototype as a step toward scalable, production-ready unique extrusions
By following this action plan and partnering with experienced providers, you’ll accelerate your path from concept to credible first articles—setting your project up for cost-effective, risk-reduced success. Whether you’re working with cnc aluminium extrusion, machined aluminum extrusion, or exploring custom metal extrusion services, the right approach will keep your prototype aluminium extrusions on track and ready for the next stage of development.
Frequently Asked Questions About Prototype Aluminium Extrusions
1. What are prototype aluminium extrusions and why are they important?
Prototype aluminium extrusions are small-batch or one-off extruded aluminum profiles made to test and validate design, fit, and function before committing to full production tooling. They help engineering teams identify potential issues with geometry, alloy selection, and downstream processes, reducing the risk of costly changes during mass production.
2. How do I choose the right alloy for my prototype aluminum extrusion?
Selecting the right alloy depends on your prototype's goals. Alloys like 6063, 6061, and 7075 each offer unique balances of strength, machinability, and surface finish. For most prototypes, 6061 and 6063 are versatile and cost-effective, while 7075 is chosen for high-strength requirements. Always confirm with your supplier that the chosen alloy matches your intended application and process capabilities.
3. What are the main methods for prototyping aluminium extrusions?
Common prototyping methods include short-run extrusion (using a temporary die), CNC machining from billet for high precision, modifying standard extrusion profiles, and producing 3D-printed surrogates for form and fit checks. The best method depends on your needs for speed, material representativeness, and the complexity of your design.
4. How can I ensure my prototype meets the required tolerances and quality standards?
To ensure prototype quality, reference industry standards like ASTM B221 or EN 755-9 on your drawings, define critical features and tolerances, and implement a clear inspection plan. Work with suppliers who provide first article inspection reports and quality certifications such as ISO 9001 to verify compliance and consistency.
5. What should be included in an RFQ for prototype aluminium extrusions?
A comprehensive RFQ should include fully dimensioned drawings, CAD files, specified alloy and temper, quantity bands, surface finish requirements, inspection criteria, certifications needed, and delivery timelines. This ensures suppliers can provide accurate, comparable quotes and helps avoid delays or miscommunications.
-
Posted in
aluminum extrusion design, aluminum prototype, custom aluminum extrusions, extrusion prototyping, prototype aluminium extrusions


