
Welding Stainless Steel: 8 Steps To Clean, Corrosion-Safe Welds
Step 1: Understand Your Stainless Grades and Fillers for Reliable Welds
Know Your Stainless Family: Austenitic, Ferritic, Martensitic, Duplex
Ever wondered why some stainless welds last for decades while others fail quickly? The answer often starts with knowing exactly which stainless steel family and grade you’re working with. Before you even strike an arc, identifying the family—austenitic, ferritic, martensitic, or duplex—sets the tone for everything from filler selection to technique and corrosion safety.
- Austenitic (e.g., 304, 316): Non-magnetic, excellent corrosion resistance, and the most common for welding stainless steel. Used in food processing, medical devices, and architectural features. These grades are easy to weld, but heat input must be controlled to avoid distortion.
- Ferritic (e.g., 409, 430): Magnetic, moderate corrosion resistance, and lower cost. Often found in exhaust systems and building panels. Weldability is good, but matching the right filler is key to prevent cracking.
- Martensitic (e.g., 410, 420): Magnetic and hardenable by heat treatment, but with moderate corrosion resistance. Used for blades and tools. Requires careful heat control to avoid brittleness.
- Duplex (e.g., 2205): Combines austenitic and ferritic properties—high strength and corrosion resistance, especially in chloride-rich environments. Used in chemical plants and offshore applications. Welding technique must balance both phases for best results.
Sounds complex? Here’s a simple action plan before you weld stainless steel:
- Confirm the alloy: Use Material Test Reports (MTRs) or Positive Material Identification (PMI). If unsure, a magnet check (austenitics are non-magnetic; ferritics and martensitics are magnetic) and a spark test can give clues before verification.
- Note product form and thickness: Thicker plate or pipe needs careful heat input management to avoid distortion, especially in austenitics.
- Define the service environment: Will the joint face chlorides, high temperatures, or hygiene requirements? This guides not just filler choice but also post-weld cleaning and finishing.
Match Filler to Base Metal Without Overmatching
Choosing the right filler metal is crucial for stainless steel welding. The main goal is to match corrosion resistance and phase balance—not just tensile strength. For example, if you’re welding 304 stainless steel, ER308 or ER308L is the go-to filler. The “L” grade (low carbon) is preferred for minimizing carbide precipitation (sensitization), which can lead to intergranular corrosion—especially in food or chemical service environments.
When joining dissimilar metals, such as stainless to carbon steel, the 309 family (e.g., ER309L) is commonly used. This filler bridges the differences in composition and thermal expansion, reducing the risk of cracking. For duplex grades, always use a matching duplex filler to maintain the right austenite-ferrite balance for strength and corrosion resistance.
| Grade | Typical Uses | Weldability Notes | Recommended Filler Family |
|---|---|---|---|
| 304/304L (Austenitic) | Food equipment, chemical tanks, architectural panels | Excellent weldability; use L-grade filler for low-carbon service | ER308/308L (stainless welding electrodes, stainless steel wire for welding) |
| 316/316L (Austenitic) | Marine, pharmaceutical, chemical processing | Superior corrosion resistance; L-grade filler for chloride-rich or sanitary use | ER316/316L |
| 409 (Ferritic) | Automotive exhaust, industrial ducting | Good weldability; match with stabilized filler (Ti or Nb) | ER409, ER430 |
| 430 (Ferritic) | Kitchenware, appliance panels | Magnetic, moderate corrosion resistance; avoid high heat input | ER430 |
| Duplex (e.g., 2205) | Oil & gas, chemical plants, marine | Requires precise heat input; maintain phase balance | Duplex-specific filler (e.g., ER2209) |
| Stainless to Carbon Steel | Transition joints, repair, piping | Use 309 filler to bridge alloy differences | ER309/309L |
Pick fillers for corrosion and phase balance first, tensile strength second.
By following this cheat sheet and confirming your alloy, product form, and environment, you’ll set the stage for welds that stand the test of time. Whether you’re using stainless welding electrodes for stick welding, or stainless steel wire for welding with MIG or TIG, matching the right filler to the job is the foundation of every corrosion-safe weld.
Step 2: Prioritize Safety, Ventilation, and Clean Prep for Stainless Steel Welding
Control Hazards From Fumes and Hexavalent Chromium
When you think about welding stainless steel, it’s easy to focus on the shine and strength of the finished weld. But what about the invisible risks floating in the air? One of the most critical welding on stainless steel hazards is exposure to toxic fumes—especially hexavalent chromium (CrVI) and nickel oxide. These substances, released when welding stainless steel, can cause serious health issues such as respiratory irritation, asthma, skin sensitization, and even cancer over time.
So, what toxic substance is released when welding stainless steel? The answer is primarily hexavalent chromium, a known carcinogen, along with nickel compounds. Both can be inhaled as fine particulates during welding, making ventilation and personal protection non-negotiable.
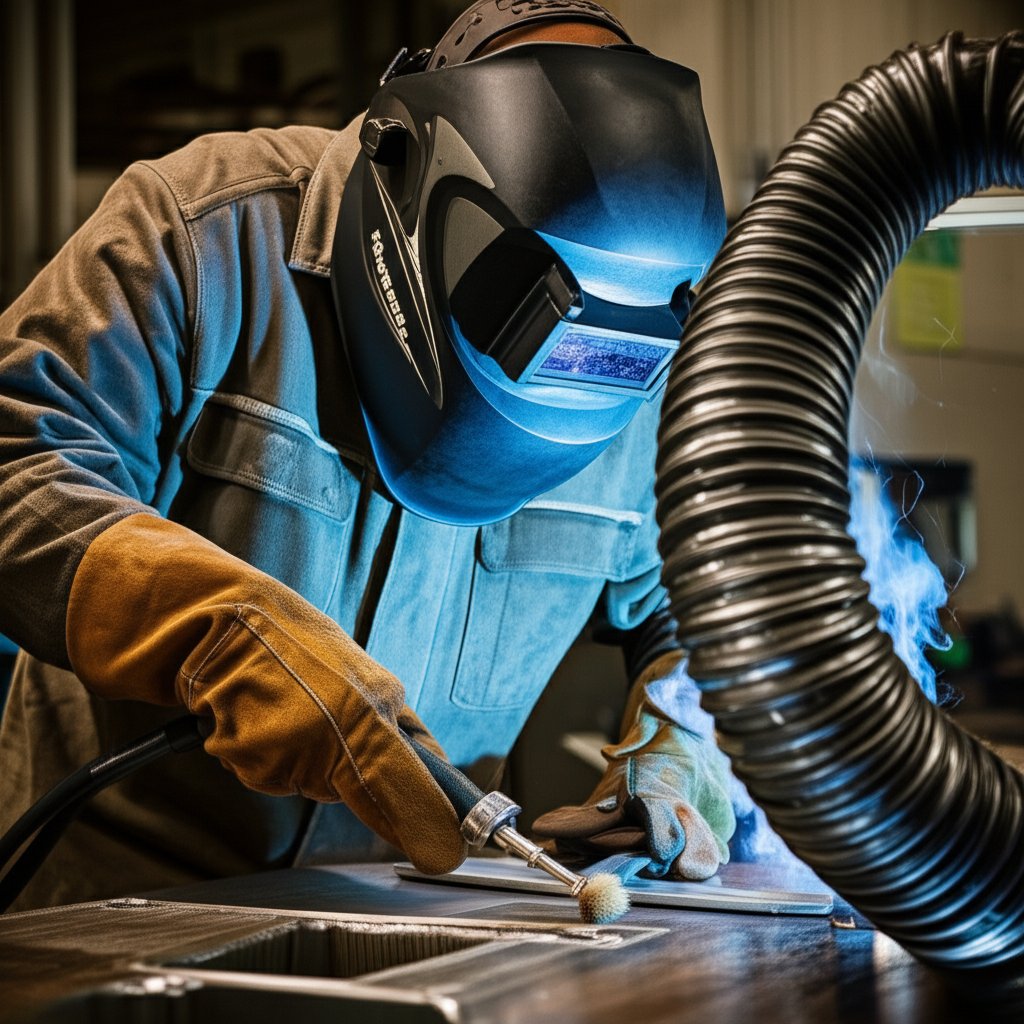
- Ventilation: Always use local exhaust ventilation (LEV) at the weld source to capture fumes before they disperse. If LEV isn’t available, weld in a well-ventilated or open area. Portable fume extractors or industrial fans can also help reduce airborne hazards.
- Respiratory Protection: Select a respirator rated for metal fumes, and make sure it fits properly. Fit testing and regular filter changes are essential for effectiveness.
- PPE: Wear flame-resistant gloves, long sleeves, and a welding helmet with the correct lens shade. Don’t forget hearing protection—welding can be noisy!
Remember, the dangers of welding stainless steel aren’t just about fumes. Electric shock, burns, and UV exposure also threaten your safety. Keeping your gear in top shape and following proper procedures is key to minimizing these risks.
Surface Prep That Prevents Contamination
Surface preparation isn’t just about aesthetics—it’s about ensuring the corrosion resistance that makes stainless steel so valuable. Imagine spending hours on a weld, only to see rust appear because of a contaminated brush or a greasy fingerprint. Stainless is unforgiving when it comes to contamination, so every prep step matters.
- Degrease: Use an appropriate solvent or alkaline cleaner to remove oil, grease, and dirt before welding.
- Remove Heat Tint and Oxide: Where rework occurs, clean away any oxide layer or discoloration left from previous welds using a dedicated stainless flap wheel or pickling paste.
- Masking: If you plan to back purge or pickle, mask off adjacent areas to protect them from chemical exposure or gas loss.
- Tool Separation: Never use carbon steel brushes or grinding wheels on stainless. Even trace iron contamination can destroy the passive layer and cause rust.
| Do | Don’t |
|---|---|
| Back purge for sanitary tubing | Use carbon steel brushes or tools |
| Keep interpass temperatures modest | Touch up with carbon steel grinding dust |
| Wear clean gloves when handling prepped parts | Skip degreasing before welding |
| Use dedicated stainless wire brushes and flap wheels | Mix stainless and carbon steel tooling |
Clean metal and clean gas are your best porosity insurance.
For those considering stainless steel gasless mig wire, remember that gasless options can increase spatter and contamination risk—shielding gas and clean prep are always preferred for critical welds.
By following this safety and prep checklist, you’ll protect both your health and the integrity of your welds. Next, let’s look at how to select the right welding process for your project’s needs.
Step 3: Select TIG, MIG, or Stick Welding with a Practical Decision Matrix
Choose TIG for Precision and Clean Finish
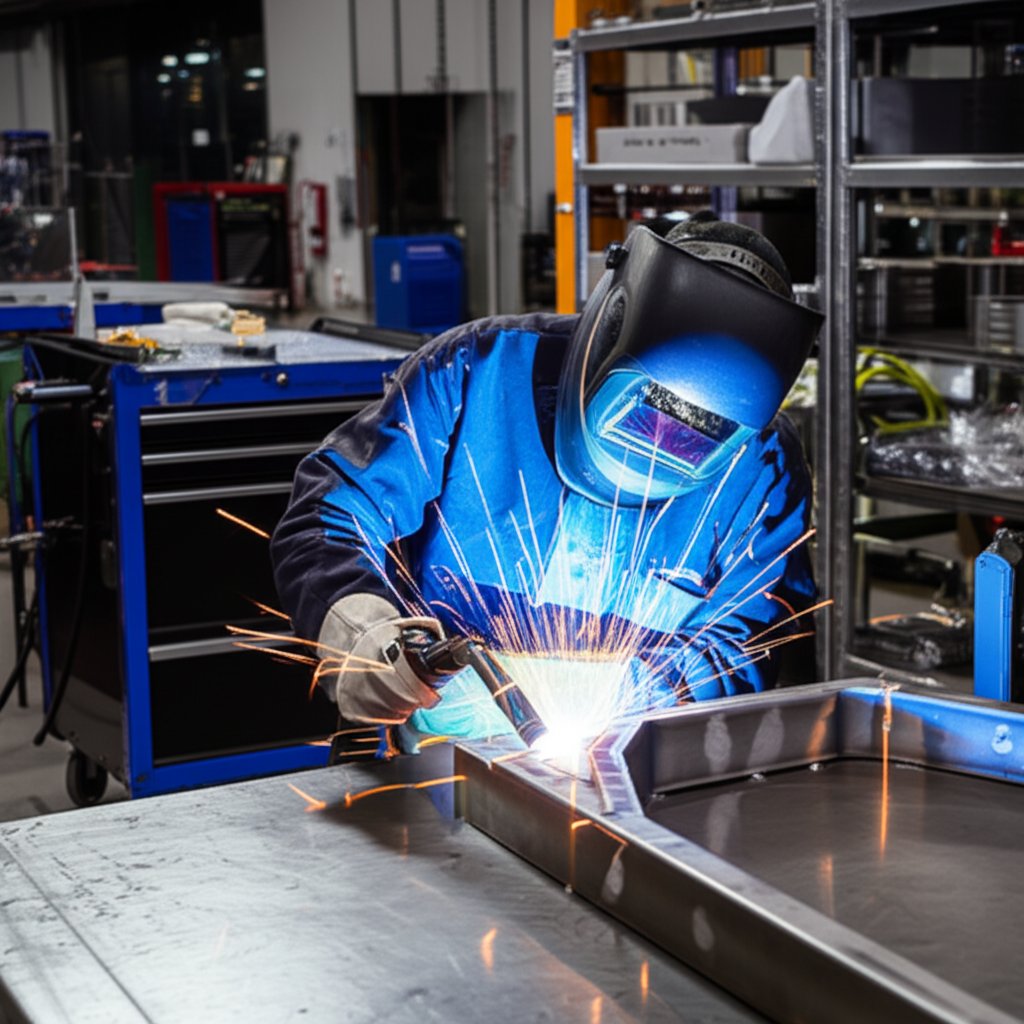
When you’re faced with a stack of stainless parts and need flawless, sanitary welds—think food processing, medical devices, or architectural trim—TIG welding stainless steel is often the gold standard. Why? TIG (Gas Tungsten Arc Welding, GTAW) offers unmatched control over heat input and arc stability. You’ll notice it delivers ultra-clean beads with minimal spatter and distortion, making it ideal for thin-gauge materials or joints where appearance and hygiene are paramount [American Torch Tip]. However, TIG stainless steel welding is slower and demands a higher skill level, so it’s best reserved for projects where quality trumps speed.
Choose MIG for Productivity on Plate and Fabrications
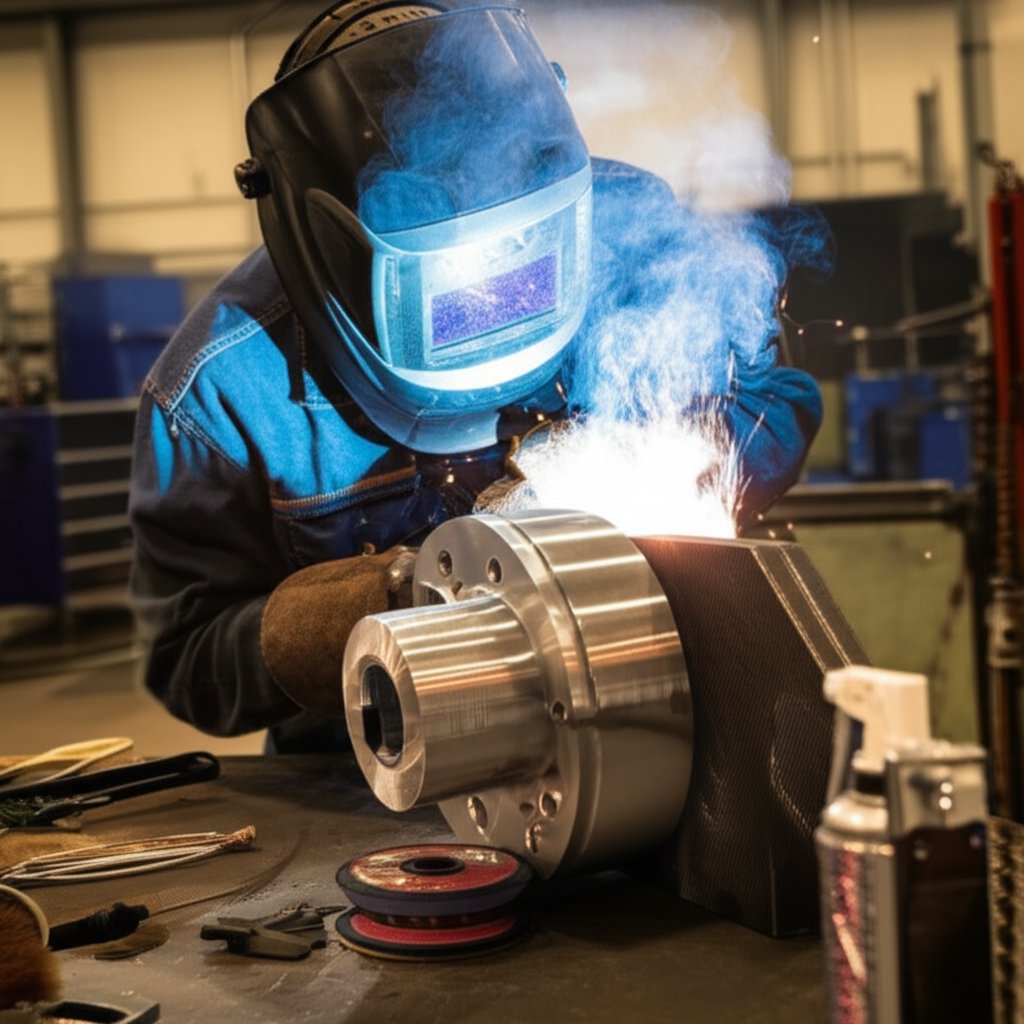
Imagine you’re fabricating large tanks, frames, or doing repair work. You want speed and efficiency without sacrificing too much on appearance. This is where MIG welding stainless steel (Gas Metal Arc Welding, GMAW) shines. MIG is semi-automatic, easy to learn, and excels at joining thicker plate or running long seams. It’s a favorite for maintenance jobs and larger projects that need to get done quickly. With the right mig stainless steel wire and gas, you can achieve solid, corrosion-resistant welds—though the finish may require touch-up for critical visual or sanitary applications.
Use Stick or Flux-Cored When Access is Tight or Outdoors
Ever had to weld stainless pipe on a rooftop, or repair railings in the wind? Stick welding stainless steel (Shielded Metal Arc Welding, SMAW) and flux-cored arc welding (FCAW) are your go-tos. These processes are portable, tolerant of less-than-ideal conditions, and don’t rely as heavily on shielding gas integrity. Stick electrodes for stainless are widely available, and flux-cored wire can boost deposition rates when productivity matters. Just remember: these methods can produce more spatter and require more post-weld clean-up, especially on thin material.
How to Choose? Use This Stainless Welding Decision Matrix
| Process | Thickness Range | Finish Quality | Travel Speed | Shielding Sensitivity | Learning Curve | Typical Use Cases |
|---|---|---|---|---|---|---|
| TIG (GTAW) | Thin to Medium | High | Low | High | High | Sanitary welds, thin sheet, tube-to-tube, art/furniture |
| MIG (GMAW) | Medium to Thick | Medium | High | Medium | Low | Structural frames, repairs, general fabrication |
| Pulsed-MIG | Thin to Medium | Medium-High | High | Medium | Medium | Thin gauge, reduced spatter, improved control |
| Stick (SMAW) | Medium to Thick | Low-Medium | Medium | Low | Medium | Field repairs, outdoor work, limited access |
| Flux-Cored (FCAW) | Medium to Thick | Low-Medium | High | Low | Medium | Heavy fabrication, windy/outdoor jobs, high deposition |
- TIG welding stainless steel: Best for thin gauge, sanitary, or appearance-critical welds.
- Pulsed-MIG: Great for reducing heat input and spatter on thinner stainless sections.
- MIG welding stainless: Choose for productivity on plate, frames, and general fabrication.
- Stick welding stainless steel: Go-to for field work, repairs, or where shielding gas is impractical.
- Flux-cored stainless: Use when wind tolerance and high deposition are priorities.
Pick the process that satisfies the strictest requirement—usually finish or access—and tune parameters for productivity after.
By mapping out your acceptance criteria—like bead appearance, spatter tolerance, and sanitary needs—and matching them to your joint type and project environment, you’ll make the right call for each job. Next, we’ll break down how to select the best filler wire, electrodes, and shielding gas to ensure your chosen process delivers the corrosion safety and weld quality your application demands.
Step 4: Choose Filler Wire, Electrodes, and Shielding Gas for Stainless Steel Welding
Wire Electrode and Filler Selection: Match for Corrosion Resistance and Service
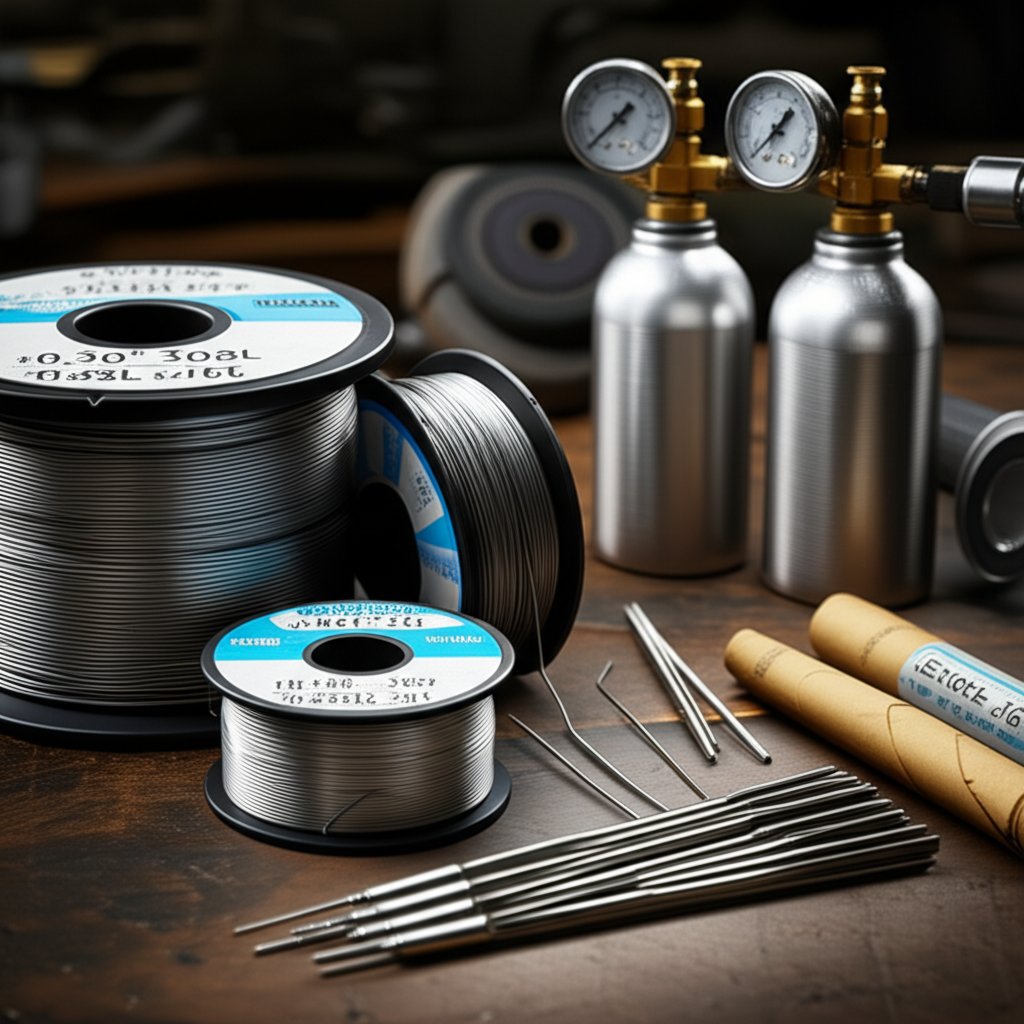
When you’re ready to weld stainless steel, the consumables you pick—especially filler wire and electrodes—can make or break your weld’s corrosion resistance and mechanical integrity. Sounds like a lot to juggle? Let’s break it down so you can make smart, shop-floor-ready choices every time.
- L-grade fillers: If your base metal is an L-grade (like 304L or 316L), always use a matching L-grade filler (such as ER308L or ER316L). Why? The low carbon content (<0.04%) in these stainless steel mig welding wire options minimizes sensitization, reducing the risk of intergranular corrosion in critical applications like food service or pharmaceuticals.
- Standard vs. H-grade: H-grade fillers (like ER308H) are formulated for high-temperature service, thanks to their higher carbon content. Use these only when your design calls for elevated temperature strength, such as in furnace components.
- 309 family fillers for dissimilar joints: Joining stainless to carbon steel? Reach for a 309 (e.g., ER309L) stainless mig wire. Its chemistry bridges the differences in thermal expansion and composition, helping prevent weld cracking and ensuring reliable transition joints. [BSSA]
- Solid vs. flux-cored wire: Solid wire is preferred for clean, indoor work where spatter and appearance matter. Flux-cored wire can be used outdoors or for higher deposition rates, but may introduce more spatter and require additional cleaning.
Pros/Cons: Solid vs. Flux-Cored Stainless Steel MIG Wire
-
Solid stainless steel mig wire
- Pros: Clean bead, low spatter, best for appearance-critical welds
- Cons: Requires high-quality shielding gas and prep, less tolerant of wind
-
Flux-cored mig wire stainless
- Pros: Higher deposition, better for outdoor or drafty conditions
- Cons: More spatter, slag to remove, higher chance of contamination
Shielding Gas Choices for MIG and TIG: Get the Right Mix
Shielding gas isn’t just a detail—it’s the barrier that protects your molten weld pool from oxidation and contamination. The wrong choice can lead to dull, porous, or even cracked welds. So, how do you pick the right stainless steel welding gas or ss mig welding gas for your job?
- MIG welding stainless: For most jobs, use a 98% Argon / 2% Carbon Dioxide mix. This blend offers arc stability, clean beads, and minimal spatter—perfect for thin to medium gauge stainless. It’s the most common stainless steel mig gas for general fabrication. [YesWelder]
- Tri-mix shielding gas: For thicker stainless or critical joints, a tri-mix (typically Argon, Helium, and CO2) boosts heat input and weld penetration. Helium increases heat, Argon stabilizes the arc, and a small CO2 fraction (around 2%) improves wetting. This is ideal for heavy sections or when deep penetration is needed.
- TIG welding stainless: Pure Argon is standard. It ensures a stable arc and clean welds. For extra arc starts or specific alloys, you might use a lanthanated or ceriated tungsten electrode.
Pros/Cons: Tri-Mix vs. Argon/CO2 for MIG
-
Tri-mix (Ar/He/CO2):
- Pros: Superior penetration, good for thick plate, smooth bead
- Cons: Higher gas cost, more complex supply, overkill for thin work
-
Argon/CO2 (98/2):
- Pros: Readily available, affordable, good for most shop work
- Cons: Limited penetration on thick sections, not for heavy plate
Pros/Cons: L-Grade vs. Non-L Filler
-
L-grade:
- Pros: Best for corrosion resistance, especially in low-temperature or sanitary service
- Cons: Slightly lower high-temperature strength
-
Non-L grade:
- Pros: Better for high-temperature applications
- Cons: Can be more prone to sensitization and corrosion in some environments
| Consumable Type | Options | When To Use | Pros | Cons |
|---|---|---|---|---|
| Filler Wire (Solid) | ER308L, ER316L, ER309L | Most shop work, clean environment | Low spatter, clean bead | Needs good gas coverage |
| Filler Wire (Flux-Cored) | E308LT, E316LT | Outdoor, heavy deposition | Wind tolerant, high deposition | More spatter, slag removal |
| Shielding Gas (MIG) | 98% Ar / 2% CO2; Tri-mix (Ar/He/CO2) | 98/2 for general, tri-mix for thick plate | Stable arc, clean welds | Tri-mix costs more |
| Shielding Gas (TIG) | Pure Argon | All TIG welding stainless | Clean, stable arc | None significant |
| Tungsten (TIG) | Lanthanated, Ceriated | Precise arc starts | Stable, long life | More expensive than pure tungsten |
Before welding, always check gas purity, set the correct flow rate (typically 20–30 cubic feet per hour for MIG), and leak-test your lines. The right combination of stainless steel mig wire, mig wire stainless, and shielding gas for mig welding will help you achieve strong, corrosion-resistant welds with minimal rework. With your consumables dialed in, you’re ready to develop repeatable procedures—next, we’ll show you how to lock in your best parameters with simple WPS templates.
Step 5: Build Simple WPS Templates and Lock Parameters for Stainless Steel Welding
Create Reusable WPS Templates for TIG, MIG, and Stick Welding
Ever wondered how to weld stainless steel and get repeatable, quality results—no matter who’s on the torch? The answer is a clear, shop-friendly Welding Procedure Specification (WPS). A WPS is your team’s roadmap: it documents the essential variables, consumables, and techniques that turn best practices into reliable production welds. Imagine handing any welder a sheet that spells out exactly how to mig weld stainless steel, or how to weld stainless steel with a mig welder, and knowing the results will be consistent every time.
Let’s break down the basics. A good WPS template is concise, easy to read, and tailored to your process. Below are three plain-text templates you can adapt for TIG, MIG, and Stick welding. Print these as a one-page reference for your weld cell:
| Process | WPS Template |
|---|---|
| TIG (GTAW) | Base metal: [Grade, Thickness] Joint: [Type, Prep] Process: GTAW Polarity: [ ] Tungsten: [ ] Filler: [ER308/ER316/309 etc.] Shielding gas: [Argon, Flow] Back purge: [Yes/No, Gas] Travel speed: [ ] Heat input control: [ ] Interpass (max): [ ] Cleaning: [ ] Inspection: [VT/DT/Surface] |
| MIG (GMAW/Pulsed) | Base metal: [ ] Joint: [ ] Process: GMAW / Pulsed Wire: [Family, Diameter] Gas: [Blend] Polarity: [ ] Voltage/WFS ranges: [ ] Transfer mode: [ ] Preheat: [ ] Interpass: [ ] Backing: [ ] Post-clean: [ ] Inspection: [ ] |
| Stick (SMAW) | Base metal: [ ] Joint: [ ] Process: SMAW Electrode: [308/316/309] Polarity: [ ] Amperage range: [ ] Preheat/Interpass: [ ] Technique: [Weave/Stringer] Slag removal: [ ] Inspection: [ ] |
These templates are inspired by standard forms found in AWS codebooks and industry best practices. They help answer the big questions: What’s the process? Which base and filler metals? What joint and prep? What are the machine settings and sequence? For more detail, sample forms can be downloaded from the American Welding Society (see "Sample WPS Form" under D1.6/D1.6M:2017-AMD1) and adapted to your shop’s needs.
Parameter Windows, Not Fixed Numbers
When you’re figuring out how to weld stainless steel, don’t lock your team into a single setting. Instead, use parameter ranges—for example, voltage, amperage, wire feed speed, and travel speed. Why? Because real-world conditions vary: material thickness, joint fit-up, and even ambient temperature can affect your weld. By bracketing your settings (say, 20–24 volts or 250–300 IPM wire feed speed), you give welders a safe window to adjust for best results without straying from proven practice.
Where do you get these ranges? Start with manufacturer datasheets for your stainless welding electrodes or stainless steel wire for welding. If those aren’t available, run bracketed test welds and record what produces the best bead profile and pass/fail on macro-etch tests. This approach is supported by industry experts and helps ensure your WPS is both practical and audit-ready.
Document what worked and lock it into your WPS before moving to production.
Tools and Resources for Fast, Reliable WPS Development
- Rapid Prototyping Services: Quickly fabricate custom stainless weld fixtures, purge dams, or test coupons. Their DFM feedback helps you optimize joint designs before production—saving time and reducing costly rework.
- Sample WPS forms from AWS: Download templates and adjust for your project’s needs.
- Manufacturer datasheets: Use for recommended parameter ranges and consumable compatibility.
- Macro-etch and mechanical test kits: Validate your WPS by testing real welds.
Prototyping services can be a game changer—imagine iterating fixture designs or testing weld coupons overnight, so you’re ready to qualify your WPS the next day. This is especially valuable when you’re exploring how do you weld stainless steel for new products or processes, or when you want to see if you can weld stainless steel with a mig welder for a specific application.
By standardizing your WPS templates and using parameter windows, you’ll create a culture of consistency and continuous improvement in your shop. Next, we’ll dive into quick, shop-ready recipes for common stainless joints and gauges—making it easy to go from template to perfect weld, every time.
Step 6: Quick Welding Recipes for Stainless Steel Joints and Gauges
Butt Weld on Thin Plate: TIG Welding Stainless for Clean Results
Ever wondered how to weld stainless so your joints look flawless and last for years? When working with thin austenitic stainless plate—like 304 or 316, commonly found in food-grade and architectural applications—TIG welding stainless is the go-to for precision and minimal distortion. Here’s a step-by-step recipe to help you nail those butt welds every time:
- Fit-up with minimal gap: Clamp plates tightly with the smallest gap possible. This reduces heat input and prevents burn-through.
- Use a tight arc length: Keep the tungsten electrode close to the workpiece (about 1/8 inch or less). This focuses the arc and controls heat spread, which is crucial in stainless steel tig welding.
- Pulse if available: If your machine has a pulse mode, use it. Pulsing helps control heat input and keeps the weld pool manageable, reducing distortion and the risk of sensitization.
- Back purge for sanitary joints: For food, pharma, or chemical service, flow argon on the backside of the joint to prevent oxidation and ensure a bright, corrosion-resistant root pass.
- Feed small diameter filler steadily: Use a filler rod that matches your base metal (e.g., ER308L for 304) and feed at a consistent rate. Too much filler or erratic feeding can lead to oxidation and uneven beads.
- Control interpass temperature: Allow brief cooling between passes if needed. Stainless steel holds heat, and too much can cause warping or discoloration.
Following these steps, you’ll achieve consistent, high-quality welds that meet sanitary and structural requirements. If you’re new to stainless steel tig welding, practice on scrap to dial in your technique and settings.
Lap Weld on Tube: MIG Welding Stainless Steel with Light-Gauge Materials
Need to join thin-walled tubing or sheet quickly? Welding stainless steel with MIG is efficient and accessible—even for less experienced welders. Here’s how to get reliable lap welds on light-gauge stainless using a MIG welder and stainless steel wire:
- Use argon-rich mig shielding gas: For best results, select a blend like 98% Argon / 2% CO2. This mix stabilizes the arc, reduces spatter, and produces a clean bead.
- Favor short-circuit or pulsed transfer: These transfer modes limit heat input, helping prevent burn-through and distortion on thin material.
- Keep stickout consistent: Maintain a wire stickout of about 3/8 inch. Too much or too little can affect arc stability and bead quality, especially with mig welder stainless steel wire.
- Travel fast enough: Move the torch briskly to avoid overheating and burn-through. Consistent travel speed ensures even penetration and bead appearance.
Remember, clean prep and proper fit-up are just as important for MIG as for TIG. Always use dedicated stainless brushes and keep surfaces free of contaminants.
If heat tint appears, your purge or gas coverage needs improvement.
Visual Inspection: What Does a Good Stainless Weld Look Like?
After welding, take a close look at your beads. Whether you weld stainless with TIG or MIG, high-quality joints share these visual cues:
- Uniform ripple pattern (even “stacked dimes” for TIG)
- Minimal discoloration—silver to light gold is ideal
- No undercut at the edges
- Good toe fusion (smooth transition from weld to base metal)
If you see excessive spatter, dark colors, or uneven beads, check your gas flow, travel speed, and settings. Record the amperage, voltage, and wire feed speed (WFS) ranges that produced the best results—these numbers should go straight into your WPS from Step 5 for future reference.
By following these quick recipes and inspection tips, you’ll be ready to weld stainless confidently—no matter the joint or gauge. Next, we’ll cover how to tackle dissimilar metal joints so your stainless welds stay strong even when connecting to carbon steel.
Step 7: Welding Stainless to Carbon or Mild Steel
Select Dissimilar Filler and Control Dilution
Ever needed to weld carbon steel to stainless and wondered why standard fillers just don't cut it? When it comes to welding stainless to mild steel or carbon steel, the key challenge is bridging the differences in chemical composition and thermal expansion. If you use the wrong filler, you risk cracking, poor fusion, or rapid corrosion at the joint. That's why the industry standard is to reach for a 309 family filler—like ER309L or 309LSi.
- Why 309? 309 fillers are engineered with higher chromium and nickel content, giving them the flexibility to accommodate dilution from both stainless and carbon steel sides. This composition minimizes cracking and helps resist corrosion, even when the joint is exposed to both environments. According to leading technical guides, 309L or 312 austenitic fillers are the top choices for welding stainless to steel because they offer increased ductility and crack resistance.
- Buttering the carbon side: For critical or highly stressed applications, consider laying a buffer layer ("buttering") of 309 or 312 on the carbon steel side before making the final weld. This creates a transition zone, reducing the risk of dilution-related cracking and ensuring better fusion to the stainless side.
- Low-carbon options: Using low-carbon ("L" grade) 309 fillers helps minimize sensitization and intergranular corrosion, especially where the joint will see corrosive or hygienic service.
Imagine you’re tackling a piping system that requires welding stainless steel to carbon steel. Using 309LSi MIG wire and an argon-rich shielding gas provides both the chemistry and process stability you need for a robust, corrosion-resistant weld.
Sequence and Heat Management for Dissimilar Welds
Sounds tricky? It can be, but with the right approach, you’ll avoid the most common pitfalls in welding of carbon steel to stainless steel—like distortion, cracking, and sensitization.
- Prep both sides: Remove all mill scale, rust, and contaminants from the carbon steel at least 1/2 inch back from the weld joint. Stainless surfaces should be clean and oxide-free as well.
- Buttering for critical service: For pressure vessels or structural joints, butter the carbon steel side with a 309/312 layer, then weld to the stainless member. This technique is especially valuable when dilution or cracking is a concern.
- Use argon-rich shielding: MIG or TIG processes with high-purity argon or argon/low-CO2 blends (like 98/2) are preferred. This minimizes carbon pickup and oxidation, protecting the weld pool.
- Sequence and interpass: Use stitch welding or skip sequencing to spread out heat input and control distortion. Keep interpass temperatures moderate—avoid overheating, which can cause grain growth and weaken the joint.
- Clean between passes: Remove any oxide or slag before laying the next bead, especially when using stick or flux-cored processes.
- Post-weld cleaning: For stainless surfaces, finish with pickling or passivation to restore corrosion resistance at the weld zone.
| Joint Type | Recommended Filler Family | Purge Need | Distortion Risk | Post-weld Cleaning |
|---|---|---|---|---|
| Butt | ER309L, ER312 | Yes (for sanitary or full-penetration) | Medium-High (manage with sequence) | Pickle/passivate stainless side |
| Lap | ER309L, ER312 | Optional (based on service) | Medium | Clean slag/oxide, passivate stainless |
| Fillet | ER309L, ER312 | No (unless internal hygiene required) | Low-Medium | Remove spatter, passivate stainless |
Corrosion Control Tips for Dissimilar Welds
- Isolate dissimilar metals in service where possible (e.g., use gaskets or coatings) to prevent galvanic corrosion.
- Seal joints where crevice corrosion is likely, especially in wet or chloride-rich environments.
- Avoid carbon steel contamination of stainless surfaces—use dedicated tools and clean gloves throughout fabrication.
By following these steps, you’ll master carbon steel and stainless steel welding—creating joints that are strong, corrosion-resistant, and built to last. Next, let’s see how to inspect, finish, and troubleshoot your stainless welds for the best results in production.
Step 8: Inspect, Finish, Troubleshoot, and Finalize Your Stainless Steel Welds
Visual and Surface Inspection: What Does a Quality Stainless Weld Look Like?
When you complete a stainless steel weld, do you know exactly what to look for before signing off? Visual inspection and surface checks are your first—and most crucial—line of defense against future corrosion or failure. Imagine catching a flaw now, rather than after installation. Here’s how to make sure your stainless welds are production-ready:
- Uniform bead appearance: Look for consistent width, smooth ripples, and even tie-in at the edges. Irregularities can signal poor technique or contamination.
- No undercut or overlap: The weld should blend smoothly into the base metal, without deep grooves or excess metal spilling over.
- Heat tint assessment: Stainless steel welds should show minimal discoloration—light straw to pale gold is acceptable, but blue, purple, or black hues mean excessive heat or poor gas coverage. These colors signal a compromised passive layer and reduced corrosion resistance.
- Optional dye penetrant testing: For critical or sanitary applications, use dye penetrant to reveal surface cracks or porosity invisible to the naked eye.
By making these checks routine, you’ll spot the most common welding on stainless steel issues before they become costly problems down the line.
Finishing and Passivation: Restoring the Corrosion-Resistant Surface
Ever noticed how a beautiful welded stainless steel joint can lose its luster—or even rust—if not finished correctly? Stainless steel’s corrosion resistance depends on a clean, chromium-rich passive layer. After welding, it’s vital to remove heat tint and restore this protective surface. Here’s what you need to do:
- Mechanical brushing: Use stainless-only brushes or flap wheels. Never reuse tools from carbon steel—cross-contamination can destroy the passive layer and cause rust stains [The Fabricator].
- Chemical pickling: For joints showing heat tint, apply a pickling paste or gel (typically nitric and hydrofluoric acids) to dissolve the discolored layer. Always follow the supplier’s instructions and rinse thoroughly with deionized water to prevent residue and pitting.
- Passivation: After pickling (or for intricate parts), use an oxidizing acid—like nitric or citric acid—to accelerate the formation of the passive layer. This step is especially important for parts with complex shapes or after heavy mechanical cleaning.
- Final rinse and dry: Always finish with a thorough rinse and dry to prevent water spots or chemical residues that can initiate corrosion.
Skipping any of these steps? You risk undermining the corrosion resistance that makes a stainless steel weld so valuable in the first place.
Troubleshooting Matrix: Fast Fixes for Common Stainless Weld Defects
Even experienced welders encounter issues—what matters is knowing how to diagnose and fix them fast. Use this troubleshooting matrix as your quick-reference guide on the shop floor:
| Symptom | Probable Causes | Corrective Actions |
|---|---|---|
| Sugaring (grainy, oxidized weld root) | Insufficient back purge or poor shielding gas coverage | Improve purge seal, increase gas flow, check for leaks, use higher purity gas |
| Porosity (small holes in weld) | Contaminated surfaces, moisture, or dirty gas | Thoroughly clean base metal, use dedicated abrasives, check gas lines and flow |
| Lack of fusion | Incorrect travel speed, low amperage, poor technique | Adjust travel speed, increase amperage, ensure correct torch/electrode angle |
| Distortion | Excessive heat input, poor clamping, uneven sequencing | Use skip/stitch welding, clamp securely, reduce heat input, allow cooling between passes |
| Spatter | Improper settings, dirty surfaces, incorrect shielding gas | Adjust parameters, clean surfaces, confirm gas type and flow |
If discoloration persists, reduce heat input or increase purge quality before changing fillers.
Tools and Resources for Finalizing Production
Need to streamline your inspection and finishing workflow? Here’s a prioritized list of tools and resources to make every stainless steel weld production-ready:
- XTJ Rapid Prototyping Services: Quickly create custom purge fixtures, prototype weld coupons, or test samples for inspection. Their DFM feedback helps you optimize joint design and finishing steps before full-scale production.
- Dedicated stainless steel brushes, flap wheels, and polishing pads
- Pickling and passivation kits (with safety instructions)
- Dye penetrant or surface inspection kits for critical welds
- Macro-etch kits for cross-section analysis (optional for QA/QC)
By using these resources and following a disciplined inspection and finishing routine, you ensure every stainless weld not only looks great but also delivers on corrosion resistance and longevity. This is the final step in making your welding with stainless steel process truly production-ready.
Frequently Asked Questions about Welding Stainless Steel
1. What type of welding is best for stainless steel?
The best welding method for stainless steel depends on your project. TIG welding offers precise, clean welds ideal for thin materials and sanitary applications. MIG welding is faster and suited for thicker plate or larger fabrications. Stick and flux-cored welding are reliable for outdoor or hard-to-reach jobs, especially when shielding gas is difficult to maintain.
2. Can I weld stainless steel with a regular MIG welder?
Yes, you can weld stainless steel with a standard MIG welder if you use the correct stainless steel wire and an appropriate shielding gas, such as a 98% Argon/2% CO2 mix. Always ensure your welder settings and consumables match the stainless grade for best results.
3. What are the main hazards of welding stainless steel?
Welding stainless steel produces hazardous fumes, especially hexavalent chromium and nickel compounds, which can cause respiratory issues and are carcinogenic. Proper ventilation, fume extraction, and personal protective equipment are essential to reduce these health risks.
4. How do I prevent rust and contamination when welding stainless steel?
Prevent rust by using only dedicated stainless steel brushes and tools, thoroughly cleaning surfaces before welding, and avoiding any contact with carbon steel. After welding, remove heat tint and passivate the joint to restore corrosion resistance.
5. What filler metal should I use when welding stainless to carbon steel?
When joining stainless to carbon steel, use a 309 or 312 family filler metal. These fillers bridge the chemical differences, reduce cracking risk, and help maintain corrosion resistance at the joint.
-
Posted in
stainless steel weld safety, stainless steel welding tips, stainless to carbon steel welding, welding processes, welding stainless steel


