
Remove Rust From Stainless Steel And Stop It Coming Back
Step 1: Diagnose Your Stainless Grade and Finish Before You Clean
Ever wonder why some stainless steel surfaces seem to resist rust for years, while others develop stains or even pitting? Before you reach for any cleaner to remove rust from stainless steel, it’s vital to know exactly what you’re working with. The type (or grade) and finish of your stainless steel directly affect how you should approach rust removal—and what risks you need to watch for.
Identify Your Stainless Steel Grade
Sounds complex? It’s actually pretty straightforward. Most household stainless steel falls into a few common families and grades, each with distinct properties. For instance, austenitic stainless grades like 304 and 316 are popular for their high corrosion resistance and are often non-magnetic when annealed, while ferritic grades such as 430 are magnetic and used in budget appliances or kitchenware. If you have access to labels, manuals, or supplier documentation, check for grade numbers like 304 or 430. No paperwork? Try a magnet: if it sticks, you likely have a ferritic grade; if not, it’s probably austenitic. This matters because austenitic steels generally resist stainless steel rusting better, but no stainless is truly rust-proof—just more resistant depending on the alloy mix and environment.
Match Method to Surface Finish
Next, inspect the finish. Is it brushed or satin with a visible grain, polished to a mirror shine, or matte? The finish determines how aggressive you can be when removing rust from stainless steel without causing micro-scratches or dull spots. Light orange specks often signal surface rust stainless steel—usually from contamination, not deep corrosion. Darker, rougher pits can indicate more severe breakdown and need extra caution.
- Brushed/Satin: Use soft cloths, nylon brushes, or non-abrasive pads. Always clean with the grain.
- Polished/Mirror: Only use microfiber or other non-scratch cloths. Avoid any abrasives.
- Matte: Gentle cleaning tools; avoid anything that could alter the surface texture.
Why be so careful? Scratches not only dull the look but can trap contaminants, making future rust on stainless steel more likely.
Run a Safe Spot Test First
Before committing to any cleaning method, always perform a spot test in a hidden area. This ensures your chosen approach won’t harm the finish or worsen stainless steel rust spots. Here’s a quick step-by-step:
- Tape off a small, inconspicuous section.
- Apply your cleaner (baking soda paste, lemon and salt, or diluted vinegar) with a cotton swab.
- Allow brief contact—no more than a minute or two.
- Wipe and inspect for shine loss or discoloration.
- Rinse and dry thoroughly.
If you notice any change in shine or color, switch to a gentler method. For brushed finishes, always work along the grain; for mirror finishes, stick with non-scratch cloths only.
Always test on a hidden area and work with the grain.
What triggers stainless steel rusting in the first place? The science is simple: stainless steel resists rust thanks to a thin chromium oxide film. But exposure to chlorides (like salt or bleach) or mechanical damage—from scratches, dents, or harsh scouring—can break down this protective layer. When that happens, surface rust stainless steel becomes much more likely.
By taking a few minutes to identify your stainless grade and finish, and by running a quick spot test, you’ll set yourself up for safe, effective rust removal. This careful approach helps you avoid accidental scratches and keeps your stainless steel looking its best—now and for years to come.
Step 2: Set Up Safe, Effective Prep and PPE for Rust Removal
When you’re ready to tackle rust on stainless steel, safety and preparation are your best allies. Imagine jumping right in—only to find your cleaner splashes, the room fills with fumes, or your favorite sink’s finish dulls after a harsh scrub. That’s why setting up a safe workspace and understanding your cleaning options is just as important as the removal itself. Here’s how to clean stainless steel from rust without risking your health or the integrity of your surfaces.
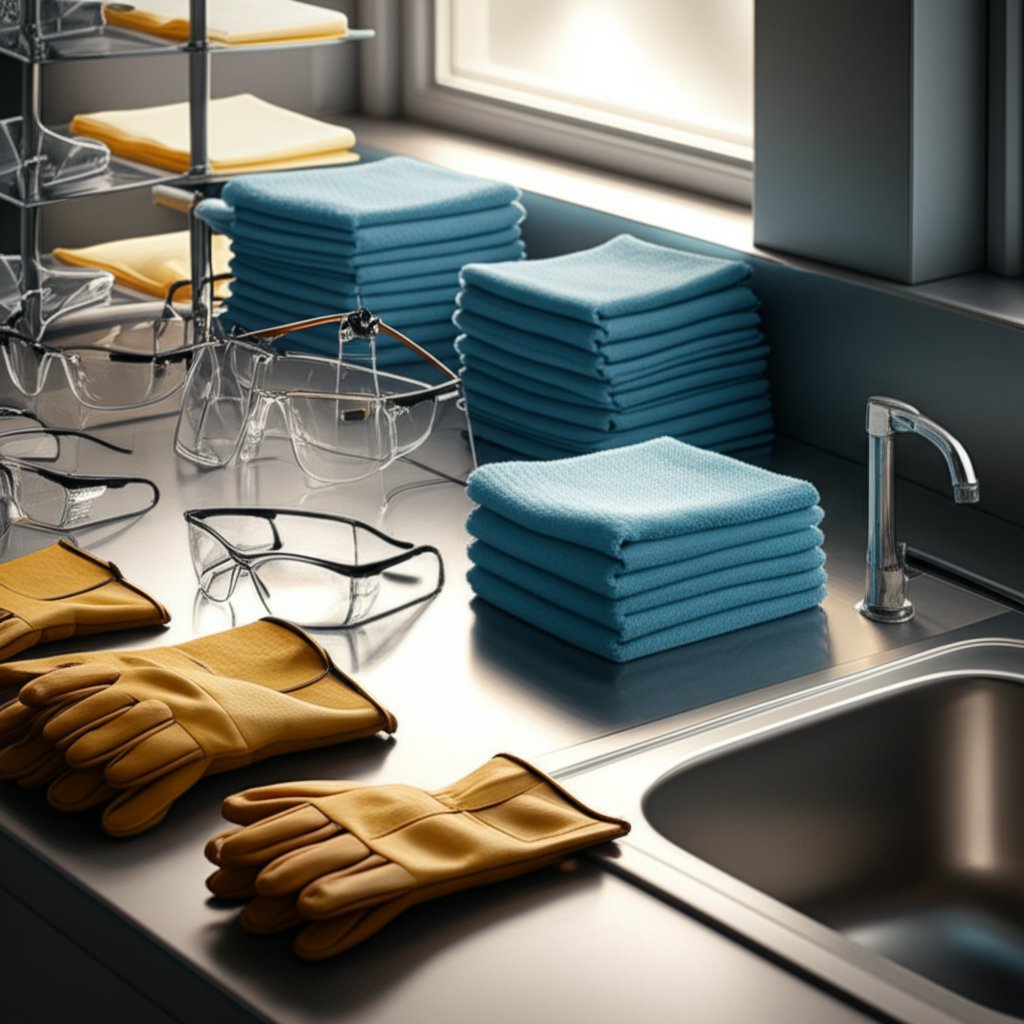
Gather PPE and Set Up
Before you even open a bottle or mix a paste, think about protection. Rust removal—whether mechanical or chemical—can create splashes, dust, or fumes. Here’s a checklist to get you started:
- Gloves: Chemical-resistant is best, especially for acids or commercial products.
- Eye Protection: Safety glasses or goggles to shield against splashes.
- Ventilation: Work in a well-ventilated area to disperse fumes or dust.
- Soft Microfiber Cloths: For gentle cleaning and drying without scratching.
- Non-Scratch Pads & Nylon Brushes: To agitate rust safely.
- Plenty of Clean Water: For rinsing and neutralizing after treatment.
Set up your workspace so tools and materials are within reach, and keep surfaces stable to prevent accidents. If you’re working indoors, open windows or use a fan for airflow. Always read the labels and instructions on any cleaner you use.
Understand Cleaner Types: Acids, Chelators, Abrasives
Not all rust removers work the same way—and picking the right one can mean the difference between a gleaming finish and a scratched, dulled surface. Let’s break down your main options:
- Mild Acids: White vinegar and citric acid gently dissolve rust and light staining. They’re effective on minor spots and food-contact surfaces.
- Chelators: These are commercial stainless steel rust removers that bind iron oxides without attacking the base metal. They’re a good option for tougher stains when you want to minimize the risk to your stainless steel.
- Abrasives: Baking soda slurries, nonwoven pads, or nylon brushes lift rust mechanically. The answer to “does baking soda remove rust” is yes—baking soda is a gentle abrasive that can safely help remove surface rust when used with care.
Important: Never mix different chemicals, and avoid using bleach on stainless steel. While it might seem powerful, bleach can attack the protective film and actually make rusting worse. If you’re wondering about “bleach stainless steel” solutions, skip them entirely—they do more harm than good (Nickel Institute).
After using acidic cleaners, always have a mild baking soda solution ready to neutralize any leftover acid, then rinse thoroughly and dry. This simple step helps prevent new stains and protects your finish.
Follow a Safe Rust-Removal Workflow
To keep things organized and effective, use this simple workflow whenever you’re removing rust from stainless steel:
- Prep: Gather PPE and set up your workspace.
- Apply: Apply your chosen cleaner or abrasive to the rust spot.
- Dwell: Allow the cleaner to sit for the recommended time (don’t rush or overdo it).
- Agitate: Gently scrub or agitate the area with a non-scratch tool.
- Rinse: Use plenty of clean water to flush away residues.
- Neutralize: If you used acids, follow with a mild baking soda solution, then rinse again.
- Dry: Wipe completely dry with a soft cloth to prevent water spots.
- Inspect: Check under bright light to ensure the rust is gone and the finish is unharmed.
Gentlest method that works is the best method.
By prepping carefully, choosing the right cleaner, and following a safe workflow, you’ll master how to clean rust off stainless steel while protecting both yourself and your surfaces. Next, let’s look at food-safe methods for light rust that keep your cookware and sinks spotless and safe.
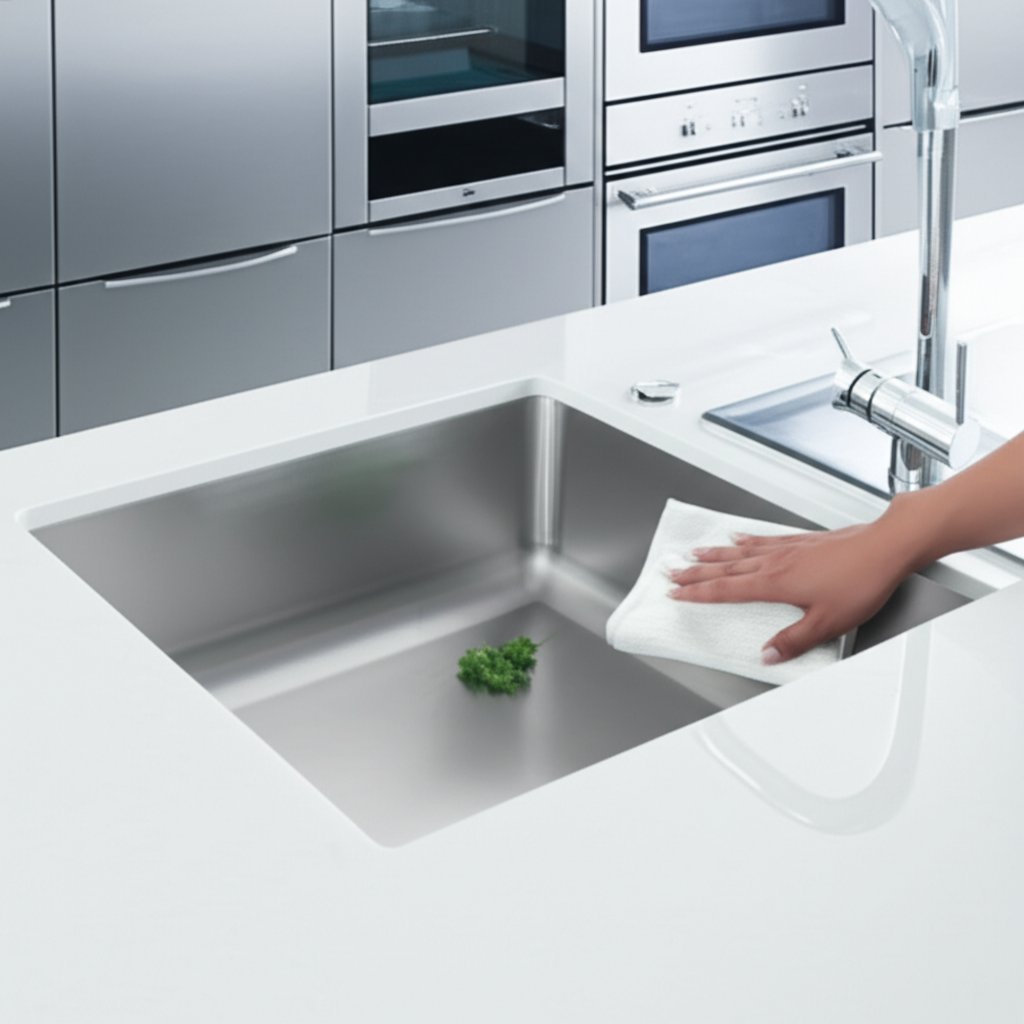
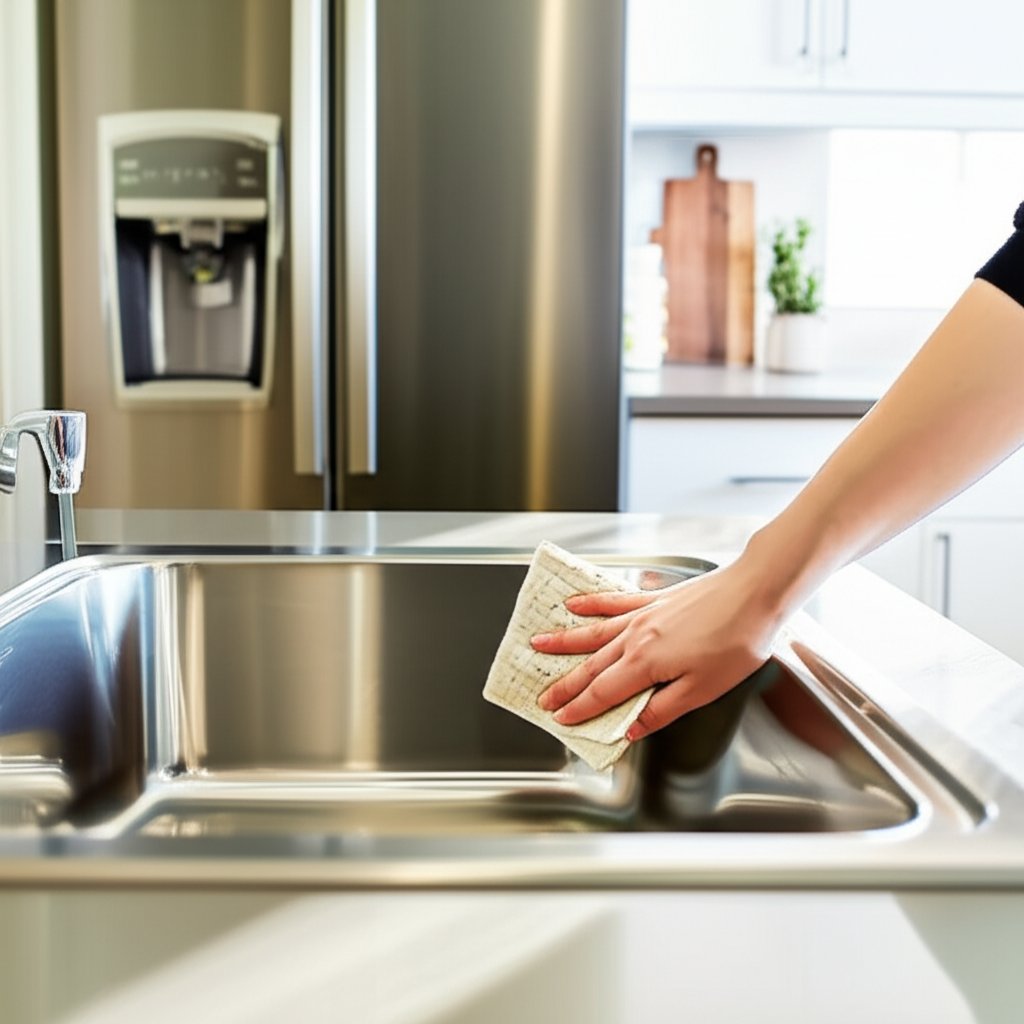
Step 3: Use Food-Safe Methods for Light Rust on Stainless Steel Sinks and Cookware
Ever noticed stubborn orange specks in your stainless steel sink or on cookware that just won’t budge with a regular wash? If you’re wondering how to remove rust from stainless steel sink or keep your tumblers and utensils looking spotless, you’re not alone. The good news: you can tackle most light rust without harsh chemicals—using simple, food-safe ingredients already in your kitchen.
Baking Soda Paste for Light Rust
When it comes to how to get rust off stainless steel—especially for items that touch food—baking soda is your best friend. Why? It’s a gentle abrasive, non-toxic, and won’t harm the protective finish when used correctly. Here’s how to use a baking soda paste for rust removal:
- Mix just enough water with baking soda to form a spreadable paste (think toothpaste consistency).
- Apply the paste directly onto the rust spots.
- Let it sit for a few minutes to allow the baking soda to lift and neutralize the rust.
- Gently rub the area with a soft cloth or nylon brush, always working with the grain if you’re treating a brushed finish.
- Rinse thoroughly with clean water and dry completely with a microfiber cloth.
You’ll notice the rust color fading and the paste turning gray as you scrub—a clear sign that the baking soda to remove rust is working. If the stain persists, simply repeat the process. This baking soda rust removal method is especially effective for how to clean rust from stainless steel cookware, utensils, and sinks.
Lemon and Salt for Spot Treatment
For those tiny, stubborn spots where baking soda alone isn’t enough, the classic combination of lemon and salt can help. Here’s what to do:
- Sprinkle coarse salt directly onto the rust spot.
- Squeeze fresh lemon juice over the salt (or dip your cleaning sponge in lemon juice).
- Let the mixture sit for up to 30 minutes, but don’t let it dry out.
- Gently scrub with a soft cloth or nylon brush, again moving with the grain.
- Rinse thoroughly and dry.
The mild acid in lemon juice, combined with the texture of the salt, helps lift oxidation without scratching. This method is ideal for how to get rust out of stainless steel sink or spot-treating utensils (Family Handyman).
Food-Safe Rinse and Neutralize
After using any acidic treatment—whether it’s lemon or a touch of vinegar—it’s important to neutralize any leftover acid to protect your stainless steel. Here’s a simple routine you can use for any food-contact item:
- Wash the item with mild detergent and warm water to remove surface grime.
- Apply your baking soda paste or lemon/salt as needed.
- Agitate gently, always working with the grain.
- Rinse and neutralize by wiping over the area with a mild baking soda solution (just a bit of baking soda in water), then rinse again with clean water.
- Dry completely with a soft microfiber cloth to discourage water spots and encourage water beading—a sign of a healthy, intact surface film.
For polished or mirror finishes, avoid abrasives entirely and use only non-scratch sponges with the lightest pressure.
For items that touch food, stick to baking soda, lemon, and brief vinegar contact, then rinse thoroughly.
These gentle, food-safe steps are effective for how to remove rust from stainless steel sink and other kitchen essentials, keeping both your surfaces and your meals safe. If light rust persists or you’re dealing with deeper stains, the next section will guide you through escalating safely with stronger methods—without compromising your finish or food safety.
Step 4: Escalate with Vinegar or Chelators for Stubborn Rust
What if light scrubbing and food-safe remedies aren’t enough? When you find yourself facing persistent stains or patches that just won’t budge, it’s time to escalate—carefully. Choosing the right method for how to remove rust off stainless steel can make the difference between restoring your surface and risking unwanted dullness or damage. Here’s how to approach tougher cases with confidence.
White Vinegar Soak or Wrap Method
Ever wondered why rust removal with white vinegar is so popular? The secret is acetic acid—a mild but effective agent for dissolving surface oxidation. For small items like cutlery or detachable parts, a vinegar bath for rust removal is simple and safe:
- Submerge the affected item in undiluted white vinegar overnight. The acetic acid gently breaks down rust without harsh fumes or scrubbing.
- For larger or fixed surfaces, saturate a paper towel or cloth with vinegar and lay it over the rust spot, ensuring it stays damp for several hours.
- Periodically agitate with a nylon brush or soft cloth to encourage the rust to lift.
- Once the rust color fades and the base metal’s sheen returns, thoroughly rinse the area with clean water.
Cleaning rust with white vinegar is gentle and fume-free, making it ideal for kitchen appliances, sinks, and cookware. However, prolonged contact can dull mirror finishes, so always monitor progress and avoid overexposure.
Chelation for Finish-Friendly Removal
If vinegar alone isn’t enough—or you’re concerned about sensitive finishes—a rust remover for stainless steel that uses chelation chemistry can be a smart next step. Chelators work by binding to iron oxides (the main component of rust), dissolving them without attacking the chromium-rich surface of stainless steel. This means less risk of scratching or dulling, especially on polished or decorative appliances.
Many commercial stainless steel rust remover products are formulated for this purpose. They’re typically more powerful than household acids and can rejuvenate pitted or heavily stained items. Always follow the manufacturer’s instructions, wear appropriate PPE, and test on a hidden area first. Some chelators are reusable for multiple cleaning sessions, making them cost-effective for ongoing maintenance (CitriSurf).
| Method | Finish Risk | Odor | Ease of Rinsing | Reusability |
|---|---|---|---|---|
| White Vinegar | Low for brushed/matte; moderate for mirror if overexposed | Mild, food-safe | Easy with water | Single use (discard after soaking) |
| Chelating Stainless Steel Rust Remover | Very low if used as directed; safe for most finishes | Usually low; some may have mild chemical scent | Easy; most are water-soluble | Often reusable for several cycles |
Rinse, Neutralize, and Dry
Whether you use vinegar or a chelator, the final steps are crucial for lasting results. Rinse the treated area thoroughly with clean water to remove any acid or chemical residue. Then, wipe over the area with a mild baking soda solution to neutralize lingering acidity—this helps protect the passive film on your stainless steel. Dry completely with a soft cloth to prevent new water spots or rust from forming.
Stop once rust lightens and the base metal’s sheen returns—overexposure won’t improve results.
By escalating thoughtfully and choosing the right stainless steel rust remover for your needs, you’ll restore your surfaces while safeguarding their finish. If stubborn stains remain or you’re worried about micro-scratches, the next step is to explore mechanical methods—always tuned to your specific stainless steel finish.
Step 5: Use Finish-Safe Mechanical Methods to Clean Rust Off Stainless Steel
When chemical approaches aren’t quite enough, it’s time to consider mechanical action. But here’s the catch: you want to clean rust off stainless steel without leaving behind scratches or dull patches. Sounds tricky? It’s all about choosing the right tools and techniques for your specific finish—whether you’re working with a brushed sink, a matte appliance, or a high-gloss mirror panel.
Non-Scratch Tools Come First
Imagine you’re scrubbing away, only to realize you’ve left fine scratches where the rust used to be. That’s why the gentlest tools should always be your starting point. Here’s a quick toolkit for safe, effective rust removal:
- Microfiber cloths: For light stains and routine polishing.
- Nylon brushes: Excellent for agitating rust in crevices or on textured surfaces.
- White or gray nonwoven pads: Rated for delicate surfaces, these pads help clean rust from stainless steel without marring the finish.
- Soft eraser-style blocks: Useful for spot-treating stubborn specks.
- Baking soda slurry: Acts as a gentle abrasive lubricant; mix baking soda with a little water to form a paste for extra cleaning power.
Avoid steel wool, wire brushes, or aggressive sanding. These can embed particles into the steel, leading to new rust down the line.
Protect the Grain on Brushed Finishes
When you get rust off stainless steel with a brushed or satin finish, always scrub with the grain. This preserves the uniform lines that give brushed stainless its distinctive look. Use a dampened nonwoven pad or nylon brush, applying light, even pressure. As you work, you’ll see the baking soda slurry darken—this means it’s lifting rust, not damaging the steel beneath. Stop immediately if you notice the area becoming cloudy or streaked; this is a sign you may be overdoing it.
For mirror or polished surfaces, mechanical action should be limited to non-abrasive methods. Stick to soft microfiber cloths and, if needed, a dab of stainless steel polish. Never use gritty pads or powders—these will dull the reflective surface.
Compare Abrasives Before You Scrub
Not sure which tool or abrasive is safest for your project? Use the table below to weigh your options. Gentlest choices come first, and we note which require follow-up polishing for best results:
| Abrasive Type | Aggressiveness | Risk to Brushed Finish | Risk to Mirror Finish | Typical Use-Case | Follow-up Polishing Needed? |
|---|---|---|---|---|---|
| Microfiber Cloth | Very Gentle | None | None | Light stains, routine cleaning | No |
| Baking Soda Slurry with Nylon Brush | Gentle | Very Low (if with grain) | Moderate (can dull shine) | Surface rust, light spots | Sometimes, if haze remains |
| White/Gray Nonwoven Pad | Moderate | Low (if with grain) | High (not recommended) | Stubborn rust, brushed/matte only | Yes |
| Soft Eraser-Style Block | Targeted | Low | High (avoid) | Small, stubborn spots | Rarely |
| Stainless Steel Polish with Microfiber | Very Gentle | None | None | Final shine, mirror finish | No |
When you’re finished, rinse thoroughly with clean water and dry with a soft cloth. For extra shine and protection, consider using a stainless steel rust cleaner formulated for your finish—these products can help repel future stains and make routine maintenance easier.
If you can feel the abrasive, it may be too harsh for mirror finishes.
By tuning your technique to your surface, you’ll take rust off stainless steel while preserving its original beauty. If you still see roughness or discoloration after these steps, the next section will guide you through advanced chemical options and passivation to restore your stainless steel’s protective layer for the long haul.
Step 6: Apply Advanced Chemicals and Passivate Stainless Steel for Long-Term Protection
What if you’re facing persistent rust stains, early pitting, or stubborn discoloration that just won’t budge? When gentler methods plateau, advanced chemistry and post-cleaning passivation can help remove rust from stainless steel and restore its corrosion resistance. Let’s break down how to use these powerful options safely and effectively—without risking further damage.
Use Oxalic or Phosphoric Gels Carefully
Imagine you’ve tried vinegar and baking soda, but rust lingers in crevices or deeper patches. This is where oxalic or phosphoric acid gels come in. These products—often labeled as "rust remover from stainless steel"—work by dissolving iron oxides (the main component of rust) and can even brighten the surface. For best results, follow these practical steps:
- Oxalic Acid: Mix oxalic acid with water in a 1:10 ratio. Immerse small parts for about 20 minutes, then scrub gently with a soft brush or cloth. Repeat if necessary, but avoid prolonged soaking to minimize risk to the base metal.
- Phosphoric Acid: Use gel or liquid forms for vertical or intricate surfaces. Start with a 30% concentration; if rust remains, increase to 45%. Apply as directed, allow brief contact, then rinse thoroughly. Phosphoric acid is less aggressive than sulfuric acid, making it safer for delicate finishes and precision parts.
Products in the phosphoric class (such as Ospho-type rust removers) can even convert rust to a more stable compound, but any residue must be removed completely to avoid future staining. Always wear gloves and eye protection, and keep the workspace well ventilated.
Never Mix Acids or Use Bleach
It’s tempting to reach for whatever’s on hand, but certain combinations can be dangerous—or outright destructive. Mixing acids (like oxalic and phosphoric) or combining acid treatments with bleach can release toxic fumes or cause rapid corrosion. Bleach, in particular, can attack the protective chromium oxide film on stainless steel, leading to stress cracking and accelerated rust.
Never mix acids or combine acid treatments with bleach.
Stick to one advanced chemical at a time, and always rinse thoroughly between steps. If you’re unsure about a product’s compatibility, consult the manufacturer’s instructions or seek professional advice.
Citric Passivation to Restore the Passive Film
After the removal of rust from stainless steel, your job isn’t quite done. Even the best rust remover for stainless steel can leave the surface vulnerable if the protective passive film has been compromised. That’s where citric acid passivation comes in—a finishing process that restores the chromium-rich oxide layer and boosts long-term rust resistance.
Here’s how citric passivation works:
- Clean and degrease the item thoroughly (no oils or debris).
- Immerse in a 4–10% citric acid solution, following ASTM A967 or AMS 2700 standards. Treatment time varies by temperature: 4 minutes at 140–160°F, 10 minutes at 120–140°F, or 20 minutes at 70–120°F (Best Technology Inc.).
- Rinse with deionized water (if available) to remove all acid residues.
- Dry completely to prevent new water spots or corrosion.
This process removes free iron from the surface and forms a robust, corrosion-resistant layer. Citric acid is non-toxic, environmentally friendly, and safe for most grades of stainless steel. If you’re wondering how to remove corrosion from stainless steel and prevent it from returning, passivation is the industry gold standard for lasting results.
-
Oxalic Acid
- Pros: Effective on deep stains and pitting; fast action; brightens surface.
- Cons: Requires strict safety; overuse can dull finish; not food-safe.
-
Phosphoric Acid
- Pros: Converts rust; safer for delicate parts; gel form clings to vertical areas.
- Cons: Residue must be removed; can leave white film if not rinsed thoroughly.
-
Citric Acid Passivation
- Pros: Restores passive film; non-toxic; meets industry standards; safe for most applications.
- Cons: Requires precise cleaning and rinsing; not a heavy-duty rust remover by itself.
After any advanced chemical treatment, always rinse thoroughly, neutralize if needed (with a mild baking soda solution), and dry completely. If the surface still feels rough or shows signs of pitting, professional refinishing or electropolishing may be the safest route to restore both appearance and corrosion resistance.
By understanding and respecting the power of advanced chemicals—and finishing with proper passivation—you’ll not only remove rust from stainless steel but also help ensure it stays bright and protected for the long haul. Next, let’s explore how to prevent rust from coming back with smart daily care and protective strategies.
Step 7: Prevent Rust From Returning
Daily and Weekly Care to Stop Stainless Steel Rusting
Ever wondered why your stainless steel sink rusting seems to keep coming back, even after you’ve worked hard to remove it? The answer often lies in your daily routine. Stainless steel is tough, but it’s not invincible—especially if moisture, salt, or harsh cleaners are left behind. The best way how to stop stainless steel from rusting is with small, consistent habits that protect its surface and keep the passive film intact.
- Wipe down surfaces after each use: Use a soft, dry microfiber cloth to remove water and prevent mineral deposits. This is especially important for sinks and appliances that see frequent splashes.
- Clean with mild soap and water: Avoid harsh cleaners or scouring pads, which can scratch and weaken the protective layer. Stick to gentle soaps and non-abrasive cloths, as recommended by THOR Kitchen.
- Dry thoroughly: Never leave stainless steel wet—standing water can trigger corrosion, especially in hard-to-dry crevices or seams.
- Remove spills quickly: Wipe up salt, acidic foods, or cleaning residues right away. These can break down the chromium oxide layer and lead to surface rust stainless steel issues.
Weekly, give your appliances and sinks a more thorough wipe-down. Each month, inspect for any small rust spots or discoloration—catching these early makes how to stop rust on stainless steel much easier and prevents deeper pitting or stains.
Select Better Alloys for Harsh Environments
Does stainless steel rust in water? The short answer: it can, especially if exposed to saltwater, standing moisture, or aggressive cleaning. For outdoor grills, marine fixtures, or areas with high humidity, consider upgrading to 316 stainless steel. This alloy has extra molybdenum, making it far more resistant to chlorides and reducing the risk of stainless steel sink rusting in tough environments.
Indoors, always ensure good drainage and ventilation—especially in kitchens and bathrooms. Proper airflow helps surfaces dry quickly, making it much less likely that you’ll see rust on your appliances or sinks. If you’re asking, "Will stainless steel rust in water?"—it’s all about time, exposure, and the grade of steel you’re using.
Add Protective Coatings and Quick Touch-Ups
Want to make your stainless steel even more resilient? Protective coatings can help. For tools and surfaces that don’t touch food, a thin layer of food-safe mineral oil or microcrystalline wax can repel water, fingerprints, and airborne salts. For appliance exteriors, these coatings help maintain shine and make cleaning easier.
Here’s a quick care checklist you can follow to keep rust at bay:
- Wipe down all stainless steel surfaces at least once a week
- Inspect monthly for new rust spots or discoloration
- Apply a protective coating (food-safe mineral oil or wax) every 1–2 months
- Address small rust specks immediately using the mildest effective method
- Ensure good drainage and ventilation wherever possible
Dry, clean, and chloride-free surfaces resist rust.
By following these simple steps, you’ll not only prevent surface rust stainless steel but also keep your kitchen and appliances looking like new. And if you do spot a small stain, treat it right away—quick action is the key to avoiding stubborn or recurring rust. Ready to take things to the next level? In the next section, we’ll show you what to do if DIY efforts aren’t enough, and how to get expert help when you need it most.
Step 8: Know When to Re-Engineer or Outsource for Lasting Results
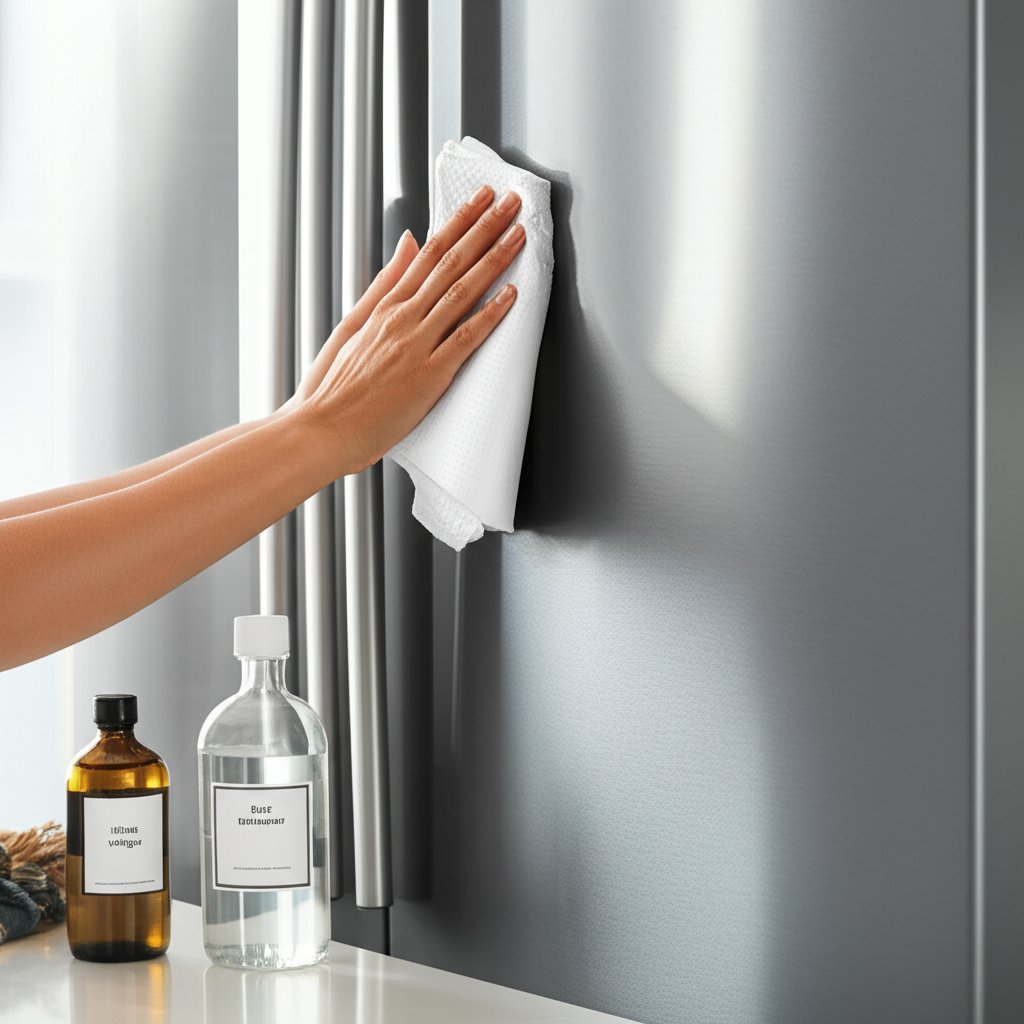
When DIY Isn’t Enough
Ever tried every home remedy and still found rust stains on stainless steel fridge or appliances reappearing? Sometimes, persistent rust signals a deeper issue—like the wrong stainless grade, fabrication contamination, or harsh environments that overwhelm even the best maintenance routines. At this point, it’s worth asking: Is it time to bring in the pros or rethink your material choices?
Design for Corrosion Resistance
Imagine your kitchen fridge or outdoor grill keeps rusting, no matter how often you clean or polish. This can happen when the original part was made from a lower-grade stainless steel (like 304) that isn’t up to the job in salty, humid, or high-use settings. In these cases, re-engineering with a better alloy—such as 316 or 316L, which offer superior chloride resistance—can make all the difference. Sometimes, optimizing the design for better drainage or specifying a passivated or electropolished finish can stop rust before it starts. If you’re wondering how to get rust off stainless steel fridge for good, it might be time to rethink the part itself—not just the cleaning method.
- XTJ Rapid Prototyping Services: If you’re dealing with recurring rust on stainless appliances, XTJ offers a practical path forward. Their engineers can help you redesign parts in more corrosion-resistant grades (like 316), optimize geometry for drainage, or specify advanced finishes such as electropolish or passivation. With over 50 materials and DFM feedback, they can help prevent future rust at the source, not just treat the symptoms.
- Local metal finishing shop: For appliances or surfaces with deep pitting or stains that won’t respond to home methods, a professional finishing shop can perform expert passivation, refinishing, or surface repair. Services like Surface Experts specialize in removing scratches and rust stains on stainless steel fridge exteriors, restoring shine and function in as little as an hour.
- Replace with higher-grade stainless components: Sometimes the best move is to swap out a problematic part for one made from a better alloy. For example, if your refrigerator’s handle or trim keeps rusting, replacing it with a 316 or 316L stainless version can solve the problem long-term.
Get Expert Help Fast: Refurbish, Re-Prototype, or Replace?
Still deciding between DIY, professional repair, or a full redesign? Here’s a practical comparison to help you weigh your options if you’re struggling with how to remove rust from stainless steel appliances or how to clean rust off stainless steel appliances:
| Option | Finish Quality | Corrosion Resistance | Lead Time | Best For |
|---|---|---|---|---|
| Re-Prototype with XTJ | Custom, as-specified (e.g., electropolished, passivated) | Highest (choose 316/316L or custom alloys) | Rapid (varies by design, often days to weeks) | Recurring rust, design flaws, or upgrades |
| Professional Refurbish | Restores original or near-original finish | Good (depends on base metal and process) | Fast (often 1–3 days) | Scratches, surface rust, minor pitting |
| Replace Off-the-Shelf Component | Factory finish | Varies (often same as original part) | Immediate (if in stock) | Worn-out, irreparable, or obsolete parts |
When you’ve tried every method and rust stains on stainless steel fridge or appliance parts keep coming back, don’t settle for endless repairs. Sometimes, the smartest fix is to re-engineer with the right material and finish from the start. Whether you choose to refurbish, re-prototype, or replace, you’ll protect your investment and finally stop asking how to get rust off stainless steel fridge again and again.
Frequently Asked Questions About Removing Rust from Stainless Steel
1. What is the safest way to remove rust from stainless steel appliances?
The safest approach is to use a baking soda paste or lemon and salt for light rust, always cleaning with the grain and using non-scratch cloths. For stubborn stains, try a commercial stainless steel rust remover or white vinegar, but avoid harsh abrasives and never use bleach, as it can damage the protective film.
2. Does baking soda really remove rust from stainless steel?
Yes, baking soda is a gentle, food-safe abrasive that effectively lifts light rust from stainless steel surfaces. Make a paste with water, apply it to the rust spot, and gently rub with a soft cloth or nylon brush. Rinse and dry thoroughly to prevent new rust from forming.
3. How can I prevent stainless steel from rusting again after cleaning?
To prevent rust from returning, always dry surfaces after cleaning, remove salt and acidic residues promptly, and apply a thin layer of mineral oil or microcrystalline wax to non-food-contact surfaces. Regular inspections and gentle cleaning maintain the passive film that keeps stainless steel rust-free.
4. What should I do if rust keeps coming back on my stainless steel fridge?
Persistent rust may indicate the wrong stainless grade or design flaws. Consider upgrading to a more corrosion-resistant alloy, redesigning with better drainage, or seeking professional refinishing. Services like XTJ Rapid Prototyping can help create custom parts with improved rust resistance.
5. Is it safe to use vinegar to remove rust from stainless steel sinks?
White vinegar is effective for dissolving rust on stainless steel, but it should be used with caution—especially on polished finishes. Apply it briefly, rinse thoroughly, and always neutralize with a baking soda solution to protect the surface and prevent future corrosion.
-
Posted in
appliance maintenance, cleaning tips, remove rust from stainless steel, rust prevention, stainless steel care


